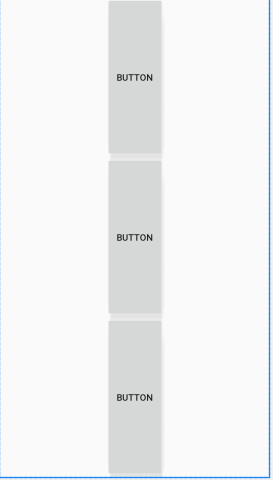
一、线性布局


<?xml version="1.0" encoding="utf-8"?>
<LinearLayout xmlns:android="http://schemas.android.com/apk/res/android"
    android:orientation="vertical"
    android:layout_width="match_parent"
    android:gravity="center"
    android:layout_height="match_parent">

    <Button
        android:id="@+id/button"
        android:layout_weight="1"
        android:layout_width="wrap_content"
        android:layout_height="0dp"
        android:text="Button" />

    <Button
        android:id="@+id/button2"
        android:layout_weight="1"
        android:layout_width="wrap_content"
        android:layout_height="0dp"
        android:text="Button" />

    <Button
        android:id="@+id/button3"
        android:layout_weight="1"
        android:layout_width="wrap_content"
        android:layout_height="0dp"
        android:text="Button" />
</LinearLayout>
效果:
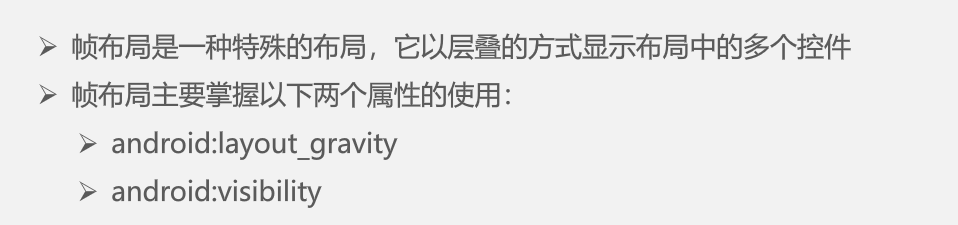
二、帧布局


以下是一个点击按钮实现切换图片的程序
<?xml version="1.0" encoding="utf-8"?>
<FrameLayout xmlns:android="http://schemas.android.com/apk/res/android"
    xmlns:app="http://schemas.android.com/apk/res-auto"
    xmlns:tools="http://schemas.android.com/tools"
    tools:context=".MainActivity"
    android:layout_width="match_parent"
    android:layout_height="match_parent">

    <ImageView
        android:id="@+id/imageView"
        android:visibility="invisible"
        android:layout_width="wrap_content"
        android:layout_height="wrap_content"
        app:srcCompat="@android:drawable/btn_dialog" />

    <ImageView
        android:id="@+id/imageView2"
        android:visibility="visible"
        android:layout_width="wrap_content"
        android:layout_height="wrap_content"
        app:srcCompat="@mipmap/ic_launcher" />

    <Button
        android:id="@+id/button"
        android:layout_gravity="center"
        android:layout_width="wrap_content"
        android:layout_height="wrap_content"
        android:text="Button" />
</FrameLayout>
MainActivity.java文件
package com.example.xianxingbuju;

import androidx.appcompat.app.AppCompatActivity;

import android.os.Bundle;
import android.view.View;
import android.widget.Button;
import android.widget.ImageView;

public class MainActivity extends AppCompatActivity {
    private Button button;
    private ImageView imageView  ,imageView2;
    private  int k;


    @Override
    protected void onCreate(Bundle savedInstanceState) {
        super.onCreate(savedInstanceState);
        setContentView(R.layout.zhenbuju);

        button=(Button)findViewById(R.id.button);
        imageView=(ImageView)findViewById(R.id.imageView);
        imageView2=(ImageView)findViewById(R.id.imageView2);

        button.setOnClickListener(new View.OnClickListener() {
            @Override
            public void onClick(View v) {
                if(k%2==0){
                    imageView.setVisibility(View.VISIBLE);
                    imageView2.setVisibility(View.INVISIBLE);
                }else{
                    imageView.setVisibility(View.INVISIBLE);
                    imageView2.setVisibility(View.VISIBLE);
                }
                k++;
            }
        });


    }
}
效果:


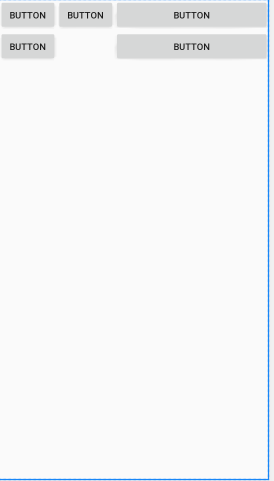
三、表格布局

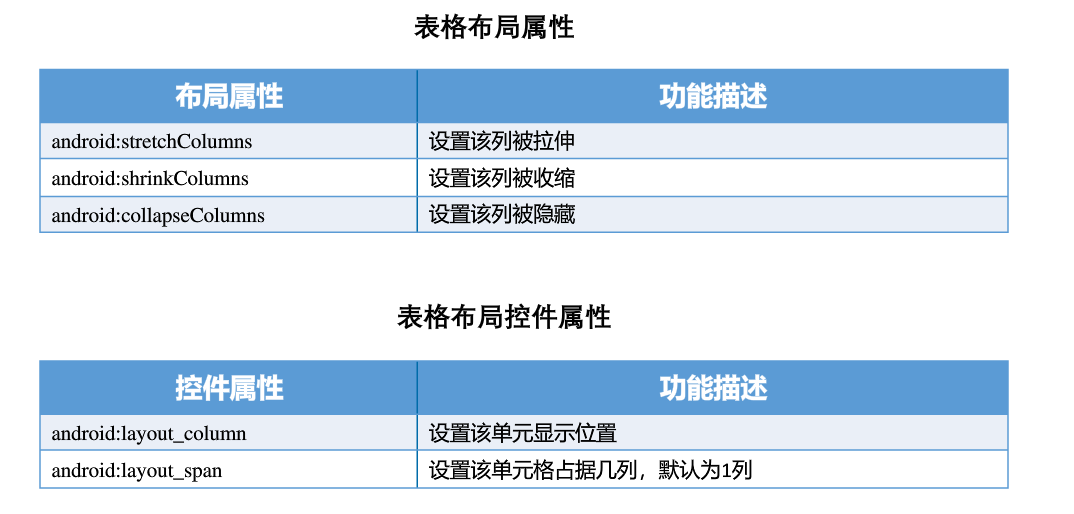
默认值为0,代表第一列
<?xml version="1.0" encoding="utf-8"?>
<TableLayout xmlns:android="http://schemas.android.com/apk/res/android"
    android:stretchColumns="2"
    android:layout_width="match_parent"
    android:layout_height="match_parent">

    <TableRow
        android:gravity="center"
        android:layout_width="match_parent"
        android:layout_height="match_parent" >

        <Button
            android:id="@+id/button4"
            android:layout_width="wrap_content"
            android:layout_height="wrap_content"
            android:text="Button" />

        <Button
            android:id="@+id/button3"
            android:layout_width="wrap_content"
            android:layout_height="wrap_content"
            android:text="Button" />

        <Button
            android:id="@+id/button2"
            android:layout_width="wrap_content"
            android:layout_height="wrap_content"
            android:text="Button" />
    </TableRow>

    <TableRow

        android:layout_width="match_parent"
        android:layout_height="match_parent" >

        <Button
            android:id="@+id/button5"
            android:layout_width="wrap_content"
            android:layout_height="wrap_content"
            android:text="Button" />

        <Button
            android:id="@+id/button6"
            android:layout_column="2"
            android:layout_width="wrap_content"
            android:layout_height="wrap_content"
            android:text="Button" />
    </TableRow>
</TableLayout>
效果:
四、约束布局
