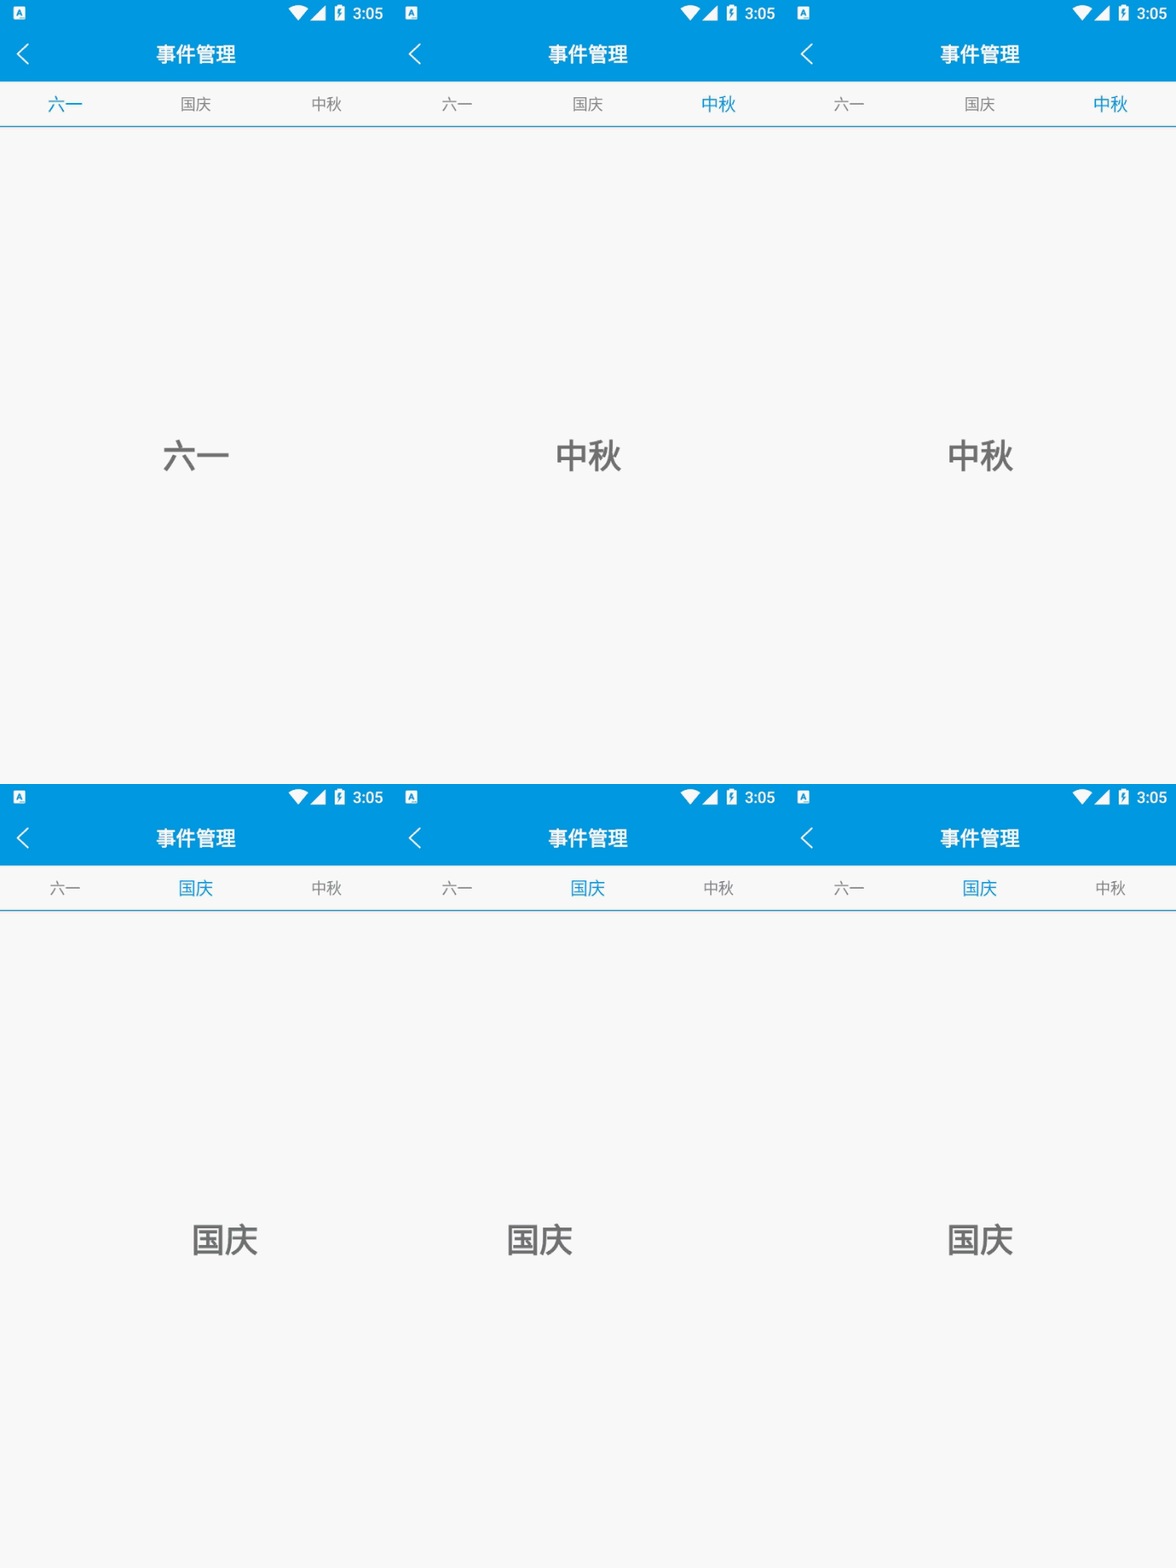
效果图:

首先实现布局文件的代码,代码中的colorBlue颜色代码"#039BE5",其他的不多说了,直接上代码:
 1 <?xml version="1.0" encoding="utf-8"?>
 2 <LinearLayout xmlns:android="http://schemas.android.com/apk/res/android"
 3     xmlns:app="http://schemas.android.com/apk/res-auto"
 4     xmlns:tools="http://schemas.android.com/tools"
 5     android:layout_width="match_parent"
 6     android:layout_height="match_parent"
 7     android:orientation="vertical"
 8     tools:context=".MainActivity">
 9
10     <RelativeLayout
11         android:layout_width="match_parent"
12         android:layout_height="50dp"
13         android:background="@color/colorBlue">
14
15         <ImageButton
16             android:id="@+id/btn_Img_Ret"
17             android:layout_width="wrap_content"
18             android:layout_height="wrap_content"
19             android:layout_centerVertical="true"
20             android:layout_marginLeft="10dp"
21             android:background="#0000"
22             android:scaleType="fitXY"
23             android:src="@mipmap/ret_left_white" />
24
25         <TextView
26             android:layout_width="wrap_content"
27             android:layout_height="wrap_content"
28             android:layout_centerHorizontal="true"
29             android:layout_centerVertical="true"
30             android:text="事件管理"
31             android:textColor="#FFFFFF"
32             android:textSize="18sp"
33             android:textStyle="bold" />
34     </RelativeLayout>
35
36     <LinearLayout
37         android:layout_width="match_parent"
38         android:layout_height="40dp"
39         android:gravity="center_vertical"
40         android:orientation="horizontal">
41
42         <TextView
43             android:id="@+id/txt1"
44             android:layout_width="0dp"
45             android:layout_height="wrap_content"
46             android:layout_weight="1"
47             android:gravity="center"
48             android:text="六一"
49             android:textSize="14sp" />
50
51         <TextView
52             android:id="@+id/txt2"
53             android:layout_width="0dp"
54             android:layout_height="wrap_content"
55             android:layout_weight="1"
56             android:gravity="center"
57             android:text="国庆"
58             android:textSize="14sp" />
59
60         <TextView
61             android:id="@+id/txt3"
62             android:layout_width="0dp"
63             android:layout_height="wrap_content"
64             android:layout_weight="1"
65             android:gravity="center"
66             android:text="中秋"
67             android:textSize="14sp" />
68     </LinearLayout>
69
70     <View
71         android:layout_width="match_parent"
72         android:layout_height="1dp"
73         android:background="@color/colorBlue" />
74
75     <androidx.viewpager.widget.ViewPager
76         android:id="@+id/viewPage"
77         android:layout_width="match_parent"
78         android:layout_height="match_parent" />
79
80 </LinearLayout>
然后新建fragment,我这里是3个,每个fragment的代码都是一样的,fragment和布局文件就贴一个就行了:
 1 public class TestFragment1 extends Fragment {
 2
 3     private View view;
 4
 5     @Nullable
 6     @Override
 7     public View onCreateView(@NonNull LayoutInflater inflater, @Nullable ViewGroup container, @Nullable Bundle savedInstanceState) {
 8         view = inflater.inflate(R.layout.fragment_test1,null);
 9
10         return view;
11     }
12 }
布局文件:
 1 <?xml version="1.0" encoding="utf-8"?>
 2 <LinearLayout xmlns:android="http://schemas.android.com/apk/res/android"
 3     android:orientation="vertical"
 4     android:gravity="center"
 5     android:layout_width="match_parent"
 6     android:layout_height="match_parent">
 7     <TextView
 8         android:text="六一"
 9         android:textSize="30sp"
10         android:textStyle="bold"
11         android:layout_width="wrap_content"
12         android:layout_height="wrap_content" />
13
14 </LinearLayout>
建立好3个fragment和布局文件后就开始我们的fragment的适配器:
 1 public class FragmentAdapter extends FragmentPagerAdapter {
 2
 3     private List<Fragment> fragmentList;
 4
 5     public FragmentAdapter (FragmentManager fm,List<Fragment> list){
 6         super(fm);
 7         this.fragmentList = list;
 8     }
 9
10     @NonNull
11     @Override
12     public Fragment getItem(int position) {
13         //显示第几个页面
14         return fragmentList.get(position);
15     }
16
17     @Override
18     public int getCount() {
19         return fragmentList.size();
20     }
21 }
最后就是实现代码了,直接上代码:
  1 public class MainActivity extends AppCompatActivity implements View.OnClickListener {
  2
  3     //第一次点击与第二次点击的间隔时间
  4     private long exitTime;
  5
  6     private List<Fragment> fragmentList;
  7     private ViewPager viewPager;
  8     private FragmentAdapter adapter;
  9     private ImageButton btnImg;
 10     private TextView textView1,textView2,textView3;
 11     private int num = 0;
 12
 13     @Override
 14     protected void onCreate(Bundle savedInstanceState) {
 15         super.onCreate(savedInstanceState);
 16         setContentView(R.layout.activity_main);
 17         initView();
 18     }
 19
 20     private void initView(){
 21         btnImg = (ImageButton)findViewById(R.id.btn_Img_Ret);
 22         textView1 = (TextView)findViewById(R.id.txt1);
 23         textView2 = (TextView)findViewById(R.id.txt2);
 24         textView3 = (TextView)findViewById(R.id.txt3);
 25
 26         textView1.setOnClickListener(this);
 27         textView2.setOnClickListener(this);
 28         textView3.setOnClickListener(this);
 29         btnImg.setOnClickListener(this);
 30
 31         viewPager = (ViewPager)findViewById(R.id.viewPage);
 32         viewPager.setOnPageChangeListener(new MyPagerChangeListener());
 33
 34         fragmentList = new ArrayList<>();
 35         fragmentList.add(new TestFragment1());
 36         fragmentList.add(new TestFragment2());
 37         fragmentList.add(new TestFragment3());
 38
 39         adapter = new FragmentAdapter(getSupportFragmentManager(),fragmentList);
 40         viewPager.setAdapter(adapter);
 41
 42         //初始化显示第一个页面,以及更改选中的标题样式
 43         viewPager.setCurrentItem(0); //选中第一个页面
 44         textView1.setTextSize(16); //设置选中的标题字体16sp
 45         textView1.setTextColor(Color.parseColor("#039BE5")); //设置选中的标题字体颜色
 46     }
 47
 48
 49     @Override
 50     public void onClick(View view) {
 51         switch (view.getId()){
 52             case R.id.txt1:
 53                 viewPager.setCurrentItem(0);
 54                 break;
 55             case R.id.txt2:
 56                 viewPager.setCurrentItem(1);
 57                 break;
 58             case R.id.txt3:
 59                 viewPager.setCurrentItem(2);
 60                 break;
 61         }
 62     }
 63
 64     //设置一个ViewPager的监听事件,当左右滑动ViewPager时菜单栏被选中状态跟着改变
 65     public class MyPagerChangeListener implements ViewPager.OnPageChangeListener{
 66
 67         @Override
 68         public void onPageScrolled(int position, float positionOffset, int positionOffsetPixels) {
 69
 70         }
 71
 72         @Override
 73         public void onPageSelected(int position) {
 74             switch (position){
 75                 case 0:
 76                     textView1.setTextSize(16);
 77                     textView2.setTextSize(14);
 78                     textView3.setTextSize(14);
 79                     textView1.setTextColor(Color.parseColor("#039BE5"));
 80                     textView2.setTextColor(Color.GRAY);
 81                     textView3.setTextColor(Color.GRAY);
 82                     break;
 83                 case 1:
 84                     textView1.setTextSize(14);
 85                     textView2.setTextSize(16);
 86                     textView3.setTextSize(14);
 87                     textView1.setTextColor(Color.GRAY);
 88                     textView2.setTextColor(Color.parseColor("#039BE5"));
 89                     textView3.setTextColor(Color.GRAY);
 90                     break;
 91                 case 2:
 92                     textView1.setTextSize(14);
 93                     textView2.setTextSize(14);
 94                     textView3.setTextSize(16);
 95                     textView1.setTextColor(Color.GRAY);
 96                     textView2.setTextColor(Color.GRAY);
 97                     textView3.setTextColor(Color.parseColor("#039BE5"));
 98                     break;
 99             }
100         }
101
102         @Override
103         public void onPageScrollStateChanged(int state) {
104
105         }
106     }
107
108     /**
109      * 实现点击两次系统返回键退出应用
110      * @param keyCode
111      * @param event
112      * @return
113      */
114     @Override
115     public boolean onKeyDown(int keyCode, KeyEvent event) {
116         if(keyCode == KeyEvent.KEYCODE_BACK && event.getRepeatCount() == 0){
117             exit();
118             return true;
119         }
120         return super.onKeyDown(keyCode, event);
121     }
122
123     private void exit(){
124         if((System.currentTimeMillis() - exitTime) > 2000){
125             Toast.makeText(this, "再次点击退出应用", Toast.LENGTH_SHORT).show();
126             exitTime = System.currentTimeMillis();
127         }else{
128             finish();
129             System.exit(0);
130         }
131     }
132 }