- 在eclipse中新建一个web项目,File ---> New ---> Dynamic Web project;
- 往新建好的web项目中导入jar包,jar包的网址如下:https://i-beta.cnblogs.com/files,导入的位置为:web项目名 ---> WebContent ---> WEB-INF ---> lib
- 在web.xml中进行配置,
 View Code
 1 <welcome-file-list>
 2     <welcome-file>index.html</welcome-file>
 3     <welcome-file>index.htm</welcome-file>
 4     <welcome-file>index.jsp</welcome-file>
 5     <welcome-file>default.html</welcome-file>
 6     <welcome-file>default.htm</welcome-file>
 7     <welcome-file>default.jsp</welcome-file>
 8   </welcome-file-list>
 9
10 <context-param>
11       <param-name>contextConfigLocation</param-name>
12       <param-value>classpath:bean.xml</param-value>
13   </context-param>
14
15   <filter>
16           <filter-name>openSessionInViewFilter</filter-name>
17           <filter-class>org.springframework.orm.hibernate5.support.OpenSessionInViewFilter</filter-class>
18   </filter>
19
20   <filter-mapping>
21           <filter-name>openSessionInViewFilter</filter-name>
22           <url-pattern>/*</url-pattern>
23   </filter-mapping>
24
25   <filter>
26           <filter-name>struts</filter-name>
27           <filter-class>org.apache.struts2.dispatcher.ng.filter.StrutsPrepareAndExecuteFilter</filter-class>
28   </filter>
29
30   <filter-mapping>
31           <filter-name>struts</filter-name>
32           <url-pattern>/*</url-pattern>
33   </filter-mapping>
34
35   <listener>
36       <listener-class>org.springframework.web.context.ContextLoaderListener</listener-class>
37   </listener>
- 在src中新建包、类等
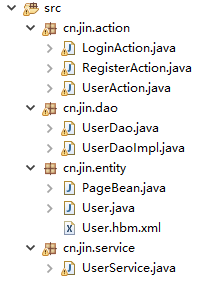 .,以此为参考。!!!注意:User.hbm.xml,代码如下:
View Code
.,以此为参考。!!!注意:User.hbm.xml,代码如下:
View Code1 <?xml version="1.0" encoding="UTF-8"?> 2 <!DOCTYPE hibernate-mapping PUBLIC 3 "-//Hibernate/Hibernate Mapping DTD 3.0//EN" 4 "http://www.hibernate.org/dtd/hibernate-mapping-3.0.dtd"> 5 6 <hibernate-mapping> 7 <class name="cn.jin.entity.User" table="t_user"> 8 <id name="lid" column="lid"> 9 <generator class="native"></generator> 10 </id> 11 <property name="lusername" column="lusername"></property> 12 <property name="lpassword" column="lpassword"></property> 13 <property name="lrepassword" column="lrepassword"></property> 14 <property name="ltel" column="ltel"></property> 15 <property name="laddress" column="laddress"></property> 16 </class> 17 </hibernate-mapping>
class的name属性为实体类的位置(包名),name属性为数据库表中的列名
-
在src目录下新建bean.xml,与数据库进行连接,代码如下:
View Code1 <?xml version="1.0" encoding="UTF-8"?> 2 <beans xmlns="http://www.springframework.org/schema/beans" 3 xmlns:xsi="http://www.w3.org/2001/XMLSchema-instance" 4 xmlns:context="http://www.springframework.org/schema/context" 5 xmlns:aop="http://www.springframework.org/schema/aop" 6 xmlns:tx="http://www.springframework.org/schema/tx" 7 xsi:schemaLocation="http://www.springframework.org/schema/beans 8 http://www.springframework.org/schema/beans/spring-beans.xsd 9 http://www.springframework.org/schema/context 10 http://www.springframework.org/schema/context/spring-context.xsd 11 http://www.springframework.org/schema/aop 12 http://www.springframework.org/schema/aop/spring-aop.xsd 13 http://www.springframework.org/schema/tx 14 http://www.springframework.org/schema/tx/spring-tx.xsd"> 15 16 <!-- 配置从c3p0连接池 --> 17 <bean id="dataSource" class="com.mchange.v2.c3p0.ComboPooledDataSource"> 18 <!-- 注入属性值 --> 19 <property name="driverClass" value="com.mysql.cj.jdbc.Driver"></property> 20 <property name="jdbcUrl" value="jdbc:mysql://localhost:3306/exercise?serverTimezone=UTC&useUnicode=true&useSSL=false&characterEncoding=utf8"></property> 21 <property name="user" value="root"></property> 22 <property name="password" value="123456"></property> 23 </bean> 24 25 <!-- sessionFactory创建 --> 26 <bean id="sessionFactory" class="org.springframework.orm.hibernate5.LocalSessionFactoryBean"> 27 <property name="dataSource" ref="dataSource"></property> 28 <property name="configLocation" value="classpath:hibernate.cfg.xml"></property> 29 </bean> 30 31 <bean id="transactionManager" class="org.springframework.orm.hibernate5.HibernateTransactionManager"> 32 <property name="sessionFactory" ref="sessionFactory"></property> 33 </bean> 34 35 <tx:annotation-driven transaction-manager="transactionManager"/> 36 37 <import resource="classpath:user.xml"/> 38 </beans>
- 在src目录下新建hibernate.cfg.xml,代码如下:
View Code
 1 <?xml version="1.0" encoding="UTF-8"?>
 2 <!DOCTYPE hibernate-configuration PUBLIC
 3     "-//Hibernate/Hibernate Configuration DTD 3.0//EN"
 4     "http://www.hibernate.org/dtd/hibernate-configuration-3.0.dtd">
 5
 6 <hibernate-configuration>
 7     <session-factory>
 8
 9         <!-- 第二部分 配置hibernate信息   可选的 -->
10         <!-- 输出底层sql语句 -->
11         <property name="hibernate.show_sql">true</property>
12         <!-- 输出底层sql语句格式 -->
13         <property name="hibernate.format_sql">true</property>
14         <!-- hibernate帮创建表,需要配置之后
15              第一次创建表时update的地方写create
16              update:如果已经有表,更新
17         -->
18         <property name="hibernate.hbm2ddl.auto">update</property>
19         <!-- 配置数据库方言
20              在MySQL里面实现分页 关键字limit 只能使用MySQL里面
21              在Oracle数据库,实现分页rownum
22              让hibernate框架识别不同数据库的自己特有的语句
23          -->
24         <property name="hibernate.dialect">org.hibernate.dialect.MySQL5Dialect</property>
25
26         <!-- <property name="hibernate.current_session_context_class">org.springframework.orm.hibernate5.SpringSessionContext</property> -->
27
28         <!-- 第三部分 把映射文件放到核心配置文件中  必须的-->
29         <mapping resource="cn/jin/entity/User.hbm.xml"/>
30     </session-factory>
31 </hibernate-configuration>
- 在src目录下新建struts.xml,代码如下:
View Code
 1 <?xml version="1.0" encoding="UTF-8"?>
 2 <!DOCTYPE struts PUBLIC
 3     "-//Apache Software Foundation//DTD Struts Configuration 2.3//EN"
 4     "http://struts.apache.org/dtds/struts-2.3.dtd">
 5
 6 <struts>
 7
 8     <!-- 设置文件上传大小 -->
 9     <constant name="struts.multipart.maxSize" value="2097152"></constant>
10
11     <package name="demo" extends="struts-default" namespace="/">
12
13         <action name="l_*" class="loginAction" method="{1}">
14             <result name="l_success">/index.jsp</result>
15             <result name="l_error">/login.jsp</result>
16         </action>
17         <action name="r_*" class="registerAction" method="{1}">
18             <result name="r_success">/login.jsp</result>
19             <result name="r_error">/register.jsp</result>
20         </action>
21         <action name="u_*" class="userAction" method="{1}">
22             <result name="u_listCondition">/tgls/user/list.jsp</result>
23             <result name="u_showUser">/tgls/user/edit.jsp</result>
24             <result name="u_listByLid">/tgls/user/listByLid.jsp</result>
25             <result name="u_add" type="redirectAction">u_listPage?currentPage=1</result>
26             <result name="u_delete" type="redirectAction">u_listPage?currentPage=1</result>
27             <result name="u_update" type="redirectAction">u_listPage?currentPage=1</result>
28             <result name="modify_success">/login.jsp</result>
29             <result name="modify_error">/modify_password.jsp</result>
30             <result name="u_listpage">/tgls/user/listpage.jsp</result>
31             <result name="u_listCount">/tgls/user/listladdress.jsp</result>
32             <result name="u_listAlarm">/tgls/user/listalarm.jsp</result>
33             <!-- 配置input结果 -->
34             <result name="input">/tgls/user/error.jsp</result>
35         </action>
36         <!-- <action name="up_*" class="uploadAction" method="{1}">
37             <result name="up_upload">/tgls/user/upload.jsp</result>
38         </action> -->
39
40     </package>
41 </struts>
result中的name值为action中的方法返回的值,要注意package中的
<package name="demo" extends="struts-default" namespace="/">
extends和namespace的设置
-
在src目录下新建user.xml,代码如下:
View Code1 <?xml version="1.0" encoding="UTF-8"?> 2 <beans xmlns="http://www.springframework.org/schema/beans" 3 xmlns:xsi="http://www.w3.org/2001/XMLSchema-instance" 4 xmlns:context="http://www.springframework.org/schema/context" 5 xmlns:aop="http://www.springframework.org/schema/aop" 6 xmlns:tx="http://www.springframework.org/schema/tx" 7 xsi:schemaLocation="http://www.springframework.org/schema/beans 8 http://www.springframework.org/schema/beans/spring-beans.xsd 9 http://www.springframework.org/schema/context 10 http://www.springframework.org/schema/context/spring-context.xsd 11 http://www.springframework.org/schema/aop 12 http://www.springframework.org/schema/aop/spring-aop.xsd 13 http://www.springframework.org/schema/tx 14 http://www.springframework.org/schema/tx/spring-tx.xsd"> 15 16 <bean id="loginAction" class="cn.jin.action.LoginAction" scope="prototype"> 17 <property name="userService" ref="userService"></property> 18 </bean> 19 <bean id="registerAction" class="cn.jin.action.RegisterAction" scope="prototype"> 20 <property name="userService" ref="userService"></property> 21 </bean> 22 <bean id="userAction" class="cn.jin.action.UserAction" scope="prototype"> 23 <property name="userService" ref="userService"></property> 24 </bean> 25 26 <bean id="userService" class="cn.jin.service.UserService"> 27 <property name="userDao" ref="userDaoImpl"></property> 28 </bean> 29 30 <bean id="userDaoImpl" class="cn.jin.dao.UserDaoImpl"> 31 <property name="sessionFactory" ref="sessionFactory"></property> 32 </bean> 33 </beans>
-
接着可以在上述的包类中写代码完成所需要的功能,ssh环境搭建过程应该也就这些部分了,多加练习熟练即可。
