为什么需要 virtualenvwrapper
为什么需要 virtualenvwrapper?而不是virtualenv?这要从 virtualenv 说起。virtualenv 的一个最大的缺点就是,每次开启虚拟环境之前要去虚拟环境所在目录下的 bin 目录下 source 一下 activate,这就需要我们记住每个虚拟环境所在的目录。
一种可行的解决方案是,将所有的虚拟环境目录全都集中起来,比如放到 ~/virtualenvs/,并对不同的虚拟环境使用不同的目录来管理。virtualenvwrapper 正是这样做的。并且,它还省去了每次开启虚拟环境时候的 source 操作,使得虚拟环境更加好用。
安装virtualenvwrapper
版本virtualenvwrapper 4.8.4
[root@web ~]# pip3 install virtualenvwrapper
Looking in indexes: https://mirrors.aliyun.com/pypi/simple/
Collecting virtualenvwrapper
  Downloading
  ...
Installing collected packages: virtualenv-clone, pbr, stevedore, virtualenvwrapper
    Running setup.py install for virtualenvwrapper ... done
Successfully installed pbr-5.4.4 stevedore-1.32.0 virtualenv-clone-0.5.3 virtualenvwrapper-4.8.4
[root@web ~]#
配置virtualenvwrapper
设置Linux的环境变量,每次启动就加载virtualenvwrapper
把下面两行代码添加到 ~/.bashrc文件中
打开文件
解释说明
vi ~/.bashrc 写入以下两行代码 export WORKON_HOME=~/Envs #设置virtualenv的统一管理目录 export VIRTUALENVWRAPPER_VIRTUALENV_ARGS='--no-site-packages' #添加virtualenvwrapper的参数,生成干净隔绝的环境 export VIRTUALENVWRAPPER_PYTHON=/opt/python347/bin/python3 #指定python解释器 source /opt/python34/bin/virtualenvwrapper.sh #执行virtualenvwrapper安装脚本 -- INSERT --
具体操作
[root@web ~]# vi ~/.bashrc # .bashrc # User specific aliases and functions alias rm='rm -i' alias cp='cp -i' alias mv='mv -i' export WORKON_HOME=~/Envs export VIRTUALENVWRAPPER_VIRTUALENV_ARGS='--no-site-packages' export VIRTUALENVWRAPPER_PYTHON=/usr/local/bin/python3 source /usr/local/bin/virtualenvwrapper.sh
保存退出
读取文件,使得生效(也可以重启终端使之生效),此时已经可以使用virtalenvwrapper
[root@web ~]# source ~/.bashrc
virtualenvwrapper.user_scripts creating /root/Envs/premkproject
virtualenvwrapper.user_scripts creating /root/Envs/postmkproject
virtualenvwrapper.user_scripts creating /root/Envs/initialize
virtualenvwrapper.user_scripts creating /root/Envs/premkvirtualenv
virtualenvwrapper.user_scripts creating /root/Envs/postmkvirtualenv
virtualenvwrapper.user_scripts creating /root/Envs/prermvirtualenv
virtualenvwrapper.user_scripts creating /root/Envs/postrmvirtualenv
virtualenvwrapper.user_scripts creating /root/Envs/predeactivate
virtualenvwrapper.user_scripts creating /root/Envs/postdeactivate
virtualenvwrapper.user_scripts creating /root/Envs/preactivate
virtualenvwrapper.user_scripts creating /root/Envs/postactivate
virtualenvwrapper.user_scripts creating /root/Envs/get_env_details
[root@web ~]#
virtualenvwrapper基本使用
1.创建虚拟环境
mkvirtualenv env-name
mkvirtualenv -p python3 env-name  # 指定python的版本号
mkvirtualenv env-name  --system-site-packages  # 可以使用虚拟环境的外部的模块
2.进入虚拟环境
workon env-name
3.离开虚拟环境
deactivate
4.删除虚拟环境
rmvirtualenv env-name
5.列出现有的虚拟环境
lsvirtualenv
其他命令
cdvirtualenv 导航到当前激活的虚拟环境的目录中,比如说这样您就能够浏览它的 site-packages 。 cdsitepackages 和上面的类似,但是是直接进入到 site-packages 目录中。 lssitepackages 显示 site-packages 目录中的内容。 完整官网介绍:https://virtualenvwrapper.readthedocs.io/en/latest/command_ref.html
二、部署准备:上传项目代码、安装nginx、安装uwsgi,安装django
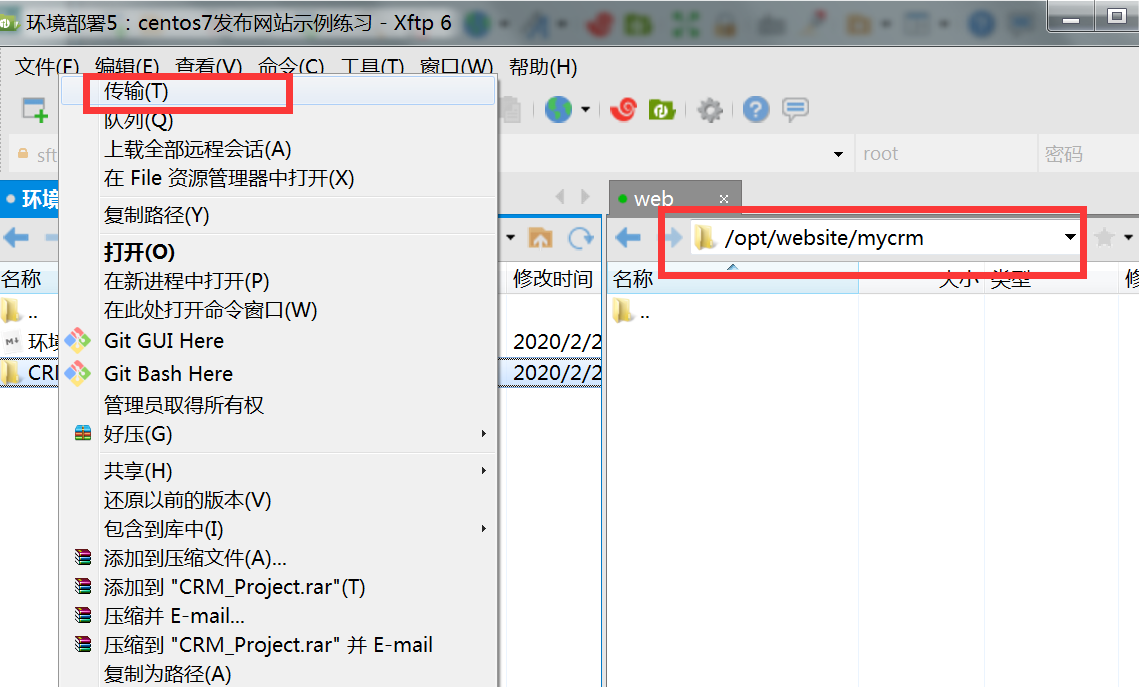
0、上传项目代码
使用xftp上传项目代码
创建文件夹
[root@web opt]# mkdir ./website/mycrm -p
选择正确的位置上传代码,注意项目不要上传到/root/ 目录下,会产生权限问题
项目文件树目录
.
├── CRM_Project
│   ├── __init__.py
│   ├── __pycache__
│   ├── settings.py
│   ├── urls.py
│   └── wsgi.py
├── db.sqlite3
├── manage.py
├── rbac
│   ├── admin.py
│   ├── apps.py
│   ├── forms
│   ├── __init__.py
│   ├── middlewares
│   ├── migrations
│   ├── models.py
│   ├── __pycache__
│   ├── service
│   ├── static
│   ├── templates
│   ├── templatetags
│   ├── tests.py
│   ├── urls.py
│   ├── views
│   ├──
├── requirements.txt
├── stark
│   ├── admin.py
│   ├── apps.py
│   ├── forms
│   ├── __init__.py
│   ├── migrations
│   ├── models.py
│   ├── __pycache__
│   ├── service
│   ├── static
│   ├── templates
│   ├── tests.py
│   ├── utils
│   └── views.py
├── templates
└── web
    ├── admin.py
    ├── apps.py
    ├── __init__.py
    ├── migrations
    ├── models.py
    ├── __pycache__
    ├── stark.py
    ├── templates
    ├── tests.py
    ├── utils
    └── views
1、安装nginx
见nginx之旅(第一篇):nginx下载安装、nginx启动与关闭、nginx配置文件详解、nginx默认网站
nginx 版本nginx/1.15.5
2、安装uwsgi
uwsgi 版本 2.0.18
创建虚拟环境mycrm
[root@web ~]# mkvirtualenv mycrm
created virtual environment in 162ms CPython3Posix(dest=/root/Envs/mycrm, clear=False, global=False) with seeder FromAppData pip=latest setuptools=latest wheel=latest app_data_dir=/root/.local/share/virtualenv/seed-v1 via=copy
virtualenvwrapper.user_scripts creating /root/Envs/mycrm/bin/predeactivate
virtualenvwrapper.user_scripts creating /root/Envs/mycrm/bin/postdeactivate
virtualenvwrapper.user_scripts creating /root/Envs/mycrm/bin/preactivate
virtualenvwrapper.user_scripts creating /root/Envs/mycrm/bin/postactivate
virtualenvwrapper.user_scripts creating /root/Envs/mycrm/bin/get_env_details
(mycrm) [root@web ~]# lsvirtualenv
mycrm
=====
安装uwsgi
(mycrm) [root@web ~]# pip3 install uwsgi Looking in indexes: https://mirrors.aliyun.com/pypi/simple/ Collecting uwsgi Using cached https://mirrors.aliyun.com/pypi/packages/e7/1e/3dcca007f974fe4eb369bf1b8629d5e342bb3055e2001b2e5340aaefae7a/uwsgi-2.0.18.tar.gz (801 kB) Building wheels for collected packages: uwsgi Building wheel for uwsgi (setup.py) ... done Created wheel for uwsgi: filename=uWSGI-2.0.18-cp37-cp37m-linux_x86_64.whl size=4966936 sha256=a6d1fdbcb6579c916dac8ada124a0ae8b99bcd598789de49add68019ab895a54 Stored in directory: /root/.cache/pip/wheels/f3/f3/79/2ea863fed859eb617614dcc0d42619af0f5109f399b678dd5b Successfully built uwsgi Installing collected packages: uwsgi Successfully installed uwsgi-2.0.18 (mycrm) [root@web ~]# #检查uwsgi版本 (mycrm) [root@web ~]# uwsgi --version 2.0.18 (mycrm) [root@web ~]# #检查uwsgi python版本 (mycrm) [root@web ~]# uwsgi --python-version 3.7.1
3、测试uwsgi 安装是否成功
创建test.py文件,启动uwsgi
(mycrm) [root@web website]# touch test.py
(mycrm) [root@web website]# vi test.py
# test.py
def application(env, start_response):
    start_response('200 OK', [('Content-Type','text/html')])
    return [b"Hello World"] # python3
    #return ["Hello World"] # python2
保存,启动uwsgi
测试启动uwsgi,启动uWSGI服务器:
uwsgi -- http :8000 --wsgi-file test.py
意思是使用8000端口启动这个文件,效果如下:
[root@web website]# uwsgi --http :8000 --wsgi-file test.py
*** Starting uWSGI 2.0.18 (64bit) on [Sun Mar 1 22:43:24 2020] ***
compiled with version: 4.8.5 20150623 (Red Hat 4.8.5-39) on 22 February 2020 03:43:05
os: Linux-3.10.0-862.el7.x86_64 #1 SMP Fri Apr 20 16:44:24 UTC 2018
nodename: web
machine: x86_64
clock source: unix
pcre jit disabled
detected number of CPU cores: 1
current working directory: /opt/website
detected binary path: /usr/local/bin/uwsgi
uWSGI running as root, you can use --uid/--gid/--chroot options
*** WARNING: you are running uWSGI as root !!! (use the --uid flag) ***
*** WARNING: you are running uWSGI without its master process manager ***
your processes number limit is 7243
your memory page size is 4096 bytes
detected max file descriptor number: 1024
lock engine: pthread robust mutexes
thunder lock: disabled (you can enable it with --thunder-lock)
uWSGI http bound on :8000 fd 4
spawned uWSGI http 1 (pid: 5077)
uwsgi socket 0 bound to TCP address 127.0.0.1:41799 (port auto-assigned) fd 3
uWSGI running as root, you can use --uid/--gid/--chroot options
*** WARNING: you are running uWSGI as root !!! (use the --uid flag) ***
Python version: 3.7.1 (default, Feb 15 2020, 22:39:51) [GCC 4.8.5 20150623 (Red Hat 4.8.5-39)]
*** Python threads support is disabled. You can enable it with --enable-threads ***
Python main interpreter initialized at 0x1366700
uWSGI running as root, you can use --uid/--gid/--chroot options
*** WARNING: you are running uWSGI as root !!! (use the --uid flag) ***
your server socket listen backlog is limited to 100 connections
your mercy for graceful operations on workers is 60 seconds
mapped 72920 bytes (71 KB) for 1 cores
*** Operational MODE: single process ***
WSGI app 0 (mountpoint='') ready in 0 seconds on interpreter 0x1366700 pid: 5076 (default app)
uWSGI running as root, you can use --uid/--gid/--chroot options
*** WARNING: you are running uWSGI as root !!! (use the --uid flag) ***
*** uWSGI is running in multiple interpreter mode ***
spawned uWSGI worker 1 (and the only) (pid: 5076, cores: 1)
[pid: 5076|app: 0|req: 1/1] 192.168.199.168 () {36 vars in 654 bytes} [Sun Mar 1 22:44:41 2020] GET / => generated 11 bytes in 0 msecs (HTTP/1.1 200) 1 headers in 44 bytes (1 switches on core 0)
[pid: 5076|app: 0|req: 2/2] 192.168.199.168 () {36 vars in 606 bytes} [Sun Mar 1 22:44:41 2020] GET /favicon.ico => generated 11 bytes in 0 msecs (HTTP/1.1 200) 1 headers in 44 bytes (1 switches on core 0)
访问 localhost:8000
显示 hello world
这就说明uWSGI启动成功了~后续可以设置uWSGI启动django了
4、创建uwsgi配置文件
(mycrm) [root@web mycrm]# vi /etc/uwsgi/mycrm_uwsgi.ini [uwsgi] uid = www gid = www http=0.0.0.0:8000 socket = 127.0.0.1:8001 chdir = /opt/website/mycrm/CRM_Project wsgi-file = /opt/website/mycrm/CRM_Project/CRM_Project/wsgi.py stats = 0.0.0.0:9191 master = true vhost = true workers = 2 threads=2 reload-mercy = 10 vacuum = true max-requests = 1000 limit-as = 512 buffer-size = 30000 pidfile = /var/run/uwsgi8000.pid daemonize = /var/log/uwsgi8000.log pythonpath = /root/Envs/mycrm/lib/python3.7/site-packages
保存退出
注意,这里不再需要home/virtualenv参数了,不然会出现
Fatal Python error: initfsencoding: Unable to get the locale encoding
ModuleNotFoundError: No module named 'encodings'
错误
原因是--home参数,以前uwsgi需要这个参数来指定python环境变量的目录,现在不需要这个参数
5、安装django
(mycrm) [root@web mycrm]# pip3 install django==1.11.1
Looking in indexes: https://mirrors.aliyun.com/pypi/simple/
Collecting django==1.11.1
  Downloading https://mirrors.aliyun.com/pypi/packages/2b/2c/019d6d5f7ed2889082ed96f849bf462c57265087a3a568a19b0d4c53bc55/Django-1.11.1-py2.py3-none-any.whl (6.9 MB)
     |███████▊                        | 1.7 MB 1.1 MB/s eta 0:00:05
     ...
6、启动uwsgi
(mycrm) [root@web mycrm]# ls /etc/uwsgi/ mycrm_uwsgi.ini uwsgi.ini (mycrm) [root@web mycrm]# uwsgi --ini /etc/uwsgi/mycrm_uwsgi.ini [uWSGI] getting INI configuration from /etc/uwsgi/mycrm_uwsgi.ini
测试uwsgi是否启动
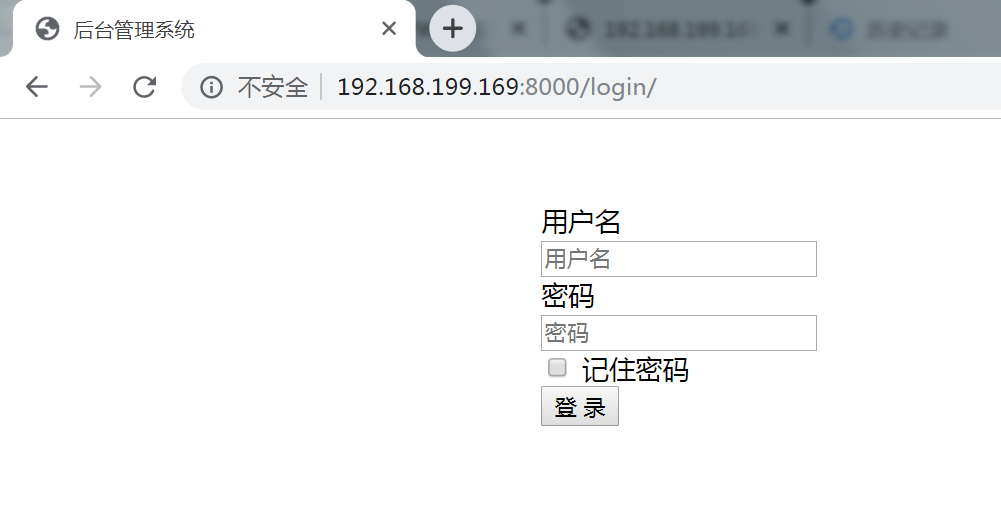
7、测试uwsgi状态下的测试页面
错误1
发现session一直出现错误
SuspiciousOperation at /login/
The request's session was deleted before the request completed.
修改settings.py,设置session在数据库读取
#SESSION存放位置设置 SESSION_ENGINE = 'django.contrib.sessions.backends.db' # 引擎(默认) SESSION_COOKIE_NAME = "crmsessionid"
错误2
attempt to write a readonly database
原因:
sqlite3所在的文件夹没有读写权限,或者权限不足
解决方案
[root@web CRM_Project]# chmod 777 db.sqlite3
错误3
unable to open database file
原因
sqlite库在对数据库进行操作时(本人估计是写操作),会在数据库的当前文件夹下创建一个临时文件,当操作结束时,该临时文件将被删除。 而远程用户一般不具备有对临时文件足够的权限 所以会造成 无法打开、写或者删除临时文件
解决方案
将数据库所在文件夹设置为任何用户都有可读可写可删的权限。
[root@web CRM_Project]# pwd /opt/website/mycrm/CRM_Project [root@web CRM_Project]# chmod -R 777 /opt/website/mycrm/CRM_Project
8、针对Nginx访问不了Django中的静态文件做处理,需要做静态文件收集
由于项目中有多个app都有static,,项目根目录没有static, 处理方式是在项目的settings.py文件里增加
STATIC_URL = '/static/'
STATIC_ROOT= os.path.join(BASE_DIR,'statics/')
STATICFILES_DIRS = (
    os.path.join(BASE_DIR, "rbac/static/"),
    os.path.join(BASE_DIR, "stark/static/"),
)
在项目根目录执行
[root@web CRM_Project]# python3 manage.py collectstatic
9、配置nginx配置文件
(mycrm) [root@web conf]# cd /usr/local/nginx/conf
(mycrm) [root@web conf]# vi nginx.conf
#user nobody;
worker_processes 1;
#error_log logs/error.log;
#error_log logs/error.log notice;
#error_log logs/error.log info;
#pid logs/nginx.pid;
events {
worker_connections 1024;
}
http {
include mime.types;
default_type application/octet-stream;
# '$status $body_bytes_sent "$http_referer" '
# '"$http_user_agent" "$http_x_forwarded_for"';
#access_log logs/access.log main;
sendfile on;
#tcp_nopush on;
#keepalive_timeout 0;
keepalive_timeout 65;
#gzip on;
server {
listen 80;
server_name localhost;
#charset koi8-r;
#access_log logs/host.access.log main;
location / {
include /usr/local/nginx/conf/uwsgi_params;
uwsgi_pass 127.0.0.1:8001;
client_max_body_size 35m;
}
location /static {
alias /opt/website/mycrm/CRM_Project/statics;
}
#error_page 404 /404.html;
# redirect server error pages to the static page /50x.html
#
error_page 500 502 503 504 /50x.html;
location = /50x.html {
root html;
}
}
10、启动uwsgi、启动nginx
启动uwsgi
mycrm) [root@web conf]# uwsgi --ini /etc/uwsgi/mycrm_uwsgi.ini
[uWSGI] getting INI configuration from /etc/uwsgi/mycrm_uwsgi.ini
启动nginx
(mycrm) [root@web nginx]# ./sbin/nginx
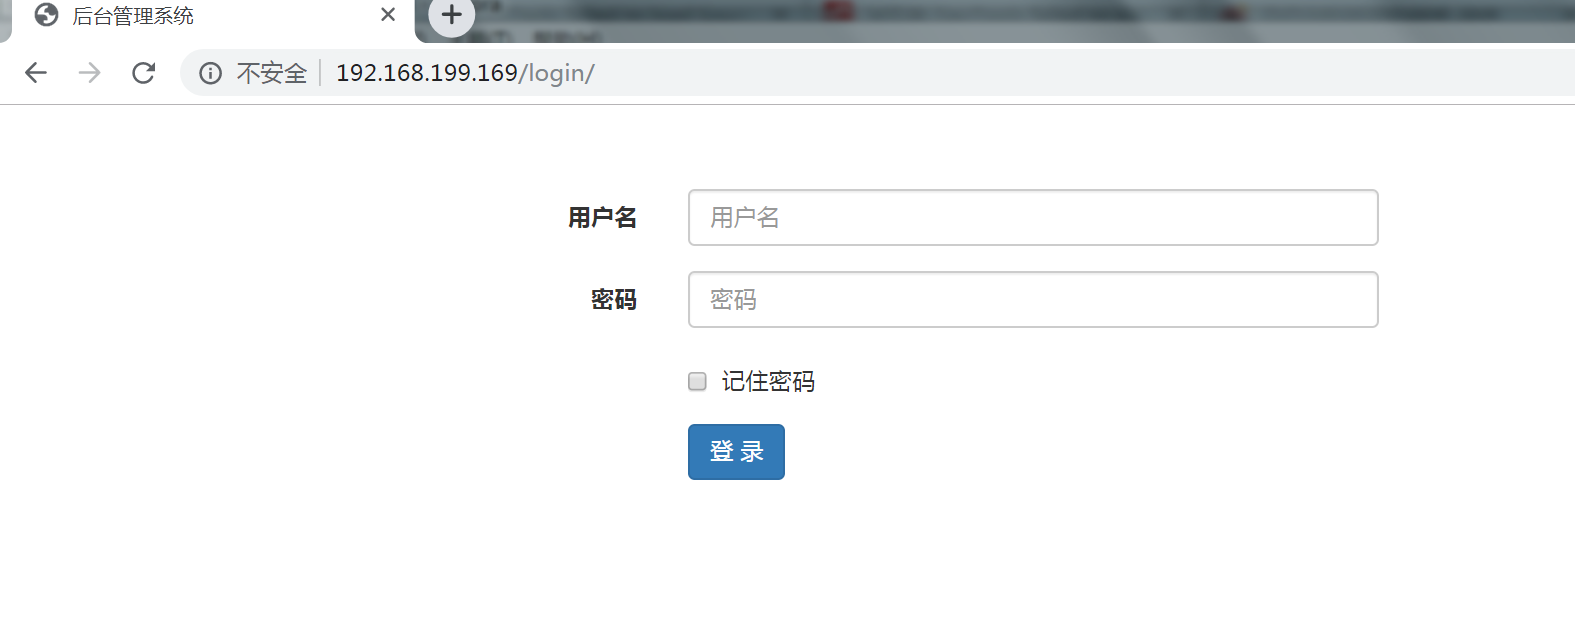
测试页面,成功
三、使用supervisor管理
介绍supervisor
用Supervisor管理的进程,当一个进程意外被杀死,supervisort监听到进程死后,会自动将它重新拉起,很方便的做到进程自动恢复的功能,不再需要自己写shell脚本来控制。
- supervisord
运行 Supervisor 时会启动一个进程 supervisord,它负责启动所管理的进程,并将所管理的进程作为自己的子进程来启动,而且可以在所管理的进程出现崩溃时自动重启。
- supervisorctl
是命令行管理工具,可以用来执行 stop、start、restart 等命令,来对这些子进程进行管理。
supervisor是所有进程的父进程,管理着启动的子进展,supervisor以子进程的PID来管理子进程,当子进程异常退出时supervisor可以收到相应的信号量。
安装supervisor
由于supervisor在python3下无法使用,因此只能用python2去下载
#注意此时已经退出虚拟环境了!!!!! [root@web nginx]# yum install supervisor Loaded plugins: fastestmirror Loading mirror speeds from cached hostfile ... [root@web nginx]# easy_install supervisor Searching for supervisor Reading https://pypi.python.org/simple/supervisor/ ... warning: no previously-included files matching '*' found under directory 'docs/.build' Adding supervisor 4.1.0 to easy-install.pth file Installing echo_supervisord_conf script to /usr/bin Installing pidproxy script to /usr/bin Installing supervisorctl script to /usr/bin Installing supervisord script to /usr/bin Installed /usr/lib/python2.7/site-packages/supervisor-4.1.0-py2.7.egg Processing dependencies for supervisor Finished processing dependencies for supervisor [root@web nginx]#
配置Supervisor
通过命令生成配置文件
[root@web local]# mkdir /usr/supervisor [root@web local]# echo_supervisord_conf > /usr/supervisor/supervisord.conf
配置文件详解
# 指定了socket file的位置 [unix_http_server] file=/tmp/supervisor.sock ;UNIX socket 文件,supervisorctl 会使用 ;chmod=0700 ;socket文件的mode,默认是0700 ;chown=nobody:nogroup ;socket文件的owner,格式:uid:gid #用于启动一个含有前端的服务,可以从Web页面中管理服务。其中,port用于设置访问地址,username和password用于设置授权认证。 ;[inet_http_server] ;HTTP服务器,提供web管理界面 ;port=127.0.0.1:9001 ;Web管理后台运行的IP和端口,如果开放到公网,需要注意安全性 ;username=user ;登录管理后台的用户名 ;password=123 ;登录管理后台的密码 # 管理服务本身的配置 [supervisord] logfile=/tmp/supervisord.log ;日志文件,默认是 $CWD/supervisord.log logfile_maxbytes=50MB ;日志文件大小,超出会rotate,默认 50MB,如果设成0,表示不限制大小 logfile_backups=10 ;日志文件保留备份数量默认10,设为0表示不备份 loglevel=info ;日志级别,默认info,其它: debug,warn,trace pidfile=/tmp/supervisord.pid ;pid 文件 nodaemon=false ;是否在前台启动,默认是false,即以 daemon 的方式启动 minfds=1024 ;可以打开的文件描述符的最小值,默认 1024 minprocs=200 ;可以打开的进程数的最小值,默认 200 [supervisorctl] serverurl=unix:///tmp/supervisor.sock ;通过UNIX socket连接supervisord,路径与unix_http_server部分的file一致 ;serverurl=http://127.0.0.1:9001 ; 通过HTTP的方式连接supervisord ; [program:xx]是被管理的进程配置参数,xx是进程的名称 [program:xx] command=/opt/apache-tomcat-8.0.35/bin/catalina.sh run ; 程序启动命令 autostart=true ; 在supervisord启动的时候也自动启动 startsecs=10 ; 启动10秒后没有异常退出,就表示进程正常启动了,默认为1秒 autorestart=true ; 程序退出后自动重启,可选值:[unexpected,true,false],默认为unexpected,表示进程意外杀死后才重启 startretries=3 ; 启动失败自动重试次数,默认是3 user=tomcat ; 用哪个用户启动进程,默认是root priority=999 ; 进程启动优先级,默认999,值小的优先启动 redirect_stderr=true ; 把stderr重定向到stdout,默认false stdout_logfile_maxbytes=20MB ; stdout 日志文件大小,默认50MB stdout_logfile_backups = 20 ; stdout 日志文件备份数,默认是10 ; stdout 日志文件,需要注意当指定目录不存在时无法正常启动,所以需要手动创建目录(supervisord 会自动创建日志文件) stdout_logfile=/opt/apache-tomcat-8.0.35/logs/catalina.out stopasgroup=false ;默认为false,进程被杀死时,是否向这个进程组发送stop信号,包括子进程 killasgroup=false ;默认为false,向进程组发送kill信号,包括子进程 # 对事件进行的管理 ;[eventlistener:theeventlistenername] # 对任务组的管理 ,包含其它配置文件 ;[group:thegroupname] ;programs=progname1,progname2 ; each refers to 'x' in [program:x] definitions ;priority=999 ; the relative start priority (default 999) [include] files = supervisord.d/*.ini ;可以指定一个或多个以.ini结束的配置文件
使用示例:
设置配置文件,通过supervisor管理uwsgi ginx,使得uwsgi ginx意外关闭后自动重启,
在 supervisord.conf末尾添加
[program:uwsgi] command=/root/Envs/mycrm/bin/uwsgi --ini /etc/uwsgi/mycrm_uwsgi.ini autostart=true ; 在supervisord启动的时候也自动启动 startsecs=10 ; 启动10秒后没有异常退出,就表示进程正常启动了,默认为1秒 autorestart=true ;程序退出后自动重启,可选值:[unexpected,true,false],默认为unexpected,表示进程意外杀死后才重启 startretries=3 ; 启动失败自动重试次数,默认是3 ; 停止等待时间 stopwaitsecs=0 stopasgroup=true ;由于uwsgi是多进程的,所以需要设置 killasgroup=true stdout_logfile=/usr/local/uwsgi/log/ss_uwsgi_access.log stderr_logfile=/usr/local/uwsgi/log/ss_uwsgi_error.log [program:nginx] command=/usr/local/nginx/sbin/nginx -c /usr/local/nginx/conf/nginx.conf autostart=true ; 在supervisord启动的时候也自动启动 startsecs=10 ; 启动10秒后没有异常退出,就表示进程正常启动了,默认为1秒 autorestart=true ;程序退出后自动重启,可选值:[unexpected,true,false],默认为unexpected,表示进程意外杀死后才重启 startretries=3 ; 启动失败自动重试次数,默认是3 ; 停止等待时间 stopwaitsecs=0 stopasgroup=true ;由于uwsgi是多进程的,所以需要设置 killasgroup=true stdout_logfile=/usr/local/nginx/logs/ss_nginx_access.log stderr_logfile=/usr/local/nginx/logs/ss_nginx_error.log ;设置一个可以前端查看的页面 [inet_http_server] port=192.168.199.169:9001 ;IP按需配置 username=user password=123
启动supervisor
supervisord -c /usr/supervisor/supervisord.conf
测试
可以看到supervisor启动,uwsgi已经启动,nginx已经启动
[root@web supervisor]# ps aux |grep super root 7191 0.0 0.5 217676 10416 ? Ss 14:23 0:00 /usr/bin/python /usr/bin/supervisord -c /usr/supervisor/supervisord.conf root 7208 0.0 0.0 112712 964 pts/1 R+ 14:24 0:00 grep --color=auto super [root@web supervisor]# ps aux |grep uwsgi www 7194 0.5 1.4 243528 27272 ? S 14:23 0:00 /root/Envs/mycrm/bin/uwsgi --ini /etc/uwsgi/mycrm_uwsgi.ini www 7195 0.0 1.2 243528 22792 ? S 14:23 0:00 /root/Envs/mycrm/bin/uwsgi --ini /etc/uwsgi/mycrm_uwsgi.ini www 7196 0.0 1.2 243528 22792 ? S 14:23 0:00 /root/Envs/mycrm/bin/uwsgi --ini /etc/uwsgi/mycrm_uwsgi.ini www 7197 0.0 1.1 243528 22308 ? S 14:23 0:00 /root/Envs/mycrm/bin/uwsgi --ini /etc/uwsgi/mycrm_uwsgi.ini root 7210 0.0 0.0 112712 964 pts/1 R+ 14:24 0:00 grep --color=auto uwsgi [root@web supervisor]# ps aux |grep super root 7320 0.1 0.5 219756 10432 ? Ss 14:57 0:00 /usr/bin/python /usr/bin/supervisord -c /usr/supervisor/supervisord.conf root 7341 0.0 0.0 112712 964 pts/1 S+ 14:57 0:00 grep --color=auto super
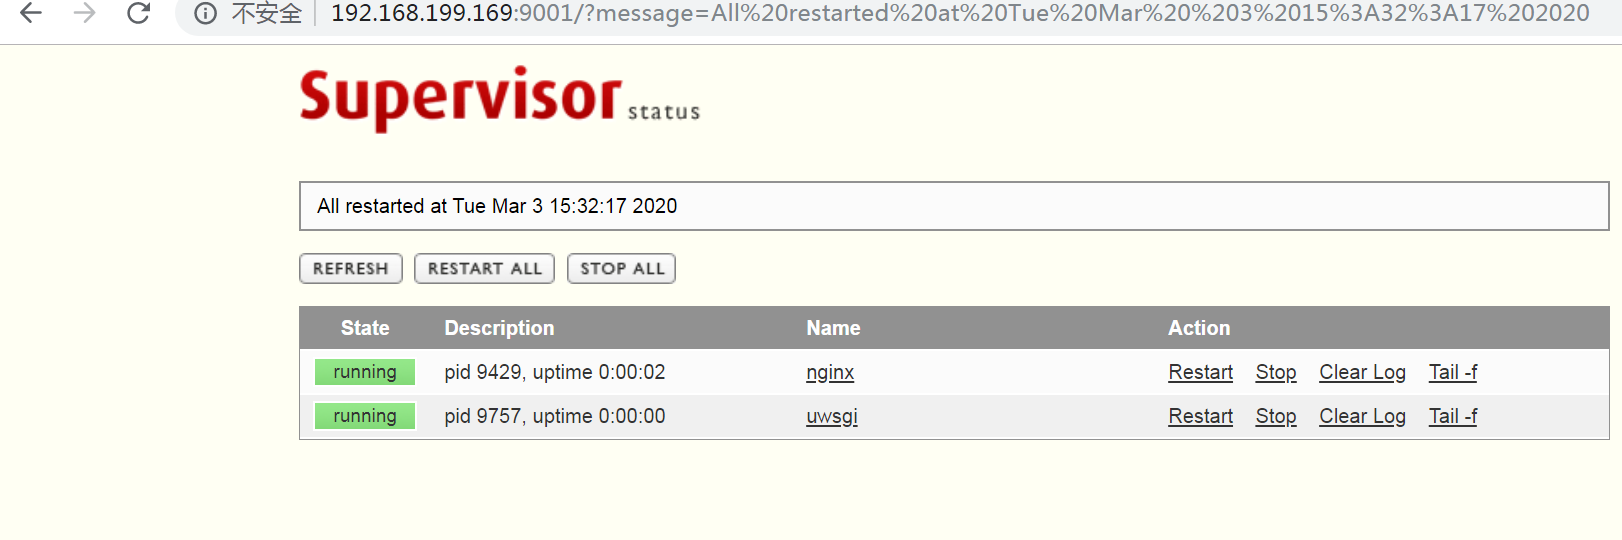
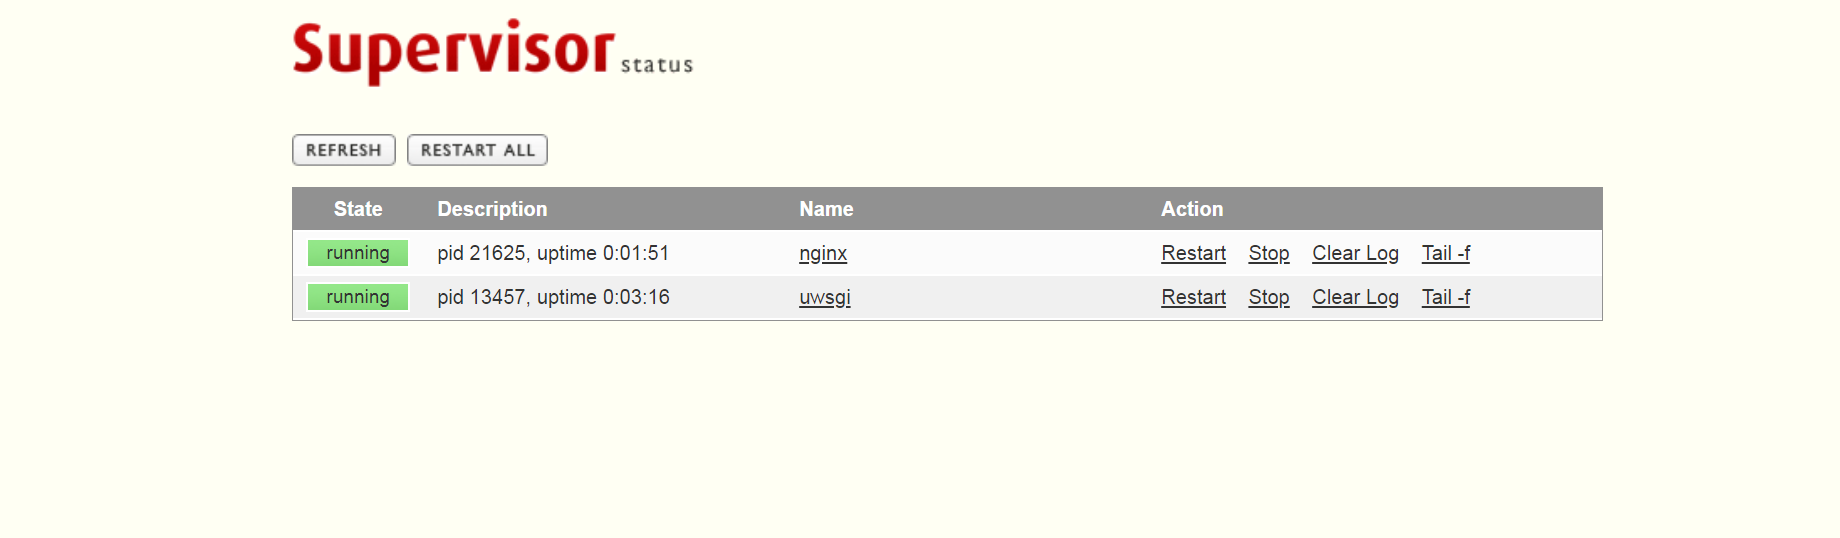
web页面查看
supervisor操作方式
supervisor包含两个东西,一个是服务端(Server),我们使用的命令是supervisord;一个是客户端(Client),我们使用的命令是supervisorctl。服务端面向程序,负责进程的运行,客户端面向用户,负责进程的管理。现在我们要对supervisor进行管理,因此需要用supervisorctl命令,下面是常用的命令:
方式一,通过web页面进行管理
在浏览器输入配置文件设置的ip:port精管理
方式二通过命令进行管理
#查看所有进程的运行状态 supervisorctl status #查看某一进程的运行状态 supervisorctl status 进程名 #启动某一进程 supervisorctl start 进程名 #启动所有进程 supervisorctl start all #停止某一进程 supervisorctl stop 进程名 #停止所有进程 supervisorctl stop all #重启某一进程 supervisorctl restart 进程名 #重启所有进程 supervisorctl restart all #新增进程后,更新进程(不影响其他进程运行) supervisorctl update #新增进程后,重启所有进程 supervisorctl reload
错误解决
1、uwsgi出现Exited too quickly (process log may have details)
原因:
supervisor 比较适合监控业务应用,且只能监控前台程序
解决方案:
之前我们在uwsgi的配置文件中设置了一个日志文件保存位置的参数:
daemonize = /home/mysite_uwsgi/mysite.log
但是这个参数的配置与Supervisor的日志输出配置是有冲突的,需要注释掉它,因为在前面加个#:
nginx出现相同的错误方式解决方式
...
daemon off;
...
events {
...
}
http {
...
}