介绍
Windows Teminal是一款新式、快速、高效、强大的终端应用程序,适用于命令行工具、命令提示符、PowerShell、WSL(Linux子系统)等等的Shell用户,主要功能包括多选项卡、窗格、Unicode/UTF-8字符支持、GPU 加速文本渲染引擎,以及自定义主题、样式和配置等等。
Github地址:https://github.com/microsoft/terminal
官网下载地址:https://www.microsoft.com/zh-cn/p/windows-terminal/9n0dx20hk701?activetab=pivot:overviewtab
安装Windows Terminal
打开Microsoft Store,搜索Windows Teminal并安装。
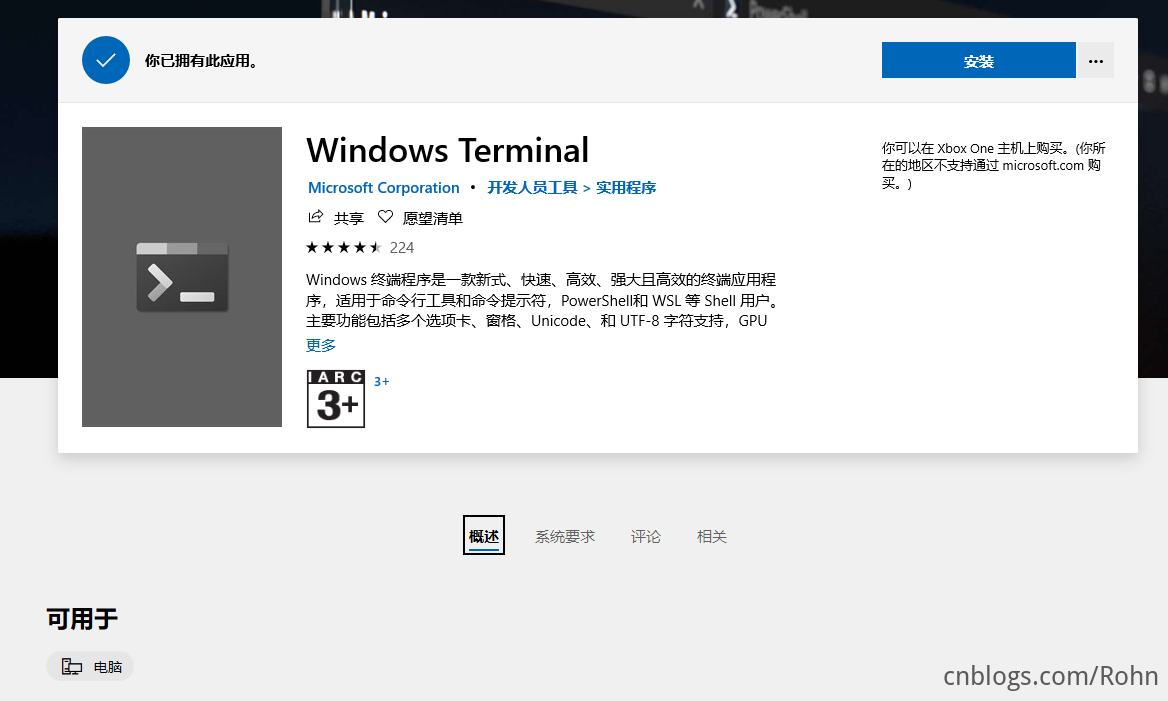
启动:
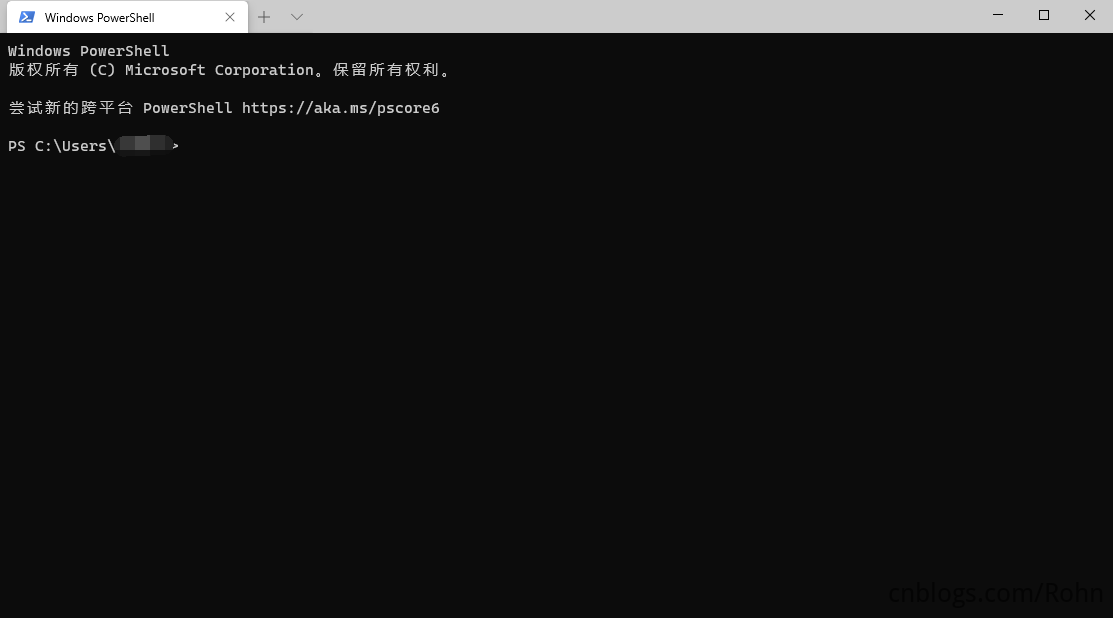
安装最新版本PowerShell
Widows 10 默认是 Windows PowerShell 是 5.X 版本,在 Win10 V1903 以上版本后,打开 PowerShell 时,会提示 “尝试新的跨平台 PowerShell https://aka.ms/pscore6” ,打开提示网址。
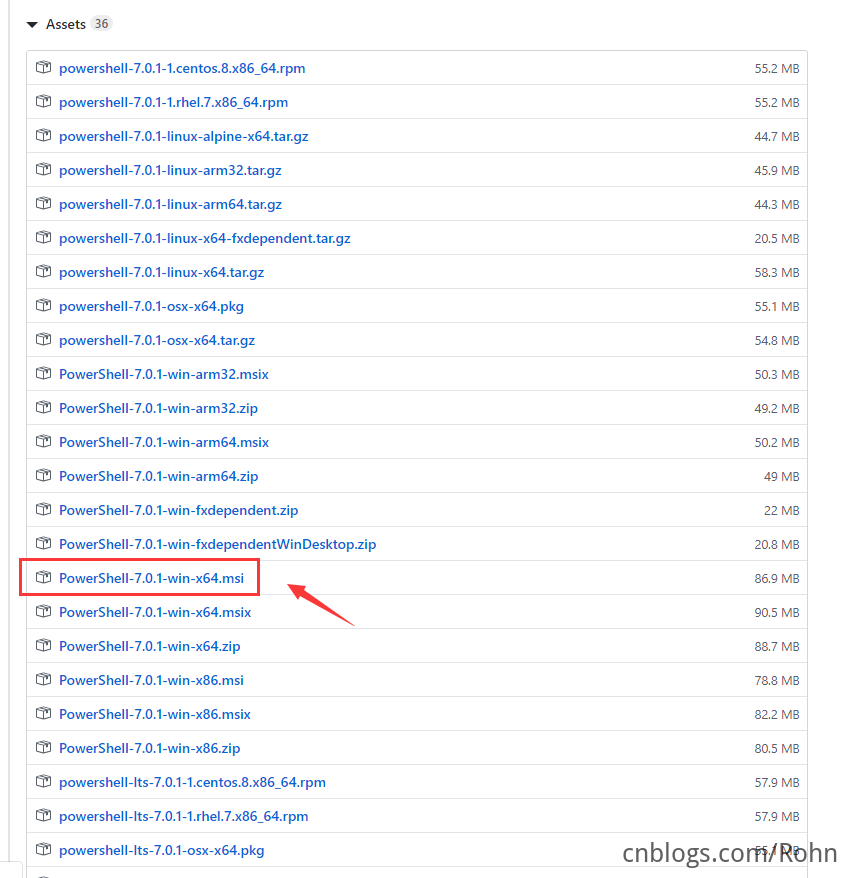
下载地址:https://github.com/PowerShell/PowerShell/releases
选择PowerShell-<version>-win-<os-arch>.msi格式的安装包:
下载后,双击安装程序并按照提示进行操作。
安装程序在 Windows“开始”菜单中创建一个快捷方式。
- 默认情况下,包安装位置为
$env:ProgramFilesPowerShell - 可以通过“开始”菜单或
$env:ProgramFilesPowerShell\pwsh.exe启动 PowerShell
PowerShell 7 安装到新目录,并与 Windows PowerShell 5.1 并行运行。 对于 PowerShell Core 6.x,PowerShell 7 是删除 PowerShell Core 6.x 的就地升级。
- PowerShell 7 安装到
$env:ProgramFilesPowerShell7 $env:ProgramFilesPowerShell7文件夹已添加到$env:PATH$env:ProgramFilesPowerShell6文件夹已删除
如果需要与 PowerShell 7 并行运行 PowerShell 6,请使用 ZIP 安装方法重新安装 PowerShell 6。
查看版本,在命令行窗口中输入命令
$PSVersionTable.PSVersion
美化Windows Terminal
参考:https://docs.microsoft.com/zh-cn/windows/terminal/
默认会话为Power Shell 5.x版本,将之修改为7
"defaultProfile":的值改为"source": "Windows.Terminal.PowershellCore"的guid即可,例如它的guid为"{574e775e-4f2a-5b96-ac1e-a2962a402336}"。
"defaultProfile": "{574e775e-4f2a-5b96-ac1e-a2962a402336}",
schemes配置
		{
				"name": "Snazzy",
				"black": "#000000",
				"red": "#fc4346",
				"green": "#50fb7c",
				"yellow": "#f0fb8c",
				"blue": "#49baff",
				"purple": "#fc4cb4",
				"cyan": "#8be9fe",
				"white": "#ededec",
				"brightBlack": "#555555",
				"brightRed": "#fc4346",
				"brightGreen": "#50fb7c",
				"brightYellow": "#f0fb8c",
				"brightBlue": "#49baff",
				"brightPurple": "#fc4cb4",
				"brightCyan": "#8be9fe",
				"brightWhite": "#ededec",
				"background": "#1e1f29",
				"foreground": "#ebece6"
		}
毛玻璃主题
若喜欢毛玻璃主题,可以在"profiles"内加入以下两个参数:
- useAcrylic:如果设置为
true,窗口将使用acrylic背景。 设置为false时,窗口将为普通的、不带纹理的背景。默认值为false。 - acrylicOpacity:将
useAcrylic设置为true时,这会设置该配置文件的窗口透明度。 接受的浮点值为0-1。默认值为0.5。
效果如下:
安装oh-my-posh
Github地址:https://github.com/JanDeDobbeleer/oh-my-posh
安装 posh-git 和 oh-my-posh
Install-Module posh-git -Scope CurrentUser
Install-Module oh-my-posh -Scope CurrentUser
Install-Module DirColors
设置 Powershell 的 profile
if (!(Test-Path -Path $PROFILE )) { New-Item -Type File -Path $PROFILE -Force }
notepad $PROFILE
粘贴以下内容进 profile 文件
Import-Module posh-git
Import-Module oh-my-posh
Import-Module DirColors
主题颜色美化
安装colortool
scoop install colortool
查看颜色方案
colortool -s
设置颜色:
colortool OneHalfDark.itermcolors
Power Shell 7美化
Power Shell 7的配置:
            {
                "guid": "{574e775e-4f2a-5b96-ac1e-a2962a402336}",
                "hidden": false,
                "name": "PowerShell",
                "source": "Windows.Terminal.PowershellCore",
                "colorScheme" : "Snazzy",
                "startingDirectory": "E:\",
				"fontFace" : "Cascadia Code PL",
                "cursorColor" : "#000000"
            }
显示效果如下:


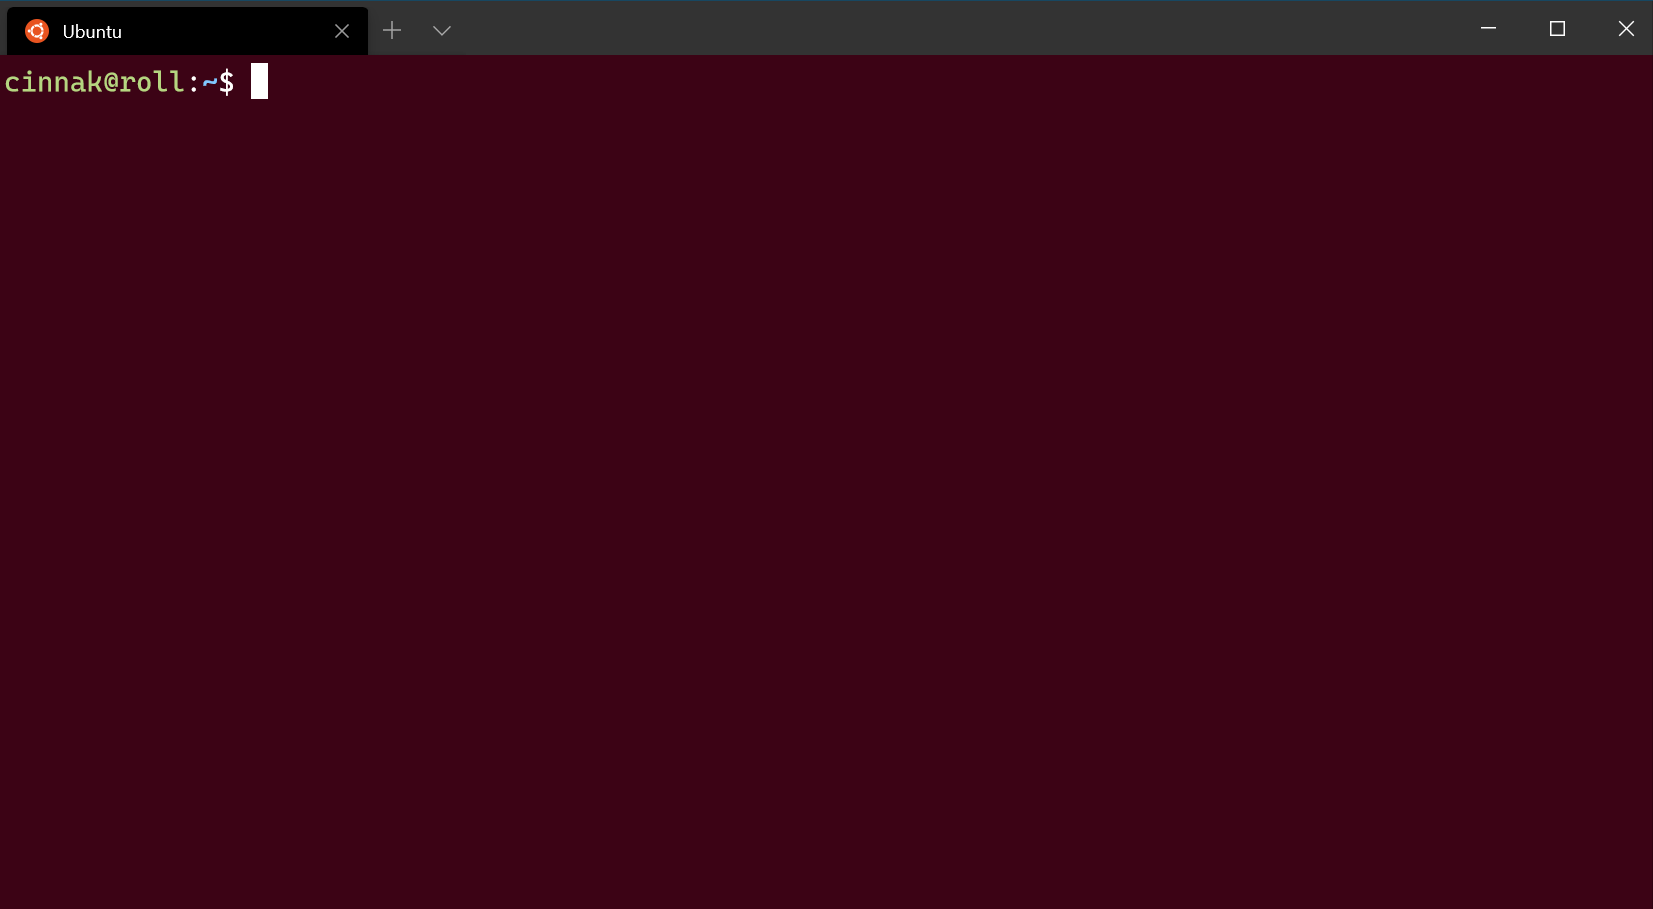
ubuntu美化
Ubuntu的配置:
            {
                "guid": "{07b52e3e-de2c-5db4-bd2d-ba144ed6c273}",
                "hidden": false,
                "name": "Ubuntu-20.04",
				"colorScheme" : "Snazzy",
                "startingDirectory": "E:\code",
                "source": "Windows.Terminal.Wsl"
            },
修改命令提示符,修改root用户的~/.bashrc文件:
export PS1='[e[31;1m][u[e[37;1m]@[e[34;1m]H W][e[35;1m]$ [e[0m]'
新建/etc/profile.d/ps1.sh
export PS1='[e[36;1m][u[e[33;1m]@[e[35;1m]H W][e[34;1m]$ [e[0m]'
新建/etc/profile.d/alias.sh
alias cp='cp -i'
alias egrep='egrep --color=auto'
alias fgrep='fgrep --color=auto'
alias grep='grep --color=auto'
alias l.='ls -d .* --color=auto'
alias ll='ls -l --color=auto'
alias ls='ls --color=auto'
alias mv='mv -i'
alias rm='rm -i'
alias which='(alias; declare -f) | /usr/bin/which --tty-only --read-alias --read-functions --show-tilde --show-dot'
alias xzegrep='xzegrep --color=auto'
alias xzfgrep='xzfgrep --color=auto'
alias xzgrep='xzgrep --color=auto'
alias zegrep='zegrep --color=auto'
alias zfgrep='zfgrep --color=auto'
alias zgrep='zgrep --color=auto'
显示效果如下:
