相关官方文档信息:
https://xlrd.readthedocs.io/en/latest/api.html#xlrd-sheet
参考了白月黑羽学python的教程:
教程位置:http://www.python3.vip/tut/py/extra/excel/
笔记如下:
对于示例中的execel文件income.xlsx
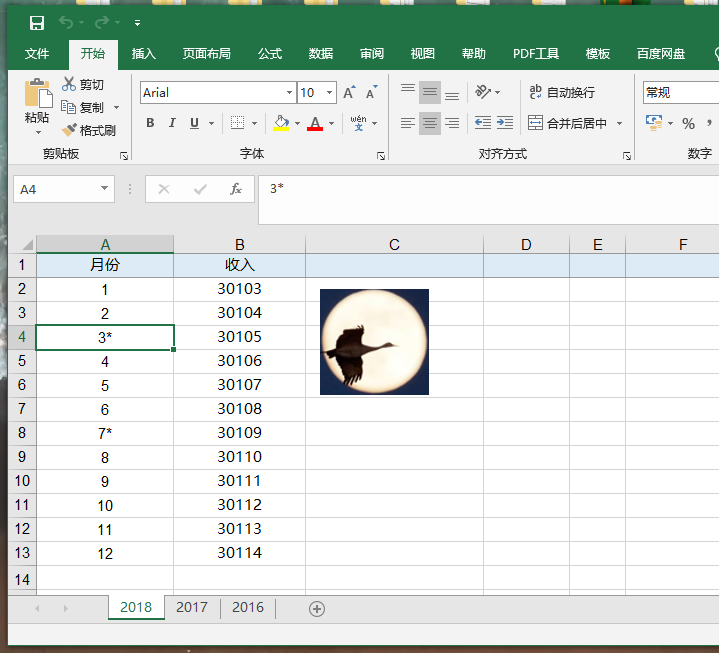
首先若要获得较为笼统的execel信息,方法如下:
 1 import xlrd
 2
 3 """Get the information of all sheets"""
 4 book = xlrd.open_workbook("income.xlsx")
 5 print("The execel file include sheets : %s "%book.nsheets)
 6 print("The execel file include sheets name are : %s "%book.sheet_names())
 7
 8 # output is
 9 # The execel file include sheets : 3
10 # The execel file include sheets name are : ['2018', '2017', '2016']
11
12
13 """The way of get one sheet"""
14 book1 = book.sheet_by_index(0)
15 book11 = book.sheet_by_name("2018")
16 book111 = book.sheets()
17 print("book1 is :%s"%book1)
18 print("book11 is :%s"%book11)
19 print("book111 is :%s"%book111)
20
21 # output is
22 # book1 is :<xlrd.sheet.Sheet object at 0x0000016F06EE5CC8>
23 # book11 is :<xlrd.sheet.Sheet object at 0x0000016F06EE5CC8>
24 # book111 is :[<xlrd.sheet.Sheet object at 0x0000016F06EE5CC8>, <xlrd.sheet.Sheet object at 0x0000016F06F3C1C8>, <xlrd.sheet.Sheet object at 0x0000016F06F3C508>]
接下来取得指定sheet的详细内容
 1 """when get the sheet,you can also get the information of name,number,rows,cols"""
 2 book_selected = xlrd.open_workbook("income.xlsx")
 3 sheet_selected = book_selected.sheet_by_index(0)
 4 print("The sheet name is %s"%sheet_selected.name)
 5 print("The sheet index_number is %s"%sheet_selected.number)
 6 print("The sheet rows count is %s"%sheet_selected.nrows)
 7 print("The sheet cols count is %s"%sheet_selected.ncols)
 8 print("The sheet cell A1 is %s"%sheet_selected.cell_value(rowx=0,colx=0))
 9 print("The value of all cells in the target row of the sheet are %s"%sheet_selected.row_values(rowx=0))
10 print("The value of selected cells in the target row of the sheet are %s"%sheet_selected.row_values(rowx=0,start_colx=0,end_colx=2))
11
12 """col is the same way of row (the arg:end_cols can be omitted)"""
13
14 # output is
15 # The sheet name is 2018
16 # The sheet index_number is 0
17 # The sheet rows count is 13
18 # The sheet cols count is 2
19 # The sheet cell A1 is 月份
20 # The value of all cells in the target row of the sheet are ['月份', '收入']
21 # The value of selected cells in the target row of the sheet are ['月份', '收入']
如果是要创建表格
 1 # 使用的是openpyxl模块
 2 import openpyxl
 3
 4 # 创建一个Excel workbook 对象
 5 book = openpyxl.Workbook()
 6
 7 # 创建时,会自动产生一个sheet,通过active获取
 8 sh = book.active
 9
10 # 修改当前 sheet 标题为 工资表
11 sh.title = '工资表'
12
13 # 保存文件
14 book.save('信息.xlsx')
15
16 # 增加一个名为 '年龄表' 的sheet,放在最后
17 sh1 = book.create_sheet('年龄表-最后')
18
19 # 增加一个 sheet,放在最前
20 sh2 = book.create_sheet('年龄表-最前',0)
21
22 # 增加一个 sheet,指定为第2个表单
23 sh3 = book.create_sheet('年龄表2',1)
24
25 # 根据名称获取某个sheet对象
26 sh = book['工资表']
27
28 # 给第一个单元格写入内容
29 sh['A1'] = '你好'
30
31 # 获取某个单元格内容
32 print(sh['A1'].value)
33
34 # 根据行号列号, 给第一个单元格写入内容,
35 # 注意和 xlrd 不同,是从 1 开始
36 sh.cell(2,2).value = '白月黑羽'
37
38 # 根据行号列号, 获取某个单元格内容
39 print(sh.cell(1, 1).value)
40
41 book.save('信息.xlsx')
根据写入的数据类型不同,可以有不同的写入方法
 1 """如果是字典中的内容要写入execel"""
 2 row = 2
 3 for name,age in dict.items():
 4     sh.cell(row, 1).value = name
 5     sh.cell(row, 2).value = age
 6     row += 1
 7
 8 """如果是列表中的内容要写入execel"""
 9 for row in list:
10     # 添加到下一行的数据
11     sh.append(row)
插入行、列 和 删除行、列 以及另存为
 1 import openpyxl
 2
 3 wb = openpyxl.load_workbook('income.xlsx')
 4 sheet = wb['2018']
 5
 6 # 在第2行的位置插入1行
 7 sheet.insert_rows(2)
 8
 9 # 在第3行的位置插入3行
10 sheet.insert_rows(3,3)
11
12 # 在第2列的位置插入1列
13 sheet.insert_cols(2)
14
15 # 在第2列的位置插入3列
16 sheet.insert_cols(2,3)
17
18 # 在第2行的位置删除1行
19 sheet.delete_rows(2)
20
21 # 在第3行的位置删除3行
22 sheet.delete_rows(3,3)
23
24 # 在第2列的位置删除1列
25 sheet.delete_cols(2)
26
27 # 在第3列的位置删除3列
28 sheet.delete_cols(3,3)
29
30 ## 指定不同的文件名,可以另存为别的文件
31 wb.save('income-1.xlsx')
改变 字体类型、大小、颜色
 1 import openpyxl
 2 # 导入Font对象 和 colors 颜色常量
 3 from openpyxl.styles import Font,colors
 4
 5 wb = openpyxl.load_workbook('income.xlsx')
 6 sheet = wb['2018']
 7
 8 # 指定单元格字体颜色,
 9 sheet['A1'].font = Font(color=colors.RED, #使用预置的颜色常量
10                         size=15,    # 设定文字大小
11                         bold=True,  # 设定为粗体
12                         italic=True # 设定为斜体
13                         )
14
15 # 也可以使用RGB数字表示的颜色
16 sheet['B1'].font = Font(color="981818")
17
18 # 指定整行 字体风格, 这里指定的是第3行
19 font = Font(color="981818")
20 for y in range(1, 100): # 第 1 到 100 列
21     sheet.cell(row=3, column=y).font = font
22
23 # 指定整列 字体风格, 这里指定的是第2列
24 font = Font(bold=True)
25 for x in range(1, 100): # 第 1 到 100 行
26     sheet.cell(row=x, column=2).font = font
27
28 wb.save('income-1.xlsx')
单元格背景色 以及 插入图片
 1 import openpyxl
 2 # 导入Font对象 和 colors 颜色常量
 3 from openpyxl.styles import PatternFill
 4
 5 wb = openpyxl.load_workbook('income.xlsx')
 6 sheet = wb['2018']
 7
 8 # 指定 某个单元格背景色
 9 sheet['A1'].fill = PatternFill("solid", "E39191")
10
11 # 指定 整行 背景色, 这里指定的是第2行
12 fill = PatternFill("solid", "E39191")
13 for y in range(1, 100): # 第 1 到 100 列
14     sheet.cell(row=2, column=y).fill = fill
15
16 # 在第1行,第4列 的位置插入图片
17 sheet.add_image(Image('1.png'), 'D1')
18
19 wb.save('income-1.xlsx')
文章还介绍了 “打开文件快,读写速度慢” 的COM接口操作
适用于 “从大execel文件中操作少量数据” 的情况,其他情况用普通的读写方式即可
目前设计的较少,有需要或者感兴趣的可移步页首提供的网站参考COM写法