前言:Microsoft Windows 服务能够创建在它们自己的 Windows 会话中可长时间运行的可执行应用程序。这些服务可以在计算机启动时自动启动,可以暂停和重新启动而且不显示任何用户界面。这使服务非常适合在服务器上使用,或任何时候,为了不影响在同一台计算机上工作的其他用户,需要长时间运行功能时使用。还可以在不同于登录用户的特定用户帐户或默认计算机帐户的安全上下文中运行服务。本文就向大家介绍如何运用C#来创建、安装、卸载、调试Windows Service程序。
一、创建Windows服务
1)用VS新建Windows 服务项目

2)默认生成文件包括Program.cs,Service1.cs。重命名Service1.cs为你的服务名或删除Service1.cs文件然后创建自己的服务文件,假设取服务名字为MyService。注意:如果是删除Service1.cs文件然后创建自己的服务文件,需要将Program.cs文件里的Service1修改为MyService。
MyService.cs属性窗口中,相关属性如下:
Autolog 是否自动写入系统的日志文件
CanHandlePowerEvent 服务时候接受电源事件
CanPauseAndContinue 服务是否接受暂停或继续运行的请求
CanShutdown 服务是否在运行它的计算机关闭时收到通知,以便能够调用 OnShutDown 过程
CanStop 服务是否接受停止运行的请求
ServiceName 服务名
注意:CanPauseAndContinue和CanShutdown的默认值均为False,要想使服务的OnPause()、OnContinue()、OnShutdown()起作用,需要将CanPauseAndContinue和CanShutdown属性值设置为True。
3)双击MyService.cs服务文件,在左侧设计模式中,右键点击“添加安装程序”(或者在MyService.cs的属性窗口的下方点击添加“添加安装程序”;如果看不到“添加安装程序”的可点链接,可以右键属性窗口,点击“命令(C)”后就会出来了。注意:是属性窗口而不是文件属性窗口),会自动生成Projectinstaller.cs文件以及两个安装组件,如下:
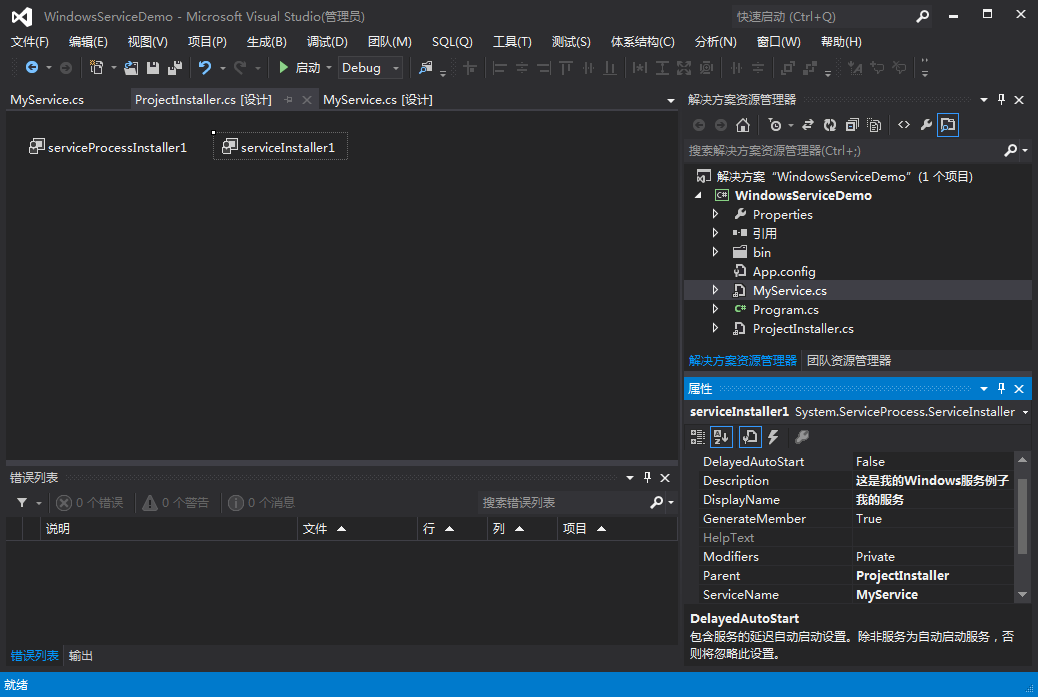
4)单击“serviceProcessInstaller1”,在其属性窗口中设置Account帐号方式,建议为LocalService(当然也可以Account属性改为 LocalSystem,这样,不论是以哪个用户登录的系统,服务总会启动)。
5)单击“serviceInstaller1”,在其属性窗口设置属性:
a)Description 服务描述,直接显示到Windows服务列表中的描述;
b)DisplayName 服务显示名称,直接显示到Windows服务列表中的名称;
c)ServiceName 服务进程名称,安装与卸载服务时的唯一标识。
具体设置如上图所示。
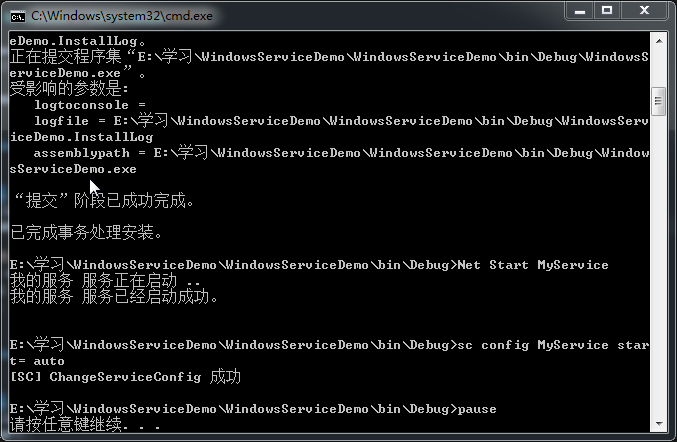
6)创建安装服务批处理文件Install.bat,可以创建记事本,然后修改后缀为bat,记事本内容如下:
%SystemRoot%Microsoft.NETFrameworkv4.0.30319installutil.exe WindowsServiceDemo.exe
Net Start MyService
sc config MyService start= auto
pause
注意:记事本另存为时设置编码为ANSI
说明:第二行为启动服务,第三行为设置服务为自动运行,这两行视服务形式自行选择。如果需要查看脚本运行状况,在脚本最后一行加入pause。
7)同理创建卸载服务批处理文件Uninstall.bat,内容如下:
%SystemRoot%Microsoft.NETFrameworkv4.0.30319installutil.exe /u WindowsServiceDemo.exe
pause
8)将Install.bat以及Uninstall.bat这两个文件添加到binDebug目录下,此时解决方案的目录结构如下:

9)写服务代码,以向文本文件写入文本记录系统时间为例:


  1 using System;
  2 using System.IO;
  3 using System.Diagnostics;
  4 using System.ServiceProcess;
  5 using System.Timers;
  6
  7 namespace WindowsServiceDemo
  8 {
  9     public partial class MyService : ServiceBase
 10     {
 11         private Timer time = new Timer();
 12         public MyService()
 13         {
 14             InitializeComponent();
 15         }
 16
 17         protected override void OnStart(string[] args)
 18         {
 19             #if DEBUG
 20             if (!Debugger.IsAttached)
 21                 Debugger.Launch();
 22             Debugger.Break();
 23             #endif
 24             WriteLog("服务启动,时间:" + DateTime.Now.ToString("HH:mm:ss") + "
");
 25             time.Elapsed += new ElapsedEventHandler(MethodEvent);
 26             time.Interval = 60 * 1000;//时间间隔为2秒钟
 27             time.Start();
 28         }
 29
 30         protected override void OnStop()
 31         {
 32             #if DEBUG
 33             if (!Debugger.IsAttached)
 34                 Debugger.Launch();
 35             Debugger.Break();
 36             #endif
 37             WriteLog("服务停止,时间:" + DateTime.Now.ToString("HH:mm:ss") + "
");
 38         }
 39
 40         protected override void OnPause()
 41         {
 42             #if DEBUG
 43             if (!Debugger.IsAttached)
 44                 Debugger.Launch();
 45             Debugger.Break();
 46             #endif
 47             WriteLog("服务暂停,时间:" + DateTime.Now.ToString("HH:mm:ss") + "
");
 48             base.OnPause();
 49         }
 50
 51         protected override void OnContinue()
 52         {
 53             #if DEBUG
 54             if (!Debugger.IsAttached)
 55                 Debugger.Launch();
 56             Debugger.Break();
 57             #endif
 58             WriteLog("服务恢复,时间:" + DateTime.Now.ToString("HH:mm:ss") + "
");
 59             base.OnContinue();
 60         }
 61
 62         protected override void OnShutdown()
 63         {
 64             WriteLog("计算机关闭,时间:" + DateTime.Now.ToString("HH:mm:ss") + "
");
 65             base.OnShutdown();
 66         }
 67
 68         private void MethodEvent(object source, System.Timers.ElapsedEventArgs e)
 69         {
 70             time.Enabled = false;
 71             string result = string.Empty;
 72             try
 73             {
 74                 //.........
 75                 result = "执行成功,时间:" + DateTime.Now.ToString("HH:mm:ss") + "
";
 76             }
 77             catch (Exception ex)
 78             {
 79                 result = "执行失败,原因:" + ex.Message + "
";
 80             }
 81             finally
 82             {
 83                 WriteLog(result);
 84                 time.Enabled = true;
 85             }
 86         }
 87         /// <summary>
 88         /// 日志记录
 89         /// </summary>
 90         /// <param name="logInfo"></param>
 91         private void WriteLog(string logInfo)
 92         {
 93             try
 94             {
 95                 string logDirectory = AppDomain.CurrentDomain.BaseDirectory + "\Logs";
 96                 if (!Directory.Exists(logDirectory))
 97                 {
 98                     Directory.CreateDirectory(logDirectory);
 99                 }
100                 string filePath = logDirectory + "\" + DateTime.Now.ToString("yyyy-MM-dd") + ".txt";
101                 File.AppendAllText(filePath, logInfo);
102             }
103             catch
104             {
105
106             }
107         }
108     }
109 }
注意:代码编写完成后,你无法点击通过启动按钮或按F5来运行或调试服务,会弹出如下图所示的警告:

二、安装windows服务
项目生成成功后,定位到binDebug目录,以管理员身份运行Install.bat安装服务,成功结果如下图:
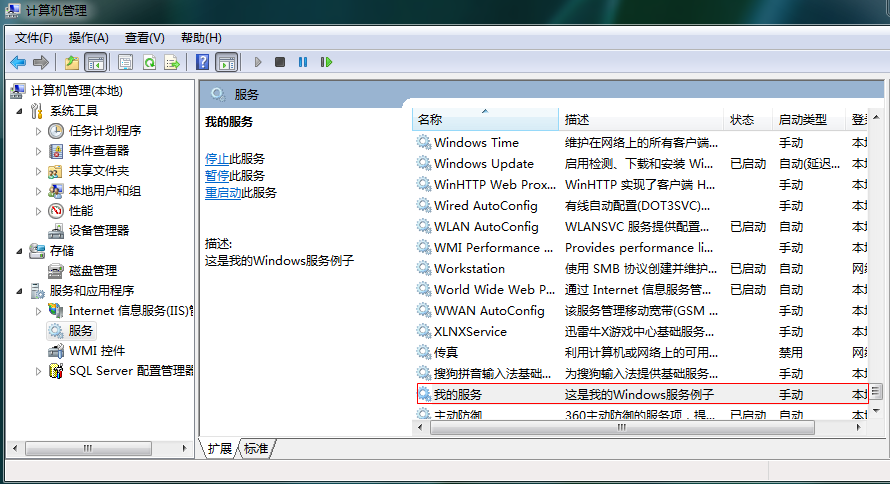
这时,“我的电脑”右键,选择“管理”,选择“服务和应用程序”下的“服务”,就可以看到服务已安装,如下图:
同时,Debug文件夹里有了Logs文件夹,Logs文件夹里有txt文档,内容如下:
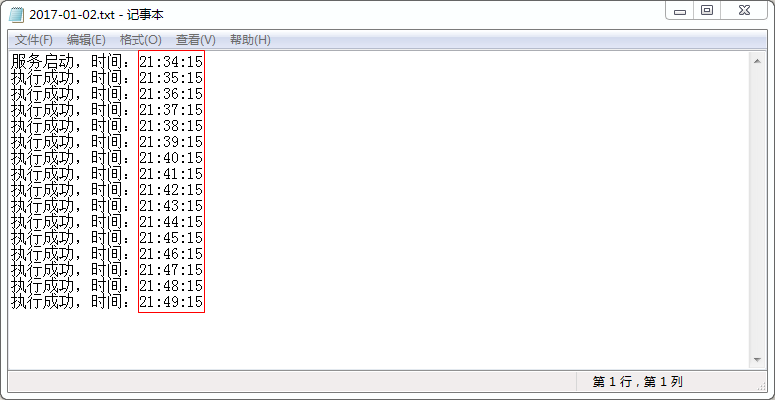
可以看到,每分钟执行一次。
三、调试windows服务
1)通常的处理办法是,在service运行后, 在调试器中选择“附加到进程”,附加自己的服务即可调试。但此法有局限性,例如在service启动时的OnStart事件中的代码, 基本上很难调试,往往当attach到我们的service的时候,这部分代码已经执行过了。当然了,你可以让OnStart事件之前先睡个20s,趁着服务睡觉的时候赶紧“附加到进程”。 System.Threading.Thread.Sleep(1000 * 20);
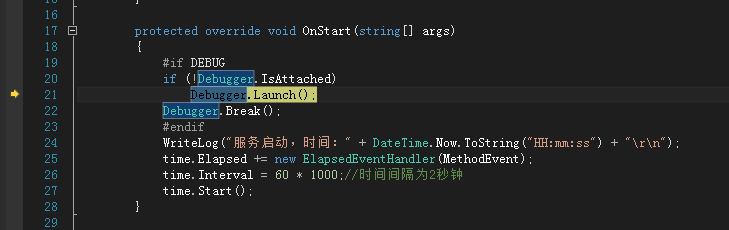
2)我的做法是,在OnStart事件的最开始部分加上“Debugger.Launch();”的调用, 当service运行到此处时,将会弹出一个选择调试器的对话框,同时暂停在当前位置。这样,我们就做到了在代码中手动的启动调试器。
说明:a)Debugger.Launch()方法的作用是“启动调试器并将其连接到进程”;
b)可以手动设置断点,也可以用“Debugger.Break();”动态设置断点;
c)为了避免多个调试器实例,可以用“Debugger.IsAttached”属性判断调试器是否已附加到进程,代码片段: if (!Debugger.IsAttached) Debugger.Launch();
d)为了使调试只在Debug模式下生效,Release模式下无效,可以用条件编译来处理,代码片段如下:
 #if DEBUG
 if (!Debugger.IsAttached)
     Debugger.Launch();
 Debugger.Break();
 #endif
关于条件编译,请查看我的另一篇博客:C#-#define条件编译
e)在调试服务的其他事件或方法时,同样可以用到。
弹出选择调试器的对话框,以及调试界面如下图所示:

四、卸载windows服务
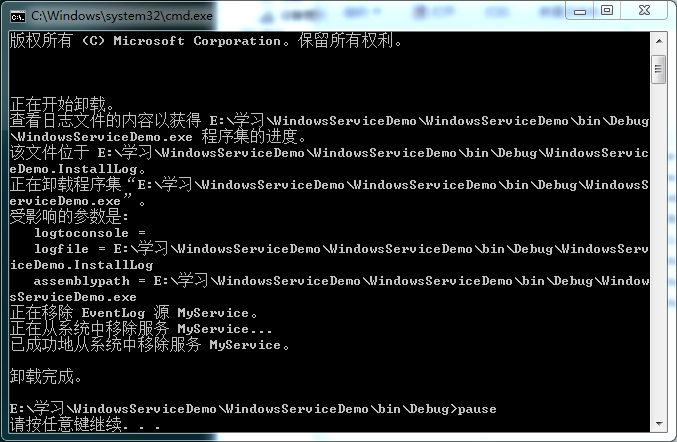
卸载服务,同样以管理员身份运行Uninstall.bat即可,成功结果如下图:
参考链接:https://msdn.microsoft.com/zh-cn/library/windows/desktop/system.diagnostics.debugger(v=vs.110).aspx