环境准备
1、下载 hibernate 3.3.2;
2、下载 hibernate 3.4.0;
3、注意阅读 hibernate compatibility matrix(hibernate 网站,download),hibernate 3.5以后注解包和核心包打包在一起就可以不用管这条了;
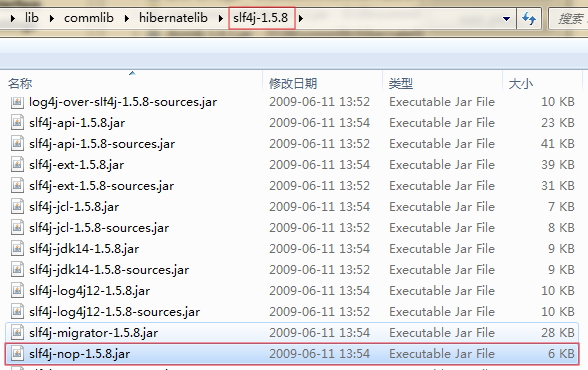
4、下载 slf1.5.8。
下载链接: http://pan.baidu.com/s/1qYjmu5m 密码: pn25

第一个hibernate应用程序
1、建立新的 java 项目,名为:hibernate_0100_HelloWorld
2、学习建立 User-library - hibernate,并加入相应的jar包
a) 项目右键-build path-configure build path-add library
b) 选择User-library,在其中新建library,命名为hibernate
详细步骤:http://www.cnblogs.com/ShawnYang/p/6691935.html
c) 在该library中加入 hibernate 所需 jar 包
i. hibernate core
ii./required
iii.slfnop jar


3、引入 mysql 的 JDBC 驱动包
4、在 mysql中建立对应的数据库以及表
a) create database hibernate;
b) user hibernate;
c) create table Student(id int primary key,name varchar(20),age int);
5、建立 hibernate 配置文件 hibernate.cfg.xml
a) 从参考文档中copy
b) 修改对应的数据库连接
c) 注释掉暂时用不上的内容


 1 <?xml version='1.0' encoding='utf-8'?>
 2 <!DOCTYPE hibernate-configuration PUBLIC
 3         "-//Hibernate/Hibernate Configuration DTD 3.0//EN"
 4         "http://hibernate.sourceforge.net/hibernate-configuration-3.0.dtd">
 5
 6 <hibernate-configuration>
 7
 8     <session-factory>
 9
10         <!-- Database connection settings -->
11         <property name="connection.driver_class">com.mysql.jdbc.Driver</property>
12         <property name="connection.url">jdbc:mysql://localhost:3306/hibernate</property>
13         <property name="connection.username">root</property>
14         <property name="connection.password">root</property>
15
16         <!-- JDBC connection pool (use the built-in) -->
17         <!-- <property name="connection.pool_size">1</property> -->
18
19         <!-- SQL dialect -->
20         <property name="dialect">org.hibernate.dialect.MySQLDialect</property>
21
22         <!-- Enable Hibernate's automatic session context management -->
23         <!-- <property name="current_session_context_class">thread</property> -->
24
25         <!-- Disable the second-level cache  -->
26         <property name="cache.provider_class">org.hibernate.cache.NoCacheProvider</property>
27
28         <!-- Echo all executed SQL to stdout -->
29         <property name="show_sql">true</property>
30
31         <!-- Drop and re-create the database schema on startup -->
32         <!-- <property name="hbm2ddl.auto">update</property> -->
33
34         <mapping resource="com/bjsxt/hibernate/model/Student.hbm.xml"/>
35
36     </session-factory>
37
38 </hibernate-configuration>
6、建立 Student 类
 1 package com.bjsxt.hibernate.model;
 2
 3 public class Student {
 4     private Integer id;
 5
 6     private String name;
 7
 8     private Integer age;
 9
10     public Integer getId() {
11         return id;
12     }
13
14     public void setId(Integer id) {
15         this.id = id;
16     }
17
18     public String getName() {
19         return name;
20     }
21
22     public void setName(String name) {
23         this.name = name;
24     }
25
26     public Integer getAge() {
27         return age;
28     }
29
30     public void setAge(Integer age) {
31         this.age = age;
32     }
33 }
7、建立 Student 映射文件 Student.hbm.xml
a)参考文档
 1 <?xml version="1.0"?>
 2 <!DOCTYPE hibernate-mapping PUBLIC
 3         "-//Hibernate/Hibernate Mapping DTD 3.0//EN"
 4         "http://hibernate.sourceforge.net/hibernate-mapping-3.0.dtd">
 5
 6 <hibernate-mapping package="com.bjsxt.hibernate.model">
 7     <class name="Student" table="student">
 8         <id name="id" column="id"/>
 9         <property name="name" column="name"/>
10         <property name="age" column="age"/>
11     </class>
12 </hibernate-mapping>
8、将映射文件加入到 hibernate.cfg.xml中
a) 参考文档
1 <mapping resource="com/bjsxt/hibernate/model/Student.hbm.xml"/>
9、写测试类Main,在Main中对Student对象进行直接的存储测试
a) 参考文档
 1 import org.hibernate.Session;
 2 import org.hibernate.SessionFactory;
 3 import org.hibernate.cfg.Configuration;
 4
 5 import com.bjsxt.hibernate.model.Student;
 6
 7 public class StudentTest {
 8
 9     public static void main(String[] args) {
10         Student s = new Student();
11         s.setId(1);
12         s.setName("s1");
13         s.setAge(1);
14
15         Configuration cfg = new Configuration();
16         SessionFactory sf = cfg.configure().buildSessionFactory();
17         Session session = sf.openSession();
18         session.beginTransaction();
19
20         session.save(s);
21
22         session.getTransaction().commit();
23         session.close();
24         sf.close();
25     }
26
27 }
10、FAQ:
a) 要调用 new Configuration().configure().buildSessionFactory(),而不是省略configure,
否则会出 hibernate hibernate dialect must be sef 的异常。
11、Note:
a) 请务必建立自己动手查文档的能力
b) 重要的是
i.要建立自己动手查一手文档的信心;
ii.还有建立自己动手查一手文档的习惯;
iii.主动学习,放弃被动接收灌输的习惯。
链接: http://pan.baidu.com/s/1mi0VuPi 密码: 8dyv
示例项目所需jar包链接: http://pan.baidu.com/s/1qY6SRQ8 密码: vzpm