来源于:http://www.haogongju.net/art/1964313
1. 使用SharePoint2013实现基于AD的Form认证,首先创建一个Web Application,步骤如下:Central Administration -> Application Management -> Manage Web Application -> New Web Application;
填写web application 端口,允许或者不允许Anonymous等等;
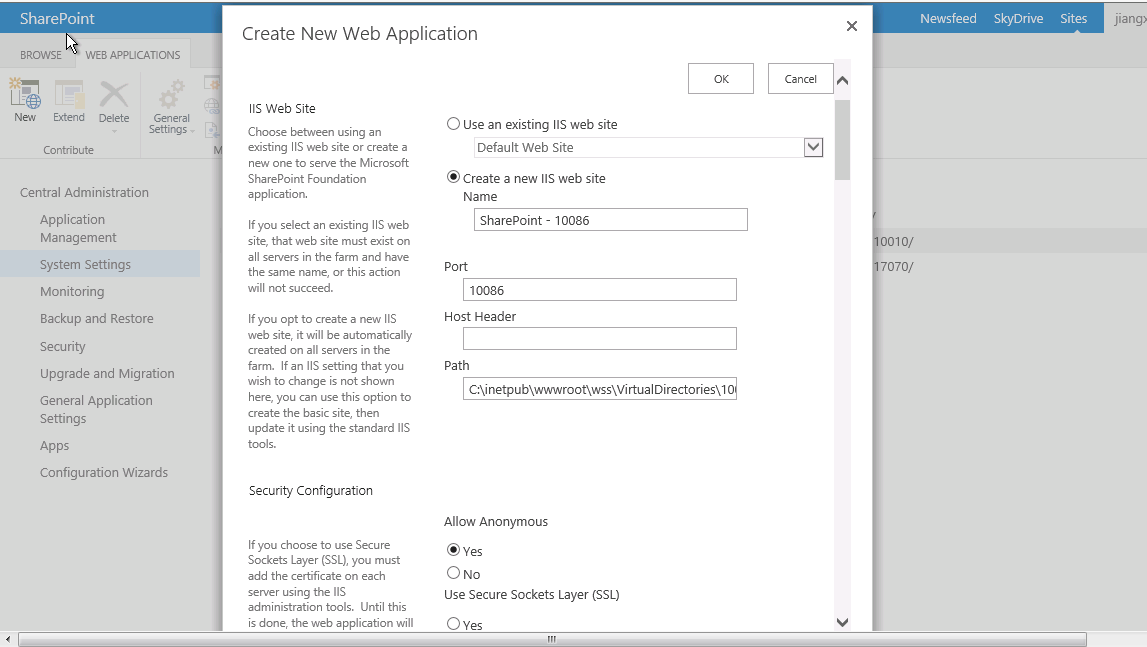
虽然我们只用FORM方式认证,但是现在我们还没有创建membership provider在,所以这里我们先只选择 “Enable Windows Authentication”, 当我们创建好membership provider的时候,再回过头来更改这里。然后“OK”, 系统自动创建web application,可能时间会有一点儿长,耐心等一会就好了。
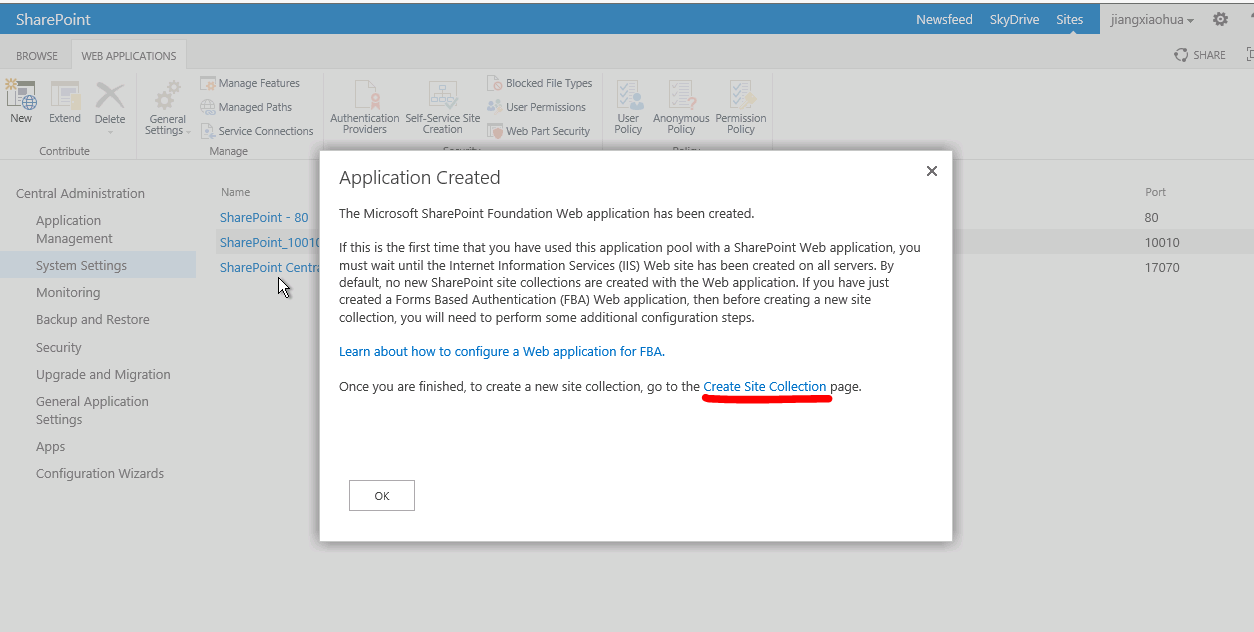
2. 当web application建好后,在接下来就是在此app下面建立一个site collection. 在完成application创建后弹出的对话框中,选择 “create site collection”, 进入此application的site collection创建页面:
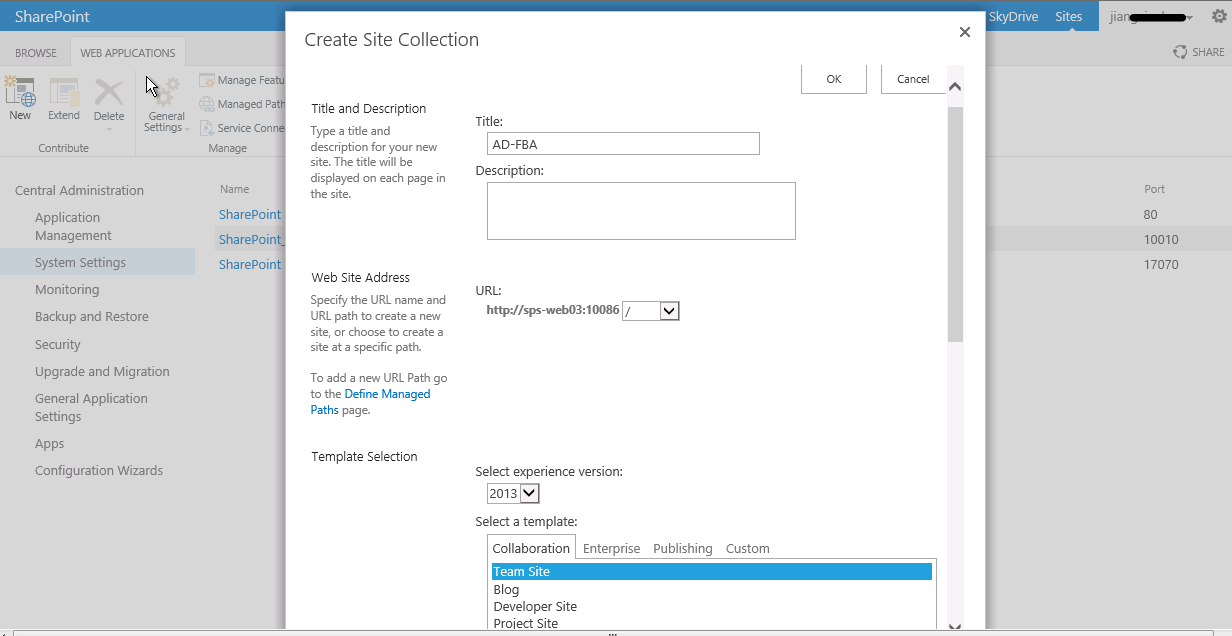
在弹出的对话框中,填入站点名字,选择站点template,输入站点管理员Primary site collection administrator, 然后“OK”,等待站点创建完成;
当如上几步都准确完成后,接下来将要配制刚才创建的Web Application 来采用基于Form 认证的使用Active Directory Membership Provider(即AD认证方式);
有三个文件需要更改:
Central Administration site 的配制文件,
刚才创建的Web Application 的配制文件,
STS (SecurityTokenService) Application 的配制文件. This is important because it is this service that will ensure claims tokens are being passed correctly between the provider (in our case AD) and the consumer (CA and our Web Application). Further, we can have multiple providers plugged in. STS Application manages all of these interaction for us.
1)更改Central Administration web.config
打开 SharePoint 2013 Central Administration 站点,增加如下的内容:
<connectionStrings>
<add name=”ADConn"
connectionString="LDAP://ufhosted.net" />
</connectionStrings>
membership provider增加如下:
<membership defaultProvider="ADMembers">
<providers>
<add name="ADMembers"
type="System.Web.Security.ActiveDirectoryMembershipProvider, System.Web, Version=4.0.0.0, Culture=neutral, PublicKeyToken=b03f5f7f11d50a3a"
connectionStringName="ADConn"
enableSearchMethods="true"
attributeMapUsername="sAMAccountName" />
</providers>
</membership>
备注: connectionStrings 元素应放在<system.web></system.web> 节点的外部, membership provider 元素应该放在<system.web></system.web> 节点内。
2)更改 Web Application web.config 文件
打开新创建的web application 的配制文件, 添加如下的信息:
<connectionStrings>
<add name=”ADConn"
connectionString="LDAP://ufhosted.net" />
</connectionStrings>
membership provider增加如下(此config文件中已经有system.web的节点,因此只需把下面内容放入其中,把空的<membership> <providers> </providers></membership>删除即可):
<membership defaultProvider="ADMembers">
<providers>
<add name="ADMembers"
type="System.Web.Security.ActiveDirectoryMembershipProvider, System.Web, Version=4.0.0.0, Culture=neutral, PublicKeyToken=b03f5f7f11d50a3a"
connectionStringName="ADConn"
enableSearchMethods="true"
attributeMapUsername="sAMAccountName" />
</providers>
</membership>
备注: connectionStrings 元素应放在<system.web></system.web> 节点的外部, membership provider 元素应该放在<system.web></system.web> 节点内, 同时你会发现这里已经有一个默认的membership 及 role provider, SPClaimsAuthMembershipProvider & SPClaimsAuthRoleProvider in Microsoft.SharePoint.Administration.
保存并关闭 web.config 文件.
3) 更改STS Application web.config 配制文件
进入目录:“C:Program FilesCommon FilesMicrosoft SharedWeb Server Extensions15WebServicesSecurityToken”;
打开里面的web.config文件,
如果是第一次配制 claims声明认证,里面没有<system.web>的节点,所以里面的所有关于认证的信息都需要现在添加:
<connectionStrings>
<add name=”ADConn"
connectionString="LDAP://ufhosted.net" />
</connectionStrings>
<system.web>
<membership defaultProvider="ADMembers">
<providers>
<add name="ADMembers"
type="System.Web.Security.ActiveDirectoryMembershipProvider, System.Web, Version=4.0.0.0, Culture=neutral, PublicKeyToken=b03f5f7f11d50a3a"
connectionStringName="ADConn"
enableSearchMethods="true"
attributeMapUsername="sAMAccountName" />
</providers>
</membership>
</system.web>
添加好后,重启IIS.
接下来要做的就是: 先前创建Web Application的时候,我们没有选择使用“Enable Form Base authentication”,因此按照如下步骤进去设置;
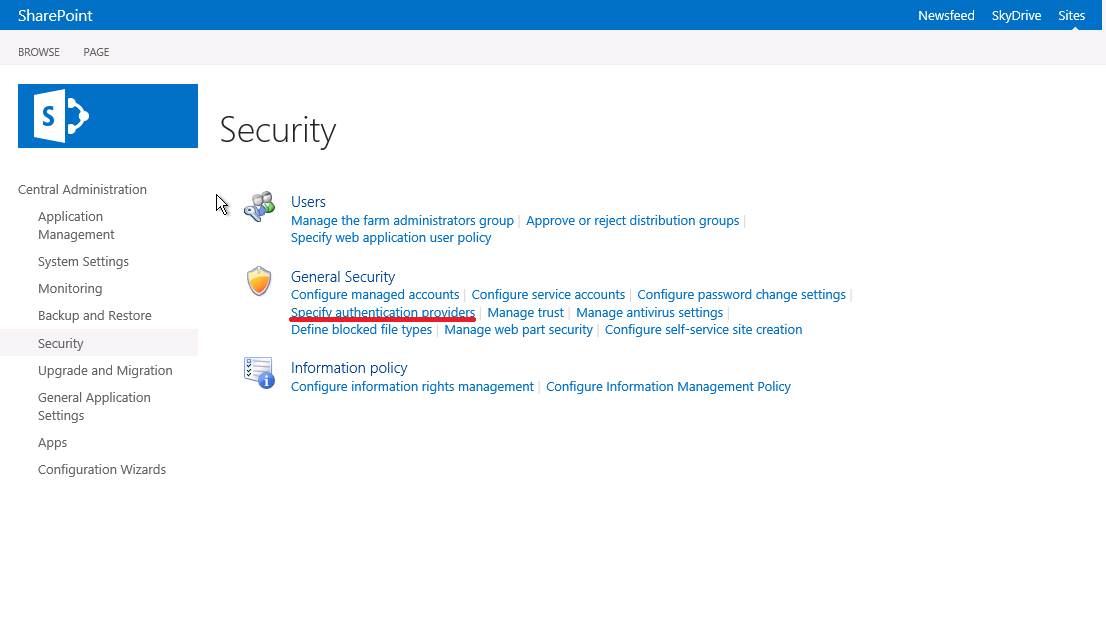
依次进入: central administration -> security -> general security 点击“specify authentication provider”;
在web application 处选择刚才创建的web application, 然后在“Zone”处点击 “default”,
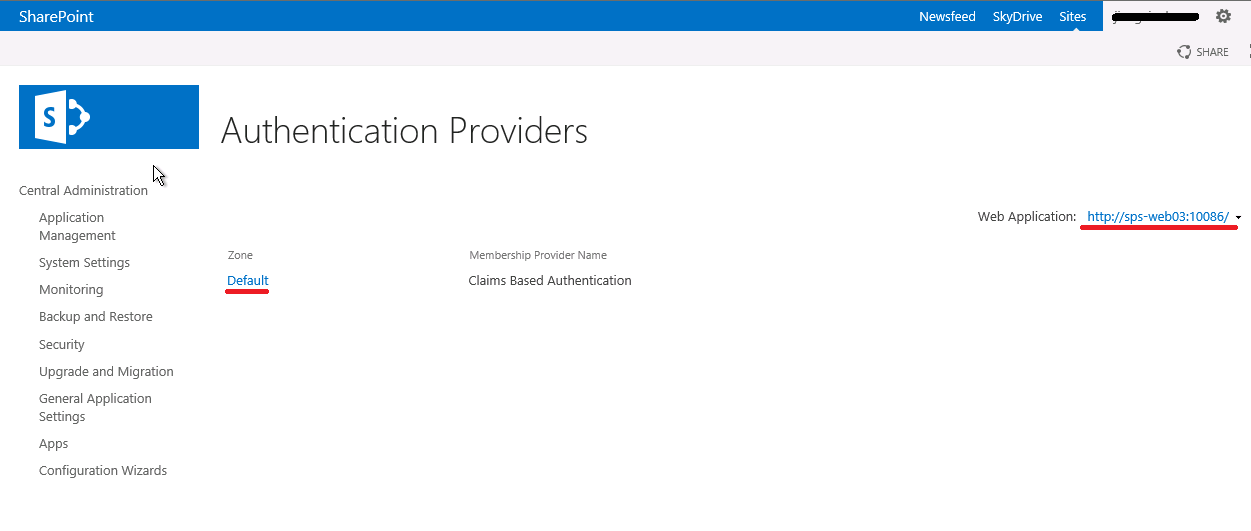
在打开的页面中,选择“Enable Form Based Authentication(FBA)”,并在“ASP.NET Membership Provider”文本框处填入前面所配制的membership provider name“ADMembers”;

保存“OK”。
再次配制管理员用户, 所以用户均来自ADMembers这个membership中,步骤:
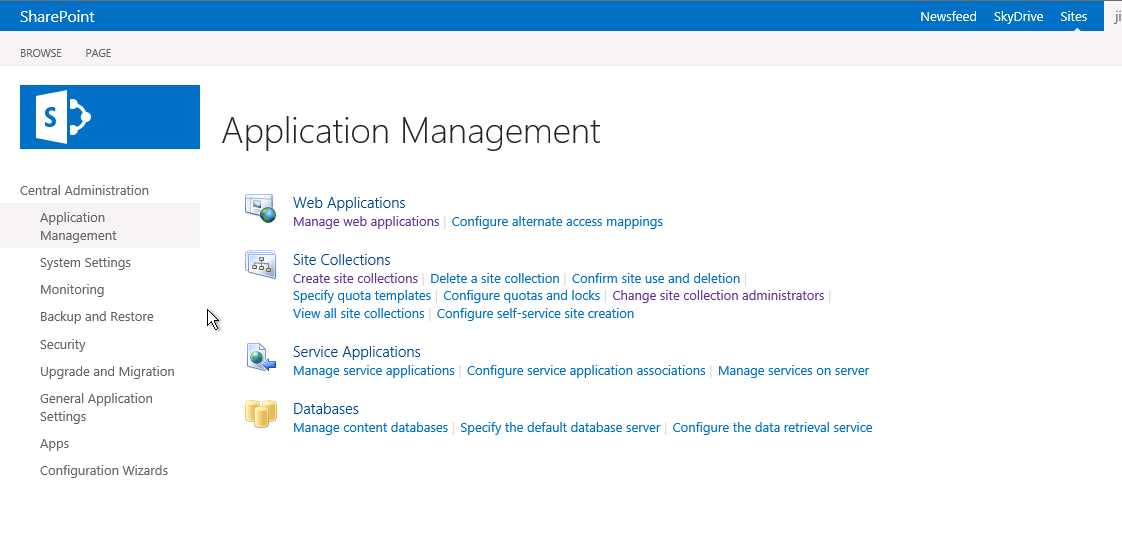
依次打打: central administration -> Application management -> sites collections -> change sites collection administrator,
在新打开的窗口中的右侧,选择前面创建的web application, 在primary site collection administrator处选择 “ADMembers”提供的用户作为管理员。如下面所示,鼠标放在用户名上可以看出来此用户是 “ADMembers”提供的用户。当保存后,这用户将做为此web application的管理员。

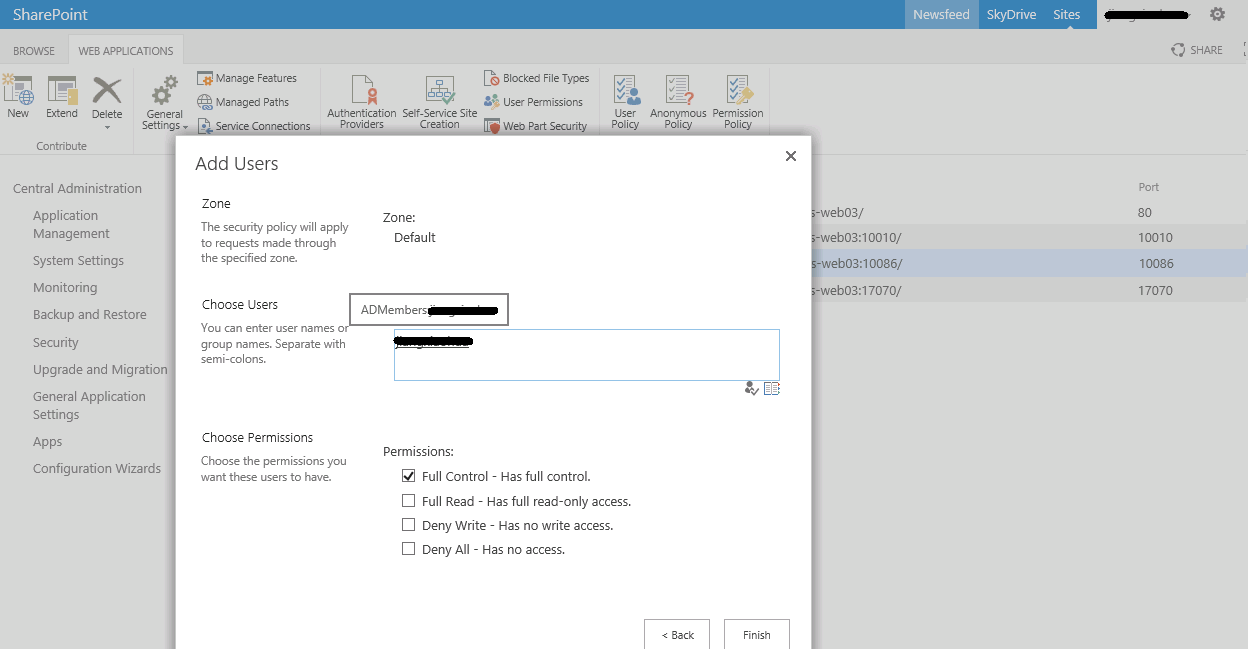
接下来为web application添加其它用户,操作方式为: web application->选择创建的web application -> User Policy,
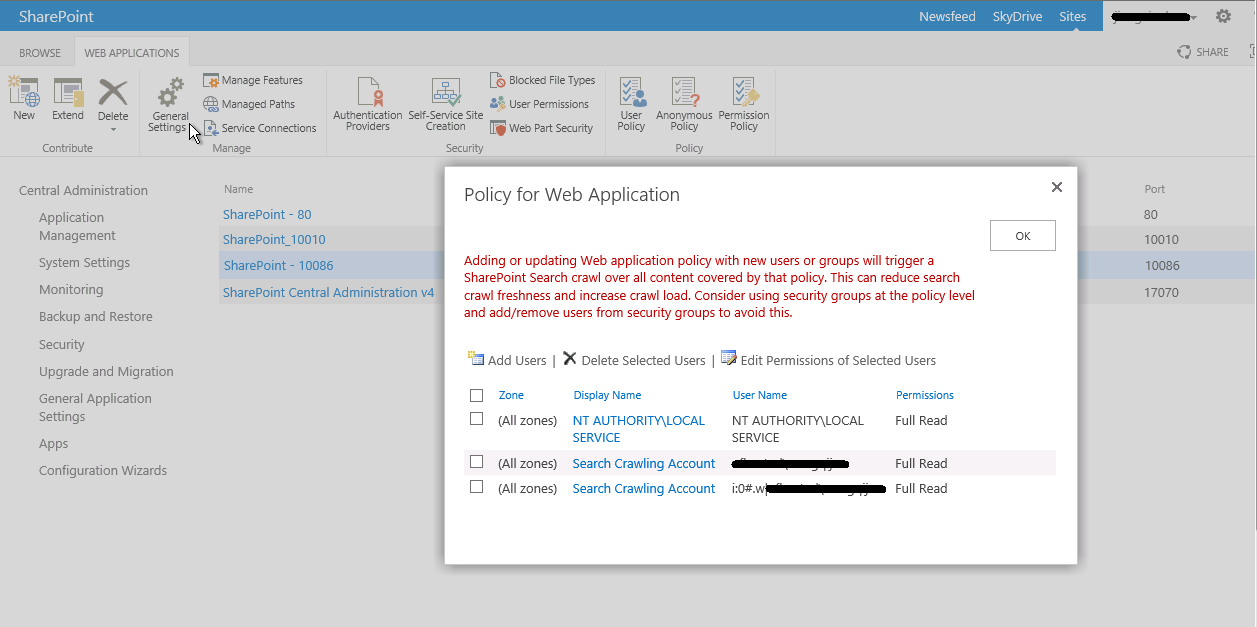
在弹出来的对话框选择“Add User”,并赋予权限,保存。
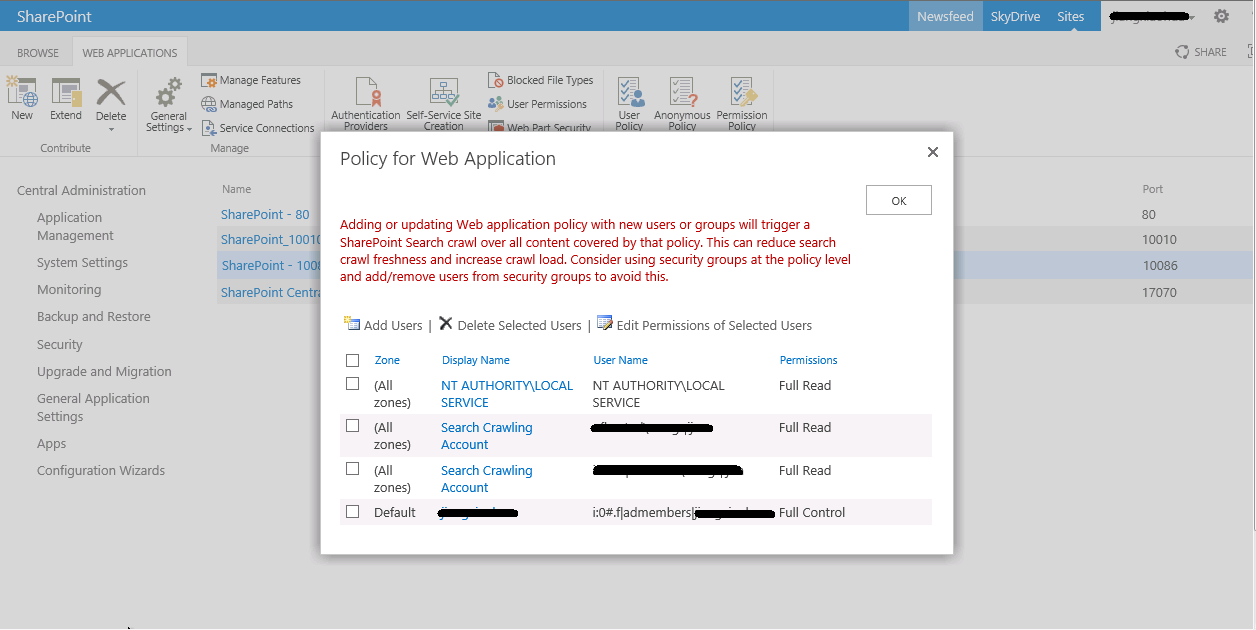
当用户添加成功后,结果如下图示:
接下来进入我们创建好的站点, 地址栏输入站点网址访问。
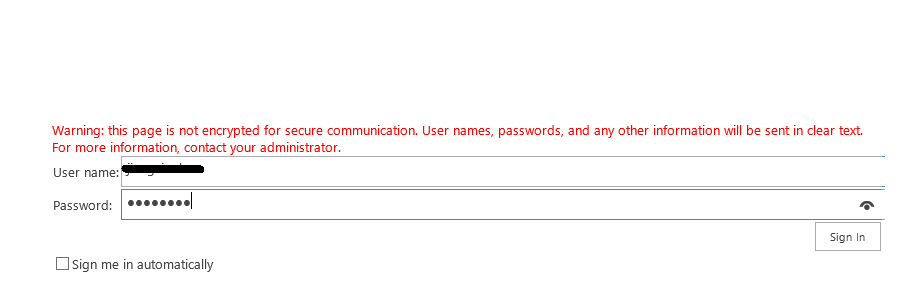
因为同时选择了windows authentication和Form based authentication两种方式,所以在访问的时候系统默认提供一个可供选择登陆模式的下拉列表,列出两种可先的登陆方式:

选择form认证方式,在弹出的对话框中输入username及密码就可能是登陆了:
登陆成功后的页面如下两图所示(加载页面与首页):


至此FBA认证的AD完成,希望对大家有所帮助。