JS膏集01
1、动态页面:
向服务器发送请求,服务器那边没有页面,动态生成后,返回给客户端
由html/css/js组成。
js还不是面向对象的语言,是基于对象的语言。js中没有类的概念,js的继承基于原型。
2、三种创建对象的方式
对象特指某个事物,具有属性和方法
特征:属性
行为:方法
1、字面量的方式
var per1={
name:"cc".
age:20,
eat:function(){
...
}
}
2、调用系统的构造函数
var per2=new Object();
per2.name="ccc";
per2.age="12";
per2.eat=function(){
...
};
以上两种方式所创建的对象是无法确定是哪种类型的,Object除外
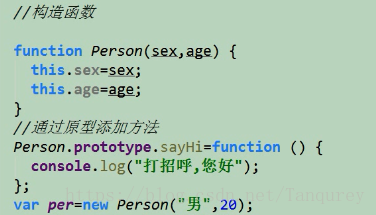
3、自定义构造函数的方式
function Person(name,age,sex){
this.name=name;
this.age=age;
this.play=function(){
console.log("games");
};
}
var per3=new Person("cc",18);
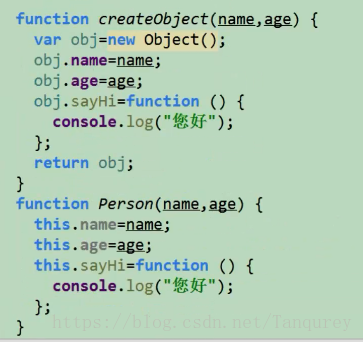
4、工厂模式和自定义构造函数的区别
共同点:都是对像,都可以传入参数
工厂模式:
函数名首字母小写createObject
函数体内有new
有返回值
new之后的对象是当前的对象
直接调用函数就可以创建对象
自定义构造函数:
函数名首字母是大写
没有new
没有返回值
this是当前对象
通过new 的方式来创建对象
上为工厂模式下为自定义构造函数模式
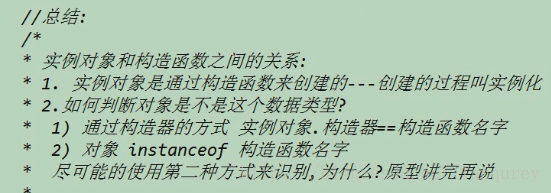
5、构造函数和实例对象之间的关系
自定义构造函数–实例化对象
构造函数–创建对象
实例对象是通过构造函数来创建的
//显示对象的结构
console.dir(per);
console.dir(Person);//有构造函数
console.log(per.constructor==Person);//true
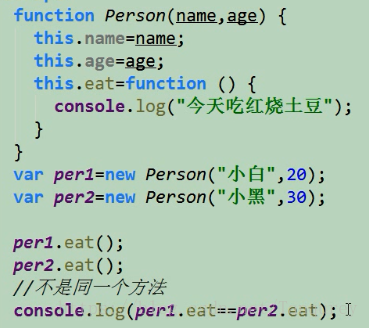
6、原型
1)构造函数创建对象存在的问题
对象内包含相同的方法时,非常占用空间。
用原型根本解决该问题:数据共享,节省内存空间
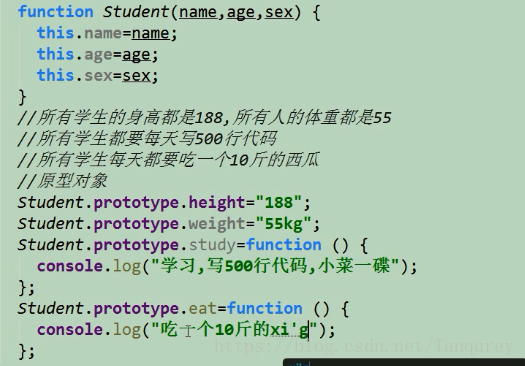
通过原型来添加方法
function Person(name,age){
this.name="cc";
this.age=12;
};
Person.prototype.eat=function(){

};
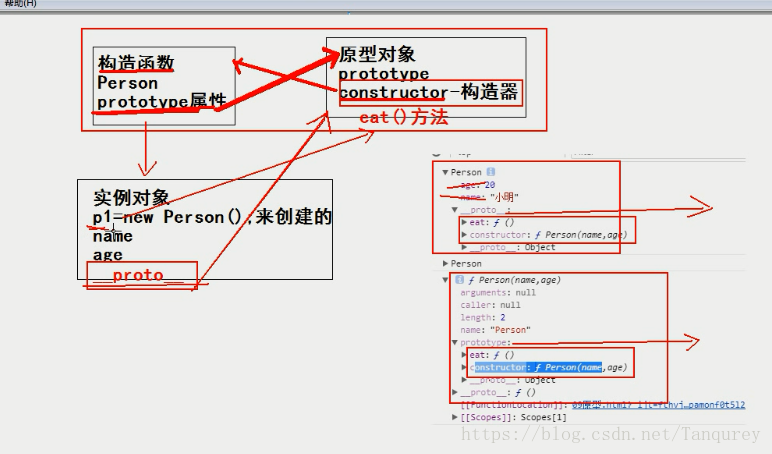
图解:
//案例:利用原型修改div颜色
<!DOCTYPE html>
<html lang="en">
<head>
    <style>
        div {
             200px;
            height: 400px;
            background-color: red;
        }
    </style>

</head>
<body>
<div id="dv">
</div>
<input type="button" id="btn" value="change"/>

<script>
    function ChangeColor(btnId, dvId, color) {
        this.btnObj = document.getElementById(btnId);
        this.dvObj = document.getElementById(dvId);
        this.color = color;
    }

    ChangeColor.prototype.init = function () {
        var that = this;
        this.btnObj.onclick = function (ev) {
            that.dvObj.style.backgroundColor = that.color;
        };
    };
    var cc=new ChangeColor("btn","dv","blue");
    cc.init();
</script>

</body>
</html>
它们都是原型对象
实例对象中的_proto_属性和其构造函数中的prototype属性是一个东西


2)构造函数和实例对象之间的关系
通过构造函数是实例化对象,并初始化
构造函数,原型对象,实例对象之间的关系
3)使用原型共享数据
不需要共享的数据写在构造函数中,需要共享的数据写在原型中
7、简单的原型语法
变量名.prototype={
//必须手动修改构造器的指向
constructor:上面的变量名,
属性1:"…",
属性2:"…",
方法1:function(){…
}
};
8、原型对象中添加方法
实例对象中的方法可以相互调用, 原型中的方法可以相互访问
9、

10、为系统内置对象的原型对象中添加方法
很多实例对象调用的方法在实例对象中都没有,都是在其所在的构造函数中的原型存在的。
为内置对象中的原型对象添加方法是允许的。相当于改变了系统的源码
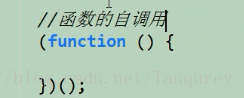
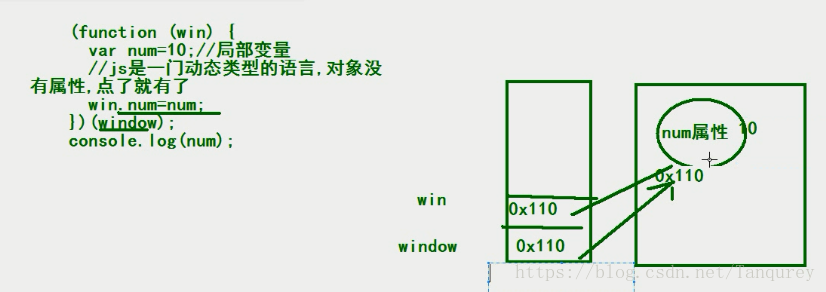
11、局部变量变成全局变量
页面加载后,自调用函数的代码就执行完了。前一个括号传形参,后一个括号传实参。
图解:
如何把局部变量变成全局变量?
把局部变量这一属性给window对象即可。
12、产生随机数对象
<!DOCTYPE html>
<html lang="en">
<head>
    <style>
    </style>

</head>
<body>


<script>
    // 通过自调用函数产生一个随机数对象,在自调用
    // 函数外面,调用该随机数对象方法产生随机数
    (function (window) {
        //产生随机数的过早函数


    }

    //在原型对象中添加构造方法
    Random.prototype.getRandom = function () {
        return Math.floor(Math.random * () * 5);
    };
    window.random = new Random();
    //或
    window.Random=Random;//把random对象暴露给顶级对象window,外部可以直接使用这个对象
    )

    })
    (window);
    var rm = random;
    console.log(rm.getRandom());
    //或
    var rm=new Random();
    console.log(rm.getRandom());
</script>

</body>
</html>
//案例:在页面中产生随机小方块
<!DOCTYPE html>
<html lang="en">
<head>
    <style>
        .map {
             800px;
            height: 600px;
            background-color: #ccc;
            position: relative;
        }
    </style>

</head>
<body>
<div class="map"></div>
<script src="common.js"></script>
<script>
    //产生随机数对象
    (function (window) {
        function Random() {

        }

        Random.prototype.getRandom = function (min, max) {
            return Math.floor(Math.random() * (max - min) + min);
        };
        window.Random = new Random();
    })(window);
    //产生小方块对象
    (function (window) {
        //选择器的方式来获取元素对象
        var map = document.querySelector(".map");

        //食物的构造函数
        function Food(width, height, color) {
            this.width = width || 20;//默认值
            this.height = height || 20;
            //横纵坐标
            this.x = 0;
            this.y = 0;
            this.color = color;
            this.element = document.createElement("div");//小方块的元素
        }

        //初始化小方块的显示效果及位置
        Food.prototype.init = function (map) {
            //设置小方块的样式
            var div = this.element;//这个this和上面的this指代的是同一个实例对象
            div.style.position = "absolute";
            div.style.width = this.width + "px";
            div.style.height = this.height + "px";
            div.style.backgroundColor = this.color;
            //把小方块加到地图中
            map.appendChild(div);
            this.render(map);
        };
        //产生随机位置
        Food.prototype.render = function (map) {
//随机产生横纵坐标
            var x = Random.getRandom(0, map.offsetWidth / this.width) * this.width;
            var y = Random.getRandom(0, map.offsetHeight / this.height) * this.height;
            this.x = x;
            this.y = y;
            var div = this.element;
            div.style.left = this.x + "px";
            div.style.top = this.y + "px";
        }
        var fd = new Food(20, 20, "green");
        fd.init(map);

    })
    (window);
</script>
</body>
</html>