1、全局安装create-react-app
npm install -g create-react-app
2、创建项目,安装依赖
create-react-app my-react-app
3、进入项目
cd my-react-app
4、启动项目
npm start
这是你就有了一个react demo
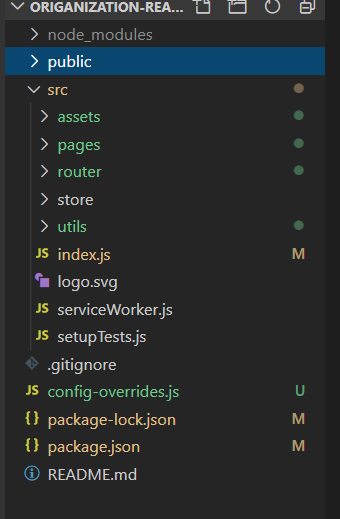
接着是对demo的改造了。。。这里是改造后的项目目录

1、配置路由:
首先安装路由组件:react-router-dom
npm install react-router-dom --save-dev
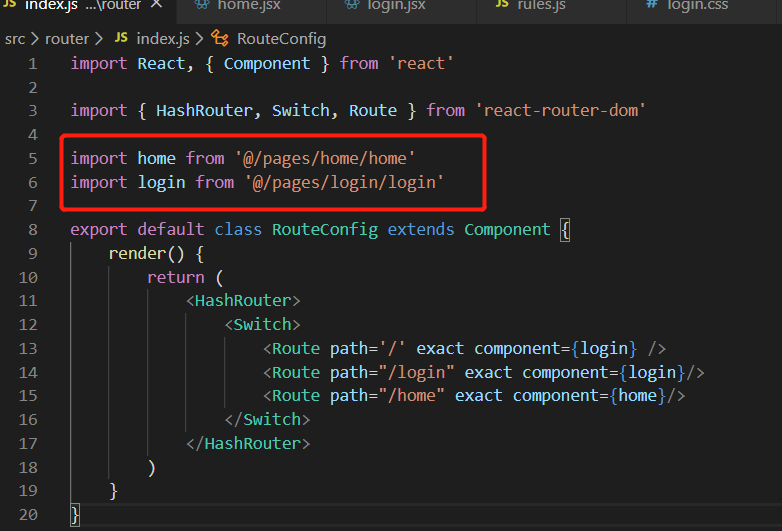
router.js如下
import React, { Component } from 'react'

import { HashRouter, Switch, Route } from 'react-router-dom'

import home from '@/pages/home/home'
import login from '@/pages/login/login'

export default class RouteConfig extends Component {
    render() {
        return (
            <HashRouter>
                <Switch>
                    <Route path='/' exact component={login} />
                    <Route path="/login" exact component={login}/>
                    <Route path="/home" exact component={home}/>
                </Switch>
            </HashRouter>
        )
    }
}
2、根目录下的index.js内容
import React from 'react';
import ReactDOM from 'react-dom';
import Route from './router/'
import * as serviceWorker from './serviceWorker';

import './assets/css/index.css'
const render = Component => {
  ReactDOM.render(
    <Component />,
    document.getElementById('root'))
}
render(Route)

if (module.hot) {
  module.hot.accept('./router/', () => {
    render(Route)
  })
}

// If you want your app to work offline and load faster, you can change
// unregister() to register() below. Note this comes with some pitfalls.
// Learn more about service workers: https://bit.ly/CRA-PWA
serviceWorker.unregister();
最后是pages文件的改造:
1、home.jsx
在home.jsx中用到了immutable插件,所以我们需要install下
npm install immutable
同时附上immutable的JDK:immutable详解
import React, { Component } from 'react'
import { is, fromJS } from 'immutable'
class Home extends Component {
    state = {
        name: 'wql'
    }
    componentWillMount () {
        // 组件初始化时调用,更新不调用,整个生命周期只有一次,可以修改state
        this.setState({
            name: 'wql123'
        })
    }
    componentDidMount () {
        // 组件渲染之后调用,只能调用一次
        console.log('componentDidMount')
    }
    componentWillReceiveProps () {
        // 组件初始化不调用,组件接收新的props时调用
    }
    componentWillUpdate () {
        // 组件初始化时不调用,组件更新完成后调用,此时可以获取dom节点
    }
    componentWillUnmount () {
        // 组件将要卸载时调用,一些事件监听和定时器需要在此时清除
    }
    shouldComponentUpdate (nextProps, nextState) {
        // 组件判断是否需要重新渲染时调用
        // fromJS: 将纯 JS 对象和数组深层转换为不可变映射和列表
        // is: 判断是否值相等
        console.log(!is(fromJS(this.props),fromJS(nextProps)) || !is(fromJS(this.state), fromJS(nextState)))
        return !is(fromJS(this.props),fromJS(nextProps)) || !is(fromJS(this.state), fromJS(nextState))
    }
    deal = (val) => {
        console.log(val)
        this.setState({
            name: val
        })
    }
    render () {
        return (
            <div>
                <div>11{this.state.name}</div>
                <a onClick={this.deal.bind(this,'12123')}>click it</a>
            </div>
        )
    }
}
export default Home
启动项目即可,自带热更新。
下边提供将src根路径替换成@的方法,效果如下

方法:
1、安装react-app-rewired
npm install react-app-rewired --save-dev
2、跟路径下,添加config-overrides.js,如下
const path = require('path')

module.exports = function override (config,env) {
    config.resolve.alias = {
        ...config.resolve.alias,
        '@': path.resolve(__dirname, 'src')
    }
    return config
}
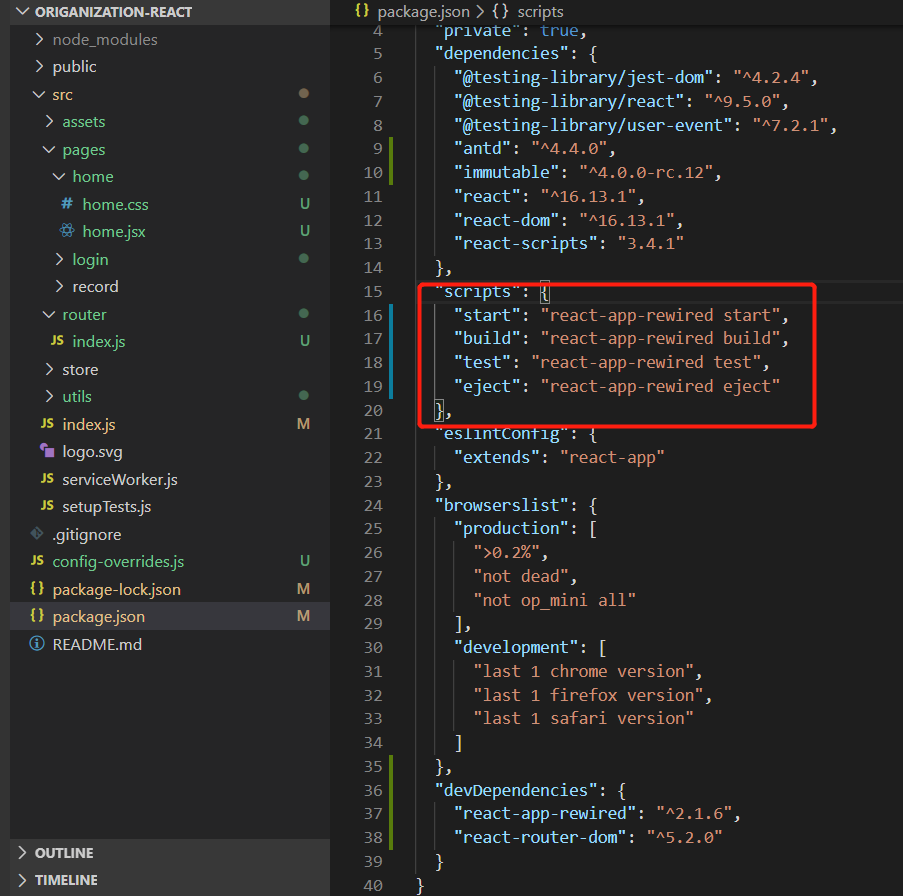
3、修改package.json,如下

参考学习 github地址:https://github.com/shenqinglin/react-antdesign.git