这次来总结一下公司的Task 1 实现一个登录界面。
登录界面其实在大三的时候就有做过,但是当时做的界面超级low,主要区别在于有无css,由于公司的设计要求,对于该界面的很多细节处理实在不容易。所以,还是想要写点东西记录一下。
先截个图,展示一下效果吧: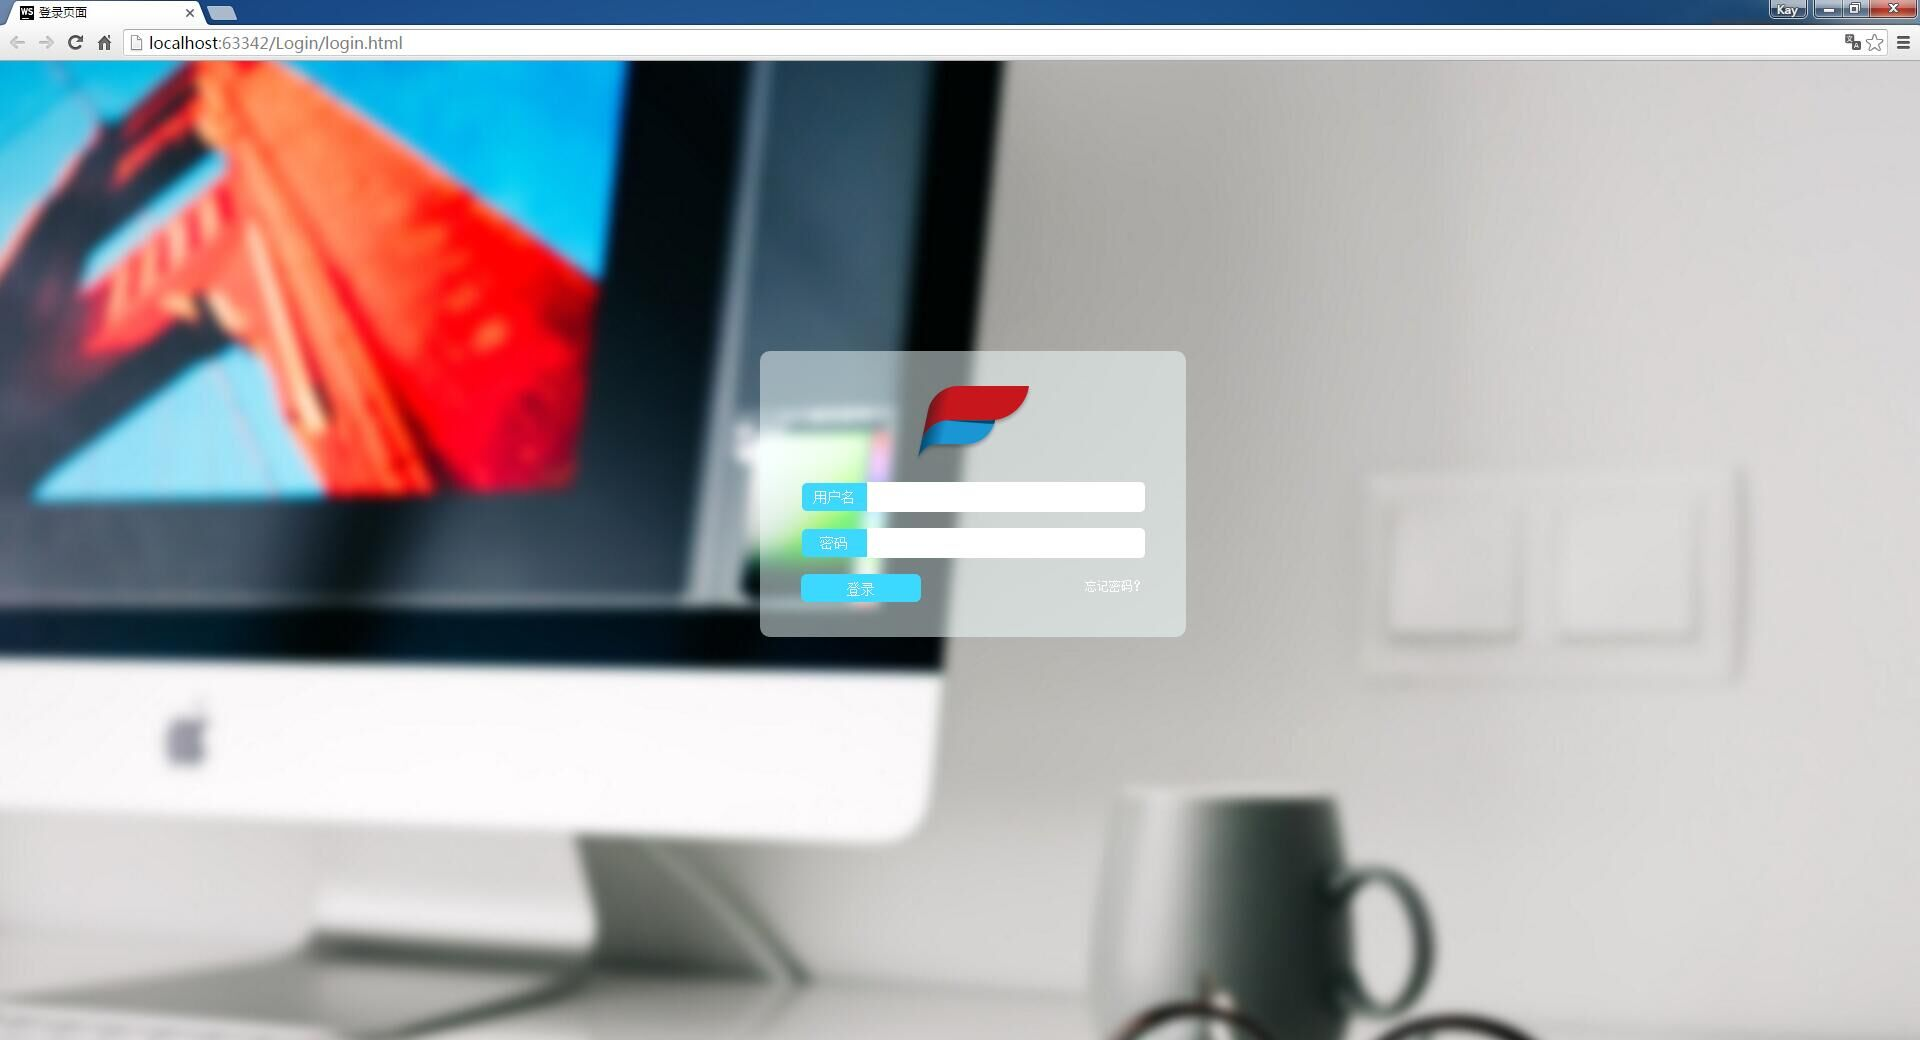
然后我们看一下代码:
在我们做一个页面之前,要先想好他的一个整体布局,也就是我们这里面的login.html主页面,大致结构如下: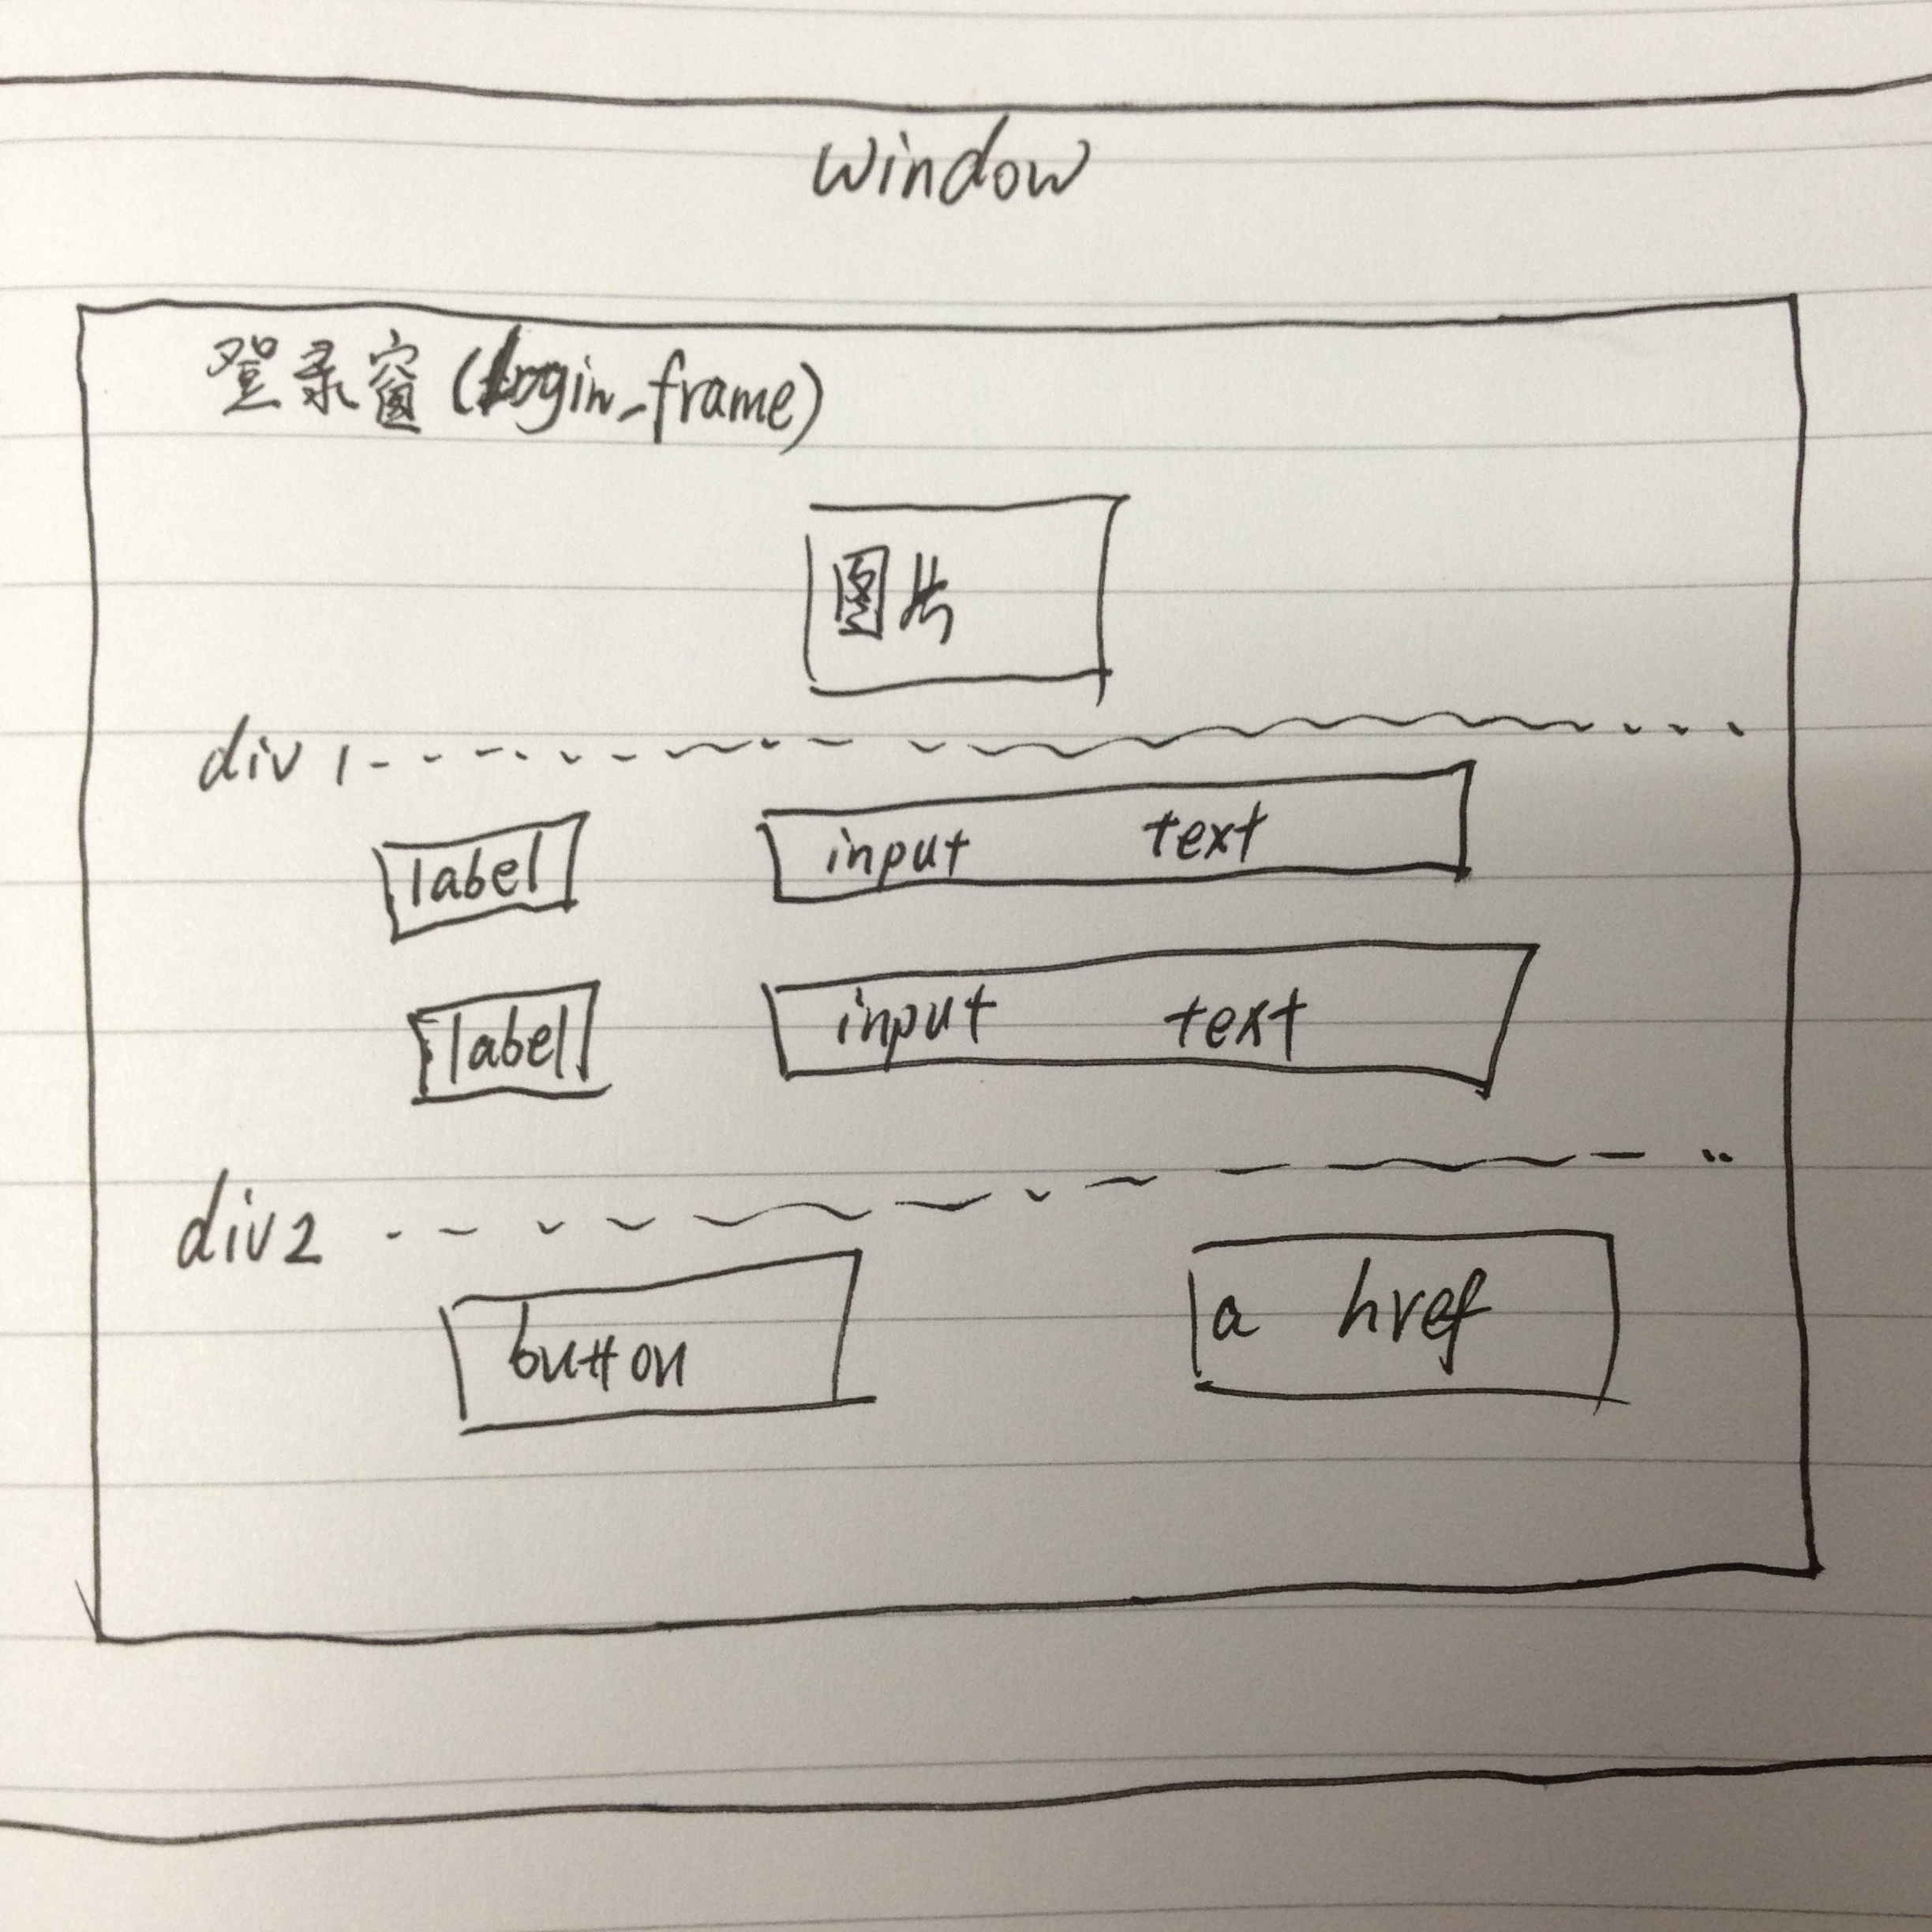
接下来,我们先上代码,看一下具体实现方法:
login.html
<!DOCTYPE html>
<html lang="en">
<head>
    <meta charset="UTF-8">
    <title>登录页面</title>

    <link rel="stylesheet" type="text/css" href="login.css"/>
    <script type="text/javascript" src="login.js"></script>
</head>

<body>
<div id="login_frame">

    <p id="image_logo"><img src="images/login/fly.png"></p>

    <form method="post" action="login.js">

        <p><label class="label_input">用户名</label><input type="text" id="username" class="text_field"/></p>
        <p><label class="label_input">密码</label><input type="text" id="password" class="text_field"/></p>

        <div id="login_control">
            <input type="button" id="btn_login" value="登录" οnclick="login();"/>
            <a id="forget_pwd" href="forget_pwd.html">忘记密码?</a>
        </div>
    </form>
</div>

</body>
</html>
说明:
在这个html里面,我们主要对登录界面进行了整体布局规划,利用div将内部的窗口、图片、标签、输入框、按钮、链接进行分块,这样方便我们之后用css对其进行准确的调位置、调边距。同时也对重要的几个东西设置了id和class,这也是方便我们之后用css对其进行准确的调颜色、调字体。
login.js
/**
 * Created by WinkJie on 2019/11/17.
 */
function login() {

    var username = document.getElementById("username");
    var pass = document.getElementById("password");

    if (username.value == "") {

        alert("请输入用户名");

    } else if (pass.value  == "") {

        alert("请输入密码");

    } else if(username.value == "admin" && pass.value == "123456"){

        window.location.href="welcome.html";

    } else {

        alert("请输入正确的用户名和密码!")

    }
}
说明:
这个js是用来判断用户名和密码是否正确的,实现起来还算简单。
可以记一下,界面跳转的语句:
window.location.href="welcome.html";
其次就是对输入框的返回值的获取,这里我们用到了document.getElementById的知识点,通过document的对象方法来获得指定ID值的对象。这里要注意是byId,所以前面的html里的username和password要设id值,而不是name值,不然获取不到的!
关于document的介绍可以点击该链接:详解JavaScript Document对象
login.css
body {
    background-image: url("images/login/loginBac.jpg");;
    background-size: 100%;
    background-repeat: no-repeat;
}

#login_frame {
     400px;
    height: 260px;
    padding: 13px;

    position: absolute;
    left: 50%;
    top: 50%;
    margin-left: -200px;
    margin-top: -200px;

    background-color: rgba(240, 255, 255, 0.5);

    border-radius: 10px;
    text-align: center;
}

form p > * {
    display: inline-block;
    vertical-align: middle;
}

#image_logo {
    margin-top: 22px;
}

.label_input {
    font-size: 14px;
    font-family: 宋体;

     65px;
    height: 28px;
    line-height: 28px;
    text-align: center;

    color: white;
    background-color: #3CD8FF;
    border-top-left-radius: 5px;
    border-bottom-left-radius: 5px;
}

.text_field {
     278px;
    height: 28px;
    border-top-right-radius: 5px;
    border-bottom-right-radius: 5px;
    border: 0;
}

#btn_login {
    font-size: 14px;
    font-family: 宋体;

     120px;
    height: 28px;
    line-height: 28px;
    text-align: center;

    color: white;
    background-color: #3BD9FF;
    border-radius: 6px;
    border: 0;

    float: left;
}

#forget_pwd {
    font-size: 12px;
    color: white;
    text-decoration: none;
    position: relative;
    float: right;
    top: 5px;

}

#forget_pwd:hover {
    color: blue;
    text-decoration: underline;
}

#login_control {
    padding: 0 28px;
}
说明:
这个css就是最难部分了,界面之所以能达到如此美观的效果,比如登录的窗口要在屏幕居中显示、背景透明、框的四个角要有一点弧度、登录按钮与输入框上下对齐等等。
摘要:
①让背景图片拉伸且占据整个屏幕:
background-size: 100%;
background-repeat: no-repeat;
②让一个div块在整个屏幕居中:
400px;
height: 260px;
padding: 13px;
position: absolute;
left: 50%;
top: 50%;
margin-left: -200px;
margin-top: -200px
(其中的margin-left:和margin-top最好是设为width和height的一半值,那样是完全居中的效果,当然记得前面要加个负号!)
③设置圆角:
text-align: center;
border-top-left-radius: 5px;
border-bottom-left-radius: 5px;
border-top-right-radius: 5px;
border-bottom-right-radius: 5px;
④设置背景颜色且加透明效果:
background-color: rgba(240, 255, 255, 0.5);
⑤让输入框和label对齐居中:
form p > * {
display: inline-block;
vertical-align: middle;
}
⑥去除链接的下划线:
text-decoration: underline;
7、给一个label或者button里面的文字设置居中:
120px;
height: 28px;
line-height: 28px;
text-align: center;
(需要设置line-height 其值等于 height 也就是字的行高等于它所在的label、button的高!)
8、给“登录”和“忘记密码”的中间设置间距:
先在html里给他们绑定一块div:
<div id="login_control">
<input type="button" id="btn_login" value="登录" οnclick="login();"/>
<a id="forget_pwd" href="forget_pwd.html">忘记密码?</a>
</div>
然后在css里设置一下padding:
#login_control {
padding: 0 28px;
}