Spring Security简介
历史
添加parent和web依赖
SpringBootApplication
@MapperScan
@SpringBootApplication
public class SpringSecurityApplication{
    public static void main(String[] args){
        SpringApplication.run(SpringSecurityApplication.class, args);
    }
}
MyTest
SpringBootTest(classes = SpringSecurityApplication.class)
@RunWith(SpringJUnit4ClassRunner.class)
public class MyTest{
    @Test
    public void test(){
        PasswordEncoder encoder = new BCryptPasswordEncoder();
        String result = encoder.encode("pwd");
        System.out.println(result);
        boolean match = encode.matches("pwd", result);
        System.out.println(match);
    }
}
DemoController
@Controller
public class DemoController{
    @RequestMapping("/");
    @ResponseBody
    public String demo(){
        return "demo";
    }
}
添加依赖,官方地址:https://mvnrepository.com/artifact/org.springframework.boot/spring-boot-starter-security
<!-- https://mvnrepository.com/artifact/org.springframework.boot/spring-boot-starter-security -->
<dependency>
    <groupId>org.springframework.boot</groupId>
    <artifactId>spring-boot-starter-security</artifactId>
</dependency>
进入http://localhost:8080/login.html
UserDetailService详解
public interface UserDetailService{
    UserDetails loadUserByUserName(String var1) throws UsernameNotFoundException;
}
接口方法

UserDetailServiceimpl
@Service
public class UserDetailsServiceImpl implements UserDetailsService{
    @Autowired
    private PasswordEncoder passwordEncoder;

    @Overrride
    public UserDetails loadUserByUserName(String username) throws UsernameNotFoundException{
        if(!username.equals("admin")){
            throw new UsernameNotFoundException("用户不存在!");
        }
        // 从数据库中获取密码
        String password = "pwd";
        String encodePassword = PasswordEncoder.encode(password);
        UserDetails userDetails = new User(username, encodePassword, AuthorityUtils.commaSeparatedStringToAuthorityList("admin1, admin2"));
        return userDetails;
    }
}
SecurityConfig
@Configuration
public class SecurityConfig{
    @Bean
    protected PasswordEncoder passwrodEncoder(){
        return new BCryptPasswordEncoder();
    }
}
连接数据库实现自定义逻辑
UserMapper
public interface UserMapper{
    public User selectByUserName(String username);
}
application.yml
spring:
    datasource:
        username: root
        password: root
        driver-class-name: com.mysql.jdbc.Driver
        url: jdbc:mysql://127.0.0.1:3306/test
mybatis:
    mapper-locations: classpath:mybatis/*.xml
UserMapper.xml
<mapper namespace="com.test.mapper.UserMapper">
    <select id="selectByUsername" resultType="com.test.pojo.User">
        select id, username, password from t_user where username = #{param}
    </select>
</mapper>
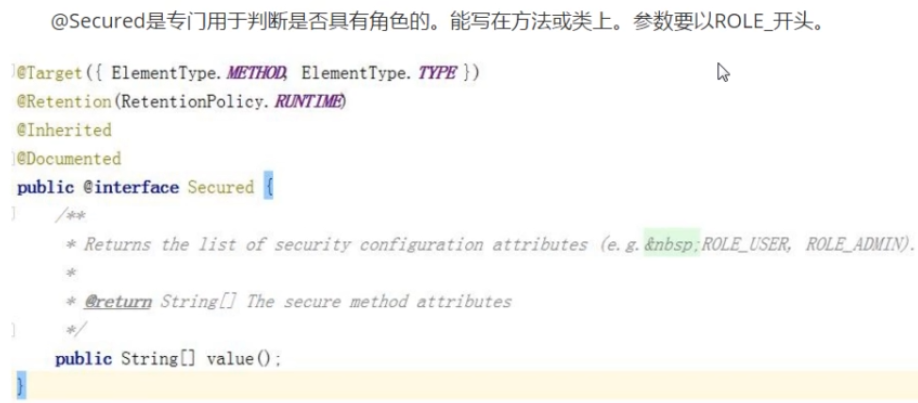
注解@Secured的使用
在启动类中添加注解
@EnaleGlobalMethodSecurity(securedEnabled = true)
在controller中添加注解
@Secured("ROLE_ADMIN")
ConfigureAdapter中添加
.antMatchers("/demo").permitAll()
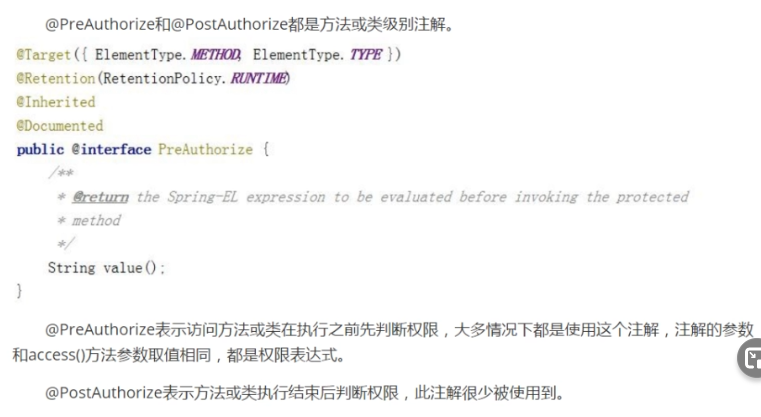
@PreAuthorize/@PostAuthorize
启动类
@EnaleGlobalMethodSecurity(prePostEnabled = true)
controller
@PreAuthorize("hasAuthority('demo:update')")
Remember me功能实现

添加mybatis依赖,官方地址:https://mvnrepository.com/artifact/org.mybatis.spring.boot/mybatis-spring-boot-starter
<!-- https://mvnrepository.com/artifact/org.mybatis.spring.boot/mybatis-spring-boot-starter -->
<dependency>
    <groupId>org.mybatis.spring.boot</groupId>
    <artifactId>mybatis-spring-boot-starter</artifactId>
    <version>2.1.0</version>
</dependency>
添加mysql依赖,官方地址:https://mvnrepository.com/artifact/mysql/mysql-connector-java
<!-- https://mvnrepository.com/artifact/mysql/mysql-connector-java -->
<dependency>
    <groupId>mysql</groupId>
    <artifactId>mysql-connector-java</artifactId>
    <version>5.1.47</version>
</dependency>
配置数据源
applicaiton.yml
spring:
    datasource:
        username: root
        password: root
        driver-class-name: com.mysql.jdbc.Driver
        url: jdbc:mysql://127.0.0.1:3306/test
mybatis:
    mapper-locations: classpath:mybatis/*.xml
RememberMeConfig
@Configuration
public class RemeberMeConfig{
    @Autowired
    private Datasource dataSource;
    @Bean
    protected PersonTokenRepository persistentTokenRepository(){
        JdbcTokenRepositoryImpl jdbcTokenRepository = new JdbcToeknRepositoryImpl();
        jdbcTokenRepository.setCreateTableOnStartup(true);
        jdbcTokenRepository.setDataSource(dataSource);

        return jdbcTokenRepository;
    }
}
WebSecurityConfigureAdapter
@Autowire
private PersistentTokenRepository persistentTokenRepository;
修改SecurityConfig
http.rememberMe()
     .userDetailsSevice(userDetailsService)// 登录逻辑对象
     .tokenValiditySeconds(10)// 设置有效时间
     .tokenRepository(persistentTokenRepository);// 持久层对象
在客户端页面添加复选框
添加依赖,官方地址:https://mvnrepository.com/artifact/org.thymeleaf.extras/thymeleaf-extras-springsecurity5
<!-- https://mvnrepository.com/artifact/org.thymeleaf.extras/thymeleaf-extras-springsecurity5 -->
<dependency>
    <groupId>org.thymeleaf.extras</groupId>
    <artifactId>thymeleaf-extras-springsecurity5</artifactId>
    <version>3.0.4.RELEASE</version>
</dependency>
添加依赖,官方地址:https://mvnrepository.com/artifact/org.springframework.boot/spring-boot-starter-thymeleaf
<!-- https://mvnrepository.com/artifact/org.springframework.boot/spring-boot-starter-thymeleaf -->
<dependency>
    <groupId>org.springframework.boot</groupId>
    <artifactId>spring-boot-starter-thymeleaf</artifactId>
    <version>2.3.4.RELEASE</version>
</dependency>
获取属性

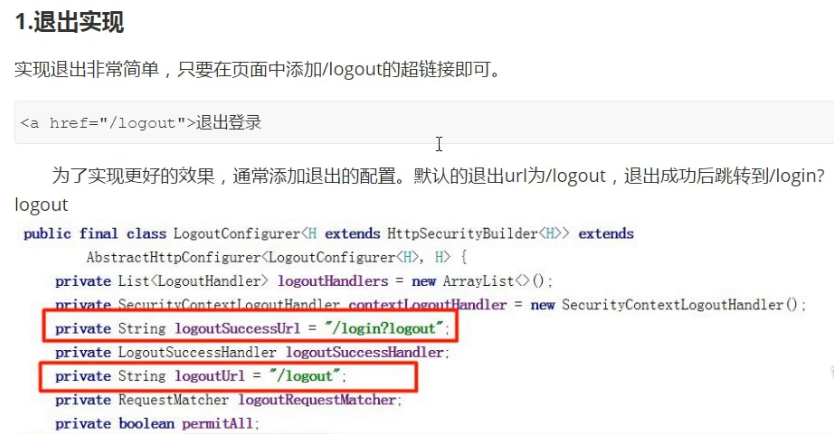
退出登录
MyWebSecurityconfigurerAdapter
http.logout()
      .logoutSuccessUrl("/showLogin")
      .logoutUrl("/test")
      .logoutSuccesshandler(new LogoutSuccessHandler(){
        @Override
        public void onLogoutSuccess(HttpServletRequest request, HttpServletResponse httpServletResponse, Authentication authentication) throws Exception{}
    })
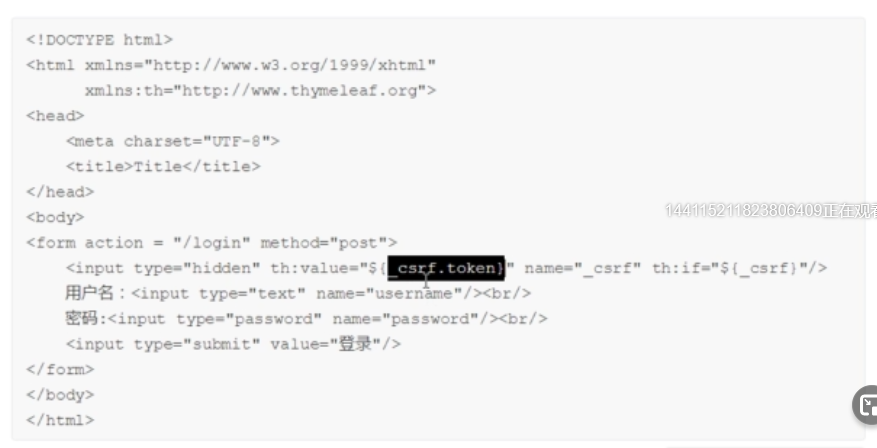
Spring Security中的CSRF详解
@SpringBootApplication
public class CsrfApplication{
    public static void main(STring[] args){
        SpringApplication.run(CsrfApplication.class, args);
    }
}
application.ymml
server:
    port: 8081