最近想要搭建自己的私人博客, 各种百度,完整的搭建步骤如下!
首先得要有自己的vps或者云主机,我这里是自己的云主机,有自己的域名(我这边目前没有买域名)!
搭建步骤!
1,安装lnmp(linux+nginx+mysql+php),如果需要自己安装,可能需要花费不少时间。我们采用直接暴力安装!!!
wget http://soft.vpser.net/lnmp/lnmp1.4beta.tar.gz
tar -zxvf lnmp1.4beta.tar.gz
进去到目录里面
./install.sh 这里需要花费大概30-60分钟!!
出现如下页面:
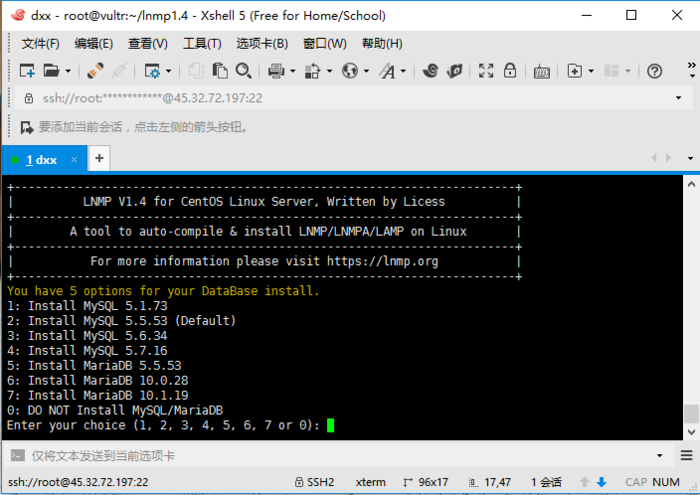
依次输入你要安装的选项前的数字并回车即可下一步。
MySql 选项
You have 5 options for your DataBase install.
1: Install MySQL 5.1.73
2: Install MySQL 5.5.53 (Default)
3: Install MySQL 5.6.34
4: Install MySQL 5.7.16
5: Install MariaDB 5.5.53
6: Install MariaDB 10.0.28
7: Install MariaDB 10.1.19
0: DO NOT Install MySQL/MariaDB
Enter your choice (1, 2, 3, 4, 5, 6, 7 or 0):
此处根据所需选择,如果使用的上述服务器,请选择2或者直接回车。我选择默认。
注意:安装MySql时,如果选择太高的版本安装会被拒绝,提示信息如下 Memory less than 1GB, can't install MySQL 5.6, 5.7 or MairaDB 10!。根据个人手动安装MySql5.7的经验来看,此768MB内存的服务器在运行一个nginx,mysql,php时还好,倘若再运行一个tomcat,mysql将会不定期down掉。所以此处选择一个低版本的5.5MySql即可。
You will install MySQL 5.5.53
===========================
Please setup root password of MySQL.(Default password: root)
Please enter:
输入密码回车或直接回车,直接回车默认密码为root。此处做实验我选择默认,个人实际使用请修改。
MySQL root password: root
===========================
Do you want to enable or disable the InnoDB Storage Engine?
Default enable,Enter your choice [Y/n]:
输入Y或者n然后回车或直接回车,直接回车默认启用InnoDB存储引擎。我选择默认。
No input,The InnoDB Storage Engine will enable.
===========================
You have 6 options for your PHP install.
1: Install PHP 5.2.17
2: Install PHP 5.3.29
3: Install PHP 5.4.45
4: Install PHP 5.5.38 (Default)
5: Install PHP 5.6.30
6: Install PHP 7.0.15
7: Install PHP 7.1.1
Enter your choice (1, 2, 3, 4, 5, 6 or 7):
输入选项然后回车或者直接回车,直接回车默认安装PHP5.5.38版本。我选择默认。
You will install PHP 7.1.1
===========================
You have 3 options for your Memory Allocator install.
1: Don't install Memory Allocator. (Default)
2: Install Jemalloc
3: Install TCMalloc
输入选项然后回车或者直接回车,直接回车默认不安装内存分配器。我选择默认。
此时出现
Press any key to install...or Press Ctrl+c to cancel
当然是摁任意键啦,一般都是回车咯。
然后出现一大堆信息。前几行如下:
You will install lnmp stack.
nginx-1.10.3
mysql-5.5.53
php-5.5.38
Enable InnoDB: y
Print lnmp.conf infomation...
Download Mirror: http://soft.vpser.net
Nginx Additional Modules:
PHP Additional Modules:
Database Directory: /usr/local/mysql/var
Default Website Directory: /home/wwwroot/default
CentOS release 6.8 (Final)
Kernel \r on an \m
这一堆东西你就不用管啦。本次实验的开始时间23:04……经过了漫长漫长漫长的等待之后……大概23:35结束。所以期间你去洗个澡看个电视剧都不是问题。然后我们看到屏幕上最后输出的信息如下。
http://IP 例如 http://45.32.195.77便可以访问了。看到的内容如下: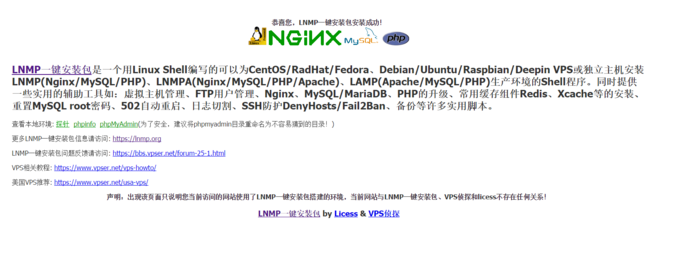
网站根目录路径/home/wwwroot/default,如果只用来放一些静态页面,那么,现在就足够了,直接将你的html,js,css等文件丢进去即可。这不是本文重点,在此不赘述了。
退出使用ctrl+c
安装WordPress
下载WordPress包
中文官方站点 英文官方站点具体的根据自己的需求选择。下面以中文版为例。当前最新版本是4.7.2
为了方便,我们还是在用站点默认的路径,但是我们投机取巧一下。
# 进入根目录上一级目录
cd /home/wwwroot/
# 将default重命名为old
mv default old
# 下载WordPress包中文版
wget https://cn.wordpress.org/wordpress-4.7.2-zh_CN.tar.gz
# 解压WordPress包
tar -zxvf wordpress-4.7.2-zh_CN.tar.gz
# 查看解压后的文件夹名,此处是wordpress,估计应该都是吧,看看保险啊
[root@vultr wwwroot]# ls
old  wordpress  wordpress-4.7.2-zh_CN.tar.gz
# 将wordpress重命名为default
mv wordpress default
# 再次查看检验
[root@vultr wwwroot]# ls
default  old  wordpress-4.7.2-zh_CN.tar.gz
给相应目录授权
# 目录以及目录下的文件授权
[root@vultr wwwroot]# chown -R 755 /home/wwwroot
chown: changing ownership of ‘/home/wwwroot/old/.user.ini’: Operation not permitted
# 将目录的所有者分给www组下的www用户。
[root@vultr wwwroot]# chown -R www:www /home/wwwroot/
chown: changing ownership of ‘/home/wwwroot/old/.user.ini’: Operation not permitted
出现的提示大概是说有一个文件无法更改用户分组和权限。不会影响你的wordpress,忽略就好。
创建一个数据库wordpress
# 登录数据库
mysql -u root -p
# 输入密码
默认的话就是root,否则就是你自己之前设置的那个
# 登录进来之后,看到这样一些东西
Welcome to the MySQL monitor.  Commands end with ; or \g.
Your MySQL connection id is 3
Server version: 5.5.53-log Source distribution
Copyright (c) 2000, 2016, Oracle and/or its affiliates. All rights reserved.
Oracle is a registered trademark of Oracle Corporation and/or its
affiliates. Other names may be trademarks of their respective
owners.
Type 'help;' or '\h' for help. Type '\c' to clear the current input statement.
mysql>
# 不用理会上面的,创建我们的数据库,比如名字为wordpress。记得加分号。
mysql> create database wordpress;
# 看一下,有没有我们创建的数据库
mysql> show databases;
# 大概看到如下内容。意味着这一步也没问题。
+--------------------+
| Database |
+--------------------+
| information_schema |
| mysql |
| performance_schema |
| wordpress |
+--------------------+
4 rows in set (0.01 sec)
# 退出mysql
exit
配置WordPress
这时候在此通过浏览器访问 http://IP 例如 http://45.32.195.77,浏览器将自动跳转到http://45.32.195.77/wp-admin/setup-config.php,这就是wordpress的配置页面了,看到的内容如下:
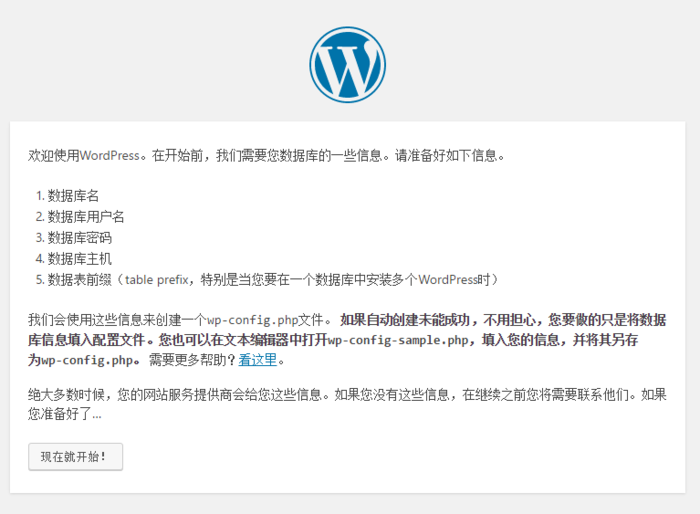
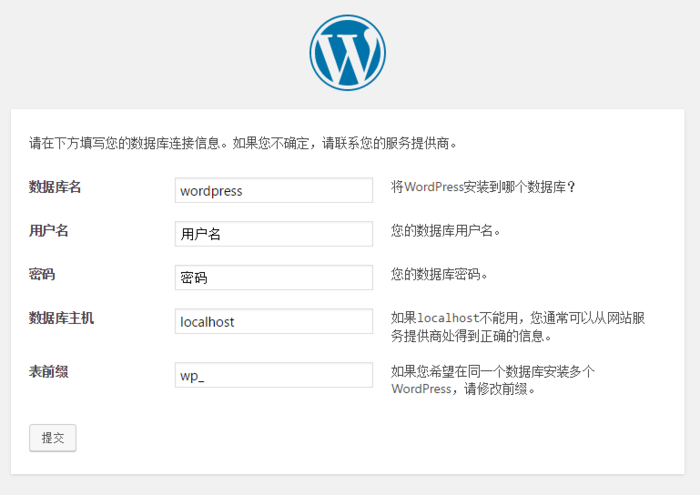
按照之前设置的,输入如下信息。
数据库名:wordpress
用户名:root
密码:root
数据库主机:localhost
表前缀:wp_
点击提交。

到这一步,基本上就意味着大功告成了,因为后边基本不会出错啦。
点击进行安装按钮。出现下图:

按照自己的需求填写,
点击安装WordPress按钮,然后登录设置啥的纯页面操作就不在这里过多介绍咯。
OK 完成安装只有我这边写文章,发表文章之后再次查看文章发现 404 not fount nginx!!!!!!!!!!
修改nginx.conf文件,在location /节点下添加如下代码:
location / {
    try_files $uri $uri/ /index.php?q=$uri&$args;
}
- 1
- 2
- 3
- 4
然后重启nginx即可解决。
ps -ef|grep nginx
平滑重启命令:
kill -HUP 住进称号或进程号文件路径
或者使用
/usr/nginx/sbin/nginx -s reload
注意,修改了配置文件后最好先检查一下修改过的配置文件是否正 确,以免重启后Nginx出现错误影响服务器稳定运行。
判断Nginx配置是否正确命令如下:
nginx -t -c /usr/nginx/conf/nginx.conf
或者
/usr/nginx/sbin/nginx -t
nginx reload重启
执行
# /usr/local/nginx/sbin/nginx -s reload
nginx已经重启成功
Centos nginx重启
重启Nginx
service nginx restart
/etc/init.d/nginx stop
/etc/init.d/nginx start