一、 软件包分类
- 二进制包
- 源码包
二、 二进制包
1-1 二进制包分类
-
DPKG包:是由 Debian Linux 所开发出来的包管理机制,通过 DPKG 包,Debian Linux 就可以进行软件包管理。主要应用在 Debian 和 unbuntu 中。
-
RPM 包:是由 Red Hat 公司所开发的包管理系统。功能强大,安装、升级、查询和卸载 都非常简单和方便。目前很多 Linux 都在使用这种包管理方式,包括 Fedora、CentOS、 SuSE 等,这里是以CentOS 7.x为例,主要学习RPM包
1-2 RPM包特点
- 优点
- 包管理系统简单,只通过几个命令就可以实现包的安装、升级、查询和卸载
- 安装速度比源码包安装快的多
- 缺点
- 经过编译,不再可以看到源代码
- 功能选择不如源码包灵活
- 依赖性。有时我们会发现需要安装软件包 a 时需要先安装 b 和 c,而安装 b 时需要安装 d 和 e。这是需要先安装 d 和 e,再安装 b 和 c,最后才能安装 a 包。比如说,我买了个 漂亮的灯具,打算安装到我们家客厅,可是在安装灯具之前我们家客厅总要有顶棚吧, 顶棚总要是做好了防水和刷好油漆了吧,这个装修和安装软件其实类似总要有一定的顺 序的。可是有时依赖性会非常繁琐
1-3 RPM包依赖
- 软件包依赖:安装软件包A、需要先安装软件包B 、安装软件C又要其他软件包依赖
- 函数库依赖:什么是模块依赖?我们举一个例子,尝试安装以下文件:
[root@m01 tools]# rpm -ivh mysql-community-server-8.0.20-1.el8.x86_64.rpm
error: Failed dependencies:  # 依赖检测失败
	libc.so.6(GLIBC_2.28)(64bit) is needed by mysql-community-server-8.0.20-1.el8.x86_64
	libcrypto.so.1.1()(64bit) is needed by mysql-community-server-8.0.20-1.el8.x86_64
	libcrypto.so.1.1(OPENSSL_1_1_0)(64bit) is needed by mysql-community-server-8.0.20-1.el8.x86_64
	libcrypto.so.1.1(OPENSSL_1_1_1)(64bit) is needed by mysql-community-server-8.0.20-1.el8.x86_64
	libssl.so.1.1()(64bit) is needed by mysql-community-server-8.0.20-1.el8.x86_64
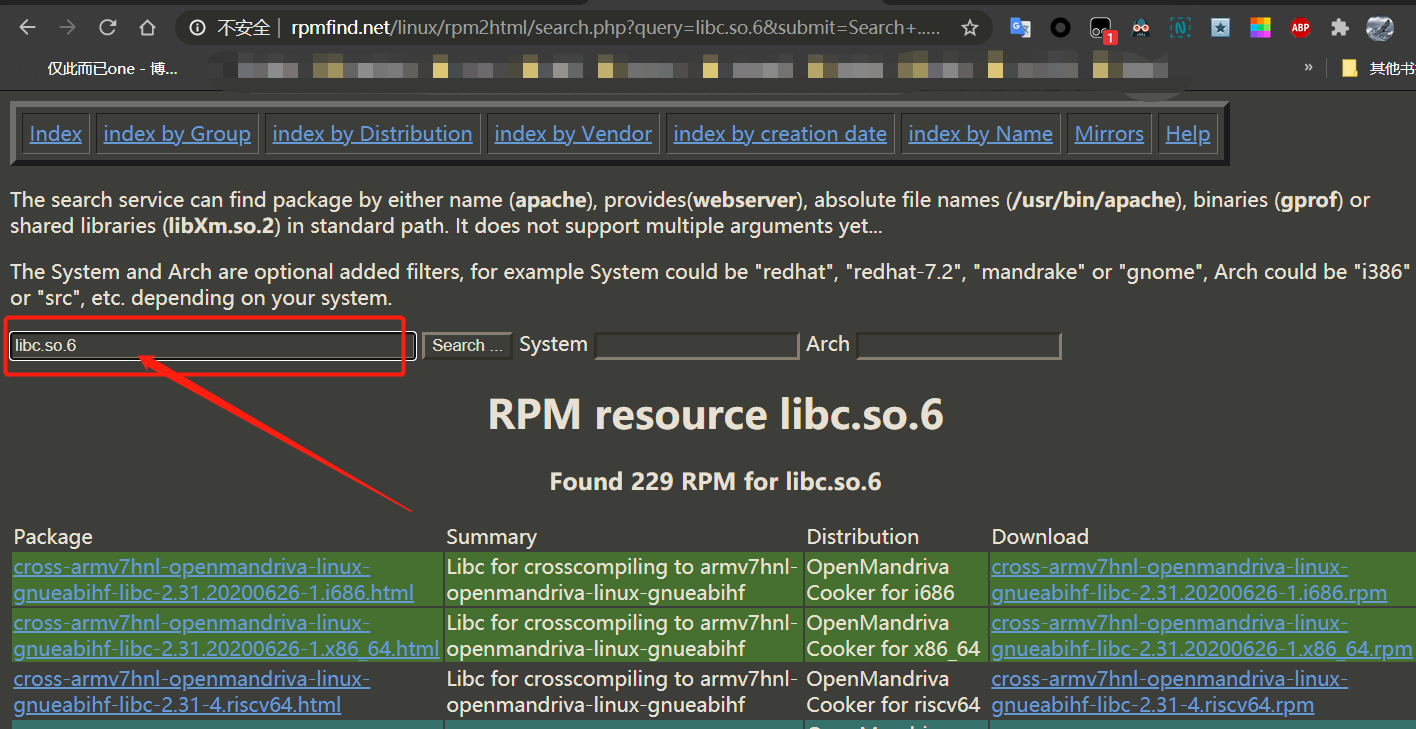
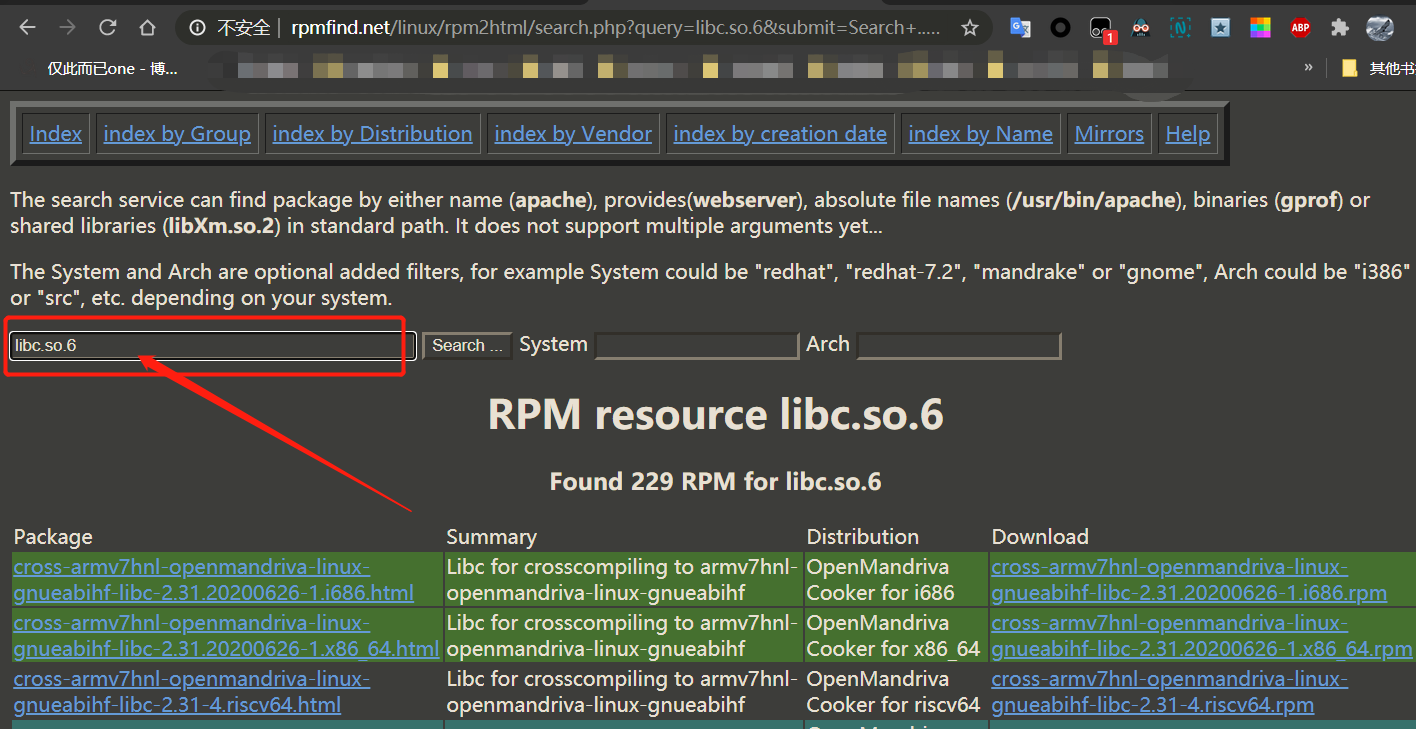
这就是函数库依赖,安装mysql需要先安装libc.so.6、libcrypto.so.1.1等等,去哪里找?http://www.rpmfind.net/linux/rpm2html/search.php和
https://pkgs.org/两个地址搜索

1-4 RPM包安装
命名规则
htop - 1.0.3 - 1 . el7 . rf.x86_64. rpm
htop: 软件包明1.0.3软件版本1软件发行次数e17软件发行商。el7是 RedHat 公司发布,适合 RHEL7.x(Red Hat Enterprise Linux)和 CentOS7.x 下使用rf.x86_64x86_64(64 位 CPU 可以安装)和 noarch(没有硬 件限制)等文件名
包全名:如果操作的是未安装软件包,则使用包全名,而且需要注意绝对路径
包名:如果操作的是已经安装的软件包,则使用包名即可,系统会生产 RPM 包的数据库(/var/lib/rpm/),而且可以在任意路径下操作
1-5 rpm包手工命令安装
默认安装位置
| /etc/ | 配置文件安装目录 |
|---|---|
| /usr/bin/ | 可执行的命令安装目录 |
| /usr/lib/ | 程序所使用的函数库保存位置 |
| /usr/share/doc/ | 基本的软件使用手册保存位置 |
| /usr/share/man/ | 帮助文件保存位置 |
安装命令
语法格式:rpm –ivh 包全名
-i install 安装(install)
-v 显示更详细的信息(verbose)
-h 打印#显示安装进度(hash)
--nodeps 不检测依赖性安装。软件时会检测依赖性,确定所需的底层软件是否安装。 如果没有安装则会报错。如果我不管依赖性,想强行安装,可以使用这个选项。注意: 这样不检测依赖性安装的软件基本是不能使用的,所以不建议这样做
--replacefiles 替换文件安装。如果安装软件包,可是包中部分文件已经存在,那么 正常安装时候,会报错“某个文件已经存在”从而导致软件无法安装,使用这个选项可 以忽视这个报错,而覆盖安装
--replacepkgs 替换软件包安装。如果软件包已经安装,此选项可以把软件包重复安 装一遍。
--force 强制安装。不管是否已经安装,都重新安装。就是—replacefiles 和 —replacepkgs 的综合。
--test 测试安装。不会实际安装,只是检测一下依赖性。
--prefix 指定安装路径。为安装软件指定安装路径,而不使用默认安装路径。注意: 如果指定了安装路径,软件没有安装到系统默认路径中的话,系统会找不到这些安装的 软件,需要进行手工配置才能被系统识别。所以 rpm 包一般都采用默认路径安装
1-6 服务启动
CentOS 6.x
[root@localhost ~]# service 服务名 start|stop|restart|status
参数:
    start:  启动服务
    stop:  停止服务
    restart: 重启服务
    status: 查看服务状态
CentOS 7.x
[root@localhost ~]# systemctl start|stop|restart|status 服务名
参数:
    start:    启动服务
    stop:     停止服务
    restart:  重启服务
    status:   查看服务状态
1-7 RPM 包升级
[root@localhost ~]#  rpm –Uvh 包全名
选项:
    -U(大写) 升级安装,如果没有安装过,系统直接安装。如果安装过的版本较旧,则 升级到新版本(upgrade)
[root@localhost ~]#  rpm –Fvh 包全名
选项:
    -F(大写)  升级安装,如果没有安装过,则不会安装。必须安装有较旧版本,才能升级(freshen)
1-8 RPM 卸载
[root@localhost ~]# rpm  -e  包名
选项:
    --nodeps 不检查依赖性
1-9 RPM 查询
[root@localhost ~]#  rpm –q 包名
选项:
    -q  查询(query)
    -a:所有(all)
    -i: 查询软件信息(information)
    -p: 查询没有安装的软件包(package)
    -l: 列出软件包中所有的文件列表和软件所安装的目录(list)
    -f: 查询系统文件属于哪个软件包(file)
    -R: 查询软件包的依赖性(requires)
2. RPM包在线安装(yum安装)
yum在线安装RPM包的最大好处就是会自动给你解决依赖关系,一键安装。
yum提供了查找、安装、删除某一个、一组甚至全部软件包的命令。yum 源配置文件保存在/etc/yum.repos.d/目录中,文件的扩展名一定是*.repo,这个目录中有 5 个 yum 源配置文件,默认情况下 CentOS-Base.repo 文件生效
[root@localhost ~]# ls
CentOS-Base.repo       CentOS-fasttrack.repo  CentOS-Vault.repo
CentOS-Debuginfo.repo  CentOS-Media.repo

# 默认源配置
[root@localhost yum.repos.d]# vim /etc/yum.repos.d/CentOS-Base.repo
[base] name=CentOS-$releasever - Base mirrorlist=http://mirrorlist.centos.org/?release=$releasever&arch=$basearch& repo=os baseurl=http://mirror.centos.org/centos/$releasever/os/$basearch/ gpgcheck=1 gpgkey=file:///etc/pki/rpm-gpg/RPM-GPG-KEY-CentOS-6

# [base]:容器名称,一定要放在[]中。
# name:容器说明,可以自己随便写。
# mirrorlist:镜像站点,这个可以注释掉。
# baseurl:我们的 yum 源服务器的地址。默认是 CentOS 官方的 yum 源服务器,是可以使用的。 如果你觉得慢,则可以改成你喜欢的 yum 源地址。
# enabled:此容器是否生效,如果不写或写成
# enabled=1 则表示此容器生效,写成 enabled=0 则表示此容器不生效。
# gpgcheck:如果为 1 则表示 RPM 的数字证书生效;如果为 0 则表示 RPM 的数字证书不生效。
# gpgkey:数字证书的公钥文件保存位置。不用修改。
2-1 更改安装源
2-2 yum命令格式
yum [options] [command] [package ...]
说明:
options:选项包括-h(帮助),-y(当安装过程提示选择全部为”yes”),-q(不显示安装的过程)等等[command]: 所要进行的操作, install(安装) 、 update(更新)、remove(删除)等[package …]是操作的对象(安装包1)
yum具体参数和选项: 使用yum --help
详情
[root@backup ~]# yum --help
Loaded plugins: fastestmirror, langpacks
Usage: yum [options] COMMAND

List of Commands:

check          Check for problems in the rpmdb
check-update   Check for available package updates
clean          Remove cached data
deplist        List a package's dependencies
distribution-synchronization Synchronize installed packages to the latest available versions
downgrade      downgrade a package
erase          Remove a package or packages from your system
fs             Acts on the filesystem data of the host, mainly for removing docs/lanuages for minimal hosts.
fssnapshot     Creates filesystem snapshots, or lists/deletes current snapshots.
groups         Display, or use, the groups information
help           Display a helpful usage message
history        Display, or use, the transaction history
info           Display details about a package or group of packages
install        Install a package or packages on your system
langavailable  Check available languages
langinfo       List languages information
langinstall    Install appropriate language packs for a language
langlist       List installed languages
langremove     Remove installed language packs for a language
list           List a package or groups of packages
load-transaction load a saved transaction from filename
makecache      Generate the metadata cache
provides       Find what package provides the given value
reinstall      reinstall a package
repo-pkgs      Treat a repo. as a group of packages, so we can install/remove all of them
repolist       Display the configured software repositories
search         Search package details for the given string
shell          Run an interactive yum shell
swap           Simple way to swap packages, instead of using shell
update         Update a package or packages on your system
update-minimal Works like upgrade, but goes to the 'newest' package match which fixes a problem that affects your system
updateinfo     Acts on repository update information
upgrade        Update packages taking obsoletes into account
version        Display a version for the machine and/or available repos.


Options:
  -h, --help            show this help message and exit
  -t, --tolerant        be tolerant of errors
  -C, --cacheonly       run entirely from system cache, don't update cache
  -c [config file], --config=[config file]
                        config file location
  -R [minutes], --randomwait=[minutes]
                        maximum command wait time
  -d [debug level], --debuglevel=[debug level]
                        debugging output level
  --showduplicates      show duplicates, in repos, in list/search commands
  -e [error level], --errorlevel=[error level]
                        error output level
  --rpmverbosity=[debug level name]
                        debugging output level for rpm
  -q, --quiet           quiet operation
  -v, --verbose         verbose operation
  -y, --assumeyes       answer yes for all questions
  --assumeno            answer no for all questions
  --version             show Yum version and exit
  --installroot=[path]  set install root
  --enablerepo=[repo]   enable one or more repositories (wildcards allowed)
  --disablerepo=[repo]  disable one or more repositories (wildcards allowed)
  -x [package], --exclude=[package]
                        exclude package(s) by name or glob
  --disableexcludes=[repo]
                        disable exclude from main, for a repo or for
                        everything
  --disableincludes=[repo]
                        disable includepkgs for a repo or for everything
  --obsoletes           enable obsoletes processing during updates
  --noplugins           disable Yum plugins
  --nogpgcheck          disable gpg signature checking
  --disableplugin=[plugin]
                        disable plugins by name
  --enableplugin=[plugin]
                        enable plugins by name
  --skip-broken         skip packages with depsolving problems
  --color=COLOR         control whether color is used
  --releasever=RELEASEVER
                        set value of $releasever in yum config and repo files
  --downloadonly        don't update, just download
  --downloaddir=DLDIR   specifies an alternate directory to store packages
  --setopt=SETOPTS      set arbitrary config and repo options
  --bugfix              Include bugfix relevant packages, in updates
  --security            Include security relevant packages, in updates
  --advisory=ADVS, --advisories=ADVS
                        Include packages needed to fix the given advisory, in
                        updates
  --bzs=BZS             Include packages needed to fix the given BZ, in
                        updates
  --cves=CVES           Include packages needed to fix the given CVE, in
                        updates
  --sec-severity=SEVS, --secseverity=SEVS
                        Include security relevant packages matching the
                        severity, in updates

  Plugin Options:
2-3 yum常用的命令
- 自动搜索最快镜像插件:
yum install yum-fastestmirror - 安装yum图形窗口插件:
yum install yumex - 查看可能批量安装的列表:
yum grouplist
1 安装
yum install全部安装yum install package1安装指定的安装包package1yum groupinsall group1安装程序组group1
2 更新和升级
yum update全部更新yum update package1更新指定程序包package1yum check-update检查可更新的程序yum upgrade package1升级指定程序包package1yum groupupdate group1升级程序组group1
3 查找和显示
yum info package1显示安装包信息package1yum list显示所有已经安装和可以安装的程序包yum list package1显示指定程序包安装情况package1yum groupinfo group1显示程序组group1信息yum search string根据关键字string查找安装包yum search~查找软件包yum list列出所有可安装的软件包yum list updates列出所有可更新的软件包yum list installed列出所有已安装的软件包yum info列出所有软件包的信息yum info updates列出所有可更新的软件包信息yum info installed列出所有已安裝的软件包信息yum info extras列出所有已安裝但不在Yum Repository 內的软件包信息yum provides~列出软件包提供哪些文件
4 删除程序
yum remove package1删除程序包package1yum groupremove group1删除程序组group1yum deplist package1查看程序package1依赖情况
5 清除缓存
yum 会把下载的软件包和header存储在cache中,而不会自动删除。如果我们觉得它们占用了磁盘空间,可以使用yum clean指令进行清除.
yum clean packages清除缓存目录下的软件包yum clean headers清除缓存目录下的 headersyum clean oldheaders清除缓存目录下旧的 headersyum clean, yum clean all (= yum clean packages; yum clean oldheaders)清除缓存目录下的软件包及旧的headers
三、 源码包
源码安装的优点,编译安装过程,可以设定参数,按照需求,进行安装,并且安装的版本,可以自己选择,灵活性比较大。
源码安装的缺点,由于安装包过新或者是其他问题,导致依赖的包没有,或者版本过低。这个时候就要解决包的依赖问题,linux系统中有的包,一个依赖一个,可能装一个小东西,就要解决一堆包的依赖问题,花很多时间解决包的依赖问题,得不尝失。源码安装的多了,不敢升级系统,升级系统,可能会导致以前手动装的东西,不能用
1- 源码包安装步骤
- 下载软件包 ,一般都去官网下载
- 解压缩
- 进入到压缩目录
./configure编译前准备工作, 指定安装目录/功能模块等选项,使用./configure --help查看选项make编译 生成可执行的二进制程序文件make clean如果在./configure或make编译中报错,那么我们在重新执行命令前一定要记得执行make clean命令,它会清空 Makefile 文件或编译产生的.o头文件。make install编译安装, 将编译好的文件复制到安装目录- 删除 源码包没有删除命令,如果需要删除,直接删除安装目录即可。
2- CentOS 7.5下编译安装Nginx1.18.0
- 下载Nginx
[root@web02 tools]# wget https://nginx.org/download/nginx-1.18.0.tar.gz
- 解压缩
[root@web02 tools]# tar -zxvf nginx-1.18.0.tar.gz
[root@web02 tools]# ls
nginx-1.18.0  nginx-1.18.0.tar.gz
- 创建www用户用户管理Nginx服务,
useradd -M www -s /sbin/nologin
[root@web02 tools]# useradd -M www -s /sbin/nologin
[root@web02 tools]# id www
uid=1005(www) gid=1005(www) groups=1005(www)
./configure指定安装目录、功能模块等
./configure --prefix=/Applications/nginx-1.18.0 --user=www --group=www --with-http_stub_status_module --with-http_ssl_module
| 参数名称 | 备注 |
|---|---|
--prefix=value |
指向安装目录 |
--sbin-path |
指向(执行)程序文件(nginx) |
--conf-path= |
指向配置文件(nginx.conf) |
--error-log-path= |
指向错误日志目录 |
--pid-path= |
指向 pid 文件(nginx.pid) |
--lock-path= |
指向 lock 文件(nginx.lock)(安装文件锁定,防止安装文件被别人利用,或自己误操作。)进程ID文件 |
--user= |
指定程序运行时的用户名 |
--group= |
指定程序运行时的用户组名 |
--builddir= |
指向编译目录 |
--with-rtsig_module |
启用 rtsig 模块支持(实时信号) |
--with-select_module |
启用 select 模块支持(一种轮询模式,不推荐在高载环境下使用)禁用:--without-select_module |
--with-poll_module |
启用 poll 模块支持(功能与 select 相同,与 select 特性相同,为一种轮询模式,不推荐在高载环境下使用) |
--with-file-aio |
启用 file aio 支持(一种 APL 文件传输格式) |
--with-ipv6 |
启用 ipv6 支持 |
--add-module= |
启用外部模块支持 |
--with-cc= |
指向 C 编译器路径 |
--with-cpp= |
指向 C 预处理路径 |
--with-cc-opt= |
设置 C 编译器参数 |
--with-ld-opt= |
设置连接文件参数 |
--with-cpu-opt= |
指定编译的 CPU,可用的值为:pentium, pentiumpro, pentium3, pentium4, athlon, opteron, amd64, sparc32, sparc64, ppc64 |
--without-pcre |
禁用 PCRE 库 |
--with-pcre |
启用 PCRE 库 |
--with-pcre= |
指向 PCRE 库文件目录 |
--with-pcre-opt= |
在编译时为 PCRE 库设置附加参数 |
--with-md5= |
指向 MD5 库文件目录(消息摘要算法第五版,用以提供消息的完整性保护) |
--with-md5-opt= |
在编译时为 MD5 库设置附加参数 |
--with-md5-asm |
使用 MD5 汇编源 |
--with-sha1= |
指向 sha1 库目录(数字签名算法,主要用于数字签名) |
--with-sha1-opt= |
在编译时为 sha1 库设置附加参数 |
--with-sha1-asm |
使用 sha1 汇编源 |
--with-perl= |
设定 perl 库文件路径 |
--with-zlib= |
指向 zlib 库目录 |
--with-zlib-opt= |
在编译时为 zlib 设置附加参数 |
--with-zlib-asm= |
为指定的 CPU 使用 zlib 汇编源进行优化,CPU 类型为 pentium, pentiumpro |
--with-libatomic |
为原子内存的更新操作的实现提供一个架构 |
--with-libatomic= |
指向 libatomic_ops 安装目录 |
--with-openssl= |
指向 openssl 安装目录 |
--with-openssl-opt |
在编译时为 openssl 设置附加参数 |
--with-debug |
启用 debug 日志 |
--with-http_ssl_module |
启用 ngx_http_ssl_module 支持(使支持 HTTPS 请求,需已安装 openssl) |
--with-http_realip_module |
启用 ngx_http_realip_module 支持(这个模块允许从请求标头更改客户端的 IP 地址值,默认为关) |
--with-http_addition_module |
启用 ngx_http_addition_module 支持(作为一个输出过滤器,支持不完全缓冲,分部分响应请求) |
--with-http_xslt_module |
启用 ngx_http_xslt_module 支持(过滤转换 XML 请求) |
--with-http_image_filter_module |
启用 ngx_http_image_filter_module 支持(传输 JPEG/GIF/PNG 图片的一个过滤器)(默认为不启用。GD 库要用到) |
--with-http_geoip_module |
启用 ngx_http_geoip_module 支持(该模块创建基于与 MaxMind GeoIP 二进制文件相配的客户端 IP 地址的 ngx_http_geoip_module 变量) |
--with-http_sub_module |
启用 ngx_http_sub_module 支持(允许用一些其他文本替换 Nginx 响应中的一些文本) |
--with-http_dav_module |
启用 ngx_http_dav_module 支持(增加 PUT、DELETE、MKCOL 创建集合,COPY 和 MOVE 方法)默认情况下为关闭,需编译开启 |
--with-http_flv_module |
启用 ngx_http_flv_module 支持(提供寻求内存使用基于时间的偏移量文件) |
--with-http_gzip_static_module |
启用 ngx_http_gzip_static_module 支持(在线实时压缩输出数据流) |
--with-http_random_index_module |
启用 ngx_http_random_index_module 支持(从目录中随机挑选一个目录索引) |
--with-http_secure_link_module |
启用 ngx_http_secure_link_module 支持(计算和检查要求所需的安全链接网址) |
--with-http_degradation_module |
启用 ngx_http_degradation_module 支持(允许在内存不足的情况下返回204或444码) |
--with-http_stub_status_module |
启用 ngx_http_stub_status_module 支持(获取 Nginx 自上次启动以来的工作状态) |
--without-http_charset_module |
禁用 ngx_http_charset_module 支持(重新编码 WEB 页面,但只能是一个方向--服务器端到客户端,并且只有一个字节的编码可以被重新编码) |
--without-http_gzip_module |
禁用 ngx_http_gzip_module 支持(该模块同 --with-http_gzip_static_module 功能一样) |
--without-http_ssi_module |
禁用 ngx_http_ssi_module 支持(该模块提供了一个在输入端处理处理服务器包含文件(SSI)的过滤器,目前支持 SSI 命令的列表是不完整的) |
--without-http_userid_module |
禁用 ngx_http_userid_module 支持(该模块用来处理用来确定客户端后续请求的 cookie ) |
--without-http_access_module |
禁用 ngx_http_access_module 支持(该模块提供了一个简单的基于主机的访问控制。允许/拒绝基于 IP 地址) |
--without-http_auth_basic_module |
禁用 ngx_http_auth_basic_module(该模块是可以使用用户名和密码基于 HTTP 基本认证方法来保护你的站点或其部分内容) |
--without-http_autoindex_module |
禁用 ngx_http_autoindex_module 支持(该模块用于自动生成目录列表,只在 ngx_http_index_module 模块未找到索引文件时发出请求。) |
--without-http_geo_module |
禁用 ngx_http_geo_module 支持(创建一些变量,其值依赖于客户端的IP地址) |
--without-http_map_module |
禁用 ngx_http_map_module 支持(使用任意的键/值对设置配置变量) |
--without-http_split_clients_module |
禁用 ngx_http_split_clients_module 支持(该模块用来基于某些条件划分用户。条件如:ip地址、报头、cookies等等) |
--without-http_referer_module |
禁用 ngx_http_referer_module支持(该模块用来过滤请求,拒绝报头中 Referer 值不正确的请求) |
--without-http_rewrite_module |
禁用 ngx_http_rewrite_module ,链接重写 |
--without-http_proxy_module |
禁用 ngx_http_proxy_module 支持(有关代理服务器) |
--without-http_fastcgi_module |
禁用 ngx_http_fastcgi_module 支持(该模块允许 Nginx 与 FastCGI 进程交互,并通过传递参数来控制 FastCGI 进程工作。 )FastCGI 一个常驻型的公共网关接口。 |
--without-http_uwsgi_module |
禁用 ngx_http_uwsgi_module 支持(该模块用来医用uwsgi协议,uWSGI服务器相关) |
--without-http_scgi_module |
禁用 ngx_http_scgi_module支持 |
--without-http_memcached_module |
禁用 ngx_http_memcached_module 支持(该模块用来提供简单的缓存,以提高系统效率) |
-without-http_limit_zone_module |
禁用 ngx_http_limit_zone_module 支持(该模块可以针对条件,进行会话的并发连接数控制) |
--without-http_limit_req_module |
禁用 ngx_http_limit_req_module 支持(该模块允许你对于一个地址进行请求数量的限制用一个给定的session或一个特定的事件) |
--without-http_empty_gif_module |
禁用 ngx_http_empty_gif_module 支持(该模块在内存中常驻了一个1*1的透明GIF图像,可以被非常快速的调用) |
--without-http_browser_module |
禁用 ngx_http_browser_module 支持 |
--without-http_upstream_ip_hash_module |
禁用 ngx_http_upstream_ip_hash_module 支持(该模块用于简单的负载均衡) |
--with-http_perl_module |
启用 ngx_http_perl_module 支持(该模块使nginx可以直接使用perl或通过ssi调用perl) |
--with-perl_modules_path= |
设定 perl 模块路径 |
--http-log-path= |
设定 access log 路径 |
--http-client-body-temp-path= |
设定 HTTP 客户端请求临时文件路径 |
--http-proxy-temp-path= |
设定 HTTP 代理临时文件路径 |
--http-fastcgi-temp-path= |
设定 HTTP Fastcgi 临时文件路径 |
--http-uwsgi-temp-path= |
设定 HTTP uwsgi 临时文件路径 |
--http-scgi-temp-path= |
设定 HTTP scgi 临时文件路径 |
--without-http |
禁用 HTTP server 功能 |
--without-http-cache |
禁用 HTTP Cache 功能 |
--with-mail |
启用 POP3/IMAP4/SMTP 代理模块支持 |
--with-mail_ssl_module |
启用 ngx_mail_ssl_module 支持 |
--without-mail_pop3_module |
禁用 POP3 协议 |
--without-mail_imap_module |
禁用 IMAP 协议 |
--without-mail_smtp_module |
禁用 SMTP 协议 |
--with-google_perftools_module |
启用 ngx_google_perftools_module 支持(调试用,剖析程序性能瓶颈) |
--with-cpp_test_module |
启用 ngx_cpp_test_module 支持 |
make && make install
[root@web02 nginx-1.18.0]# make && make install
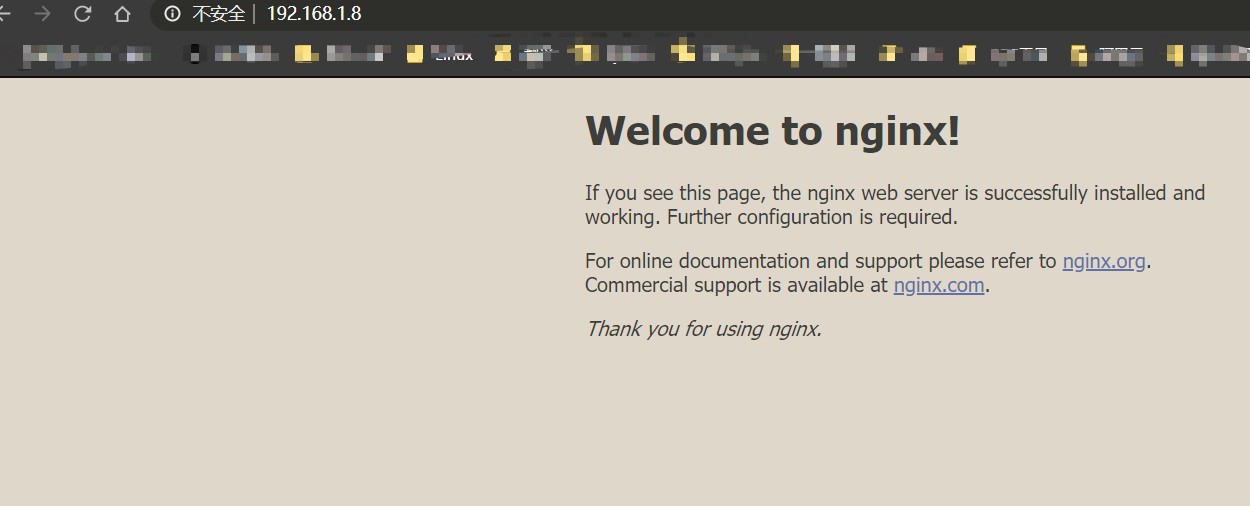
- 测试访问
在浏览器中输入http://IP地址:80,IP是你主机的IP地址

参考地址
https://xuexb.github.io/learn-nginx/guide/linux-install.html
