内容:本文带大家使用IdentityServer4进行使用OpenID Connect添加用户认证
作者:zara(张子浩) 欢迎分享,但需在文章鲜明处留下原文地址。
在这一篇文章中我们希望使用OpenID Connect这种方式来验证我们的MVC程序,我们首先需要干什么呢?那就是搞一个UI,这样非常美观既可以看到我们的身份验证效果,那么IdentityServer官方已经给我们提供了一套UI了,我们从哪里可以获取呢?
可以通过这个地址就行克隆安装到本地并附加到你的MVC程序中,地址。当然我们可以根据PowerShell 进行远程拉取(以下命令在项目根目录进行Code)
在Windows中我们的命令如下:
iex ((New-Object System.Net.WebClient).DownloadString('https://raw.githubusercontent.com/IdentityServer/IdentityServer4.Quickstart.UI/master/getmaster.ps1'))
或者在macOS或Linux上使用bash one-line:
curl -L https://raw.githubusercontent.com/IdentityServer/IdentityServer4.Quickstart.UI/master/getmaster.sh | bash
下图所示是我在Windows Powershell中进行远程拉取的。
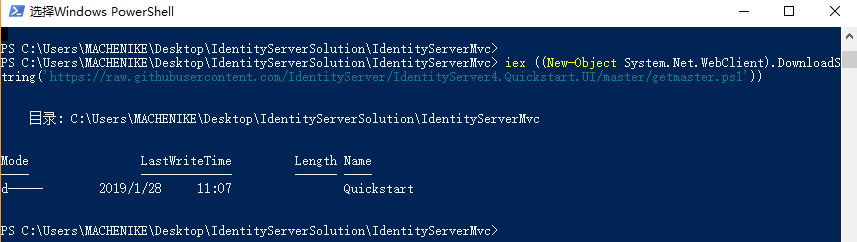
安装完项目中会添加一个Quickstart的这么一个文件夹,其中有IdentityServer给我们写好的代码,有控制器,模型,视图,静态文件等等。

当然还需要在Startup类中配置好你的MVC,这需要在ConfigureService里面将MVC添加到DI中并在Configure方法中将MVC中间件添加到管道上。
// This method gets called by the runtime. Use this method to add services to the container.
        public void ConfigureServices(IServiceCollection services)
        {
            services.AddMvc();

            JwtSecurityTokenHandler.DefaultInboundClaimTypeMap.Clear();

            services.AddAuthentication(options =>
            {
                options.DefaultScheme = "Cookies";
                options.DefaultChallengeScheme = "oidc";
            })  .AddCookie("Cookies")
                .AddOpenIdConnect("oidc", options =>
                {
                    options.Authority = "http://localhost:5000";
                    options.RequireHttpsMetadata = false;

                    options.ClientId = "mvc";
                    options.SaveTokens = true;
                });
        }
首先我们通过 AddAuthentication 将身份验证服务添加到我们的DI中。其中参数有三个,第一个 DefaultScheme 它呢可以设置我们通过Cookies进行保存登录信息。那么后面是我们的 DefaultChallengeScheme ,它的参数是 oidc ,也就是因为当我们需要用户登录时,我们将使用OpenID Connect协议。然后 AddCookie ,我们使用添加可处理cookie的处理程序。最后, AddOpenIdConnect 用于配置执行OpenID Connect协议的处理程序。这 Authority 表明我们信任IdentityServer。然后我们通过 ClientId 。识别这个客户。 SaveTokens 用于在cookie中保留来自IdentityServer的令牌,同时我还关闭了JWT声明映射,这样会让我们的应用程序流畅地通过: JwtSecurityTokenHandler.DefaultInboundClaimTypeMap.Clear(); 。
最后,我们需要让我们的认证请求达到响应,应在管道中的MVC之前添加认证中间件。
        // This method gets called by the runtime. Use this method to configure the HTTP request pipeline.
        public void Configure(IApplicationBuilder app, IHostingEnvironment env)
        {
            ///xxx//添加服务请求
            app.UseAuthentication();
       ///xxx
        }
为了触发验证,我们在 HomeController 中添加一个特性 [Authorize] 。还要修改该Action的View以显示用户的信息,例如:
@using Microsoft.AspNetCore.Authentication
<dl>
    @foreach (var claim in User.Claims)
    {
        <dt>@claim.Type</dt>
        <dd>@claim.Value</dd>
    }
</dl>

<h2>Properties</h2>

<dl>
    @foreach (var prop in (await Context.AuthenticateAsync()).Properties.Items)
    {
        <dt>@prop.Key</dt>
        <dd>@prop.Value</dd>
    }
</dl>
如果你现在启动的话,会出现内部错误,因为MVC客户端在认证平台服务器中并没有注册。
现在我们回到我们的认证服务中心,在Config.cs中添加如下代码(范围代表您想要保护的内容以及客户想要访问的内容。与OAuth相比,OIDC中的范围不代表API,而是代表用户ID,名称或电子邮件地址等身份数据。)
public static IEnumerable<IdentityResource> GetIdentityResources()
        {
            return new List<IdentityResource>
            {
                new IdentityResources.OpenId(),
                new IdentityResources.Profile(),
            };
        }
然后,您需要将这些身份资源添加到Startup.cs中的IdentityServer配置中。使用 AddInMemoryIdentityResources 扩展方法调用 AddIdentityServer() 。
public void ConfigureServices(IServiceCollection services)
        {
            // configure identity server with in-memory stores, keys, clients and scopes
            services.AddIdentityServer()
                .AddDeveloperSigningCredential()
                .AddInMemoryIdentityResources(Config.GetIdentityResources())
                .AddInMemoryApiResources(Config.GetSoluction())
                .AddInMemoryClients(Config.GetClients())
                //.AddTestUsers(Config.GetUsers());

            services.AddMvc().SetCompatibilityVersion(CompatibilityVersion.Version_2_1);
        }
最后一步是将MVC客户端的配置添加到IdentityServer。基于OpenID Connect的客户端与我们目前添加的OAuth 2.0客户端非常相似。但由于OIDC中的流程始终是交互式的,因此我们需要在配置中添加一些重定向URL。将以下内容添加到您的客户端配置:
public static IEnumerable<Client> GetClients()
{
    return new List<Client>
    {
        // other clients omitted...

        // OpenID Connect implicit flow client (MVC)
        new Client
        {
            ClientId = "mvc",
            ClientName = "MVC Client",
            AllowedGrantTypes = GrantTypes.Implicit,

            // where to redirect to after login
            RedirectUris = { "http://localhost:5002/signin-oidc" },

            // where to redirect to after logout
            PostLogoutRedirectUris = { "http://localhost:5002/signout-callback-oidc" },

            AllowedScopes = new List<string>
            {
                IdentityServerConstants.StandardScopes.OpenId,
                IdentityServerConstants.StandardScopes.Profile
            }
        }
    };
}
就这样我们启动项目,现在启动项目也就没有什么问题了。

其中我们用到了IdentityServer的Quickstart,虽说已经写好了很多相关的控制器等等,这个Ui但是还是自己写个好,或者改造!
总结:这篇文章说明了Server和Client之间的配置关系,Client不用管Server,只需要知道 Authority 的地址,携带其中的 ClientId ,而Server中相比上一篇文章中我们多了 Client 里面有ClientId用于和Client端匹配,那么我们就可以存到数据库中!而Server端需要注入Client信息,通过 AddInMemoryClients 方法。当然你想到这里了,那么就一定可以介入QQ登录、微信登录了、后续的文章会写这些!