CSS
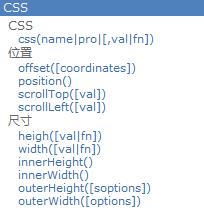
css
<!DOCTYPE html>
<html>
<head>
<meta charset="UTF-8">
<title>11_css</title>
</head>
<body>
    <p style="color: blue;">后裔</p>
    <p style="color: green;">太阳的后裔</p>

    <!--
设置css样式/读取css值
  css()
-->
    <script src="js/jquery-1.10.1.js" type="text/javascript"></script>
    <script type="text/javascript">
        /*
         1. 得到第一个p标签的颜色
         2. 设置所有p标签的文本颜色为red
         3. 设置第2个p的字体颜色(#ff0011),背景(blue),宽(300px), 高(30px)
         */
        //1. 得到第一个p标签的颜色
        //console.log($('p:first').css('color'))


        //2. 设置所有p标签的文本颜色为red
        //$('p').css('color', 'red')


        //3. 设置第2个p的字体颜色(#ff0011),背景(blue),宽(300px), 高(30px)
        $('p:eq(1)').css({
            color : '#ff0011',
            background : 'blue',
            width : 300,
            height : 30
        })
    </script>
</body>
</html>
offset/ position
<!DOCTYPE html>
<html>
<head>
<meta charset="UTF-8">
<title>12_offset和position</title>
</head>
<style type="text/css">
* {
    margin: 0px;
}

.div1 {
    position: absolute;
    width: 200px;
    height: 200px;
    top: 20px;
    left: 10px;
    background: blue;
}

.div2 {
    position: absolute;
    width: 100px;
    height: 100px;
    top: 50px;
    background: red;
}

.div3 {
    position: absolute;
    top: 250px;
}
</style>
<body style="height: 2000px;">

    <div class="div1">
        <div class="div2">测试offset</div>
    </div>

    <div class='div3'>
        <button id="btn1">读取offset和position</button>
        <button id="btn2">设置offset</button>
    </div>

    <!--
获取/设置标签的位置数据
  * offset(): 相对页面左上角的坐标
  * position(): 相对于父元素左上角的坐标
-->
    <script src="js/jquery-1.10.1.js" type="text/javascript"></script>
    <script type="text/javascript">
        /*
        需求:
        1. 点击 btn1
          打印 div1 相对于页面左上角的位置
          打印 div2 相对于页面左上角的位置
          打印 div1 相对于父元素左上角的位置
          打印 div2 相对于父元素左上角的位置
        2. 点击 btn2
          设置 div2 相对于页面的左上角的位置
         */
        $('#btn1').click(function() {
            //    打印 div1 相对于页面左上角的位置
            var offset = $('.div1').offset()
            console.log(offset.left, offset.top) // 10 20
            //    打印 div2 相对于页面左上角的位置
            offset = $('.div2').offset()
            console.log(offset.left, offset.top) // 10 70
            //    打印 div1 相对于父元素左上角的位置
            var position = $('.div1').position()
            console.log(position.left, position.top) // 10 20
            //    打印 div2 相对于父元素左上角的位置
            position = $('.div2').position()
            console.log(position.left, position.top) // 0 50
        })

        $('#btn2').click(function() {
            $('.div2').offset({
                left : 50,
                top : 100
            })
        })
    </script>
</body>
</html>
scrollTop
<!DOCTYPE html>
<html>

<head>
<meta charset="UTF-8">
<title>13_元素滚动</title>
</head>
<body style="height: 2000px;">
    <div
        style="border: 1px solid black;  100px; height: 150px; overflow: auto">
        This is some text. This is some text. This is some text. This is some
        text. This is some text. This is some text. This is some text. This is
        some text. This is some text. This is some text. This is some text.
        This is some text. This is some text. This is some text. This is some
        text. This is some text. This is some text. This is some text. This is
        some text. This is some text. This is some text. This is some text.
        This is some text. This is some text. his is some text.</div>
    <br>
    <br>
    <br>
    <button id="btn1">得到scrollTop</button>
    <button id="btn2">设置scrollTop</button>

    <!--
1. scrollTop():
  读取/设置滚动条的Y坐标
2. $(document.body).scrollTop()+$(document.documentElement).scrollTop()
  读取页面滚动条的Y坐标(兼容chrome和IE)
3. $('body,html').scrollTop(60);
  滚动到指定位置(兼容chrome和IE)
-->
    <script src="js/jquery-1.10.1.js"></script>
    <script>
        /*
         需求:
         1. 得到div或页面滚动条的坐标
         2. 让div或页面的滚动条滚动到指定位置
         */

        //1. 得到div或页面滚动条的坐标
        $('#btn1').click(
                function() {
                    console.log($('div').scrollTop())
                    // console.log($('html').scrollTop()+$('body').scrollTop())
                    console.log($(document.documentElement).scrollTop()
                            + $(document.body).scrollTop()) // 兼容IE/Chrome
                })
//2. 让div或页面的滚动条滚动到指定位置
        $('#btn2').click(function() {
            $('div').scrollTop(200)
            $('html,body').scrollTop(300)
        })
    </script>
</body>

</html>
动态回到顶部
<!DOCTYPE html>
<html>

<head>
<meta charset="UTF-8">
<title>03_回到顶部</title>
<style>
#to_top {
    width: 30px;
    height: 40px;
    font: 14px/20px arial;
    text-align: center;
    background: #06c;
    position: fixed;
    cursor: pointer;
    color: #fff;
    left: 1050px;
    top: 500px;
}
</style>
</head>
<body style="height: 2000px;">

    <div id="to_top">返回顶部</div>

    <script type="text/javascript" src="jquery-1.10.1.js"></script>
    <script type="text/javascript">
        $('#to_top').click(function() {
            // 瞬间滚到顶部
            //$('html,body').scrollTop(0)

            // 平滑滚到顶部
            // 总距离
            var $page = $('html,body')
            var distance = $('html').scrollTop() + $('body').scrollTop()
            // 总时间
            var time = 500
            // 间隔时间
            var intervalTime = 50
            var itemDistance = distance / (time / intervalTime)
            // 使用循环定时器不断滚动
            var intervalId = setInterval(function() {
                distance -= itemDistance
                // 到达顶部, 停止定时器
                if (distance <= 0) {
                    distance = 0 //修正
                    clearInterval(intervalId)//清除定时器
                }
                $page.scrollTop(distance)
            }, intervalTime)

        })
    </script>
</body>

</html>
元素尺寸
<!DOCTYPE html>
<html>
<head>
<meta charset="UTF-8">
<title>14_元素的尺寸</title>
</head>
<style>
div {
    width: 100px;
    height: 150px;
    background: red;
    padding: 10px;
    border: 10px #fbd850 solid;
    margin: 10px;
}
</style>
</head>

<body>
    <div>div</div>

    <!--
1. 内容尺寸
  height(): height
  width(): width
2. 内部尺寸
  innerHeight(): height+padding
  innerWidth(): width+padding
3. 外部尺寸// 默认为 true
  outerHeight(false/true): height+padding+border  如果是true, 加上margin
  outerWidth(false/true): width+padding+border 如果是true, 加上margin
-->
    <script src="js/jquery-1.10.1.js" type="text/javascript"></script>
    <script>
        var $div = $('div')//$div 为对象    $('div')为函数,返回的为对象($div)
        // 1. 内容尺寸
        console.log($div.width(), $div.height()) // 100 150
        // 2. 内部尺寸
        console.log($div.innerWidth(), $div.innerHeight()) //120 170
        // 3. 外部尺寸
        console.log($div.outerWidth(), $div.outerHeight()) //140 190
        console.log($div.outerWidth(true), $div.outerHeight(true)) //160 210
    </script>
</body>

</html>