在我们实际项目中,轮播图(走马灯)是一个使用很频繁的功能组件。今天就自己动手实现一个简单的轮播图组件,在实际动手中加深对基础知识的理解,在项目中更加熟练的去应用。
首先整理下实现此组件的基本功能以及思路:
1.把几张图片放置在一个容器中,每次只显示一张
2.根据图片在容器中的偏移来控制当前显示哪张图片
3.通过计时器来控制循环显示
4.根据指示控件可手动控制显示哪张图片
5.显示当前图片的描述信息
小技巧:图片播放完最后一张切换到第一张的时候,会有明显的切换闪烁的痕迹,为了做到顺滑的切换,我们会在最后位置插入第一张图片作为过渡。
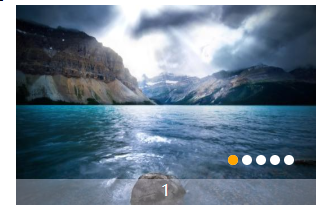
效果图:
首先准备素材图片,在assets文件夹下新建一个img文件夹,把素材图片放置在这个目录下面。
既然是和业务不相关的独立组件,图片列表需要从使用的父组件进行传入,首先定义下父组件需要传值的数据结构:
[
{ title: "1", path: require("@/assets/img/1.jpg"), url: "#" },
{ title: "2", path: require("@/assets/img/2.jpg"), url: "#" },
{ title: "3", path: require("@/assets/img/3.jpg"), url: "#" },
{ title: "4", path: require("@/assets/img/4.jpg"), url: "#" },
{ title: "5", path: require("@/assets/img/5.jpg"), url: "#" }
]
- title:显示图片的标题信息
- path:图片加载的路径
- url:点击图片后跳转的地址
知识点:
其中的@符号是Vue中的别名,表示src目录。这是Vue默认配置好的,可以在vue.config.js(使用vue cli 3之前的版本请在webpack.config.js中配置)中配置resolve、alias。
一、实现图片轮播
新建一个名称为Carousel的vue组件。在props中定义个名称为list的参数,类型定义为数组,默认值为空,并且作为必传值。如下:
props: {
list: {
type: Array,
required: true,
default() {
return []
}
}
}
知识点:
1.父子组件传值:通过Prop向子组件传递数据。Prop类型可以是一个组数或是一个对象,数组方式无法指定参数的类型。如上面通过对象声明的list参数为例,类型类数组(Array),必传(required),默认值(default)
实现步骤:
1.在模板中展示list数据,为了切换的更加顺滑,我们把数据的第一条数据提取出来,为了更改的获取第一条数据,我们把它放在计算属性firstItem中。
2.更改样式,让图片显示在同一行,并且隐藏滚动条。
3.设置图片容器大小,和一张图片的大小保持一致,只允许显示一张图片。在data中定义两个属性,width和height。在这里我们定义sizeStyle的计算属性,来响应式的设置容器大小。
到这里基本内容已经布局好了,下面就开始让图片动起来。
1.在methods中新增begin方法,在mounted中调用
2.在begin方法中定义一个计时器,2s触发一次
3.然后在methods中定义一个move方法,在begin方法中调用此方法
4.在move方法中定义根据当前需要显示的图片index计算偏移量,并绑定到容器的style attribute上
代码如下:
<style scoped>
.carousel {
display: flex;
overflow: hidden;
position: relative;
margin: 0 auto;
width: 100%;
height: 100%;
}
</style>
<template>
<div class="carousel" :style="sizeStyle">
<div :style="scrollStyle" v-for="(item) in list" :key="item.title">
<a :href="item.url">
<img :src="item.path" :alt="item.title" :style="sizeStyle" />
</a>
</div>
<!-- 过渡图片 -->
<div :style="scrollStyle">
<a :href="firstItem.url">
<img :src="firstItem.path" :alt="firstItem.title" :style="sizeStyle" />
</a>
</div>
</div>
</template>
<script>
let timer;
export default {
name: "Carousel",
props: {
list: {
type: Array,
required: true,
default() {
return [];
}
}
},
data() {
return {
 300,
height: 200,
currentIndex: 1,
scrollStyle: { transform: "translateX(0px)" }
};
},
mounted() {
this.begin();
},
computed: {
firstItem() {
return this.list[0];
},
sizeStyle() {
return {  this.width + "px", height: this.height + "px" };
}
},
methods: {
begin() {
timer = setInterval(() => {
this.move();
}, 2000);
},
move() {
const index = this.currentIndex % this.list.length;
let end = -index * this.width;

this.scrollStyle = {
transform: "translateX(" + end + "px)"
};
this.currentIndex++;
}
},
destroyed() {
clearInterval(timer);
timer = null;
}
};
</script>
知识点:
1.v-for指令:列表渲染
2.v-bind指令(缩写:):响应式的更改html attribute
3.class和style的绑定
二、添加动画
此组件创建了两个动画效果:平移和渐变。
1.平移
平移效果是使用计时器改变偏移量来实现的,主要代码如下:
<template>
<div class="carousel" :style="sizeStyle">
<div :style="scrollStyle" v-for="(item) in list" :key="item.title">
<a :href="item.url">
<img
:src="item.path"
:alt="item.title"
:style="sizeStyle"
/>
</a>
</div>
<!-- 过渡图片 -->
<div :style="scrollStyle">
<a :href="firstItem.url">
<img
:src="firstItem.path"
:alt="firstItem.title"
:style="sizeStyle"
/>
</a>
</div>
</div>
</template>
<script>
let timer;
let transtionTimer;
export default {
name: "Carousel",
props: {
list: {
type: Array,
required: true,
default() {
return [];
}
}
},
data() {
return {
 300,
height: 200,
currentIndex: 1,
scrollStyle: { transform: "translateX(0px)" }
};
},
mounted() {
this.begin();
},
computed: {
firstItem() {
return this.list[0];
},
number() {
return this.list.length + 1;
},
sizeStyle() {
return {  this.width + "px", height: this.height + "px" };
}
},
methods: {
begin() {
timer = setInterval(() => {
if (transtionTimer) {
return;
}
this.scroll();
}, 2000);
},
scroll() {
let start = -(((this.currentIndex - 1) % this.number) * this.width);
let end = -(this.currentIndex % this.number) * this.width;
if (end == 0) {
start = 0;
end = -this.width;
}
this.move(start, end);
},
move(start, end) {
let offset = this.width / 20;
//定时器,实现平移效果
transtionTimer = setInterval(() => {
start = start - offset;
if (start <= end) {
clearInterval(transtionTimer);
transtionTimer = null;
start = end;
if (this.currentIndex % this.number == 0) {
this.currentIndex = 1;
} else {
this.currentIndex++;
// 过渡效果:移动到最后一张图后(我们在最后加的第一张图片),把偏移量设置为0,自动切换成第一图
if (this.currentIndex == this.number) {
this.currentIndex = 1;
start = 0;
}
}
}
this.scrollStyle = {
transform: "translateX(" + start + "px)"
};
}, 20);
}
},
destroyed() {
clearInterval(timer);
timer = null;
clearInterval(transtionTimer);
transtionTimer = null;
}
};
</script>
<style scoped>
.carousel {
display: flex;
overflow: hidden;
position: relative;
margin: 0 auto;
width: 100%;
height: 100%;
}
</style>
2.渐变效果
渐变效果主要是通过css动画来实现的。未显示的图片可见度默认为0.1,展示后设置为1,然后通过css animation实现动画效果。
主要代码如下:
/* 动画效果 */
.selected {
opacity: 1;
animation: myOpacity 0.6s;
}
.unSelect {
opacity: 0.1;
}

@keyframes myOpacity {
0% {
opacity: 0.1;
}
25% {
opacity: 0.25;
}
50% {
opacity: 0.5;
}
75% {
opacity: 0.75;
}
100% {
opacity: 1;
}
}
<div class="carousel" :style="sizeStyle">
<div :style="scrollStyle" v-for="(item,index) in list" :key="item.title">
<a :href="item.url">
<img
:src="item.path"
:alt="item.title"
:style="sizeStyle"
:class="(currentIndex==index+1)?'selected':'unSelect'"
/>
</a>
</div>
<!-- 过渡图片 -->
<div :style="scrollStyle">
<a :href="firstItem.url">
<img
:src="firstItem.path"
:alt="firstItem.title"
:style="sizeStyle"
:class="(currentIndex==1)?'selected':'unSelect'"
/>
</a>
</div>
</div>
三、添加指示控件
指示控件和图片数量一致,并一一对应。当切换到当前图片后,指示控件高亮显示,并且可以手动点击指示控件来展示对应的图片。
1.首先根据图片数组来加载指示控件
2.在控件上添加click监听事件
3.如果当前图片被展示,指示控件高亮显示
代码如下:
html:
<div class="dotList">
<span @click="handleSwitch(index)" class="dot" v-for="(item,index) in list" :key="item.title">
<div v-show="currentIndex==index+1" class="dot-actived"></div>
</span>
</div>
css:
.dotList {
display: flex;
position: absolute;
z-index: 1000;
right: 20px;
bottom: 40px;
}
.dot {
width: 10px;
height: 10px;
margin: 0 2px;
background: #fff;
border-radius: 50%;
display: flex;
cursor: pointer;
}

.dot-actived {
width: 10px;
height: 10px;
border-radius: 50%;
background: orange;
}
js:
handleSwitch(index) {
clearInterval(transtionTimer);
transtionTimer = null;
clearInterval(timer);
timer = null;
this.currentIndex = index + 1;

this.scrollStyle = {
transform: "translateX(" + -(index % this.number) * this.width + "px)",
transition: "opacity 0.6s linear"
};
this.begin();
}
知识点:
1.v-show指令:用于条件性地渲染一块内容。元素总是会被渲染,并且只是简单地基于 CSS 进行切换
2.v-for指令:用于条件性地渲染一块内容。是“真正”的条件渲染,因为它会确保在切换过程中条件块内的事件监听器和子组件适当地被销毁和重建
3.v-on(缩写@):监听DOM事件
四、添加Title描述信息
Title主要是展示图片的描述信息,并且父组件可以设置是否显示。
1.首先在props中添加showTitle参数,默认是true
2.在图片列表中添加span标签,来展示title信息
主要代码如下:
<div class="carousel" :style="sizeStyle">
<div :style="scrollStyle" v-for="(item,index) in list" :key="item.title">
<a :href="item.url">
<img
:src="item.path"
:alt="item.title"
:style="sizeStyle"
:class="(currentIndex==index+1)?'selected':'unSelect'"
/>
</a>
<span v-if="showTitle" class="title">{{item.title}}</span>
</div>
<!-- 过渡图片 -->
<div :style="scrollStyle">
<a :href="firstItem.url">
<img
:src="firstItem.path"
:alt="firstItem.title"
:style="sizeStyle"
:class="(currentIndex==1)?'selected':'unSelect'"
/>
</a>
<span v-if="showTitle" class="title">{{firstItem.title}}</span>
</div>
<!-- 指示控件 -->
<div class="dotList">
<span @click="handleSwitch(index)" class="dot" v-for="(item,index) in list" :key="item.title">
<div v-show="currentIndex==index+1" class="dot-actived"></div>
</span>
</div>
</div>
props: {
list: {
type: Array,
required: true,
default() {
return [];
}
},
showTitle: {
type: Boolean,
default() {
return true;
}
}
}
.title {
height: 30px;
background: rgba(213, 213, 230, 0.4);
text-align: center;
position: absolute;
transform: translateY(-100%);
color: #fff;
display: flex;
width: 100%;
justify-content: center;
}
完整代码如下:


  1 <template>
  2   <div class="carousel" :style="sizeStyle">
  3     <div :style="scrollStyle" v-for="(item,index) in list" :key="item.title">
  4       <a :href="item.url">
  5         <img
  6           :src="item.path"
  7           :alt="item.title"
  8           :style="sizeStyle"
  9           :class="(currentIndex==index+1)?'selected':'unSelect'"
 10         />
 11       </a>
 12       <span v-if="showTitle" class="title">{{item.title}}</span>
 13     </div>
 14     <!-- 过渡图片 -->
 15     <div :style="scrollStyle">
 16       <a :href="firstItem.url">
 17         <img
 18           :src="firstItem.path"
 19           :alt="firstItem.title"
 20           :style="sizeStyle"
 21           :class="(currentIndex==1)?'selected':'unSelect'"
 22         />
 23       </a>
 24       <span v-if="showTitle" class="title">{{firstItem.title}}</span>
 25     </div>
 26     <!-- 指示控件 -->
 27     <div class="dotList">
 28       <span @click="handleSwitch(index)" class="dot" v-for="(item,index) in list" :key="item.title">
 29         <div v-show="currentIndex==index+1" class="dot-actived"></div>
 30       </span>
 31     </div>
 32   </div>
 33 </template>
 34
 35 <script>
 36 let timer;
 37 let transtionTimer;
 38 export default {
 39   name: "Carousel",
 40   props: {
 41     list: {
 42       type: Array,
 43       required: true,
 44       default() {
 45         return [];
 46       }
 47     },
 48     showTitle: {
 49       type: Boolean,
 50       default() {
 51         return true;
 52       }
 53     }
 54   },
 55   data() {
 56     return {
 57        300,
 58       height: 200,
 59       currentIndex: 1,
 60       scrollStyle: { transform: "translateX(0px)" }
 61     };
 62   },
 63   mounted() {
 64     this.begin();
 65   },
 66   computed: {
 67     firstItem() {
 68       return this.list[0];
 69     },
 70     number() {
 71       return this.list.length + 1;
 72     },
 73     sizeStyle() {
 74       return {  this.width + "px", height: this.height + "px" };
 75     }
 76   },
 77   methods: {
 78     begin() {
 79       timer = setInterval(() => {
 80         if (transtionTimer) {
 81           return;
 82         }
 83         this.scroll();
 84       }, 2000);
 85     },
 86     scroll() {
 87       let start = -(((this.currentIndex - 1) % this.number) * this.width);
 88       let end = -(this.currentIndex % this.number) * this.width;
 89       if (end == 0) {
 90         start = 0;
 91         end = -this.width;
 92       }
 93       this.move(start, end);
 94     },
 95     move(start, end) {
 96       let offset = this.width / 20;
 97       //定时器,实现平移效果
 98       transtionTimer = setInterval(() => {
 99         start = start - offset;
100         if (start <= end) {
101           clearInterval(transtionTimer);
102           transtionTimer = null;
103           start = end;
104           if (this.currentIndex % this.number == 0) {
105             this.currentIndex = 1;
106           } else {
107             this.currentIndex++;
108             // 过渡效果:移动到最后一张图后(我们在最后加的第一张图片),把偏移量设置为0,自动切换成第一图
109             if (this.currentIndex == this.number) {
110               this.currentIndex = 1;
111               start = 0;
112             }
113           }
114         }
115         this.scrollStyle = {
116           transform: "translateX(" + start + "px)"
117         };
118       }, 20);
119     },
120     handleSwitch(index) {
121       clearInterval(transtionTimer);
122       transtionTimer = null;
123       clearInterval(timer);
124       timer = null;
125       this.currentIndex = index + 1;
126
127       this.scrollStyle = {
128         transform: "translateX(" + -(index % this.number) * this.width + "px)",
129         transition: "opacity 0.6s linear"
130       };
131       this.begin();
132     }
133   },
134   destroyed() {
135     clearInterval(timer);
136     timer = null;
137     clearInterval(transtionTimer);
138     transtionTimer = null;
139   }
140 };
141 </script>
142
143 <style scoped>
144 .carousel {
145   display: flex;
146   overflow: hidden;
147   position: relative;
148   margin: 0 auto;
149   width: 100%;
150   height: 100%;
151 }
152
153 /* 动画效果 */
154 .selected {
155   opacity: 1;
156   animation: myOpacity 0.6s;
157 }
158 .unSelect {
159   opacity: 0.1;
160 }
161
162 @keyframes myOpacity {
163   0% {
164     opacity: 0.1;
165   }
166   25% {
167     opacity: 0.25;
168   }
169   50% {
170     opacity: 0.5;
171   }
172   75% {
173     opacity: 0.75;
174   }
175   100% {
176     opacity: 1;
177   }
178 }
179
180 .dotList {
181   display: flex;
182   position: absolute;
183   z-index: 1000;
184   right: 20px;
185   bottom: 40px;
186 }
187 .dot {
188   width: 10px;
189   height: 10px;
190   margin: 0 2px;
191   background: #fff;
192   border-radius: 50%;
193   display: flex;
194   cursor: pointer;
195 }
196
197 .dot-actived {
198   width: 10px;
199   height: 10px;
200   border-radius: 50%;
201   background: orange;
202 }
203
204 .title {
205   height: 30px;
206   background: rgba(213, 213, 230, 0.4);
207   text-align: center;
208   position: absolute;
209   transform: translateY(-100%);
210   color: #fff;
211   display: flex;
212   width: 100%;
213   justify-content: center;
214 }
215 </style>
以上就是创建自定义轮播图组件的整个流程,实现了最基本的轮播、手动点击切换。
写在最后:
一个看似简单的功能,在实际实现过程中可能会遇到很多意想不到的问题,遇到问题、分析问题、并通过不同的方案解决问题,才能有效的提升自己。