在前面文章中,为了使数据回显,使用的技术思路是,首先,将数据持久化写到ROM或者SDCard中,其中name和password以":"分隔;然后,将数据记取出来,再用split方法将数据切割,分割后的数据再set到输入框中.整个过程可谓是相当麻烦,一不小心就会报空指针的错误,而且很容易忘记写参数.下面将学习一个叫SharedPreference东西.SharedPreference主要用来保存参数.
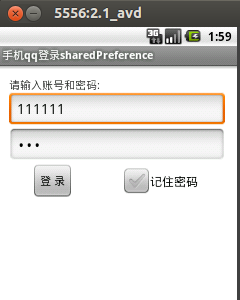
1.效果:

2.实现代码
package com.amos.sharedpreference;

import android.app.Activity;
import android.content.SharedPreferences;
import android.content.SharedPreferences.Editor;
import android.os.Bundle;
import android.view.View;
import android.view.View.OnClickListener;
import android.widget.Button;
import android.widget.CheckBox;
import android.widget.EditText;

public class MainActivity extends Activity implements OnClickListener {
    String tag = "MainActivity";
    EditText et_name;// 用户名
    EditText et_password;// 密码
    Button bt_login;// 登录按钮
    CheckBox cb_password;// 单选框

    // 用来保存参数的接口
    SharedPreferences sharedPreference;

    @Override
    protected void onCreate(Bundle savedInstanceState) {
        super.onCreate(savedInstanceState);
        setContentView(R.layout.activity_main);
        // 初始化
        et_name = (EditText) this.findViewById(R.id.et_name);
        et_password = (EditText) this.findViewById(R.id.et_password);
        bt_login = (Button) this.findViewById(R.id.bt_login);
        cb_password = (CheckBox) this.findViewById(R.id.cb_password);

        // 初始化参数配置
        sharedPreference=this.getSharedPreferences("spconfig", MODE_PRIVATE);
        if(sharedPreference.getBoolean("issetup", false)){
            et_name.setText(sharedPreference.getString("name", ""));
            et_password.setText(sharedPreference.getString("password", ""));
        }


        // 注册监听事件
        bt_login.setOnClickListener(this);

    }

    @Override
    public void onClick(View v) {
        switch (v.getId()) {
        case R.id.bt_login:
            String name = et_name.getText().toString().trim();
            String password = et_password.getText().toString().trim();
            System.out.println("name:"+name);
            System.out.println("password:"+password);
            // 定义用来保存参数的接口
            Editor edit = sharedPreference.edit();
            edit.putString("name", name);
            edit.putString("password", password);
            edit.putBoolean("issetup", true);
            //清空编辑器
            //edit.clear();

            // 当有两个编辑器(Editor)进行编辑同一个sharedPreference时,最后一个提交的将会生效
            edit.commit();

        default:
            break;
        }

    }

}
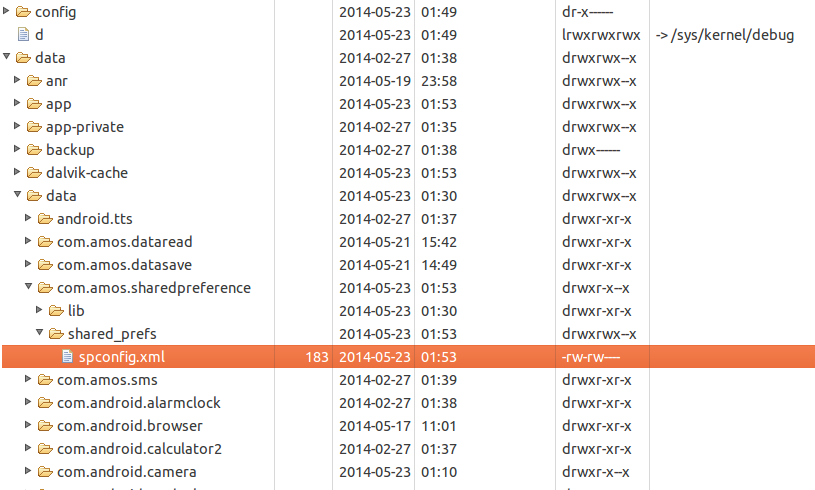
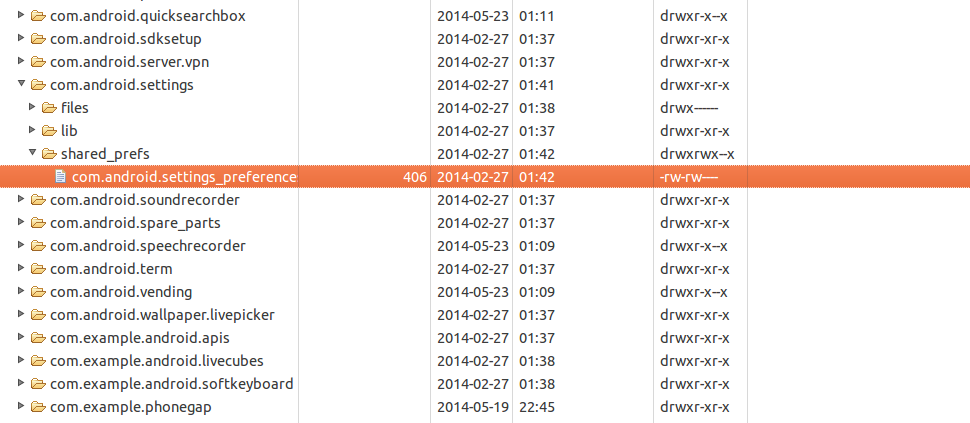
sharedpreference的使用是相当方便,这里同样会将用户名密码保存下来,但这里不同点在于,通过sharedPreference会生成规整的xml的文件,这里主要用到的是Edit类中的方法去put值到相应的位置.一般情况下其它配置也是会保存到sharedPreference中,如setting:
3.补充
1).使用openFileInput('...')读取数据.
前面文章中将密码写到rom文件中主要采用的是openFileOutput('XXX/xxx').
这里同样可以类似的通过openFileInput('xx/xxx')进行读取文件.比较简单,这里不再举例.
2).使用命令生成sdcard
t-bundle-linux-x86_64-20131030/sdk/tools$ ./mksdcard 20
mksdcard: create a blank FAT32 image to be used with the Android emulator
usage: mksdcard [-l label] <size> <file>

  if <size> is a simple integer, it specifies a size in bytes
  if <size> is an integer followed by 'K', it specifies a size in KiB
  if <size> is an integer followed by 'M', it specifies a size in MiB
  if <size> is an integer followed by 'G', it specifies a size in GiB

Minimum size is 9M. The Android emulator cannot use smaller images.
Maximum size is 1099511627264 bytes, 1073741823K, 1048575M or 1023G
amosli@amosli-pc:/media/f91a4cca-0b96-4c30-b140-7918a196de3e/amosli/java/soft/adt-bundle-linux-x86_64-20131030/sdk/tools$
3).更新ADT(android development tools )
方法一:将 https://dl-ssl.google.com/android/eclipse/ 链接加入到, Help > Install New Software > add url
方法二:直接下载zip包ADT-22.6.3.zip (https://dl.google.com/android/ADT-22.6.3.zip),不用解压.步骤与add url类似,官方介绍如下.
- Download the ADT Plugin zip file (do not unpack it):
Package Size MD5 Checksum ADT-22.6.3.zip 14590813 bytes 3982259fd2cc81e53bbbe05dcd6529a7 - Start Eclipse, then select Help > Install New Software.
- Click Add, in the top-right corner.
- In the Add Repository dialog, click Archive.
- Select the downloaded ADT-22.6.3.zip file and click OK.
- Enter "ADT Plugin" for the name and click OK.
- In the Available Software dialog, select the checkbox next to Developer Tools and click Next.
- In the next window, you'll see a list of the tools to be downloaded. Click Next.
- Read and accept the license agreements, then click Finish.
也可以直接从百度网盘中下载(推荐):http://pan.baidu.com/s/1i3rAc2D