Android PopupWindow 的使用非常广泛,PopupWindow的特点是悬浮在Activity之上的,PopupWindow可以悬浮在Activity的指定位置(X/Y);
PopupWindow 要显示的View,可以用布局加载器 加载自定义的布局文件,也可以加载 new ListView(),等等,非常的灵活
PopupWindow的使用:
package liudeli.ui.all;

import android.app.Activity;
import android.graphics.drawable.BitmapDrawable;
import android.os.Bundle;
import android.text.TextUtils;
import android.util.TypedValue;
import android.view.LayoutInflater;
import android.view.View;
import android.view.ViewGroup;
import android.view.WindowManager;
import android.widget.AdapterView;
import android.widget.ArrayAdapter;
import android.widget.EditText;
import android.widget.ListAdapter;
import android.widget.ListView;
import android.widget.PopupWindow;
import android.widget.Toast;

import java.util.ArrayList;
import java.util.List;

public class PopupActivity extends Activity {

    private final String TAG = PopupActivity.class.getSimpleName();

    private ListView listView;

    @Override
    protected void onCreate(Bundle savedInstanceState) {
        super.onCreate(savedInstanceState);

        setContentView(R.layout.activity_popup);

        // 初始化ListView
        listView = new ListView(this);
    }

    // 定义popupWindow
    private PopupWindow popupWindow;

    /**
     * 弹出popup
     * @param view
     */
    public void startPopup(View view) {

        /**
         * 真实开发中,初始化数据要写在onCreate()方法
         * 我写在这里是为了代码好区分
         */
        // 模拟数据
        final List<String> listData = new ArrayList<>();
        for (int i = 0; i < 10; i++) {
            listData.add("测试数据" + i + 1);
        }

        // 既然是数组简单类型的数据,就是用ArrayAdapter
        ListAdapter adapter = new ArrayAdapter<String>(this,
                android.R.layout.simple_list_item_1,
                android.R.id.text1,
                listData);

        // 把数据绑定给ListView
        listView.setAdapter(adapter);

        // 设置ListView条目点击事件监听
        listView.setOnItemClickListener(new AdapterView.OnItemClickListener() {
            @Override
            public void onItemClick(AdapterView<?> parent, View view, int position, long id) {
                String item = listData.get(position);
                Toast.makeText(PopupActivity.this, "" + item, Toast.LENGTH_SHORT).show();

                // 关闭popupWindow
                if (null != popupWindow) popupWindow.dismiss();
            }
        });

        if (null == popupWindow) {
            popupWindow = new PopupWindow();
            // 设置popupWindow宽度
            popupWindow.setWidth(360);
            // 设置popupWindow高度
            // popupWindow.setHeight(200);
            popupWindow.setHeight(ViewGroup.LayoutParams.WRAP_CONTENT);
            // 设置popupWindow焦点
            popupWindow.setFocusable(true);
            // 设置popupWindow去加载的ListView
            popupWindow.setContentView(listView);
            // 设置监听
            popupWindow.setOnDismissListener(new PopupWindow.OnDismissListener() {
                @Override
                public void onDismiss() {
                    Toast.makeText(PopupActivity.this, "popupWindow被关闭了", Toast.LENGTH_SHORT).show();
                }
            });
        }
        // 参数一:在那个控件旁边弹出
        // 参数二:距离控件X轴相关距离设置
        // 参数三:距离控件Y轴相关距离设置
        popupWindow.showAsDropDown(view, 0, 0);
    }


    // 定义popupWindow
    private PopupWindow popupWindow2;

    /**
     * 弹出popup 带动画
     * @param view
     */
    public void startPopup2(View view) {
        /**
         * 真实开发中,初始化数据要写在onCreate()方法
         * 我写在这里是为了代码好区分
         */
        // 模拟数据
        final List<String> listData = new ArrayList<>();
        for (int i = 2008; i < 2018; i++) {
            listData.add("" + i + 1);
        }

        // 既然是数组简单类型的数据,就是用ArrayAdapter
        ListAdapter adapter = new ArrayAdapter<String>(this,
                R.layout.popup_item,
                R.id.tv_year,
                listData);

        // 把数据绑定给ListView
        listView.setAdapter(adapter);

        // 设置ListView条目点击事件监听
        listView.setOnItemClickListener(new AdapterView.OnItemClickListener() {
            @Override
            public void onItemClick(AdapterView<?> parent, View view, int position, long id) {
                String item = listData.get(position);
                Toast.makeText(PopupActivity.this, "" + item, Toast.LENGTH_SHORT).show();

                // 点击条目后,关闭popupWindow
                if (null != popupWindow2) popupWindow2.dismiss();
            }
        });

        if (null == popupWindow2) {

            // 参数一:设置popupWindow去加载的ListView
            // 参数二:设置PopupWindow宽度
            // 参数三:设置PopupWindow高度,自动包裹,数据多大,我就多大
            popupWindow2 = new PopupWindow(listView, dp2px(80), ViewGroup.LayoutParams.WRAP_CONTENT);

            // 设置popupWindow焦点
            popupWindow2.setFocusable(true);

            // 设置监听
            popupWindow2.setOnDismissListener(new PopupWindow.OnDismissListener() {
                @Override
                public void onDismiss() {
                    Toast.makeText(PopupActivity.this, "popupWindow2被关闭了", Toast.LENGTH_SHORT).show();
                }
            });

            // 设置动画
            popupWindow2.setAnimationStyle(R.style.AnimationFade);
        }

        // 参数一:在那个控件旁边弹出
        // 参数二:距离控件X轴相关距离设置
        // 参数三:距离控件Y轴相关距离设置
        popupWindow2.showAsDropDown(view, 65, 10);
    }

    private PopupWindow popupWindow3;

    /**
     * 测试popup,测试如下:
     *                   1.setContentView(随意写的布局);
     *
     * @param view
     */
    public void testPopup(View view) {
        if (null == popupWindow3) {
            // 使用布局加载器,去加载一个布局
            View popupLogin = LayoutInflater.from(this).inflate(R.layout.popup_login, null);

            // 创建PopupWindow
            popupWindow3 = new PopupWindow();

            /**
             * 设置PopupWindow要加载的View
             * 这里的setContentView和Activity的setContentView很相似
             */
            popupWindow3.setContentView(popupLogin);

            // 设置PopupWindow显示的宽度
            popupWindow3.setWidth(dp2px(300));

            // 设置PopupWindow显示的高度
            popupWindow3.setHeight(dp2px(300));

            // 设置popupWindow焦点
            /*popupWindow3.setFocusable(true);
            popupWindow3.setOutsideTouchable(true);*/

            /**
             * android popupwindow 点击外部消失
             * 必须是在定义好popwindow3后,在ShowAtLocation方法调用之前加上
             */
            popupWindow3.setBackgroundDrawable(new BitmapDrawable());
            popupWindow3.setFocusable(true);
            popupWindow3.setOutsideTouchable(true);
            popupWindow3.update();

            // 监听Popup被关闭
            popupWindow3.setOnDismissListener(new PopupWindow.OnDismissListener() {
                @Override
                public void onDismiss() {
                    Toast.makeText(PopupActivity.this, "popupWindow3被关闭了", Toast.LENGTH_SHORT).show();
                    /**
                     * 恢复Activity背景透明度
                     */
                    backgroundAlpha(1f);
                }
            });

            // 设置动画效果
            popupWindow3.setAnimationStyle(R.style.AnimationFade);

            // setContentView的 popup_login 的 用户名EditText
            final EditText etName = popupLogin.findViewById(R.id.et_name);

            // setContentView的 popup_login 的 密码EditText
            final EditText etPwd = popupLogin.findViewById(R.id.et_pwd);

            // setContentView的 popup_login 的 登录按钮
            popupLogin.findViewById(R.id.bt_login).setOnClickListener(new View.OnClickListener() {
                @Override
                public void onClick(View v) {
                    if (TextUtils.isEmpty(etName.getText().toString()) || TextUtils.isEmpty(etPwd.getText().toString())) {
                        Toast.makeText(PopupActivity.this, "请输入用户名和密码", Toast.LENGTH_SHORT).show();
                        return;
                    }
                    if ("abc".equals(etName.getText().toString().trim()) && "123".equals(etPwd.getText().toString().trim())) {
                        Toast.makeText(PopupActivity.this, "登录成功", Toast.LENGTH_SHORT).show();
                        popupWindow3.dismiss();
                    } else {
                        Toast.makeText(PopupActivity.this, "密码或用户名错误", Toast.LENGTH_SHORT).show();
                    }
                }
            });

            //监听popupWindow3触屏事件,只要碰摸到popupWindow3,就会触发
            /*popupWindow3.setTouchInterceptor(new View.OnTouchListener() {
                @Override
                public boolean onTouch(View v, MotionEvent event) {
                    if (popupWindow3 != null && popupWindow3.isShowing()) {
                        popupWindow3.dismiss();
                    }
                    return false;
                }
            });*/
        }
        // 参数一:在那个控件旁边弹出
        // 参数二:距离控件X轴相关距离设置
        // 参数三:距离控件Y轴相关距离设置
        popupWindow3.showAsDropDown(view, -100, 100);

        /**
         * Android中popupwindow弹出后,控制屏幕背景的透明效果,
         * 可以设置一下getWindows的透明度。backgroundAlpha(0.5f);
         */
        backgroundAlpha(0.5f);
    }

    /**
     * 设置popupwindow外面背景透明度
     * @param bgalpha 透明度  0-1   0-透明   1-不透明
     */
    private void backgroundAlpha(float bgalpha) {
        WindowManager.LayoutParams lp = getWindow().getAttributes();
        lp.alpha = bgalpha;
        getWindow().setAttributes(lp);
    }

    /***
     *  在Java代码中必须要 dp px 转换
     */
    private int dp2px(int dp){
        return (int) TypedValue.applyDimension(TypedValue.COMPLEX_UNIT_DIP, dp,getResources().getDisplayMetrics());
    }
}
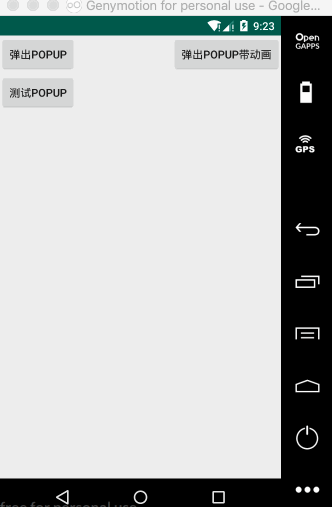
Activity引用的布局文件:activity_popup.xml
<?xml version="1.0" encoding="utf-8"?>
<RelativeLayout xmlns:android="http://schemas.android.com/apk/res/android"
    android:layout_width="match_parent"
    android:layout_height="match_parent">

    <Button
        android:layout_width="wrap_content"
        android:layout_height="wrap_content"
        android:text="弹出popup"
        android:onClick="startPopup"
        />

    <Button
        android:layout_width="wrap_content"
        android:layout_height="wrap_content"
        android:text="弹出popup带动画"
        android:onClick="startPopup2"
        android:layout_alignParentRight="true"
        />

    <Button
        android:layout_width="wrap_content"
        android:layout_height="wrap_content"
        android:layout_marginTop="49dp"
        android:text="测试popup"
        android:onClick="testPopup"
        />

</RelativeLayout>
values/styles.xml定义的动画:
  <!-- PopupWindow动画 -->
    <style name="AnimationFade">
        <!-- PopupWindow左右弹出的效果 -->
        <item name="android:windowEnterAnimation">@anim/inputodown</item>
        <item name="android:windowExitAnimation">@anim/outdowntoup</item>
    </style>
anim/的两个动画文件 inputodown.xml outdowntoup.xml
inputodown.xml:
<?xml version="1.0" encoding="UTF-8"?>
<set xmlns:android="http://schemas.android.com/apk/res/android" >

    <translate
        android:duration="500"
        android:fromYDelta="-100%"
        android:toYDelta="0" />

</set>
outdowntoup.xml:
<?xml version="1.0" encoding="UTF-8"?>
<set xmlns:android="http://schemas.android.com/apk/res/android" >

    <translate
        android:duration="500"
        android:fromYDelta="0"
        android:toYDelta="-100%" />

</set>
popupWindow2---> ListView --- > 适配器用到的 Item 布局:popup_item.xml
<?xml version="1.0" encoding="utf-8"?>
<RelativeLayout xmlns:android="http://schemas.android.com/apk/res/android"
    android:layout_width="match_parent"
    android:layout_height="wrap_content">

    <TextView
        android:id="@+id/tv_year"
        android:layout_width="wrap_content"
        android:layout_height="wrap_content"
        android:text="2019"
        android:paddingRight="6dp"
        android:paddingLeft="6dp"
        android:paddingTop="8dp"
        android:paddingBottom="8dp"
        android:layout_centerInParent="true"
        />

</RelativeLayout>
popupWindow setContent 用到的布局文件 popup_login.xml
<?xml version="1.0" encoding="utf-8"?>
<LinearLayout
    xmlns:android="http://schemas.android.com/apk/res/android"
    android:layout_width="match_parent"
    android:layout_height="match_parent"
    android:orientation="vertical"
    android:background="@android:color/white">

    <!--
        注意以下属性可以解决:EditText 在PopupWindow EditText无法获取焦点的问题
        android:windowSoftInputMode="adjustPan|stateHidden"
    -->
    <EditText
        android:id="@+id/et_name"
        android:layout_width="200dp"
        android:layout_height="40dp"
        android:hint="请输入用户名"
        android:layout_gravity="center"
        android:layout_margin="10dp"
        android:windowSoftInputMode="adjustPan|stateHidden"
        />

    <!--
        注意以下属性可以解决:EditText 在PopupWindow EditText无法获取焦点的问题
        android:windowSoftInputMode="adjustPan|stateHidden"
    -->
    <EditText
        android:id="@+id/et_pwd"
        android:layout_width="200dp"
        android:layout_height="40dp"
        android:hint="请输入密码"
        android:layout_gravity="center"
        android:layout_margin="10dp"
        android:inputType="textPassword"
        android:windowSoftInputMode="adjustPan|stateHidden"
        />

    <Button
        android:id="@+id/bt_login"
        android:layout_width="wrap_content"
        android:layout_height="wrap_content"
        android:text="登录"
        android:layout_gravity="center"
        android:layout_margin="10dp"
        />

</LinearLayout>
效果图: