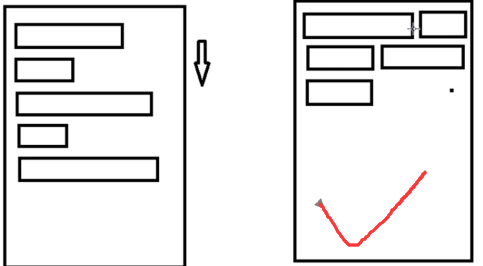
1、流式布局特点、应用场景。
2、自定义ViewGroup
(1)onMeasure:测量子View的宽和高,设置自己的宽和高。
(2)onLayout:设置子View的位置。
onMeasure:根据子View的布局文件,为子View设置测量模式和测量值。
测量 = 测量模式 + 测量值;
测量模式:3种。
(1)EXACTLY:100dp , match_parent。
(2)AT_MOST: wrap_content。
(3)UNSPCIFIED:子控件想要多大就多大,很少见。
ViewGroup - LayoutParams
FlowLayout - MarginLayoutParams
子View.getLayoutParams(); -> LinearLayout.LayoutParams
  1  import java.util.ArrayList;
  2 import java.util.List;
  3 import android.content.Context;
  4 import android.util.AttributeSet;
  5 import android.util.Log;
  6 import android.view.View;
  7 import android.view.ViewGroup;
  8
   // Source --- Generate Constructors from Superdass... ,生成三个构造方法。
  9 public class FlowLayout extends ViewGroup {
 10
 11     // 存储所有的View 一行一行的存储
 12     // 比如:一共三行 List就是3。一行有10个那么List<View> 就是10
 13     private List<List<View>> mAllViews = new ArrayList<List<View>>();
 14     // 每一行的高度
 15     private List<Integer> mLineHeight = new ArrayList<Integer>();
 16
 17     // 使用控件,及其实行,而且用了自定义的属性
 18     public FlowLayout(Context context, AttributeSet attrs, int defStyle) {
 19         super(context, attrs, defStyle);
 20         // 这样所有的逻辑就全部可以卸载这个里面去
 21     }
 22
 23     // 用到控件的属性(非自定义)
 24     public FlowLayout(Context context, AttributeSet attrs) {
 25         this(context, attrs, 0); // 调用三个构造参数方法
 26     }
 27
 28     // new一个控件的时候,我们传入一个上下文。
 29     public FlowLayout(Context context) {
 30         this(context, null); // 调用两个构造参数方法
 31     }
 32
 33     @Override
 34     protected void onMeasure(int widthMeasureSpec, int heightMeasureSpec) {
 35         // 宽度(测量值) 容器的宽度
 36         int sizeWidth = MeasureSpec.getSize(widthMeasureSpec);
 37         // 宽度(测量模式)
 38         // modeWidth == MeasureSpec.AT_MOST 用于判断
 39         int modeWidth = MeasureSpec.getMode(widthMeasureSpec);
 40
 41         int sizeHeight = MeasureSpec.getSize(heightMeasureSpec);
 42         int modeHeight = MeasureSpec.getMode(heightMeasureSpec);
 43
 44         // wrap_content (自己去计算)
 45         int width = 0;
 46         int height = 0;
 47
 48         // 记录每一行的宽度与高度
 49         int lineWidth = 0;
 50         int lineHeight = 0;
 51
 52         // 得到内部元素的个数
 53         int cCount = getChildCount();
 54
 55         for (int i = 0; i < cCount; i++) {
 56             View child = getChildAt(i);
 57             // 测量子View的宽和高
 58             measureChild(child, widthMeasureSpec, heightMeasureSpec);
 59             // 得到LayoutParams
 60             MarginLayoutParams lp = (MarginLayoutParams) child
 61                     .getLayoutParams();
 62
 63             // 子View占据的宽度
 64             int childWidth = child.getMeasuredWidth() + lp.leftMargin
 65                     + lp.rightMargin;
 66             // 子View占据的高度
 67             int childHeight = child.getMeasuredHeight() + lp.topMargin
 68                     + lp.bottomMargin;
 69
 70             // 换行
 71             // lineWidth:上一行的宽度 + childWidth:当前控件的宽度。
 72             // sizeWidth:当前容器的宽度。
 73             // "  - getPaddingLeft()- getPaddingRight() "
 74             // 是针对 android:padding="20dp"进行的。
 75             if (lineWidth + childWidth > sizeWidth - getPaddingLeft()
 76                     - getPaddingRight()) {
 77                 // 对比得到最大的宽度
 78                 width = Math.max(width, lineWidth);
 79                 // 重置lineWidth
 80                 lineWidth = childWidth;
 81                 // 记录行高
 82                 height += lineHeight;
 83                 lineHeight = childHeight;
 84             } else { // 未换行
 85                 // 叠加行宽
 86                 lineWidth += childWidth;
 87                 // 得到当前行最大的高度
 88                 lineHeight = Math.max(lineHeight, childHeight);
 89             }
 90             // 最后一个控件
 91             if (i == cCount - 1) {
 92                 width = Math.max(lineWidth, width);
 93                 height += lineHeight;
 94             }
 95         }
 96
 97         Log.e("TAG", "sizeWidth = " + sizeWidth);
 98         Log.e("TAG", "sizeHeight = " + sizeHeight);
 99
100         // 判断测量模式
101         // " + getPaddingLeft() + getPaddingRight() "
102         // 是针对 android:padding="20dp"进行的。
103         setMeasuredDimension(
104                 //
105                 modeWidth == MeasureSpec.EXACTLY ? sizeWidth : width
106                         + getPaddingLeft() + getPaddingRight(),
107                 modeHeight == MeasureSpec.EXACTLY ? sizeHeight : height
108                         + getPaddingTop() + getPaddingBottom()//
109         );
110
111     }
112
113     @Override
114     protected void onLayout(boolean changed, int l, int t, int r, int b) {
115         mAllViews.clear();
116         mLineHeight.clear();
117
118         // 当前ViewGroup的宽度
119         int width = getWidth();
120
121         int lineWidth = 0;
122         int lineHeight = 0;
123
124         List<View> lineViews = new ArrayList<View>();
125
126         int cCount = getChildCount();
127
128         for (int i = 0; i < cCount; i++) {
129             View child = getChildAt(i);
130             MarginLayoutParams lp = (MarginLayoutParams) child
131                     .getLayoutParams();
132
133             int childWidth = child.getMeasuredWidth();
134             int childHeight = child.getMeasuredHeight();
135
136             // 如果需要换行
137             // 当前行的宽度 + 当前列的宽度 + lp.leftMargin + lp.rightMargin
138             // " - getPaddingLeft() - getPaddingRight() "
139             // 是针对 android:padding="20dp"进行的。
140             if (childWidth + lineWidth + lp.leftMargin + lp.rightMargin > width
141                     - getPaddingLeft() - getPaddingRight()) {
142                 // 记录LineHeight
143                 mLineHeight.add(lineHeight);
144                 // 记录当前行的Views
145                 mAllViews.add(lineViews);
146
147                 // 重置我们的行宽和行高
148                 lineWidth = 0;
149                 lineHeight = childHeight + lp.topMargin + lp.bottomMargin;
150                 // 重置我们的View集合
151                 lineViews = new ArrayList<View>();
152             }
153             lineWidth += childWidth + lp.leftMargin + lp.rightMargin;
154             lineHeight = Math.max(lineHeight, childHeight + lp.topMargin
155                     + lp.bottomMargin);
156             lineViews.add(child);
157
158         }// for end
159             // 处理最后一行
160         mLineHeight.add(lineHeight);
161         mAllViews.add(lineViews);
162
163         // 设置子View的位置
164         // 是针对 android:padding进行的。
165         // 所以不能给left和top设置0。
166         int left = getPaddingLeft();
167         int top = getPaddingTop();
168
169         // 行数
170         int lineNum = mAllViews.size();
171
172         for (int i = 0; i < lineNum; i++) {
173             // 当前行的所有的View
174             lineViews = mAllViews.get(i);
175             lineHeight = mLineHeight.get(i);
176
177             for (int j = 0; j < lineViews.size(); j++) {
178                 View child = lineViews.get(j);
179                 // 判断child的状态
180                 if (child.getVisibility() == View.GONE) {
181                     continue;
182                 }
183
184                 MarginLayoutParams lp = (MarginLayoutParams) child
185                         .getLayoutParams();
186
187                 int lc = left + lp.leftMargin;
188                 int tc = top + lp.topMargin;
189                 int rc = lc + child.getMeasuredWidth();
190                 int bc = tc + child.getMeasuredHeight();
191
192                 // 为子View进行布局
193                 child.layout(lc, tc, rc, bc);
194
195                 left += child.getMeasuredWidth() + lp.leftMargin
196                         + lp.rightMargin;
197             }
198             // 每次循环完一行后
199             // 是针对 android:padding进行的。
200             // 所以不能给left设置0。
201             left = getPaddingLeft();
202             top += lineHeight; // 累加
203         }
204
205     }
206
207     /**
208      * 与当前ViewGroup对应的LayoutParams
209      */
210     @Override
211     public LayoutParams generateLayoutParams(AttributeSet attrs) {
212         return new MarginLayoutParams(getContext(), attrs);
213     }
214
215 }
<RelativeLayout xmlns:android="http://schemas.android.com/apk/res/android"
    xmlns:tools="http://schemas.android.com/tools"
    android:layout_width="match_parent"
    android:layout_height="match_parent" >

    <com.imooc.view.FlowLayout
        android:id="@+id/id_flowlayout"
        android:layout_width="fill_parent"
        android:layout_height="wrap_content"
        android:background="#E5E5F5"
        android:padding="20dp" >
    </com.imooc.view.FlowLayout>

</RelativeLayout>
 1 import android.app.Activity;
 2 import android.os.Bundle;
 3 import android.view.LayoutInflater;
 4 import android.widget.TextView;
 6 import com.imooc.view.FlowLayout;
 7
 8 public class MainActivity extends Activity {
 9
10     private String[] mVals = new String[] { "Hello", "Android", "Weclome Hi ",
11             "Button", "TextView", "Hello", "Android", "Weclome",
12             "Button ImageView", "TextView", "Helloworld", "Android",
13             "Weclome Hello", "Button Text", "TextView" };
14
15     private FlowLayout mFlowLayout;
16
17     @Override
18     protected void onCreate(Bundle savedInstanceState) {
19         super.onCreate(savedInstanceState);
20
21         setContentView(R.layout.activity_main);
22
23         mFlowLayout = (FlowLayout) findViewById(R.id.id_flowlayout);
24
25         initData();
26     }
27
28     public void initData() {
29         // for (int i = 0; i < mVals.length; i++)
30         // {
31         // Button btn = new Button(this);
32         //
33         // MarginLayoutParams lp = new MarginLayoutParams(
34         // MarginLayoutParams.WRAP_CONTENT,
35         // MarginLayoutParams.WRAP_CONTENT);
36         //
37         // btn.setText(mVals[i]);
38         // mFlowLayout.addView(btn, lp);
39         // }
40         LayoutInflater mInflater = LayoutInflater.from(this);
41         for (int i = 0; i < mVals.length; i++) {
42             TextView tv = (TextView) mInflater.inflate(R.layout.tv,
43                     mFlowLayout, false);
44             tv.setText(mVals[i]);
45             mFlowLayout.addView(tv);
46         }
48     }
50 }
 1 <?xml version="1.0" encoding="utf-8"?>
 2 <TextView xmlns:android="http://schemas.android.com/apk/res/android"
 3     android:layout_width="wrap_content"
 4     android:layout_height="wrap_content"
 5     android:layout_margin="5dp"
 6     android:background="@drawable/tv_bg"
 7     android:textColor="#5BC4ED"
 8     android:text="Helloworld" >
10 </TextView>
@drawable/tv_bg
 1 <?xml version="1.0" encoding="utf-8"?>
 2 <shape xmlns:android="http://schemas.android.com/apk/res/android" >
 3     <solid android:color="#ffffff" />
 4     <corners android:radius="30dp" />
 5     <padding
 6         android:bottom="2dp"
 7         android:left="10dp"
 8         android:right="10dp"
 9         android:top="2dp" />
10 </shape>