推送其实挺中意小米推送的,并经用户群占比还是比较大的,奈何拗不过php后端哥们的选型,就只好用信鸽推送了,期间接入过程中也是遇到不少问题,所以记录下来,以后如果还是用信鸽推送的话,估计看看以前的博客,也能少踩点坑。
因为最新版本是2.43,所以按照2.43的引入为准
1,导入jar包和so文件:

文件夹为信鸽推送必须的so文件:

2,针对so文件,gradle文件进行配置,生成第一张图里面的native_libs2的jar文件:

3,AndroidManifest.xml文件的配置,这个基本按照官网demo文件里面写的就行:
<!--(信鸽推送相关)-->
        <!-- 【必须】 (2.30及以上版新增)展示通知的activity -->
        <activity
            android:name="com.tencent.android.tpush.XGPushActivity"
            android:theme="@android:style/Theme.Translucent"
            android:exported="false">
            <intent-filter>
                <!-- 若使用AndroidStudio,请设置android:name="android.intent.action"-->
                <action android:name="android.intent.action"/>
            </intent-filter>
        </activity>

        <!-- 【必须】 信鸽receiver广播接收 -->
        <receiver
            android:name="com.tencent.android.tpush.XGPushReceiver"
            android:process=":xg_service_v2">
            <intent-filter android:priority="0x7fffffff">

                <!-- 【必须】 信鸽SDK的内部广播 -->
                <action android:name="com.tencent.android.tpush.action.SDK"/>
                <action android:name="com.tencent.android.tpush.action.INTERNAL_PUSH_MESSAGE"/>
                <!-- 【必须】 系统广播:网络切换 -->
                <action android:name="android.net.conn.CONNECTIVITY_CHANGE"/>

                <!-- 【可选】 系统广播:开屏 -->
                <action android:name="android.intent.action.USER_PRESENT"/>

                <!-- 【可选】 一些常用的系统广播,增强信鸽service的复活机会,请根据需要选择。当然,你也可以添加APP自定义的一些广播让启动service -->
                <action android:name="android.bluetooth.adapter.action.STATE_CHANGED"/>
                <action android:name="android.intent.action.ACTION_POWER_CONNECTED"/>
                <action android:name="android.intent.action.ACTION_POWER_DISCONNECTED"/>
            </intent-filter>
            <!-- 【可选】 usb相关的系统广播,增强信鸽service的复活机会,请根据需要添加 -->
            <intent-filter android:priority="0x7fffffff">
                <action android:name="android.intent.action.MEDIA_UNMOUNTED"/>
                <action android:name="android.intent.action.MEDIA_REMOVED"/>
                <action android:name="android.intent.action.MEDIA_CHECKING"/>
                <action android:name="android.intent.action.MEDIA_EJECT"/>

                <data android:scheme="file"/>
            </intent-filter>
        </receiver>
        <!-- 【必须】 信鸽service -->
        <service
            android:name="com.tencent.android.tpush.service.XGPushService"
            android:exported="true"
            android:persistent="true"
            android:process=":xg_service_v2"/>

        <!-- 【必须】 通知service,其中android:name部分要改为当前包名 -->
        <service
            android:name="com.tencent.android.tpush.rpc.XGRemoteService"
            android:exported="true">
            <intent-filter>
                <!-- 【必须】 请修改为当前APP名包.PUSH_ACTION,如demo的包名为:com.qq.xgdemo -->
                <action android:name="你的包名.PUSH_ACTION"/>
            </intent-filter>
        </service>

        <!-- 【可选】APP实现的Receiver,用于接收消息透传和操作结果的回调,请根据需要添加 -->
        <!-- YOUR_PACKAGE_PATH.CustomPushReceiver需要改为自己的Receiver: -->
        <receiver
            android:name=".push.MessageReceiver"
            android:exported="false">
            <intent-filter>
                <!-- 接收消息透传 -->
                <action android:name="com.tencent.android.tpush.action.PUSH_MESSAGE"/>
                <!-- 监听注册、反注册、设置/删除标签、通知被点击等处理结果 -->
                <action android:name="com.tencent.android.tpush.action.FEEDBACK"/>
            </intent-filter>
        </receiver>

        <!-- 【必须】 请修改为APP的AccessId,“21”开头的10位数字,中间没空格 -->
        <meta-data
            android:name="XG_V2_ACCESS_ID"
            android:value="你的AccessId"/>
        <!-- 【必须】 请修改为APP的AccessKey,“A”开头的12位字符串,中间没空格 -->
        <meta-data
            android:name="XG_V2_ACCESS_KEY"
            android:value="你的AccessKey"/>
还有就是相关权限:
<!-- 【必须】 信鸽SDK所需权限 -->
<uses-permission android:name="android.permission.INTERNET" />
<uses-permission android:name="android.permission.READ_PHONE_STATE" />
<uses-permission android:name="android.permission.ACCESS_WIFI_STATE" />
<uses-permission android:name="android.permission.ACCESS_NETWORK_STATE" />
<uses-permission android:name="android.permission.RECEIVE_BOOT_COMPLETED" />
<uses-permission android:name="android.permission.RESTART_PACKAGES" />
<uses-permission android:name="android.permission.BROADCAST_STICKY" />
<uses-permission android:name="android.permission.WRITE_SETTINGS" />
<uses-permission android:name="android.permission.RECEIVE_USER_PRESENT" />
<uses-permission android:name="android.permission.WRITE_EXTERNAL_STORAGE" />
<uses-permission android:name="android.permission.WAKE_LOCK" />
<uses-permission android:name="android.permission.KILL_BACKGROUND_PROCESSES" />
<uses-permission android:name="android.permission.GET_TASKS" />
<uses-permission android:name="android.permission.READ_LOGS" />
<uses-permission android:name="android.permission.VIBRATE" />
<!-- 【可选】 信鸽SDK所需权限 -->
<uses-permission android:name="android.permission.BLUETOOTH" />
<uses-permission android:name="android.permission.BATTERY_STATS" />
虽然很多,但是没办法,毕竟是中国特色,推送只能这样,才能勉强能够保证推送到达率。
4,相关代码的集成:
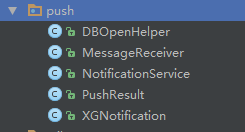
如上其实都是可以从demo文件里面拷贝出来的,其中messageReceiver是最重要的类,因为主要的推送信息是从这个类里面获取的。
public class MessageReceiver extends XGPushBaseReceiver {
    private             Intent intent = new Intent(
            "com.qq.xgdemo.activity.UPDATE_LISTVIEW");
    public static final String LogTag = "TPushReceiver";

    //private void show(Context context, String text) {
    //    Toast.makeText(context, text, Toast.LENGTH_SHORT).show();
    //}


    // 通知展示,主要控制推送来的信息在状态栏的展示,当然如果想自定义可以修改这个方法
    @Override
    public void onNotifactionShowedResult(Context context, XGPushShowedResult notifiShowedRlt) {
        if (context == null || notifiShowedRlt == null) {
            return;
        }
        XGNotification notific = new XGNotification();
        notific.setMsg_id(notifiShowedRlt.getMsgId());
        notific.setTitle(notifiShowedRlt.getTitle());
        notific.setContent(notifiShowedRlt.getContent());
        // notificationActionType==1为Activity,2为url,3为intent
        notific.setNotificationActionType(
                notifiShowedRlt.getNotificationActionType());
        // Activity,url,intent都可以通过getActivity()获得
        notific.setActivity(notifiShowedRlt.getActivity());
        notific.setUpdate_time(
                new SimpleDateFormat("yyyy-MM-dd HH:mm:ss").format(
                        Calendar.getInstance().getTime()));
        NotificationService.getInstance(context).save(notific);
        context.sendBroadcast(intent);
        String customContent = notifiShowedRlt.getCustomContent();
        KLog.json(customContent);
    }

  //反注册,注意在你用的activity里面的ondestory里面反注册
    @Override public void onUnregisterResult(Context context, int errorCode) {
        KLog.i("onUnregisterResult");
        if (context == null) {
            return;
        }
        String text = "";
        if (errorCode == XGPushBaseReceiver.SUCCESS) {
            text = "反注册成功";
        }
        else {
            text = "反注册失败" + errorCode;
        }
        KLog.i(LogTag, text);
        //show(context, text);
    }


    @Override
    public void onSetTagResult(Context context, int errorCode, String tagName) {
        KLog.i("onSetTagResult");
        if (context == null) {
            return;
        }
        String text = "";
        if (errorCode == XGPushBaseReceiver.SUCCESS) {
            text = """ + tagName + ""设置成功";
        }
        else {
            text = """ + tagName + ""设置失败,错误码:" + errorCode;
        }
        Log.d(LogTag, text);
        //show(context, text);
    }


    @Override
    public void onDeleteTagResult(Context context, int errorCode, String tagName) {
        KLog.i("onDeleteTagResult");
        if (context == null) {
            return;
        }
        String text = "";
        if (errorCode == XGPushBaseReceiver.SUCCESS) {
            text = """ + tagName + ""删除成功";
        }
        else {
            text = """ + tagName + ""删除失败,错误码:" + errorCode;
        }
        Log.d(LogTag, text);
        //show(context, text);
    }


    // 通知点击回调 actionType=1为该消息被清除,actionType=0为该消息被点击
    @Override
    public void onNotifactionClickedResult(Context context, XGPushClickedResult message) {
        KLog.i("onNotifactionClickedResult");
        if (context == null || message == null) {
            return;
        }
        String text = "";
        if (message.getActionType() ==
                XGPushClickedResult.NOTIFACTION_CLICKED_TYPE) {
            // 通知在通知栏被点击啦。。。。。
            // APP自己处理点击的相关动作
            // 这个动作可以在activity的onResume也能监听,请看第3点相关内容
            text = "通知被打开 :" + message;
            KLog.i(text);

            KLog.i(message.getActivityName());
            // 获取自定义key-value,我们的app主要的根据这块的内容进行控制的,所以主要处理这块的代码
            String customContent = message.getCustomContent();
            if (!StringUtil.isEmpty(customContent)) {
                KLog.i("customContent", customContent);
                PushResult pushResult = Json.get()
                                            .toObject(customContent,
                                                    PushResult.class);
                switch (pushResult.getIndex()) {
                    //......你的业务处理代码default:
                        break;
                }
            }
        }
        else if (message.getActionType() ==
                XGPushClickedResult.NOTIFACTION_DELETED_TYPE) {
            // 通知被清除啦。。。。
            // APP自己处理通知被清除后的相关动作
            text = "通知被清除 :" + message;
            KLog.i(text);
        }
    }


    @Override
    public void onRegisterResult(Context context, int errorCode, XGPushRegisterResult message) {
        KLog.i("onRegisterResult");
        // TODO Auto-generated method stub
        if (context == null || message == null) {
            return;
        }
        String text = "";
        if (errorCode == XGPushBaseReceiver.SUCCESS) {
            text = message + "注册成功";
            // 在这里拿token
            String token = message.getToken();
        }
        else {
            text = message + "注册失败,错误码:" + errorCode;
        }
        Log.d(LogTag, text);
        //show(context, text);
    }


    // 消息透传
    @Override
    public void onTextMessage(Context context, XGPushTextMessage message) {
        KLog.json(Json.get().toJson(message));
        // TODO Auto-generated method stub
        String text = "收到消息:" + message.toString();
        // 获取自定义key-value
        String customContent = message.getCustomContent();
        if (customContent != null && customContent.length() != 0) {
            try {
                JSONObject obj = new JSONObject(customContent);
                // key1为前台配置的key
                if (!obj.isNull("key")) {
                    String value = obj.getString("key");
                    Log.d(LogTag, "get custom value:" + value);
                }
                // ...
            } catch (JSONException e) {
                e.printStackTrace();
            }
        }
        // APP自主处理消息的过程...
        Log.d(LogTag, text);
        //show(context, text);
    }
}