插件化二(Android)
上一篇文章《插件化一(android)》里大概构思了下插件加载与校验的流程和一些大体设计,这次就具体展开,在《动态加载与插件化》里提到以apk形式开发带res资源的插件,这里也介绍下具体的实现方式。
插件信息规划
那我们就开始进入正题,在实现插件化的时候,我们都需要考虑,对于插件的描述信息(如插件名,插件版本等等),我们应该放在哪里。比如弄一个文件储存插件信息再和插件一起打个包,或如jar形式的可以直接在jar里添加插件信息,相信大家都能想到多种是实现方法。
在这里我则是将插件信息写在zip(即jar或apk)的末尾的comment里,即在不修改zip文件的结构的前提下,在zip结构中添加信息。为了后续插件开发方便我为写入插件信息的工作编写了个cmd 工具,也方便后续用ANT与Eclipse集成简化开发流程,以下是部分代码。
-
int main(int argc, char* argv[])
-
{
-
if (argc < 3)
-
{
-
printf("params count error");
-
return -1;
-
}
-
char* path = argv[1];
-
char* data = argv[2];
-
-
FileInfo* file = open(path, "r+");//打开zip文件
-
if (file == NULL)
-
{
-
printf("open file error");
-
return -1;
-
}
-
-
if (!isVaildZip(file))//校验是否是合法zip文件
-
{
-
printf("error zip file");
-
return -1;
-
}
-
-
if (!writeComment(file, data, strlen(data)))//写入信息到zip文件中
-
addComment(file, data, strlen(data));
-
-
-
EndRecord* end = readZipEndRecord(file);
-
-
if (end == NULL)
-
{
-
printf("read end Record error");
-
return -1;
-
}
-
-
printf(" comment is %s", end->Comment);
-
return 0;
-
}
插件的加载
讲完插件信息的规划,我们来看下插件化至关重要的一步插件的加载,在《动态加载与插件化》里介绍过Android动态加载的实现方式,对于纯代码的android插件加载,相对来说还是比较简单的一个DexClassLoader就搞定了,相信DexClassLoader网上很多介绍的文章,这里就不具体介绍了,直接上代码如下
-
@Override
-
public void loadPluginPackage(Context context, PluginInfo info, PluginContextLoadCallBack callBack)
-
{
-
//创建dexopt的目录DexClassLoader需要的
-
File file = new File(context.getFilesDir(), "dexopt");
-
if (!file.exists())
-
file.mkdirs();
-
-
File pluginFile = new File(info.getPath());
-
File temp;
-
try
-
{
-
temp = StorageManager.create(context).createFile(info.getName()+".jar",StorageManager.Cache);
-
Logger.I("move plugin to run path");
-
IOManager.moveTo(pluginFile, temp);//把插件移到加载目录
-
}
-
catch (IOException e)
-
{
-
ExceptionUtils.handle(e);
-
if(callBack != null)
-
callBack.onError(ErrorInfo.Plugin_Load_Error, "move "+pluginFile.getPath()+" to temp path fail");
-
return;
-
}
-
-
if (file != null)
-
{
-
//加载插件,就这么一句别的你都可以忽略
-
_loader = new DexClassLoader(temp.getPath(), file.getPath(), null, context.getClassLoader());
-
_app = context;
-
-
if (callBack != null)
-
{
-
callBack.onLoad(this);
-
return;
-
}
-
}
-
-
}
过完纯代码的插件加载方式,那我们再来看下如何加载带res资源的apk形式的插件(PS:以下方式使用到多个android内部的api,兼容性未大规模测试过),在《动态加载与插件化》介绍到要使用Apk里的res那就必须要拿到这个APK对应的Resources对象,那里我介绍了两种获取Resources对象的方法,这里我着重讲下第二种(第一种以后再介绍^_^)。
那如何获得插件APK对应的Context呢,如果去研究Androidd的Activity的启动过程不难发现,Application(就是Context^_^)是由一个叫LoadedApk的对象创建的,LoadedApk有一个makeApplication方法有两个参数,boolean和Instrumentation,第一个参数是指定是否使用创建默认的Application,第二个参数是是一个环境对象,用于跟踪android个组件的创建,在android的测试框架中可能会接触到它。调用如下(某些版本里LoadedApk是个不公开的内部类,所以以反射方式调用,也建议以下所有访问内部api的都用反射方式调用,这样可以做多版本的兼容)
-
// 创建apk的application
-
application = ReflectHelper.invoke(loadedApk, "makeApplication", new Class<?>[] { boolean.class, Instrumentation.class }, false, new Instrumentation());
现在我们知道Application是由LoadedApk创建,那LoadedApk对象我们又从哪里获得呢,查看Android的源码顺藤摸瓜,最终找到了ActivityThread. getPackageInfoNoCheck这个方法,这个方法在4.0以上的系统和4.0以下的系统,参数是不一样的.
4.0以上有两个参数,第一个是ApplicationInfo 就是对应APK的Application信息这个大家应该熟悉的,我们可以通过PackageManager.getPackageArchiveInfo这个方法传入apk路径和Flag参数获得PackageInfo,从PackageInfo里就能获得APK的Applicationinfo,然后用应用的Applicationinfo的参数替换一下如uid,datadir等.第二个是CompatibilityInfo, CompatibilityInfo是4.0以上才有的(4.0以下没有这个参数),包含和屏幕分辩率有关的信息,我们可以直接通过Resources对象获得Resources.getCompatibilityInfo()这样我们就凑齐参数了,可以放大了^_^,调用代码
-
private void RelpacePluginInfo(PackageInfo info, Context context, String path)
-
{
-
info.applicationInfo.dataDir = context.getApplicationInfo().dataDir;
-
info.applicationInfo.publicSourceDir = path;
-
info.applicationInfo.sourceDir = path;
-
info.applicationInfo.uid = context.getApplicationInfo().uid;
-
info.applicationInfo.metaData = context.getApplicationInfo().metaData;
-
info.applicationInfo.nativeLibraryDir = context.getApplicationInfo().nativeLibraryDir;
-
}
-
private void getPackageInfoNoCheck(final Context context, final ApplicationInfo info, final ResultCallBack<Object> callBack)
-
{
-
//注意ActivityThread. getPackageInfoNoCheck必须在主线程调用
-
AsyncManager.postUI(new Runnable()
-
{
-
@Override
-
public void run()
-
{
-
final Object value = getPackageInfoNoCheck(context, info);
-
if (callBack != null)
-
{
-
if (value != null)
-
callBack.onCompleted(value);
-
else callBack.onError(CallBack.Error, "get loadedapk fail");
-
}
-
}
-
});
-
}
-
-
private Object getPackageInfoNoCheck(Context context, ApplicationInfo info)
-
{
-
ActivityThread thread = ActivityThread.currentActivityThread();
-
Object value;
-
try
-
{
-
value = ReflectHelper.invoke(ActivityThread.class, "getPackageInfoNoCheck", new Class<?>[] { ApplicationInfo.class }, thread, info);
-
return value;
-
}
-
catch (Exception e)
-
{
-
ExceptionUtils.handle(e);
-
return thread.getPackageInfoNoCheck(info, context.getResources().getCompatibilityInfo());//如果调用一个参数的getPackageInfoNoCheck失败,就尝试访问两个参数的
-
}
-
}
现在万事OK不,但是当我们执行makeApplication时,Logcat无情的抛了个异常给我们,查看异常我们很容易发现原因,是某个目录没有访问的权限,是由于getPackageInfoNoCheck中创建LoadedApk时需要用DexClassLoader去加载Apk的代码,指定的路径无法访问。难道是死胡同一条,那接着去查看makeApplication的逻辑,可以发现如果LoadedApk里的mClassLoader这个字段如果不为null,LoadedApk就不会去重新创建,这样就给了我们机会,我们可以自己用DexClassLoader去加载Apk再通过反射设置给LoadedApk就骗过它了。
-
ClassLoader loader = getApkClassLoader(currentApp, path);
-
if (!ReflectHelper.setValue(loadedApk, ClassLoader, loader))
-
{
-
Logger.E("set LoadedApk ClassLoader fail");
-
return null;
-
}
这样之后我们就能顺利调用LoadedApk的makeApplication方法创建Apk对应的Application,获得Application后我们是不是就可以随便访问Apk里的资源了呢,实际上不是这么容易在的,在《动态加载与插件化》里提到,如果直接用Application的LayoutInflater去创建View资源我们是可以顺利拿到View也可以创建,但是会有潜在问题,由于这个Context所对应的Apk没有安装,如果View里使用到系统服务(如剪切板),系统服务如果去按报名检索这个apk时,是无法找到的,那时候就直接GameOver,所以我们还要对LayoutInflater做一定的处理(其实就是保证具体的Context是安装了的那个),这个有两种方法,一种是替换LayoutInflater的反射mContext字段,还有种是通过LayoutInflater(LayoutInflater,Context)这个构造创建个新的LayoutInflater。在这之前我们要先构造个特殊的Context,一个包含宿主APK信息和插件资源信息的Context
如下
-
public Context getPluginContext()
-
{
-
return new ContextWrapper(getAppContext())
-
{
-
@Override
-
public Resources getResources()
-
{
-
return getPluginAppContext().getResources();
-
}
-
-
@Override
-
public Theme getTheme()
-
{
-
return getPluginAppContext().getTheme();
-
}
-
-
@Override
-
public ClassLoader getClassLoader()
-
{
-
return getPluginClassLoader();
-
}
-
-
@Override
-
public AssetManager getAssets()
-
{
-
return getPluginAppContext().getResources().getAssets();
-
}
-
};
-
}
接下来处理LayoutInflater
第一种方式
-
LayoutInflater inflater = LayoutInflater.from(getPluginAppContext());
-
if (ReflectHelper.setValueAll(inflater, "mContext",getPluginContext()))
-
Logger.I("set mContext suc");
第二种方式,略长。。。
-
public LayoutInflater getLayoutInflater()
-
{
-
if (getAppContext().equals(getPluginAppContext()))
-
{
-
return LayoutInflater.from(getPluginAppContext());
-
}
-
-
-
LayoutInflater inflater = buildLayoutInflater();
-
inflater.setFactory(new Factory()
-
{
-
@Override
-
public View onCreateView(String name, Context context, AttributeSet set)
-
{
-
View view = null;
-
Class<?> cls;
-
try
-
{
-
cls = getViewClass(name);
-
Constructor<?> constructor = cls.getConstructor(Context.class,AttributeSet.class);
-
view = (View)constructor.newInstance(context,set);
-
}
-
catch(ClassNotFoundException e)
-
{
-
e.printStackTrace();
-
}
-
catch (SecurityException e)
-
{
-
e.printStackTrace();
-
}
-
catch (NoSuchMethodException e)
-
{
-
e.printStackTrace();
-
}
-
catch (IllegalArgumentException e)
-
{
-
e.printStackTrace();
-
}
-
catch (InstantiationException e)
-
{
-
e.printStackTrace();
-
}
-
catch (IllegalAccessException e)
-
{
-
e.printStackTrace();
-
}
-
catch (InvocationTargetException e)
-
{
-
e.printStackTrace();
-
}
-
-
return view;
-
}
-
});
-
-
return inflater;
-
}
-
-
Class<?> getViewClass(String name) throws ClassNotFoundException
-
{
-
if(-1 == name.indexOf("."))
-
return View.class.getClassLoader().loadClass("android.widget."+name);
-
else
-
return getPluginClassLoader().loadClass(name);
-
}
-
-
LayoutInflater buildLayoutInflater()
-
{
-
return new LayoutInflater( LayoutInflater.from(getPluginAppContext()),getPluginContext())
-
{
-
@Override
-
public LayoutInflater cloneInContext(Context context)
-
{
-
return this;
-
}
-
};
-
}
到此我能就可以加载带资源的插件APK了,具体使用
-
import com.joyreach.plugin.IActivityHost;
-
import com.joyreach.plugin.IActivityLifeCycle;
-
import com.joyreach.plugin.IPlugin;
-
import com.joyreach.plugin.PluginContext;
-
import android.app.Activity;
-
import android.app.Dialog;
-
import android.content.Context;
-
import android.graphics.Color;
-
import android.graphics.drawable.ColorDrawable;
-
import android.view.Window;
-
import android.widget.Toast;
-
//插件类
-
public class TestPlugin implements IPlugin,IActivityHost,IActivityLifeCycle
-
{
-
PluginContext _context;
-
-
@Override
-
public void onLoaded(PluginContext context)
-
{
-
_context = context;
-
}
-
-
@Override
-
public void onUnloaded(PluginContext context)
-
{
-
}
-
-
@Override
-
public void attach(Activity activity)
-
{
-
new TestDialog(activity, _context).show();
-
}
-
-
@Override
-
public void dattach()
-
{
-
}
-
-
@Override
-
public void onCreate(Activity activity)
-
{
-
Toast.makeText(activity, "onCreate", Toast.LENGTH_SHORT).show();
-
}
-
-
@Override
-
public void onResume(Activity activity)
-
{
-
Toast.makeText(activity, "onResume", Toast.LENGTH_SHORT).show();
-
}
-
-
@Override
-
public void onPause(Activity activity)
-
{
-
Toast.makeText(activity, "onPause", Toast.LENGTH_SHORT).show();
-
}
-
-
@Override
-
public void onDestroy(Activity activity)
-
{
-
Toast.makeText(activity, "onDestroy", Toast.LENGTH_SHORT).show();
-
}
-
-
class TestDialog extends Dialog
-
{
-
public TestDialog(Context context,PluginContext pluginContext)
-
{
-
super(context);
-
-
getWindow().requestFeature(Window.FEATURE_NO_TITLE);
-
setContentView(pluginContext.getLayoutInflater().inflate(anye.plugin.R.layout.testdialog, null));
-
getWindow().setBackgroundDrawable(new ColorDrawable(Color.argb(0, 0, 0, 0)));
-
}
-
-
}
-
}
-
Model.getInstance().getPluginSystem().loadPlugin("core", new PluginContext.PluginContextLoadCallBack()
-
{
-
@Override
-
public void onLoad(PluginContext context)
-
{
-
Toast.makeText(PluginTestActivity.this,
-
PluginManager.current().getInstallPlugins() + ":current load " + context.getInfo().getName() + "_" + context.getInfo().getVersonCode(),
-
Toast.LENGTH_LONG).show();
-
-
PluginContext.PluginContainer container = context.load("plugin.test.main.TestPlugin");
-
container.load();
-
-
IActivityHost host = container.asType();
-
host.attach(PluginTestActivity.this);
-
-
Toast.makeText(PluginTestActivity.this,getResources().getString(R.string.title_activity_data_event_test),
-
Toast.LENGTH_LONG).show();
-
}
-
-
@Override
-
public void onError(int code, String msg)
-
{
-
Toast.makeText(PluginTestActivity.this, "load fail: " + msg, Toast.LENGTH_LONG).show();
-
}
-
});
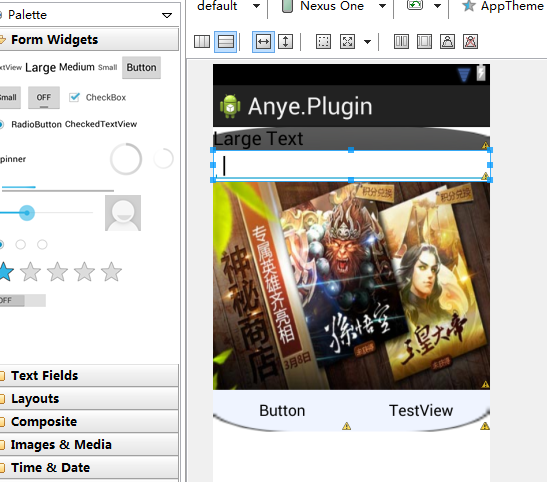
anye.plugin.R.layout.testdialog布局文件
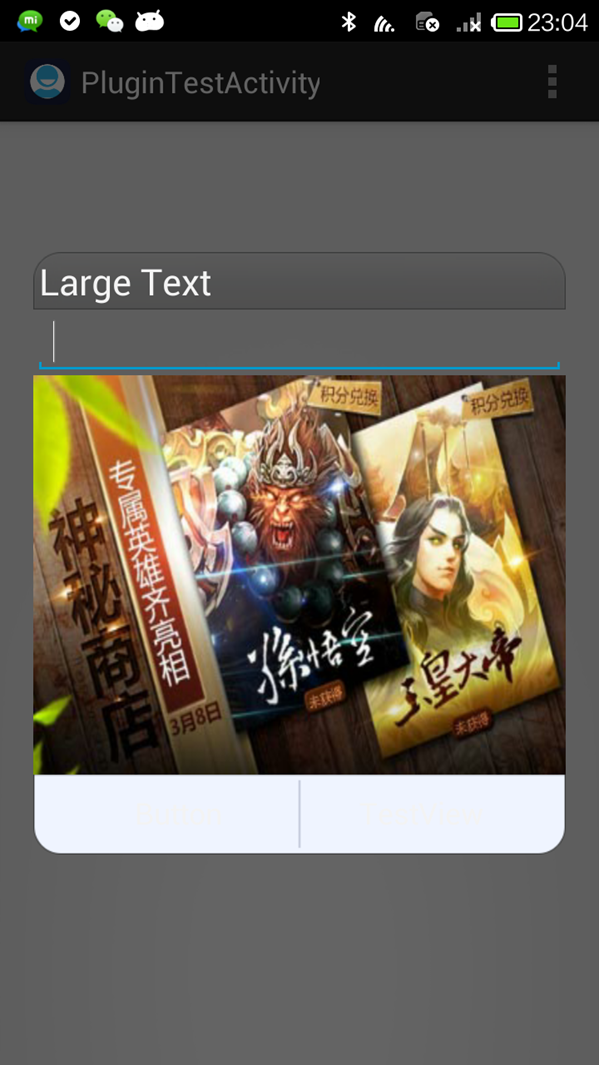
运行效果
先到这里^_^,下次介绍插件整个加载流程,项目构成,可以洗洗睡了!!!!!!!!!!!