守望博客是支持创建专栏的功能,即可以将一系列相关的文章归档到专栏中,方便用户管理和查阅文章。这里主要讲解专栏的创建、修改和删除功能,至于专栏还涉及其它的功能,例如关注专栏等后续会穿插着介绍。
1、创建专栏
接收和处理专栏相关功能的操作的方法会放在GroupController类中,首先创建专栏的页面为:
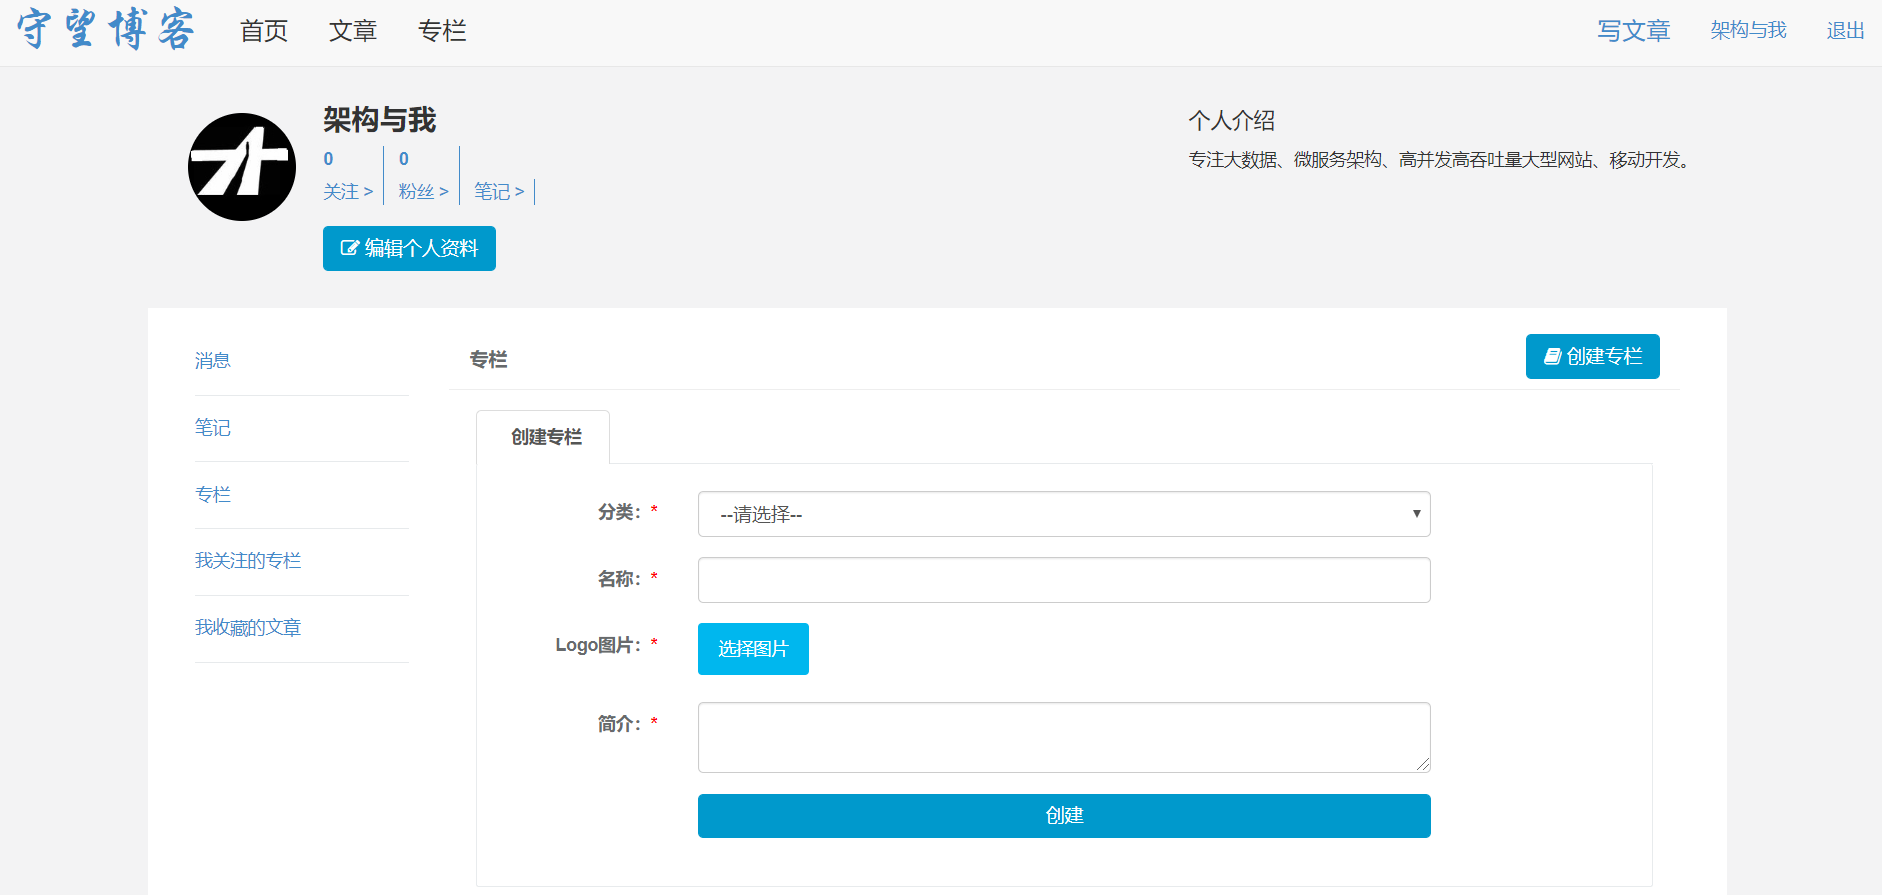
这里有两个地方需要特别说明:
第一这个分类数据,此处分类数据正是本博客网站的分类数据,这个分类数据是系统初始化时加入的,这个初始化的功能后续会加入,目前此处就是提前将数据先写入到数据库中,例如本博客作为技术类博客,则分类有:前端、架构、区块链、云计算等。
然后这个分类信息数据一般初始化后,就不会有修改,则这个数据是放入缓存中,即,CategoryCache:
/**
 * 缓存分类信息
 * 分类信息放到系统永久缓存中,存放形式为:"_CATEGORY" + categoryId为key,value为分类信息对象
 *
 * @author lzj
 * @since 1.0
 * @date [2019-07-22]
 */
@Slf4j
@DependsOn("categoryService")
@Component("categoryCache")
public class CategoryCache implements ICache<List<Category>> {

    /**
     * 注入基于Spring提供的Cache接口实例,默认由Ehcache实现
     * TODO 以后也可以是Redis、Memcached提供实现
     */
    @Autowired
    private CacheManager cacheManager;

    @Autowired
    private ICategoryService categoryService;

    /**
     * 缓存实例
     */
    private Cache cache;

    /**
     * key的前缀
     */
    private String keyPrefix = "_CATEGORY";

    /**
     * 分类信息根节点ID
     */
    public static final String ROOT_CATEGORY_ID = "0";

    @PostConstruct
    public void init() {
        // 获取系统永久缓存实例
        cache = cacheManager.getCache(Const.CACHE_SYSTEM_ETERNAL);
        log.info("获取系统永久缓存实例");

        log.debug("开始加载父分类信息");
        List<Category> categorys = categoryService.getByParentId(ROOT_CATEGORY_ID);
        if (categorys != null && !categorys.isEmpty()) {
            put(keyPrefix + ROOT_CATEGORY_ID, categorys);
        }
        log.debug("加载完毕父分类信息");
    }

    @Override
    public List<Category> get(Object key) {
        Cache.ValueWrapper valueWrapper = cache.get(keyPrefix + key);
        if (valueWrapper == null) {
            // 从数据库重新加载一次
            List<Category> categorys = categoryService.getByParentId((String) key);
            if (categorys == null) {
                return null;
            }

            // 再次放到缓存中
            put(key, categorys);

            return categorys;
        }
        return (List<Category>) valueWrapper.get();
    }

    @Override
    public void put(Object key, List<Category> value) {
        cache.put(keyPrefix + key, value);
    }

    @Override
    public void remove(Object key) {
        cache.evict(keyPrefix + key);
    }
}
第二需要说明的是,此处的上传控制是用的webuploader,利用webuploader处理的上传文件的话,需要按如下方式初始化:
$(function() {
    var _list = $('#fileList');
    var ratio = window.devicePixelRatio || 1;
    var thumbnailWidth = 100 * ratio;
    var thumbnailHeight = 100 * ratio;

    // 初始化Web Uploader
    var uploader = WebUploader.create({

        // 选完文件后,是否自动上传。
        auto: true,

        // swf文件路径
        swf: '${rc.contextPath}/static/plugins/webuploader/Uploader.swf',

        // 文件接收服务端。
        server: '${rc.contextPath}/upload',

        // 选择文件的按钮。可选。
        // 内部根据当前运行是创建,可能是input元素,也可能是flash.
        pick: '#filePicker',

        fileVal: "_uploadFile",

        formData: {
            _distId:'_distId',
            _distType:'_groupLogo',
        },

        // 只允许选择图片文件。
        accept: {
            title: 'Images',
            extensions: 'gif,jpg,jpeg,png',
            mimeTypes: 'image/*'
        },

        fileNumLimit: 1,
        fileSizeLimit: 2 * 1024 * 1024,    // 2 M
        fileSingleSizeLimit: 2 * 1024 * 1024    // 2 M
    });

    // 当有文件添加进来的时候
    uploader.on( 'fileQueued', function( file ) {
        var li = $(
            '<div id="' + file.id + '" class="file-item thumbnail text-center">' +
            '<img>' +
            // '<div class="info">' + file.name + '</div>' +
            '</div>'
            ),
            img = li.find('img');


        // _list为容器jQuery实例
        _list.append( li );

        // 创建缩略图
        // 如果为非图片文件,可以不用调用此方法。
        // thumbnailWidth x thumbnailHeight 为 100 x 100
        uploader.makeThumb( file, function( error, src ) {
            if ( error ) {
                img.replaceWith('<span>不能预览</span>');
                return;
            }

            img.attr( 'src', src );
        }, thumbnailWidth, thumbnailHeight );
    });

    // 文件上传过程中创建进度条实时显示。
    uploader.on( 'uploadProgress', function( file, percentage ) {
    });

    // 文件上传成功,给item添加成功class, 用样式标记上传成功。
    uploader.on( 'uploadSuccess', function(file, response) {
        $( '#'+file.id ).addClass('upload-state-done');
        $( '#'+file.id ).append('<a class="del" href="javascript:void(0);">删除</a>' )
        $("#logo").val(response.url);
    });

    // 文件上传失败,显示上传出错。
    uploader.on( 'uploadError', function( file ) {
        var li = $( '#'+file.id ),
            error = li.find('div.error');

        // 避免重复创建
        if ( !error.length ) {
            error = $('<div class="error"></div>').appendTo( li );
        }

        error.text('上传失败');
    });

    // 完成上传完了,成功或者失败,先删除进度条。
    uploader.on( 'uploadComplete', function( file ) {
    });

    // 执行删除方法
    _list.on('click', '.del', function () {
        var Id = $(this).parent().attr('id');
        //删除该图片
        uploader.removeFile(uploader.getFile(Id, true));
        $(this).parent().remove();
        $("#logo").val("");
    });
});
这里后台需要处理专栏的Logo图片的信息,根据上一章节的方式处理,即有UploadGroupLogoHandler类,如:
/**
 * 上传专栏Logo处理类
 *
 * @author lzj
 * @since 1.0
 * @date [2019-07-23]
 */
@Slf4j
@Component("_groupLogo")
public class UploadGroupLogoHandler implements IUploadHandler {

    @Resource(name = "configCache")
    private ICache<Config> configCache;

    @Override
    public Object upload(MultipartFile file, String distType, String userId) throws Exception {
        Map<String, Object> result = new HashMap<String, Object>();
        try {
            // 获取图片的原始名称
            String originalName = file.getOriginalFilename();

            // 判断图片的类型
            if (!(originalName.endsWith(".jpg") || originalName.endsWith(".JPG") || originalName.endsWith(".png") || originalName.endsWith(".PNG") || originalName.endsWith(".gif") || originalName.endsWith(".GIF") || originalName.endsWith(".jpeg") || originalName.endsWith(".JPEG"))) {
                throw new TipException("您上传的图片类型有误,请上传格式为jpg、png或gif");
            }

            // 获取图片的大小
            long fileSize = file.getSize();

            // 图片大小不能超过2M, 2M = 2 * 1024 * 1024B = 2097152B
            if (fileSize > 2097152L) {
                throw new TipException("您上传的图片超过2M");
            }

            Config config = configCache.get(Config.CONFIG_IMG_GROUP_LOGO_PATH);
            // 保存头像的根目录
            String basePath = config.getConfigValue();
            if (!(basePath.endsWith("/") || basePath.endsWith("\"))) {
                basePath += "/";
            }

            // 根据当前时间构建yyyyMM的文件夹,建立到月的文件夹
            String dateDirName = DateUtil.date2Str(new Date(), DateUtil.YEAR_MONTH_FORMAT);
            basePath += dateDirName;

            File imageDir = new File(basePath);
            if (!imageDir.exists()) {
                imageDir.mkdirs();
            }

            String fileNewName = IdGenarator.guid() + originalName.substring(originalName.lastIndexOf("."));
            FileUtil.copy(file.getInputStream(), new FileOutputStream(new File(imageDir, fileNewName)));

            result.put("url", dateDirName + "/" + fileNewName);
            result.put("msg", "上传成功");
        } catch (TipException e) {
            result.put("url", "");
            result.put("msg", e.getMessage());
        } catch (Exception e) {
            log.error("上传失败", e);
            result.put("url", "");
            result.put("msg", "上传失败");
        }
        return result;
    }

    @Override
    public void download(String fileId, HttpServletResponse response) throws Exception {
    }

    @Override
    public Object list(String distType, String userId) throws Exception {
        return null;
    }
}
最后创建专栏的核心代码如下:
/**
 * 创建专栏
 *
 * @param request
 * @param session
 * @return
 */
@RequestMapping(value = "/user/group/add", method = RequestMethod.POST)
@ResponseBody
public Result add(HttpServletRequest request, HttpSession session) {
    Result result = new Result();
    try {
        // 接收参数
        String categoryId = request.getParameter("categoryId");
        String name = request.getParameter("name");
        String logo = request.getParameter("logo");
        String introduce = request.getParameter("introduce");

        // 校验参数
        if (StringUtils.isEmpty(categoryId) || StringUtils.isEmpty(name) || StringUtils.isEmpty(logo) || StringUtils.isEmpty(introduce)) {
            throw new TipException("缺少必要参数");
        }

        // 获取登录信息
        User tempUser = (User) session.getAttribute(Const.SESSION_USER);
        String userId = tempUser.getUserId();

        // 构建专栏对象
        Group group = new Group();
        group.setGroupId(IdGenarator.longIdStr());
        group.setName(name);
        group.setLogo(logo);
        group.setIntroduce(introduce);
        group.setCategoryId(categoryId);
        group.setCreator(userId);
        group.setCreateTime(new Date());
        // 从系统配置项获取专栏是否审核
        Config config = configCache.get(Config.CONFIG_GROUP_AUDIT);
        if (config != null && "1".equals(config.getConfigValue())) {
            // 需要审核
            group.setStatus(Group.STATUS_NO);
        } else {
            // 不需要审核
            group.setStatus(Group.STATUS_SUCCESS);
        }

        // 保存专栏信息
        boolean flag = groupService.save(group);
        if (!flag) {
            throw new TipException("创建专栏失败");
        }

        result.setCode(Result.CODE_SUCCESS);
        result.setMsg("成功创建专栏");
    } catch (TipException e) {
        result.setCode(Result.CODE_EXCEPTION);
        result.setMsg(e.getMessage());
    } catch (Exception e) {
        log.error("创建专栏失败", e);
        result.setCode(Result.CODE_EXCEPTION);
        result.setMsg("创建专栏失败");
    }
    return result;
}
2、修改专栏
有了前面新增专栏的基础,其实修改专栏的功能就相对简单很多了,此处只列出处理修改的核心代码即可,如:
/**
 * 修改专栏
 *
 * @param groupId
 * @param request
 * @param session
 * @return
 */
@RequestMapping(value = "/user/group/edit/{groupId}", method = RequestMethod.POST)
@ResponseBody
public Result edit(@PathVariable("groupId") String groupId, HttpServletRequest request, HttpSession session) {
    Result result = new Result();
    try {
        // 根据id获取专栏信息
        Group group = groupService.getById(groupId);
        if (group == null || StringUtils.isEmpty(group.getGroupId())) {
            log.error("groupId: " + groupId + ": 该专栏不存在");
            throw new TipException("该专栏不存在");
        }

        // 获取用户信息
        User tempUser = (User) session.getAttribute(Const.SESSION_USER);
        String userId = tempUser.getUserId();
        if (!userId.equals(group.getCreator())) {
            log.error("userId: " + userId + "修改别人的groupId: " + groupId);
            throw new TipException("不能修改别人的专栏");
        }

        // 接收参数
        String categoryId = request.getParameter("categoryId");
        String name = request.getParameter("name");
        String introduce = request.getParameter("introduce");
        String logo = request.getParameter("logo");

        // 校验参数
        if (StringUtils.isEmpty(categoryId) || StringUtils.isEmpty(name) || StringUtils.isEmpty(introduce)) {
            throw new TipException("缺少必要参数");
        }

        group.setCategoryId(categoryId);
        group.setName(name);
        group.setIntroduce(introduce);
        if (!StringUtils.isEmpty(logo)) {
            group.setLogo(logo);
        }
        group.setUpdateTime(new Date());

        // 修改
        boolean flag = groupService.updateById(group);
        if (!flag) {
            throw new TipException("修改专栏失败");
        }

        result.setCode(Result.CODE_SUCCESS);
        result.setMsg("修改专栏成功");
    } catch (TipException e) {
        result.setCode(Result.CODE_EXCEPTION);
        result.setMsg(e.getMessage());
    } catch (Exception e) {
        log.error("修改专栏失败", e);
        result.setCode(Result.CODE_EXCEPTION);
        result.setMsg("修改专栏失败");

    }
    return result;
}
3、删除专栏
删除专栏功能是很简单的,但是需要考虑到,删除专栏后,需要处理其它与之关联的数据信息,此处由于其它模块还没有完成,所以先将加一个TODO,后续会再处理。那删除专栏的核心代码如下:
/**
 * 根据ID删除专栏
 *
 * @param groupId
 * @param session
 * @return
 */
@RequestMapping(value = "/user/group/delete/{groupId}", method = RequestMethod.GET)
@ResponseBody
public Result delete(@PathVariable("groupId") String groupId, HttpSession session) {
    Result result = new Result();
    try {
        // 根据id获取专栏信息
        Group group = groupService.getById(groupId);
        if (group == null || StringUtils.isEmpty(group.getGroupId())) {
            log.error("groupId: " + groupId + ": 该专栏不存在");
            throw new TipException("该专栏不存在");
        }

        // 获取用户信息
        User tempUser = (User) session.getAttribute(Const.SESSION_USER);
        String userId = tempUser.getUserId();
        if (!userId.equals(group.getCreator())) {
            log.error("userId: " + userId + "删除别人的groupId: " + groupId);
            throw new TipException("不能删除别人的专栏");
        }

        // 删除
        boolean flag = groupService.removeById(groupId);
        if (!flag) {
            throw new TipException("删除专栏失败");
        }

        // TODO 删除专栏后,需要处理其它关联的数据,由于其它模块还没有,此处后续处理

        result.setCode(Result.CODE_SUCCESS);
        result.setMsg("删除专栏成功");
    } catch (TipException e) {
        result.setCode(Result.CODE_EXCEPTION);
        result.setMsg(e.getMessage());
    } catch (Exception e) {
        log.error("删除专栏失败", e);
        result.setCode(Result.CODE_EXCEPTION);
        result.setMsg("删除专栏失败");
    }
    return result;
}
关注我
以你最方便的方式关注我:
微信公众号: