场景
一步一步教你在IEDA中快速搭建SpringBoot项目:
https://blog.csdn.net/BADAO_LIUMANG_QIZHI/article/details/87688277
插件的安装参照下面博客
IDEA中SpringBoot项目使用@Data要安装Lombok插件
https://blog.csdn.net/BADAO_LIUMANG_QIZHI/article/details/88362861
项目使用EasyCode插件自动生成代码,EasyCode代码的使用参照
IDEA中安装EasyCode插件并连接数据库生成代码:
https://blog.csdn.net/BADAO_LIUMANG_QIZHI/article/details/103132436
实现
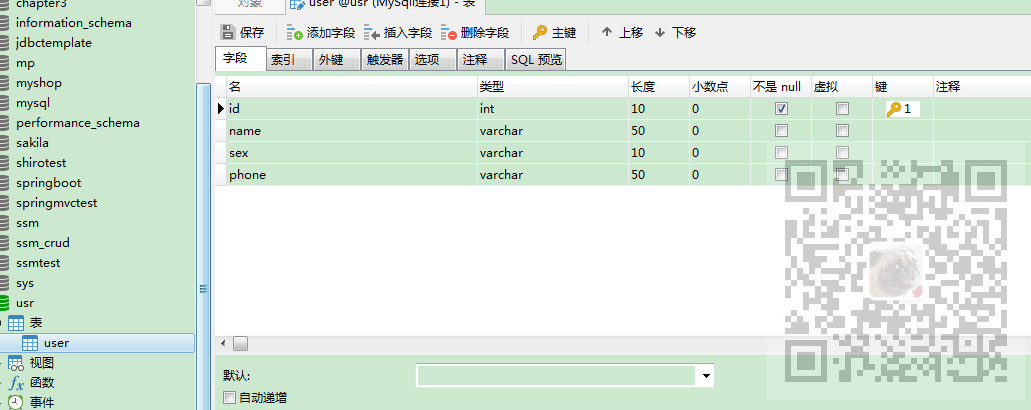
搭建数据库
本地安装Mysql 8.0 ,并安装连接Mysql的工具 Navicat,新建数据库usr,并新建表user
IDEA中新建SpringBoot项目
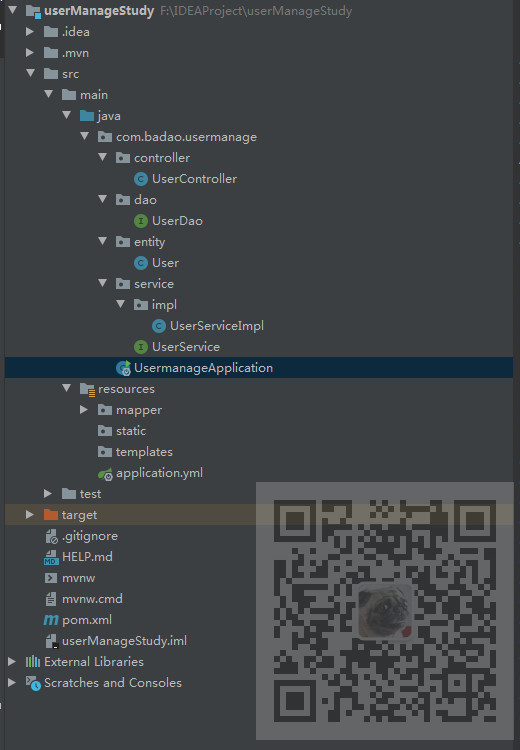
参照上面博客在IDEA中搭建好SpringBoot项目,搭建好后的项目目录为

在badao包下新建应用启动类
package com.badao.usermanage;


import org.springframework.boot.SpringApplication;
import org.springframework.boot.autoconfigure.SpringBootApplication;

@SpringBootApplication
public class UsermanageApplication {

    public static void main(String[] args) {
        SpringApplication.run(UsermanageApplication.class, args);
    }

}
然后在pom文件中添加相关依赖
<?xml version="1.0" encoding="UTF-8"?>
<project xmlns="http://maven.apache.org/POM/4.0.0" xmlns:xsi="http://www.w3.org/2001/XMLSchema-instance"
         xsi:schemaLocation="http://maven.apache.org/POM/4.0.0 https://maven.apache.org/xsd/maven-4.0.0.xsd">
    <modelVersion>4.0.0</modelVersion>
    <parent>
        <groupId>org.springframework.boot</groupId>
        <artifactId>spring-boot-starter-parent</artifactId>
        <version>2.2.1.RELEASE</version>
        <relativePath/> <!-- lookup parent from repository -->
    </parent>
    <groupId>com.badao</groupId>
    <artifactId>springbootdemo</artifactId>
    <version>0.0.1-SNAPSHOT</version>
    <name>springbootdemo</name>
    <description>Demo project for Spring Boot</description>

    <properties>
        <java.version>1.8</java.version>
    </properties>

    <dependencies>
        <dependency>
            <groupId>org.springframework.boot</groupId>
            <artifactId>spring-boot-starter-web</artifactId>
        </dependency>
        <dependency>
            <groupId>org.projectlombok</groupId>
            <artifactId>lombok</artifactId>
            <optional>true</optional>
        </dependency>

        <!-- mybatis-plus插件 -->
        <dependency>
            <groupId>com.baomidou</groupId>
            <artifactId>mybatis-plus-boot-starter</artifactId>
            <version>3.1.0</version>
        </dependency>


        <!-- mysql jdbc驱动 -->
        <dependency>
            <groupId>mysql</groupId>
            <artifactId>mysql-connector-java</artifactId>
            <scope>runtime</scope>
        </dependency>
        <dependency>
            <groupId>org.springframework.boot</groupId>
            <artifactId>spring-boot-starter-test</artifactId>
            <scope>test</scope>
            <exclusions>
                <exclusion>
                    <groupId>org.junit.vintage</groupId>
                    <artifactId>junit-vintage-engine</artifactId>
                </exclusion>
            </exclusions>
        </dependency>
    </dependencies>

    <build>
        <plugins>
            <plugin>
                <groupId>org.springframework.boot</groupId>
                <artifactId>spring-boot-maven-plugin</artifactId>
            </plugin>
        </plugins>
        <resources>
        <resource>
            <directory>src/main/java</directory>
            <includes>
                <include>**/*.yml</include>
                <include>**/*.xml</include>
            </includes>
            <filtering>false</filtering>
        </resource>
        </resources>
    </build>

</project>
然后将resources下的application.properties文件改为application.yml(个人习惯)
修改配置文件内容为
server:
  port: 8088
spring:
  datasource:
    driver-class-name: com.mysql.cj.jdbc.Driver
    url: jdbc:mysql://localhost:3306/usr
    username: root
    password: 123
mybatis-plus:
  #信息输出设置
  # xml地址
  mapper-locations: classpath:mapper/*Dao.xml
  # 实体扫描,多个package用逗号或者分号分隔
  # type-aliases-package: ***   #自己的实体类地址
  configuration:
    log-impl: org.apache.ibatis.logging.stdout.StdOutImpl
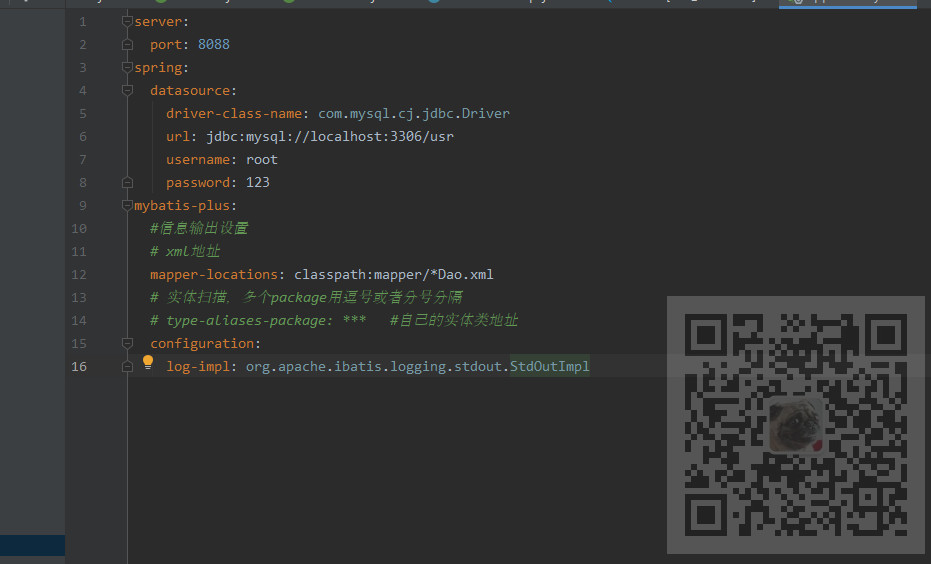
注意,这里我本地的Mysql的版本为8.0所以这里的驱动url如上。
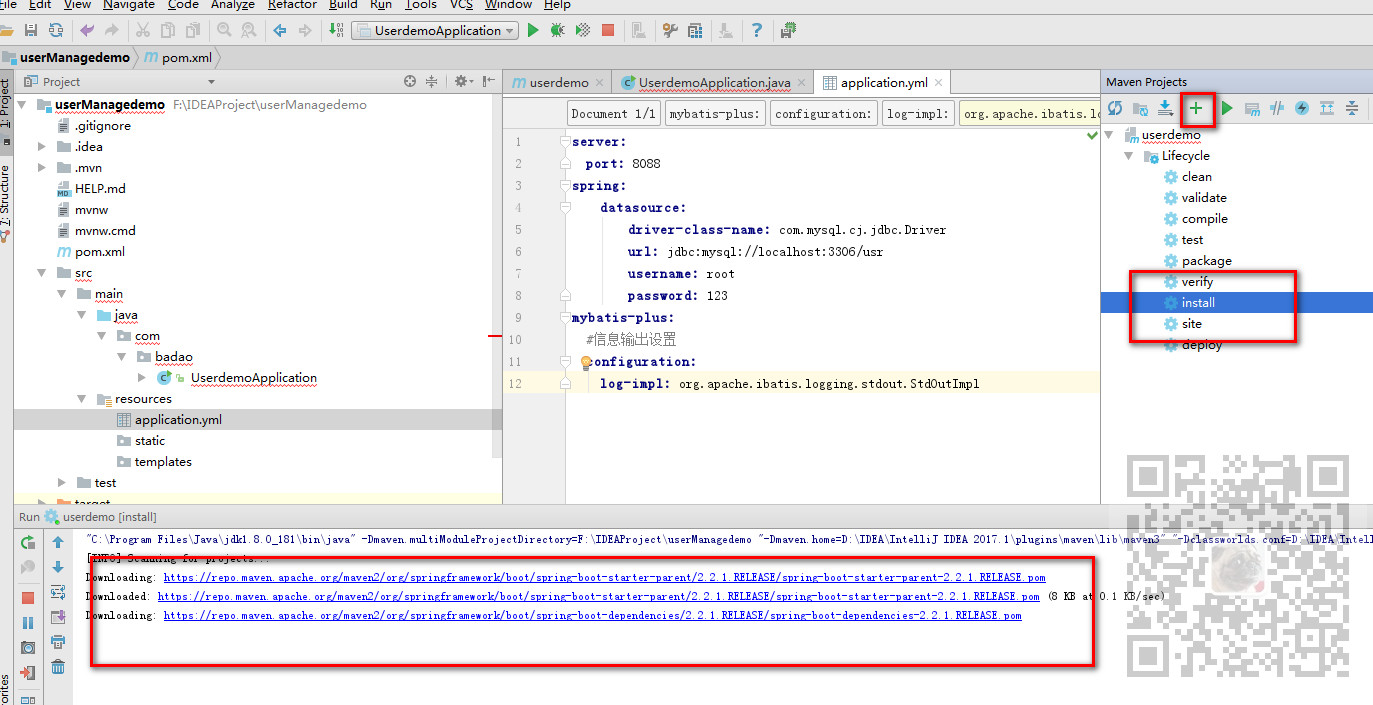
上面刚搭建好项目后报红是因为有些依赖还没下载下来。
在右侧Maven面板中--点击 + 并选中当前项目的pom.xml,然后点击install或者左上角的刷新似的图标。
使用EasyCode生成代码
参照上面博客在IDEA中安装EasyCode插件并使用其生成代码,生成代码后的目录为
在生成代码后因为使用的是默认的代码生成模板,所以还需要在启动类中添加MapperScan的注解并指定dao层包
package com.badao.usermanage;

import org.mybatis.spring.annotation.MapperScan;
import org.springframework.boot.SpringApplication;
import org.springframework.boot.autoconfigure.SpringBootApplication;

@SpringBootApplication
@MapperScan("com.badao.usermanage.dao")
public class UsermanageApplication {

    public static void main(String[] args) {
        SpringApplication.run(UsermanageApplication.class, args);
    }

}
分页插件配置
按照MybatisPlus的的分页插件的使用规范,新建config包,然后在包下新建MyBatisPlusConfig
package com.badao.usermanage.config;

import com.baomidou.mybatisplus.extension.plugins.PaginationInterceptor;
import org.springframework.context.annotation.Bean;
import org.springframework.context.annotation.Configuration;
import org.springframework.transaction.annotation.EnableTransactionManagement;

@EnableTransactionManagement
@Configuration
public class MyBatisPlusConfig {
    @Bean
    public PaginationInterceptor paginationInterceptor() {
        PaginationInterceptor paginationInterceptor = new PaginationInterceptor();
        // 设置请求的页面大于最大页后操作, true调回到首页,false 继续请求  默认false
        // paginationInterceptor.setOverflow(false);
        // 设置最大单页限制数量,默认 500 条,-1 不受限制
        // paginationInterceptor.setLimit(500);
        return paginationInterceptor;
    }
}
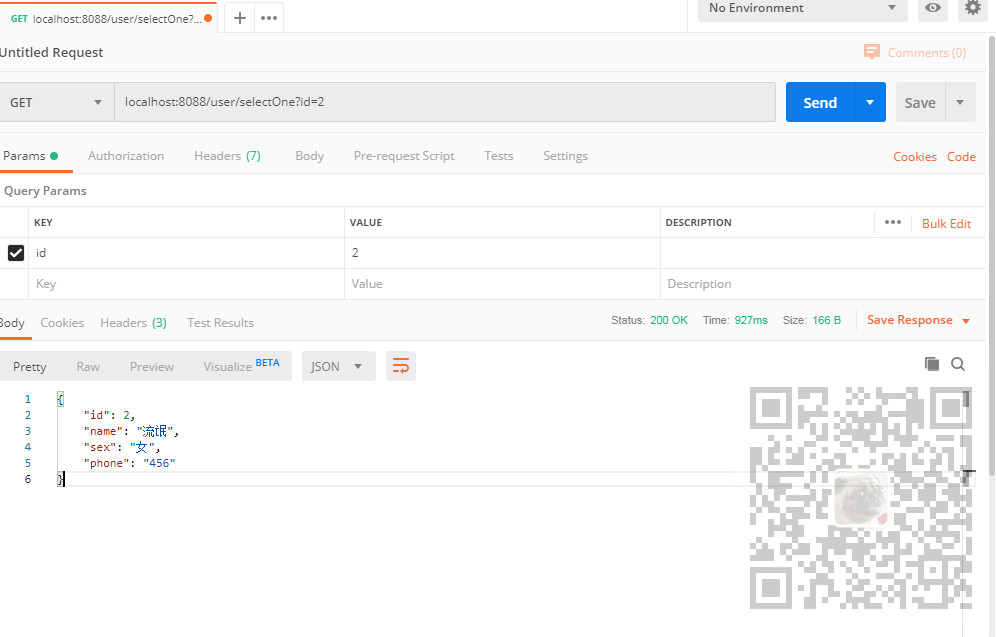
使用PostMan测试API接口
启动项目,打开PostMan,输入测试接口地址以及参数
localhost:8088/user/selectOne?id=2
这里根据Id进行查询,传递id参数为2。
快速搭建ElementUI项目
参照下面文章快速搭建一个ElementUI项目
https://blog.csdn.net/BADAO_LIUMANG_QIZHI/article/details/103285539
然后使用axios进行后台数据的请求
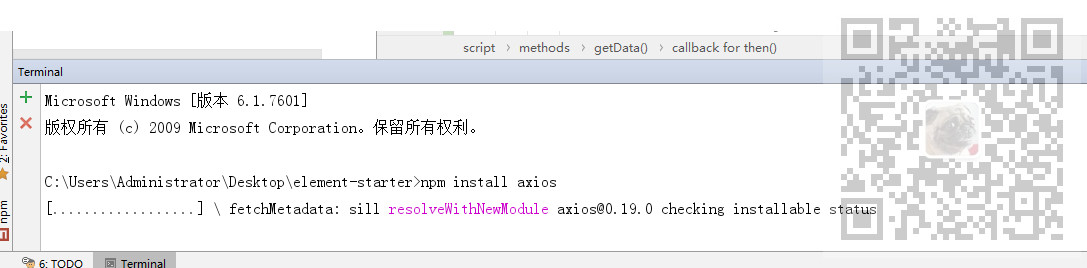
安装axios
npm install axios
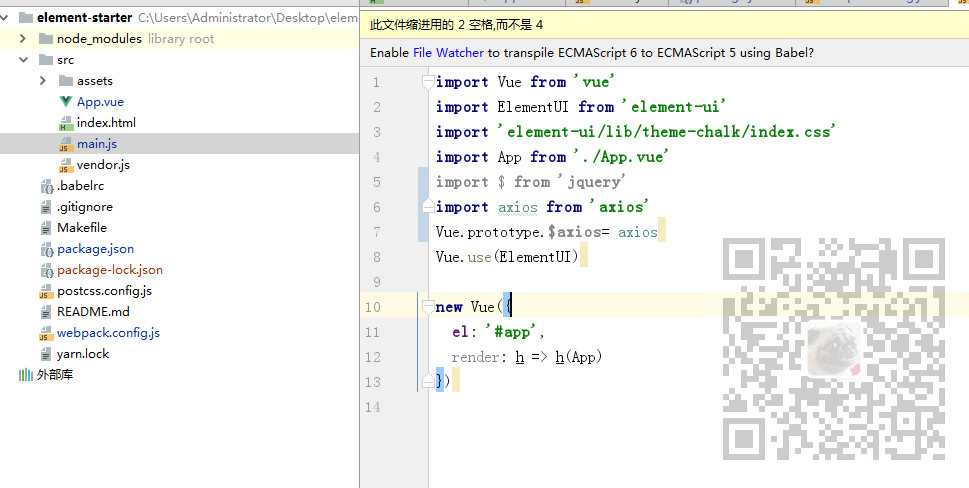
然后打开入口程序main.js添加axios
import axios from 'axios'
然后打开webpack.config.js进行url的代理配置
devServer: {
    host: '127.0.0.1',
    port: 8010,
    proxy: {
      '/api/': {
        target: 'http://127.0.0.1:8088',
        changeOrigin: true,
        pathRewrite: {
          '^/api': ''
        }
      }
    },
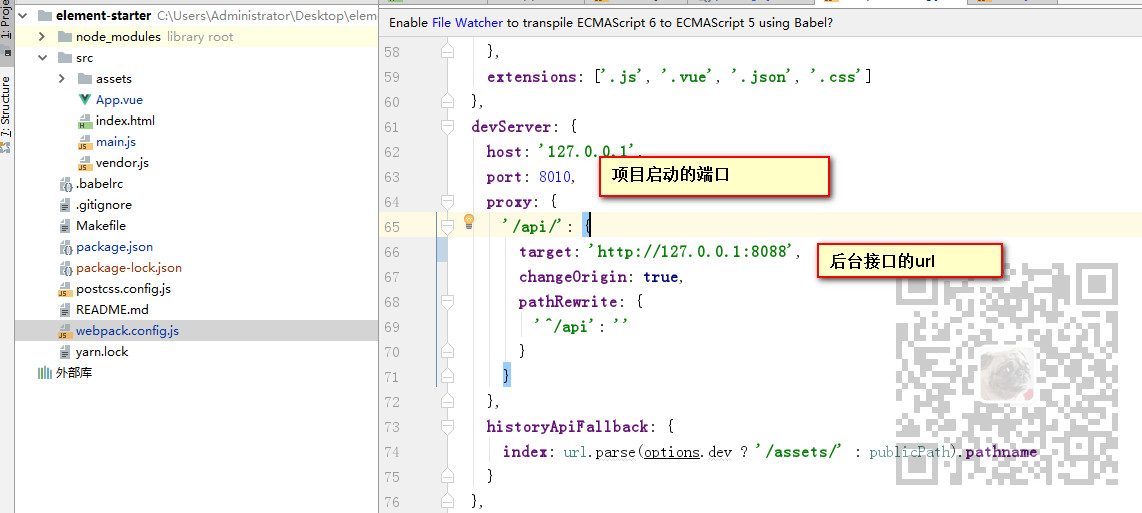
以上配置代表项目的启动端口为8010,ElementUI在向后台请求Url时,就会将/api/的请求向target中执行的地址去请求
所以我们可以在页面App.vue中这样去调用后台数据接口
//页面初始化的时候,去调用
        created: function(){
            debugger
            this.getData()
        },
        methods: {
            //通过ajax去请求服务端,获取数据
            getData() {
                debugger
                let url = "/api/user/selectAllLimit?offset=2&limit=1" ;
                this.$axios.get(url).then((res) => {

                    this.tableData = res.data;//把传回来数据赋给packData

                }).catch(function(error){

                    console.log(error);

                })
            }
请求效果
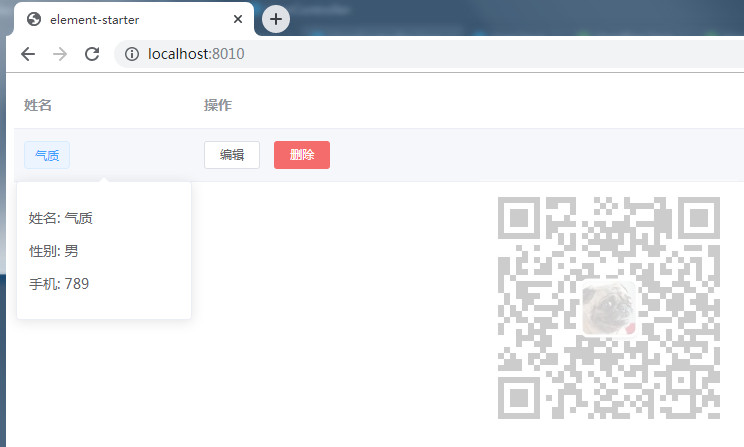
App.vue完整代码
<template>
  <el-table
          :data="tableData"
          style=" 100%">
    <el-table-column
            label="姓名"
            width="180">
      <template slot-scope="scope">
        <el-popover trigger="hover" placement="top">
          <p>姓名: {{ scope.row.name }}</p>
          <p>性别: {{ scope.row.sex }}</p>
          <p>手机: {{ scope.row.phone }}</p>
          <div slot="reference" class="name-wrapper">
            <el-tag size="medium">{{ scope.row.name }}</el-tag>
          </div>
        </el-popover>
      </template>
    </el-table-column>
    <el-table-column label="操作">
      <template slot-scope="scope">
        <el-button
                size="mini"
                @click="handleEdit(scope.$index, scope.row)">编辑</el-button>
        <el-button
                size="mini"
                type="danger"
                @click="handleDelete(scope.$index, scope.row)">删除</el-button>
      </template>
    </el-table-column>
  </el-table>
</template>

<script>
    export default {
        data() {
            return {
                //ajax: null,
                //列表相关
                tableData: [],
                dialogFormVisible: false
            }
        },

        //页面初始化的时候,去调用
        created: function(){
            debugger
            this.getData()
        },
        methods: {
            //通过ajax去请求服务端,获取数据
            getData() {
                debugger
                let url = "/api/user/selectAllLimit?offset=2&limit=1" ;
                this.$axios.get(url).then((res) => {

                    this.tableData = res.data;//把传回来数据赋给packData

                }).catch(function(error){

                    console.log(error);

                })
            }
        }
    }
</script>
代码下载
关注公众号:
霸道的程序猿
回复:
ElementUISpringBoot