原创文章,转载请注明出处http://www.cnblogs.com/baipengzhan/p/6285881.html
Android底部导航栏有多种实现方式,本文详细介绍FrameLayout + RadioGroup结构的实现方式。
主要的思路是,创建一个Fragment的容器,点击RadioButton,动态地向容器中添加Fragment对象。
这种结构不同于ViewPager + RadioButton结构,本结构的Fragment展示部分不能左右滑动,只能
通过点击RadioButton切换页面,是一种单向传递的方式。
Fragment页面可以滑动的底部导航栏结构(ViewPager + RadioButton)可以参考文章:
http://www.cnblogs.com/baipengzhan/p/6270201.html
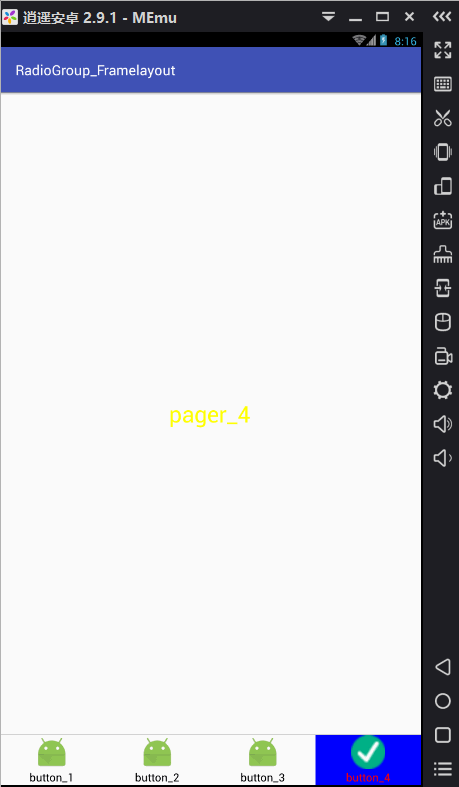
我们先看一下最终做出来的效果吧,以便有个最初的印象。
好啦,那下面我们开始制作这种结构的底部导航栏吧。
本结构特点:
1,我们无法直接手动切换FrameLayout中的Fragment页面,只能借助于RadioGroup;
2,当用户点击RadioGroup部分中的RadioButton,被点击的RadioButton出现被选中时的状态,FrameLayout界面对应于RadioButton的页面会出现在当前界面。
可以看到,FrameLayout和RadioGroup是单向传递。
下面我们通过一个实例完全弄懂FrameLayout + RadioGroup结构的用法
首先创建出我们界面的布局,上边一个FrameLayout,中间 一条分隔线,下边一个RadioGroup
我们在一个Activity的布局中创建如下的xml文件:
<?xml version="1.0" encoding="utf-8"?>
<LinearLayout xmlns:android="http://schemas.android.com/apk/res/android"
    android:id="@+id/activity_main"
    android:orientation="vertical"
    android:layout_width="match_parent"
    android:layout_height="match_parent"
    >

    <!--使用FrameLayout当做盛放Fragment对象的容器-->
    <FrameLayout
        android:id="@+id/framelayout"
        android:layout_width="match_parent"
        android:layout_height="0dp"
        android:layout_weight="1"
        />
    <!--中间为一条分割线-->
    <View
        android:background="@color/divider"
        android:layout_width="match_parent"
        android:layout_height="1dp"/>

    <!--最下边为RadioGroup-->
    <RadioGroup
        android:id="@+id/radioGroup"
        android:orientation="horizontal"
        android:layout_width="match_parent"
        android:layout_height="wrap_content">

        <!--第一个RadioButton-->
        <RadioButton
            android:id="@+id/button_1"
            android:text="button_1"
            android:button="@null"
            android:textColor="@color/radiobutton_color_selector"
            android:background="@drawable/radiobutton_bg_selector"
            android:gravity="center"
            android:layout_weight="1"
            android:drawableTop="@drawable/radiobutton_pic_selector"
            android:layout_width="wrap_content"
            android:layout_height="wrap_content" />
        <!--第二个RadioButton-->
        <RadioButton
            android:id="@+id/button_2"
            android:text="button_2"
            android:button="@null"
            android:textColor="@color/radiobutton_color_selector"
            android:background="@drawable/radiobutton_bg_selector"
            android:gravity="center"
            android:layout_weight="1"
            android:drawableTop="@drawable/radiobutton_pic_selector"
            android:layout_width="wrap_content"
            android:layout_height="wrap_content" />
        <!--第三个RadioButton-->
        <RadioButton
            android:id="@+id/button_3"
            android:text="button_3"
            android:button="@null"
            android:textColor="@color/radiobutton_color_selector"
            android:background="@drawable/radiobutton_bg_selector"
            android:gravity="center"
            android:layout_weight="1"
            android:drawableTop="@drawable/radiobutton_pic_selector"
            android:layout_width="wrap_content"
            android:layout_height="wrap_content" />
        <!--第四个RadioButton-->
        <RadioButton
            android:id="@+id/button_4"
            android:text="button_4"
            android:button="@null"
            android:textColor="@color/radiobutton_color_selector"
            android:background="@drawable/radiobutton_bg_selector"
            android:gravity="center"
            android:layout_weight="1"
            android:drawableTop="@drawable/radiobutton_pic_selector"
            android:layout_width="wrap_content"
            android:layout_height="wrap_content" />

    </RadioGroup>
</LinearLayout>
布局中重要属性说明:
①FrameLayout的android:layout_height属性值为0,android:layout_weight属性值为1。这两个属性值配合使用的意义是:
在竖直方向上FrameLayout占满父控件的剩余空间,也就是占据LinearLayout中除去分隔线和RadioGroup的剩余空间。
关于android:layout_weight属性的详细用法请参考http://www.cnblogs.com/baipengzhan/p/6282826.html
②RadioButton的android:button属性值为@null。这个属性值的意义是,去除RadioGroup默认自带显示的小圆圈。
③RadioButton的android:gravity属性值为center。这个属性值的意义是,使RadioButton的内容(图片和文字)居中。注意,内容默认情况没有居中。
④RadioGroup的android:orientation属性值为horizontal。意为,水平布置其中的RadioButton。
⑤RadioButton的android:textColor属性值为@color/radiobutton_color_selector,是一个颜色状态选择器。颜色状态选择器就是一个定义在res/color目录
下的xml文件,color目录需要我们手动创建。颜色状态选择器的代码如下:
<?xml version="1.0" encoding="utf-8"?>
<selector xmlns:android="http://schemas.android.com/apk/res/android">
    <item android:color="#f00" android:state_checked="true"/>
    <item android:color="#f00" android:state_pressed="true"/>
    <item android:color="#f00" android:state_selected="true"/>

    <!--没被选中时的颜色-->
    <item android:color="#000"/>

</selector>
关于状态选择器的更详细知识,请参考文章http://www.cnblogs.com/baipengzhan/p/6284682.html
⑥RadioButton的android:background属性值为@drawable/radiobutton_bg_selector,这一个背景状态选择器,用来改变背景颜色,代码如下:
<?xml version="1.0" encoding="utf-8"?>
<selector xmlns:android="http://schemas.android.com/apk/res/android">
    <item android:state_selected="true" android:drawable="@color/radiobutton_bg_selected"/>
    <item android:state_checked="true" android:drawable="@color/radiobutton_bg_selected"/>
    <item android:state_pressed="true" android:drawable="@color/radiobutton_bg_selected"/>

    <!--未被选中-->
    <item android:drawable="@color/radiobutton_bg_normal" />

</selector>
这个状态选择器是放置在res/drawable目录下的一个普通状态选择器,该选择器的属性android:drawable的属性值不能直接设置颜色,
颜色要封装在values目录下的colors.xml文件中,否则出错。
⑦RadioButton的android:drawableTop属性值为@drawable/radiobutton_pic_selector,是一个普通的状态选择器,用来改变图片,代码如下:
<?xml version="1.0" encoding="utf-8"?>
<selector xmlns:android="http://schemas.android.com/apk/res/android">
    <item android:state_selected="true" android:drawable="@mipmap/ic_selected"/>
    <item android:state_checked="true" android:drawable="@mipmap/ic_selected"/>
    <item android:state_pressed="true" android:drawable="@mipmap/ic_selected"/>

    <!--未被选中-->
    <item android:drawable="@mipmap/ic_launcher"/>

</selector>
该状态选择器同样放置在res/drawable目录下,选择器的属性值android:drawable属性值变为了图片,注意代码写到此处时,系统可能不会提示,
需要手动将该属性值添加进来。
更多关于状态选择器的知识请参考文章http://www.cnblogs.com/baipengzhan/p/6284682.html
创建出FrameLayout页面盛放的Fragment
我们创建出对应于四个RadioButton的四个Fragment,每个Fragment中盛放一个TextView。下边只列出一个Fragment的写法,剩余的相似,请各位朋友自己写写哦。
public class Fragment_1 extends Fragment {

    private View mView;

    @Nullable
    @Override
    public View onCreateView(LayoutInflater inflater, @Nullable ViewGroup container, @Nullable Bundle savedInstanceState) {
        //注意View对象的重复使用,以便节省资源
        if(mView == null) {
            mView = inflater.inflate(R.layout.fragment_1_layout,container,false);
        }

        return mView;
    }
}
Fragment_1对应的布局:
<?xml version="1.0" encoding="utf-8"?>
<LinearLayout xmlns:android="http://schemas.android.com/apk/res/android"
    android:orientation="vertical"
    android:gravity="center"
    android:layout_width="match_parent"
    android:layout_height="match_parent">

    <!--创建TextView-->
    <TextView
        android:text="pager_1"
        android:textSize="28sp"
        android:textColor="#00f"
        android:layout_width="wrap_content"
        android:layout_height="wrap_content" />

</LinearLayout>
在Activity中进行主要逻辑处理
我们在Activity中主要进行的工作如下:
监听RadioGroup中的RadioButton,改变FrameLayout中盛放的Fragment对象;
package com.example.radiogroup_framelayout;

import android.support.v4.app.Fragment;
import android.support.v4.app.FragmentManager;
import android.support.v4.app.FragmentTransaction;
import android.support.v7.app.AppCompatActivity;
import android.os.Bundle;
import android.view.View;
import android.view.ViewGroup;
import android.widget.FrameLayout;
import android.widget.RadioButton;
import android.widget.RadioGroup;

import java.util.ArrayList;
import java.util.List;

public class MainActivity extends AppCompatActivity implements View.OnClickListener{
    private RadioGroup radioGroup;
    private RadioButton button_1;
    private RadioButton button_2;
    private RadioButton button_3;
    private RadioButton button_4;
    private Fragment_1 fragment_1;
    private Fragment_2 fragment_2;
    private Fragment_3 fragment_3;
    private Fragment_4 fragment_4;
    private List<Fragment> list;
    private FrameLayout frameLayout;

    @Override
    protected void onCreate(Bundle savedInstanceState) {
        super.onCreate(savedInstanceState);
        setContentView(R.layout.activity_main);

        //初始化页面
        initView();
    }

    //初始化页面
    private void initView() {
        frameLayout = (FrameLayout) findViewById(R.id.framelayout);
        radioGroup = (RadioGroup) findViewById(R.id.radioGroup);

        //找到四个按钮
        button_1 = (RadioButton) findViewById(R.id.button_1);
        button_2 = (RadioButton) findViewById(R.id.button_2);
        button_3 = (RadioButton) findViewById(R.id.button_3);
        button_4 = (RadioButton) findViewById(R.id.button_4);

        //创建Fragment对象及集合
        fragment_1 = new Fragment_1();
        fragment_2 = new Fragment_2();
        fragment_3 = new Fragment_3();
        fragment_4 = new Fragment_4();

        //将Fragment对象添加到list中
        list = new ArrayList<>();
        list.add(fragment_1);
        list.add(fragment_2);
        list.add(fragment_3);
        list.add(fragment_4);

        //设置RadioGroup开始时设置的按钮,设置第一个按钮为默认值
        radioGroup.check(R.id.button_1);


        //设置按钮点击监听
        button_1.setOnClickListener(this);
        button_2.setOnClickListener(this);
        button_3.setOnClickListener(this);
        button_4.setOnClickListener(this);

        //初始时向容器中添加第一个Fragment对象
        addFragment(fragment_1);
    }

    @Override
    public void finish() {
        ViewGroup viewGroup = (ViewGroup) getWindow().getDecorView();
        viewGroup.removeAllViews();
        super.finish();
    }

    //点击事件处理
    @Override
    public void onClick(View v) {
        //我们根据参数的id区别不同按钮
        //不同按钮对应着不同的Fragment对象页面
        switch (v.getId()) {
            case R.id.button_1:
                addFragment(fragment_1);
                break;
            case R.id.button_2:
                addFragment(fragment_2);
                break;
            case R.id.button_3:
                addFragment(fragment_3);
                break;
            case R.id.button_4:
                addFragment(fragment_4);
                break;
            default:
                break;
        }

    }

    //向Activity中添加Fragment的方法
    public void addFragment(Fragment fragment) {

        //获得Fragment管理器
        FragmentManager fragmentManager = getSupportFragmentManager();
        //使用管理器开启事务
        FragmentTransaction fragmentTransaction = fragmentManager.beginTransaction();
        //使用事务替换Fragment容器中Fragment对象
        fragmentTransaction.replace(R.id.framelayout,fragment);
        //提交事务,否则事务不生效
        fragmentTransaction.commit();
    }


}
注意:
以上代码中很多可以优化,比如xml文件中大量的属性可以提取样式,等等,这里列出只是为了方便更多水平的读者读懂,请谅解。
其实Fragment对象的容器不止FrameLayout一种,只是这种结构容器对Fragment支持比较好,更为常用,各位小伙伴可以使用其他容器尝试哦,原理是一样的。
本方式利用动态添加Fragment对象到Activity中,其实我们也可以有个设想,使用静态方法添加到容器中,各个Fragment相互重叠,只有一个显示,我还没尝试,
今后有机会了可以这样试一下,各位小伙伴可以试试哦。
好啦,FrameLayout + RadioGroup结构我们到此就讲解完成了,感谢阅读!