应用雾到游戏对象
基于距离或深度的雾
支持deferred fog
1 Forward Fog
在14之前,一直假定着光线在真空中传播,在真空中可能是精确的。但是当光线穿过大气或水就不一样了,光线在击中物体表面时会发生被吸收、散射和反射。
一个精确的大气干扰光线渲染将需要及其昂贵的体积测量方法,那是大多数现代GPU负担不起的。相反,勉强采用一些常量雾参数近似模拟。
1.1 Standard Fog
Unity光照设置包含了场景雾设置选项,默认是不启用。启用后,默认是灰色雾。Unity自带的雾只适用于使用了Forward渲染路径的物体。若激活Deferred path,提示:
图1 deferred 提示
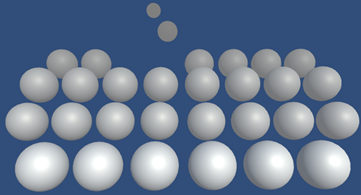
图2 不明显的雾
1.2 Linear Fog
图2不明显,是因为Fog color灰色雾将散射和反射更多的光线,吸收较少。把Fog Color改为纯黑色试试
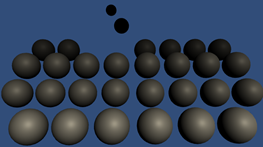
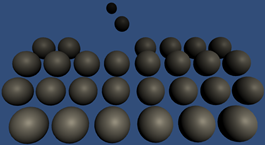
图3 linear fog
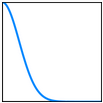
雾的浓度是随视距线性增长的,在视距开头正常显示,超过这个距离就只有雾的颜色可见。
线性雾公式:
c 是雾坐标;
S 是视距起始距离;
E 是视距终止距离;
f值 被限定在[0, 1]范围,被用在雾和物体着色之间插值。
最终计算在fragment color着色到物体对象上,雾不会影响到skybox
1.3 Exponential Fog
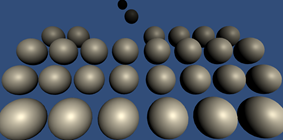
更接近真实感的雾
图4 指数雾
指数雾公式:
d 是fog的密度因子;
c 是距离因子。
1.4 Exponential Squared Fog
图5 指数平方雾
指数平方雾公式:
1.5 Adding Fog
增加Fog到自己的shader中,增加Fog需要使用内置关键字:multi_compile_fog指令。该指令会额外增加:FOG_LINEAR、FOG_EXP、FOG_EXP2变体。
#pragma multi_compile_fog
新增ApplyFog()函数,用于在Fragment计算最终着色:获取当前颜色和插值数据作为参数,返回最终颜色。
计算步骤:
任何雾公式都是基于视距的,首先计算出视距值备用;
然后使用UnityCG.cginc宏UNITY_CALC_FOG_FACTOR_RAW根据具体雾公式计算出雾因子。
最后根据雾因子,在fog_color和当前color取插值返回。
float4 ApplyFOG(float4 color, Interpolators i)
{
    float viewDistance = length(_WorldSpaceCameraPos - i.worldPos);
    UNITY_CALC_FOG_FACTOR_RAW(viewDistance);
    return learp(unity_FogColor, color, unityFogFactor);
}

//宏UNITY_CALC_FOG_FACTOR_RAW
#if defined(FOG_LINEAR)
    // factor = (end-z)/(end-start) = z * (-1/(end-start)) + (end/(end-start))
    #define UNITY_CALC_FOG_FACTOR_RAW(coord) float unityFogFactor = (coord) * unity_FogParams.z + unity_FogParams.w
#elif defined(FOG_EXP)
    // factor = exp(-density*z)
    #define UNITY_CALC_FOG_FACTOR_RAW(coord) float unityFogFactor = unity_FogParams.y * (coord); unityFogFactor = exp2(-unityFogFactor)
#elif defined(FOG_EXP2)
    // factor = exp(-(density*z)^2)
    #define UNITY_CALC_FOG_FACTOR_RAW(coord) float unityFogFactor = unity_FogParams.x * (coord); unityFogFactor = exp2(-unityFogFactor*unityFogFactor)
#else
    #define UNITY_CALC_FOG_FACTOR_RAW(coord) float unityFogFactor = 0.0
#endif

//宏UNITY_CALC_FOG_FACTOR
#define UNITY_CALC_FOG_FACTOR(coord) UNITY_CALC_FOG_FACTOR_RAW(UNITY_Z_0_FAR_FROM_CLIPSPACE(coord))

//unity_FogParams 定义在ShaderVariables
// x = density / sqrt(ln(2)), useful for Exp2 mode
// y = density / ln(2), useful for Exp mode
// z = -1/(end-start), useful for Linear mode
// w = end/(end-start), useful for Linear mode
float4 unity_FogParams;
注意雾因子必须限定在[0,1]
return learp(unity_FogColor, color, saturate(unityFogFactor));同时雾也不能影响Alpha值
color.rgb = learp(unity_FogColor.rgb, color.rgb, saturate(unityFogFactor));
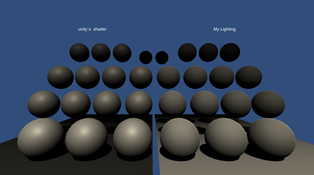
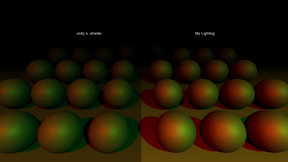
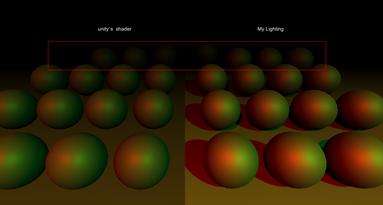
图6 linear:standard vs. mine
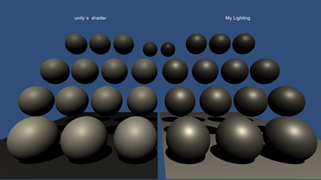
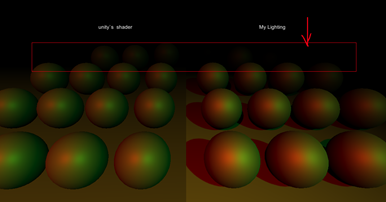
图7 exp:standard vs. mine
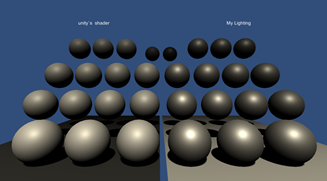
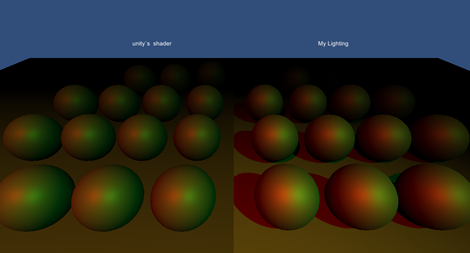
图8 exp2:standard vs. mine
1.6 Depth-Based Fog
增加深度雾支持。与Standard Shader不同的原因是计算fog坐标方法不同。虽然使用world-space视图距离是有意义的,但标准着色器使用裁剪空间深度值。因此视角不影响雾坐标。此外,在某些情况下,距离是受相机的近裁切面距离的影响,这将把雾推开一点。
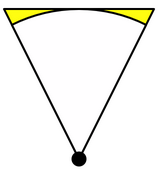
图9 深度 (三角) vs. 距离(园)
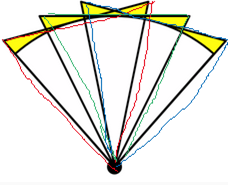
基于深度代替距离的优点是:不必计算平方根,计算速度更快,适用于非真实渲染。缺点是:忽略视角,也即相机以原点旋转会影响雾密度,因为旋转时密度会改变。
图10 红到蓝旋转,深度改变密度
支持depth-based深度雾 ,必须把clip-pass裁剪空间深度值传递到片元函数。定义一个关键字:FOG_DEPTH.
#if defined(FOG_LINEAR) || defined(FOG_EXP) || defined(FOG_EXP2)
    #define FOG_DEPTH 1
#endif
由于需要多存储一个z值,但又不能新增一个独立的变量,就把worldPos改为float4
#if defined(FOG_DEPTH)
    float4 worldPos : TEXCOORD4;
#else
    float3 worldPos : TEXCOORD4;
#endif
然后要替换i.worldPos的所有用法为i.worldPos.xyz。将剪贴空间深度值赋给i.worldPos.w,在fragment传递给viewDistance。它只是齐次剪贴空间位置的Z坐标,所以在它被转换为0-1范围内的值之前。
图11 incrrect
图12 正确
不正确的原因:可能会有反向裁剪空间Z的情况,需要转换。

#if defined(UNITY_REVERSED_Z)
    //D3d with reversed Z =>
    //z clip range is [near, 0] -> remapping to [0, far]
    //max is required to protect ourselves from near plane not being
    //correct/meaningfull in case of oblique matrices.
    #define UNITY_Z_0_FAR_FROM_CLIPSPACE(coord)
        max(((1.0-(coord)/_ProjectionParams.y)*_ProjectionParams.z),0)
#elif UNITY_UV_STARTS_AT_TOP
    //D3d without reversed z => z clip range is [0, far] -> nothing to do
    #define UNITY_Z_0_FAR_FROM_CLIPSPACE(coord) (coord)
#else
    //Opengl => z clip range is [-near, far] -> should remap in theory
    //but dont do it in practice to save some perf (range is close enought)
    #define UNITY_Z_0_FAR_FROM_CLIPSPACE(coord) (coord)
#endif

#define UNITY_CALC_FOG_FACTOR(coord)
    UNITY_CALC_FOG_FACTOR_RAW(UNITY_Z_0_FAR_FROM_CLIPSPACE(coord))
1.7 Clip-Space Depth or World-Space Distance
增加双支持!FOG_DISTANCE 和 FOG_DEPTH。用宏代替feature指令,仿照BINORMAL_PER_FRAGMENT定义FOG_DISTANCE,默认就是它。
CGINCLUDE
    #define BINORMAL_PER_FRAGMENT
    #define FOG_DISTANCE
ENDCG
//在shader中,要切换到基于距离的雾,如果FOG_DISTANCE已经被定义,我们要做的就是去掉FOG_DEPTH的定义。 #if defined(FOG_LINEAR) || defined(FOG_EXP) || defined(FOG_EXP2) #if !defined(FOG_DISTANCE) #define FOG_DEPTH 1 #endif #endif
1.8 Disabling Fog
增加支持禁用。只在需要时使用雾,增加FOG_ON宏
#if defined(FOG_LINEAR) || defined(FOG_EXP) || defined(FOG_EXP2)
    #if !defined(FOG_DISTANCE)
        #define FOG_DEPTH 1
    #endif
    #define FOG_ON 1
#endif

float4 ApplyFog (float4 color, Interpolators i) {
    #if FOG_ON
        float viewDistance = length(_WorldSpaceCameraPos - i.worldPos.xyz);
        #if FOG_DEPTH
            viewDistance = UNITY_Z_0_FAR_FROM_CLIPSPACE(i.worldPos.w);
        #endif
        UNITY_CALC_FOG_FACTOR_RAW(viewDistance);
        color.rgb = lerp(unity_FogColor.rgb, color.rgb, saturate(unityFogFactor));
    #endif
    return color;
}
1.9 Multiple Lights
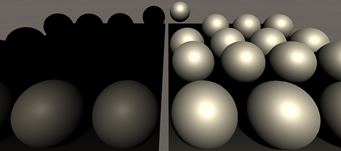
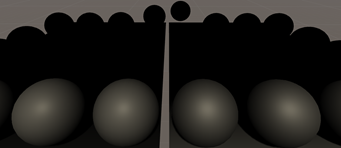
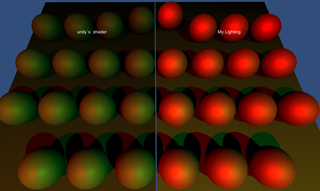
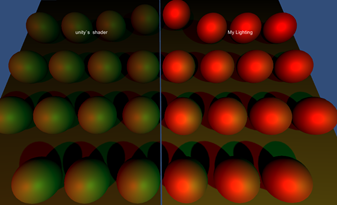
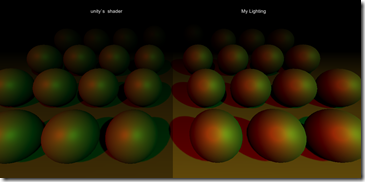
增加支持多光源。但是变得更亮了,这是因为每个光的颜色都叠加到了雾色之上,所以黑色雾是没问题。
图13 太亮了
解决办法就是:对additive pass使用黑色雾,这样就会淡化一部分颜色。
float3 fogColor = 0;
#if defined(FORWARD_BASE_PASS)
    fogColor = unity_FogColor.rgb;
#endif
color.rgb = lerp(fogColor, color.rgb, saturate(unityFogFactor));
2 Deferred Fog
deferred路径没有雾,这是因为所有的光照计算完成后,才会计算雾。为了能够在deferred渲染雾,见2.1
2.1 Image Effects
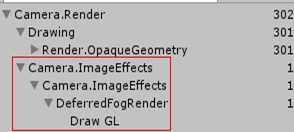
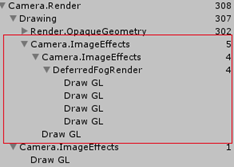
要增加雾渲染,需要等所有光照计算直到它们完成后,在其他pass再次渲染雾。该pass不在shader内部,属于屏幕ImageEffects(后处理)阶段。
[ExecuteInEditMode]
public class DeferredFogRender : MonoBehaviour
{
    private void OnRenderImage(RenderTexture source, RenderTexture destination)
    {
    }
}
这是增加了一个全屏后处理pass。如果有多个这样实现了OnRenderImage脚本,将会按顺序依次执行。
OnRenderImage(RenderTexture source, RenderTexture destination)两个参数:
source 是已计算好最终颜色
destination 输出雾。若为空直接进入帧缓冲区
方法内部必须调用Graphics.Blit函数,它会画一个全屏面片输出到Destination
void OnRenderImage (RenderTexture source, RenderTexture destination) {
    Graphics.Blit(source, destination);
}
图14 后处理pass
2.2 Fog Shader
2.1只是做了简单的拷贝,没什么用。必须要新建一个处理sourceTexture的shader来渲染雾。基本框架:
Shader "Custom/MyDeferredFog"
{
    Properties
    {
        _MainTex ("Texture", 2D) = "white" {}
    }
    SubShader
    {
        // No culling or depth
        Cull Off
        ZWrite Off
        ZTest Always
        Pass
        {
        }
    }
}
然后用后处理脚本需要引用该Shader
Pass
{
    CGPROGRAM
    #pragma vertex   VertexProgram
    #pragma fragment FragmentProgram
    #pragma multi_compile_fog
    #include "UnityCG.cginc"
    sampler2D _MainTex;
    struct modelData
    {
        float4 vertex : POSITION;
        float2 uv      : TEXCOORD0;
    };
    struct Interpolarters
    {
        float4 position : SV_POSITION;
        float2 uv        : TEXCOORD0;
    };
    Interpolarters VertexProgram(modelData m) {
        Interpolarters i;
        i.position = UnityObjectToClipPos(m.vertex);
        i.uv = m.uv;
        return i;
    }
    float4 FragmentProgram(Interpolarters i) :SV_Target
    {
        float3 sourceColor = tex2D(_MainTex, i.uv).rgb;
        return float4(sourceColor, 1);
    }
    ENDCG
}
2.3 Depth-Based Fog
增加深度雾。Unity自带深度buffer变量_CameraDepthTexture, 然后使用指令SAMPLE_DEPTH_TEXTURE采样深度:
UNITY_DECLARE_DEPTH_TEXTURE(_CameraDepthTexture);
float4 FragmentProgram(Interpolarters i) :SV_Target
{
    float depth = SAMPLE_DEPTHE_TEXTURE(_CameraDepthTexture, i.uv);
    float3 sourceColor  = tex2D(_MainTex, i.uv).rgb;
    return float4(sourceColor, 1);
}
!首先。可以使用在UnityCG中定义的Linear01Depth函数将其转换为一个线性范围。这是因为从深度缓冲区得到原始数据后,需要从齐次坐标转换为[0,1]范围的clip-space坐标。我们必须转换这个值,使它成为世界空间中的一个线性深度值。
float depth = SAMPLE_DEPTH_TEXTURE(_CameraDepthTexture, i.uv);
depth = Linear01Depth(depth);
Linear01Depth内部实现:

// Z buffer to linear 0..1 depth
inline float Linear01Depth( float z )
{
    return 1.0 / (_ZBufferParams.x * z + _ZBufferParams.y);
}

// Values used to linearize the Z buffer
// (http://www.humus.name/temp/Linearize%20depth.txt)
// x = 1-far/near
// y = far/near
// z = x/far
// w = y/far
float4 _ZBufferParams;
!然后。需要使用far_clip平面距离缩放该depth值,得到真实的深度视距。clip_space裁剪空间可通过float4 _ProjectionParams变量获得, 定义在UnityShaderVariables.cginc中。其中Z分量就是远平面far_clip距离。。
depth = Linear01Depth(depth);
float distance = depth * _ProjectionParams.z;
!最后,计算实际的fog。
float viewDistance = depth * _ProjectionParams.z;
UNITY_CALC_FOG_FACTOR_RAW(viewDistance);
unityFogFactor = saturate(unityFogFactor);
float3 sourceColor  = tex2D(_MainTex, i.uv).rgb;
float3 color = lerp(unity_FogColor.rgb, sourceColor, unityFogFactor);
return float4(color, 1);
图15 不太明显的雾
2.4 Fixing the Fog
对比图15,就像把雾蒙在了物体上方。解决办法就是在绘制物体之前,绘制雾。使用ImageEffectOpaque属性绘制
[ImageEffectOpaque]
void OnRenderImage (RenderTexture source, RenderTexture destination) {
    Graphics.Blit(source, destination, fogMate);
}
处理近平面(非精确处理),near plane存储在Y值中
float viewDistance = depth * _ProjectionParams.z -_ProjectionParams.y;2.5 Distance-Based Fog
deferred灯光的着色,从depth-buffer中重建世界空间位置,以便计算灯光。我们也可以这样仿照这样计算雾。
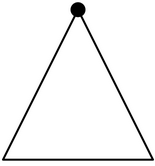
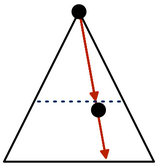
透视相机的clip-space空间定义了一个梯形区域,如果忽略near-plane就得到的是一个以相机world-pos为顶点的三角形区域。它的高是far-plaen距离,那么线性化后的depth范围:顶点为0,底边为1。
图16 金字塔区域
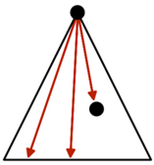
对于渲染的后处理图形Image的每个像素,都能通过从顶点到底边发射一条射线(从屏幕射向3D空间),检测是否击中任何物体,击中渲染,未击中不渲染。
图17 Image每个像素发射一条射线
若击中某个物体,那么对应像素的深度就要小于1. 如果,该射线在半道击中了物体,射线对应的像素深度值就是1/2.这就意味着射线对应的Z值 = 射线击中物体时的长度 ➗ 射线总长度。范围[0, 1]。又由于射线的方向都是一致的,X和Y坐标也应该减半。
图18 射线的缩放
一旦得到该射线,就能从相机的位置出发,寻找可能会被渲染的物体表面的世界坐标(若击中)。同时,也要得到该射线的长度。
要使用上述方法,必须知道从相机到平面的每一个像素的射线。但实际上,只需要4条射线,金字塔的每个角都需要一条射线。用插值可给出中间所有像素的光线。
2.6 Calculating Rays
基于相机远平面和视角计算光线,同时相机的方向和位置与距离无关,所以可以忽略变换。Camera提供了一个函数:CalculateFrustumCorners,四个参数
矩形面积(image rect)
光线投射距离(相机far-plane)
立体渲染(相机自带)
4个元素的3D向量组
        deferredCamera.CalculateFrustumCorners
        (
            rectArea,
            deferredCamera.farClipPlane,
            deferredCamera.stereoActiveEye,
            corners
        );
下一步传递该数据至Shader,同时也得改变索引顺序。相机提供的是:左下、左上、右上、右下。shader需要:左下、右下、左上、右上
//corners vectex index: b-l, u-l, u-r, b-r
//shader vectex index : b-l, b-r, u-l, u-r
frustumCorners[0] = corners[0];
frustumCorners[1] = corners[3];
frustumCorners[2] = corners[1];
frustumCorners[3] = corners[2];
fogMate.SetVectorArray("__FustumCorners", frustumCorners);2.7 Deriving Distances
Shader需要一个接收变量,同时定义一个FOG_DISTANCE宏,当需要使用距离时再计算光线。
#define FOG_DISTANCE

struct Interpolators
{
    float4 position : SV_POSITION;
    float2 uv       : TEXCOORD0;
#if FOG_DISTANCE
    float3 ray : TEXCOORD1;
#endif
};
根据UV坐标计算获取数组中对应的光线,传进shader的数组排列:(0,0) (1,0) (0,1) (1,1),使用U+2V可得
#if FOG_DISTANCE
    i.ray = _FustumCorners[i.uv.x + 2 * i.uv.y];
#endif
最后在Fragment函数替换基于深度计算的雾,使用基于距离计算
float viewDistance = 0;
#if defined(FOG_DISTANCE)
    viewDistance = length(i.ray * depth);
#else
    viewDistance = depth * _ProjectionParams.z - _ProjectionParams.y;
#endif
图19 基于深度的雾 standard vs deferrd
图20 基于距离的雾 standard vs deferrd
2.8 Fogged Skybox
解放天空盒。两个不同渲染路径渲染的雾会有显著差异。延迟雾也会影响天空盒。它的作用就像far-plane是一个固体屏障,受到雾的影响。当深度值接近1时,表明已经到达了远平面。如果不想给天空盒蒙上雾,可以通过将雾因子设置为1来防止。
if (depth > 0.999)
{
    unityFogFactor = 1;
}
2.9 No Fog
最后考虑如何停止渲染雾。解决方案是当没有设置任何雾关键字,通过设置雾因子为1即可。
#if !defined(FOG_LINEAR) || !defined(FOG_EXP) || !defined(FOG_EXP2)
    unityFogFactor = 1;
#endif
