前言:请各大网友尊重本人原创知识分享,谨记本人博客:南国以南i
背景:solr默认安装没带权限控制,每次进入页面直接操作都有点裸奔的感觉。
一、SolrCloud集群模式
说明:要使用基本身份验证您必须先创建一个security.json文件,对于基本身份验证,security.json文件必须有一个authentication部分,它定义用于身份验证的类。可以在创建文件时添加用户名和密码(例如:sha256(password+salt) hash),或者可以稍后使用基本验证API添加。
1.示例security.json显示了如下所示的显示两个部分:
{
"authentication":{ 【1】
   "blockUnknown": true, 【2】
   "class":"solr.BasicAuthPlugin",
   "credentials":{"solr":"IV0EHq1OnNrj6gvRCwvFwTrZ1+z1oBbnQdiVC3otuq0= Ndd7LKvVBAaZIF0QAVi1ekCfAJXr1GGfLtRUXhgrF8c="} 【3】
},
"authorization":{
   "class":"solr.RuleBasedAuthorizationPlugin",
   "permissions":[{"name":"security-edit",
      "role":"admin"}], 【4】
   "user-role":{"solr":"admin"} 【5】
}
}

以下的解释对应于上述的序号:
1.启用基本身份验证和基于规则的授权插件。
2.参数 "blockUnknown": true 表示不允许未经身份验证的请求通过。
3.已定义了一个名为 "solr" 的用户,其中有密码 "SolrRocks"。
4."admin" 角色已定义,并且具有编辑安全设置的权限。
5."solr" 用户已被定义为 "admin" 角色。
SolrCloud模式必须上传security.json到ZooKeeper。首先登入ZooKeeper终端,输入示例命令(内json字段已在上述说明)
#进入ZooKeeper终端
./zkCli.sh

#修改ZooKeeper内security.josn节点文件
set /security.json '{"authentication":{"blockUnknown":true,"class":"solr.BasicAuthPlugin","credentials":{"solr":"IV0EHq1OnNrj6gvRCwvFwTrZ1+z1oBbnQdiVC3otuq0= Ndd7LKvVBAaZIF0QAVi1ekCfAJXr1GGfLtRUXhgrF8c="}},"authorization":{"class":"solr.RuleBasedAuthorizationPlugin","permissions":[{"name":"security-edit","role":"admin"}],"user-role":{"solr":"admin"}}}'
2.重启solr访问,此时solr必须输入用户名和密码进行登入验证,这里配置了用户名密码是:solr:SolrRocks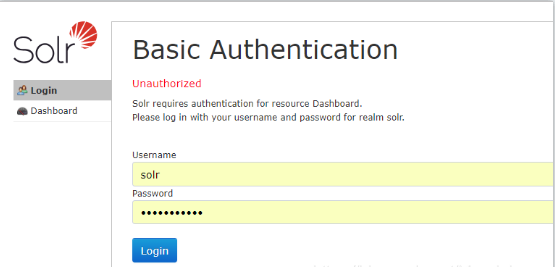
3.solr用户管理Api
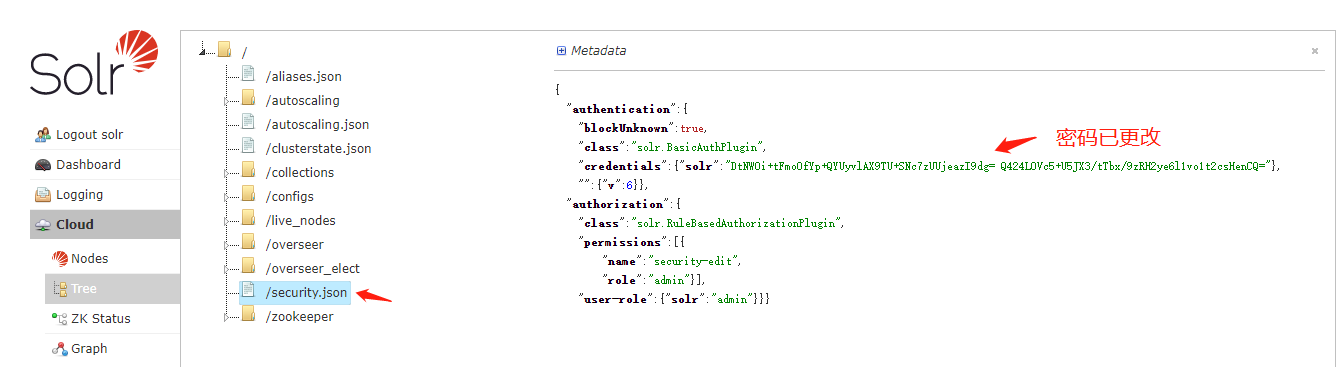
#新增或修改密码(如果用户名存在,就修改密码,否则就创建用户)
curl --user solr:SolrRocks http://localhost:8983/api/cluster/security/authentication -H 'Content-type:application/json' -d '{"set-user": {"solr":"solr","tom":"tom"}}'

#删除用户
curl --user solr:SolrRocks http://localhost:8983/api/cluster/security/authentication -H 'Content-type:application/json' -d '{"delete-user": ["tom"]}'
二、Solr单机部署模式
1.修改tomcat/conf/tomcat-user.xml配置,添加用户名、密码
<?xml version='1.0' encoding='utf-8'?>
<!--
  Licensed to the Apache Software Foundation (ASF) under one or more
  contributor license agreements.  See the NOTICE file distributed with
  this work for additional information regarding copyright ownership.
  The ASF licenses this file to You under the Apache License, Version 2.0
  (the "License"); you may not use this file except in compliance with
  the License.  You may obtain a copy of the License at

      http://www.apache.org/licenses/LICENSE-2.0

  Unless required by applicable law or agreed to in writing, software
  distributed under the License is distributed on an "AS IS" BASIS,
  WITHOUT WARRANTIES OR CONDITIONS OF ANY KIND, either express or implied.
  See the License for the specific language governing permissions and
  limitations under the License.
-->
<tomcat-users>
<!--
  NOTE:  By default, no user is included in the "manager-gui" role required
  to operate the "/manager/html" web application.  If you wish to use this app,
  you must define such a user - the username and password are arbitrary.
-->
<!--
  NOTE:  The sample user and role entries below are wrapped in a comment
  and thus are ignored when reading this file. Do not forget to remove
  <!.. ..> that surrounds them.


  <role rolename="tomcat"/>
  <role rolename="role1"/>
  <user username="tomcat" password="tomcat" roles="tomcat"/>
  <user username="both" password="tomcat" roles="tomcat,role1"/>
  <user username="role1" password="tomcat" roles="role1"/>
-->
<!-- 用户名:solr、密码:solr、roles:用户级别-->
<user username="solr" password="solr" roles="admin,manager"/>
</tomcat-users>
2.修改tomcat/webapps/solr/WEB-INF/web.xml配置,在最后增加下面代码
<security-constraint>
    <web-resource-collection>
        <web-resource-name>Restrict access to Solr admin</web-resource-name>
        <url-pattern>/admin/*</url-pattern>
        <http-method>DELETE</http-method>
        <http-method>GET</http-method>
        <http-method>POST</http-method>
        <http-method>PUT</http-method>
    </web-resource-collection>
    <auth-constraint>
        <role-name>manager</role-name>
    </auth-constraint>
    <user-data-constraint>
        <transport-guarantee>NONE</transport-guarantee>
    </user-data-constraint>
</security-constraint>
<login-config>
        <auth-method>BASIC</auth-method>
        <realm-name>default</realm-name>
</login-config>
3.重启solr访问,此时solr必须输入用户名和密码进行登入验证,这里配置了用户名密码是:solr:solr

我是南国以南i记录点滴每天成长一点点,学习是永无止境的!转载请附原文链接!!!