本博文仅作本人操作过程的记录,留作备忘。自强不息 QQ1222698
2b建议使用最后一个版本的jessie,最新版本buster比较慢。下载地址http://downloads.raspberrypi.org/raspbian/images/raspbian-2017-07-05/2017-07-05-raspbian-jessie.zip
1、连接上HDMI线,插上触摸屏,插上键盘,鼠标,网线,启动。系统正常启动,但是一直闪烁,不停的黑屏,是由于触摸屏的usb口供电不足,等会再处理这个问题,先把触摸屏的usb插到另外的一个电源(手机充电器或电脑USB)上就行了,系统启动后,是桌面。

3、第一个工作,启用root用户,修改密码,打开命令行,运行下面的命令
先在树莓派桌面下打开控制台,修改pi密码
sudo passwd pi 输入密码 重复输入密码
ifconfig 查看一下ip地址
现在可以用远程终端ssh连上去,用户名pi,密码
修改root密码 sudo passwd root 输入密码 重复输入密码
解锁root用户 sudo passwd --unlock root
3.1、设置ssh的root登陆
/设置ssh登陆,为什么不用vi呢,因为现在的vi不好用,等会再用
sudo nano /etc/ssh/sshd_config
#注释掉这行:PermitRootLogin prohibit-password
添加:PermitRootLogin yes
ctrl+o 保存,回车确认文件名 ctrl+x 退出
重启ssh
#sudo service ssh restart
3.2、修改软件源
sudo nano /etc/apt/sources.list
注释掉原来的,换成清华的
deb http://mirrors.tuna.tsinghua.edu.cn/raspbian/raspbian/ jessie main contrib non-free rpi firmware ui
deb-src http://mirrors.tuna.tsinghua.edu.cn/raspbian/raspbian/ jessie main contrib non-free rpi firmware ui
注释掉原来的,换成清华的
sudo nano /etc/apt/sources.list.d/raspi.list
deb http://mirrors.tuna.tsinghua.edu.cn/raspbian/raspbian/ jessie main ui
#更新软件源列表
sudo apt-get update
3.3、卸载vi 安装vim,因为系统自带的vi不好用,更新后就好用了。
sudo apt-get remove vim-common
sudo apt-get install vim
3.5、扩展sd卡
sudo raspi-config,选择第1、expand filesystem,回车,再回车。
sudo raspi-config,选择Interfacing Options,打开SSH,打开VNC
选择Advanced Options,打开Expand Filesystem,扩展sd卡。
4、修改IP地址,打开命令行,先su到root下,输入leafpad /etc/network/interfaces,打开网络配置文件。(也可以在桌面下直接设置)
auto eth0
iface eth0 inet static
address 192.168.0.10
netmask 255.255.255.0
gateway 192.168.0.1
5、修改DNS配置
/etc/resolv.conf
nameserver 192.168.0.1
,也可以不改,好像会自动更新(我猜的)。
6、运行命令reboot,系统重启后,IP就可以用了。
使用ssh连接到树莓派上。SecureCRT,地址http://www.xdowns.com/soft/softdown.asp?softid=23625
a、刚连接的时候会出现乱码,等安装完中文就可以了。
b、如果执行完下面的步骤,还是乱码,就SecureCRT,选项,会话选项,终端,外观,字符编码,选择UTF-8,就显示中文了。

7、安装中文字体
sudo apt-get install fonts-arphic-gbsn00lp fonts-arphic-gkai00mp fonts-arphic-bsmi00lp fonts-arphic-bkai00mp(是L,不是1)
8、在/etc/profile文件最后添加,export LC_ALL="zh_CN.UTF-8"
9、命令sudo raspi-config,修改系统默认字体,选择第5项,internationalisation options,回车,选择I1 change locale,回车,往下翻(最下面),找到zh_CN.UTF-8,回车。等半天后,重启后就可以了。
Localisation Options,打开Change Locale,选择zh_CN.UTF-8
10、下载输入法
sudo apt-get install fcitx-googlepinyin fcitx-module-cloudpinyin fcitx-sunpinyin libsunpinyin3 sunpinyin-data
11、触摸屏的USB插在树莓派上,触摸屏就不停的闪烁,是因为树莓派的USB口输出电流不够,需要调整参数。(hdmi输出到显示器,没有这个问题)
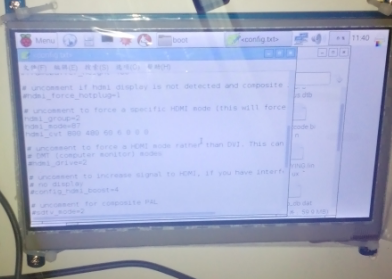
root后,修改/boot/config.txt
修改usb的最大输出电流为1A,max_usb_current=1
修改分辨率为
disable_overscan=1
hdmi_cvt 800 480 60 6 0 0 0
hdmi_group=2
hdmi_mode=87
重启,填满屏幕。
和上面的图片对比一下,就明白了。
12、(我又找到了新的办法。下面的操作,也是可以的。看下面的第10操作步骤。)
由于树莓派默认无法使用所有SD卡所有空间,很快就会系统空间不足,无法运行,所有需要尽快把sd的空间扩展起来。
pi@raspberrypi:~$ df -h
文件系统 容量 已用 可用 已用% 挂载点
/dev/root 3.5G 3.3G 0 100% /
devtmpfs 459M 0 459M 0% /dev
tmpfs 463M 0 463M 0% /dev/shm
tmpfs 463M 6.4M 457M 2% /run
tmpfs 5.0M 4.0K 5.0M 1% /run/lock
tmpfs 463M 0 463M 0% /sys/fs/cgroup
/dev/mmcblk0p1 60M 20M 41M 34% /boot
tmpfs 93M 0 93M 0% /run/user/1000
tmpfs 93M 0 93M 0% /run/user/109
pi@raspberrypi:~$ cat /sy-bash: 无法为立即文档创建临时文件: 设备上没有空间
-bash: 无法为立即文档创建临时文件: 设备上没有空间
pi@raspberrypi:/sys/block/mmcblk0/mmcblk0p2$ cat start
131072
pi@raspberrypi:/sys/block/mmcblk0/mmcblk0p2$ cd ..
pi@raspberrypi:/sys/block/mmcblk0$ sudo fdisk /dev/mmcblk0
Welcome to fdisk (util-linux 2.25.2).
Changes will remain in memory only, until you decide to write them.
Be careful before using the write command.
Command (m for help): d
Partition number (1,2, default 2): 2
Partition 2 has been deleted.
Command (m for help): n
Partition type
p primary (1 primary, 0 extended, 3 free)
e extended (container for logical partitions)
Select (default p): p
Partition number (2-4, default 2): 2
First sector (2048-15278079, default 2048): 131072
Last sector, +sectors or +size{K,M,G,T,P} (131072-15278079, default 15278079):回车
Created a new partition 2 of type 'Linux' and of size 7.2 GiB.
Command (m for help): w
The partition table has been altered.
Calling ioctl() to re-read partition table.
Re-reading the partition table failed.: 设备或资源忙
The kernel still uses the old table. The new table will be used at the next reboot or after you run partprobe(8) or kpartx(8).
pi@raspberrypi:/sys/block/mmcblk0$ df -h
文件系统 容量 已用 可用 已用% 挂载点
/dev/root 3.5G 3.3G 976K 100% /
devtmpfs 459M 0 459M 0% /dev
tmpfs 463M 0 463M 0% /dev/shm
tmpfs 463M 13M 451M 3% /run
tmpfs 5.0M 4.0K 5.0M 1% /run/lock
tmpfs 463M 0 463M 0% /sys/fs/cgroup
/dev/mmcblk0p1 60M 20M 41M 34% /boot
tmpfs 93M 0 93M 0% /run/user/1000
此时,系统的空间还没有变化,重启系统:reboot
重启后,空间还是没有变化,需要执行一个命令才行。
pi@raspberrypi:~$ df -h
文件系统 容量 已用 可用 已用% 挂载点
/dev/root 3.5G 3.3G 840K 100% /
devtmpfs 459M 0 459M 0% /dev
tmpfs 463M 0 463M 0% /dev/shm
tmpfs 463M 6.3M 457M 2% /run
tmpfs 5.0M 4.0K 5.0M 1% /run/lock
tmpfs 463M 0 463M 0% /sys/fs/cgroup
/dev/mmcblk0p1 60M 20M 41M 34% /boot
tmpfs 93M 0 93M 0% /run/user/1000
pi@raspberrypi:~$ sudo resize2fs /dev/mmcblk0p2
resize2fs 1.42.12 (29-Aug-2014)
Filesystem at /dev/mmcblk0p2 is mounted on /; on-line resizing required
old_desc_blocks = 1, new_desc_blocks = 1
The filesystem on /dev/mmcblk0p2 is now 1893376 (4k) blocks long.
pi@raspberrypi:~$ df -h
文件系统 容量 已用 可用 已用% 挂载点
/dev/root 7.1G 3.3G 3.5G 50% /
devtmpfs 459M 0 459M 0% /dev
tmpfs 463M 0 463M 0% /dev/shm
tmpfs 463M 6.3M 457M 2% /run
tmpfs 5.0M 4.0K 5.0M 1% /run/lock
tmpfs 463M 0 463M 0% /sys/fs/cgroup
/dev/mmcblk0p1 60M 20M 41M 34% /boot
tmpfs 93M 0 93M 0% /run/user/1000
pi@raspberrypi:~$
空间已经扩展开了。
13、新办法,我没做实验,不知道能不能行。sudo raspi-config,选择第1、expand filesystem,回车,再回车。
14、使用vi的时候,按方向键会出现字母,而不是移动光标,是因为vi不是完整版,我们先卸载vi,再安装vim;
sudo apt-get remove vim-common
sudo apt-get install vim
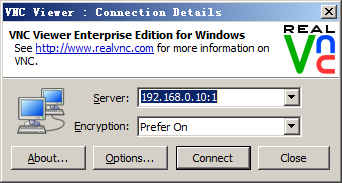
15、安装vnc,sudo apt-get install tightvncserver,安装完毕后,运行tightvncserver,输入控制密码,重复输入;选择是否设置查看密码,输入n;(3.5步已经打开vnc)
16、win7上安装vnc客户端,我用的是http://www.realvnc.com/,输入密码,就能连接上去。

a、修改密码vncpasswd
b、查看远程列表,ps ax | grep Xtightvnc | grep -v grep
c、关闭一个连接,vncserver -kill :1(注意:前面的空格)。1是桌面编号。
d、启动一个桌面:vncserver,会显示出桌面编号。用客户端连接的时候输入:192.168.0.10:1 192.168.0.10:2 这种格式。
e、系统重启后,无法连接到vnc,网上提供的自启动方法(我测试的无效,还是无法启动,那就算球了,老子用ssh连上去再手工启动不就行了!)
网上抄来的方法,先登陆root用户,新建启动文件 /etc/init.d/vncser
#! /bin/bash
### BEGIN INIT INFO
# Provides: vncser
# Required-Start: $syslog $remote_fs $network
# Required-Stop: $syslog $remote_fs $network
# Default-Start: 2 3 4 5
# Default-Stop: 0 1 6
# Short-Description: Starts VNC Server on system start.
# Description: Starts tight VNC Server. Script written by James Swineson.
### END INIT INFO
# /etc/init.d/vncser
VNCUSER='pi'
case "$1" in
        start)
                su $VNCUSER -c '/usr/bin/tightvncserver -geometry 1920x1080 -alwaysshared :1'
                echo "Starting TightVNC Server for $VNCUSER"
        ;;
        stop)
                pkill Xtightvnc
                echo "TightVNC Server stopped"
        ;;
        *)
                echo "Usage: /etc/init.d/vncser {start|stop}"
                exit 1
        ;;
esac
exit 0
然后运行:
sudo chmod 755 /etc/init.d/vncser
sudo update-rc.d vncser defaults
重启看效果吧。
取消开机启动也很简单,就一行代码: sudo update-rc.d -f vncser remove
备注:
1、查看服务列表 service --status-all
2、更新软件源
deb http://mirrors.aliyun.com/raspbian/raspbian/ jessie main contrib non-free rpi firmware ui
deb-src http://mirrors.aliyun.com/raspbian/raspbian/ jessie main contrib non-free rpi firmware ui
deb http://mirrors.tuna.tsinghua.edu.cn/raspbian/raspbian/ jessie main contrib non-free rpi
deb-src http://mirrors.tuna.tsinghua.edu.cn/raspbian/raspbian/ jessie main contrib non-free rpi
deb http://mirrors.neusoft.edu.cn/raspbian/raspbian/ jessie main contrib non-free rpi
deb-src http://mirrors.neusoft.edu.cn/raspbian/raspbian/ jessie main contrib non-free rpi
deb http://mirrors.ustc.edu.cn/raspbian/raspbian/ jessie main contrib non-free rpi
deb-src http://mirrors.ustc.edu.cn/raspbian/raspbian/ jessie main contrib non-free rpi
3、树莓派版本信息
老版本是wheezy,20150505停止,不建议使用。树莓派2b建议使用jessie,速度快,最后版本20170705。3和4建议使用最新的,最新的一直在更新,20200214不是最后版本。
http://downloads.raspberrypi.org/raspbian/images/raspbian-2015-05-07/2015-05-05-raspbian-wheezy.zip
http://downloads.raspberrypi.org/raspbian/images/raspbian-2017-07-05/2017-07-05-raspbian-jessie.zip
http://downloads.raspberrypi.org/raspbian/images/raspbian-2019-04-09/2019-04-08-raspbian-stretch.zip
http://downloads.raspberrypi.org/raspbian/images/raspbian-2020-02-14/2020-02-13-raspbian-buster.zip