简介
- 对于数据访问层, 无论是SQL还是NOSQL, SpringBoot都默认采用Spring Data的方式处理.
- SpringData包含的子项目
- SpringBoot会添加大量自动的配置, 屏蔽很多设置, 引入各种xxxTemplate, xxxRepository来简化我们对数据访问层的操作.
- 注意是没有mybatis的starter的.

整合JDBC
- 引入相关依赖
<dependency>
           <groupId>org.springframework.boot</groupId>
           <artifactId>spring-boot-starter-jdbc</artifactId>
       </dependency>

       <dependency>
           <groupId>mysql</groupId>
           <artifactId>mysql-connector-java</artifactId>
           <scope>runtime</scope>
       </dependency>
- 在application.yml中配置
spring:
  datasource:
    username: root
    password: root
    url: jdbc:mysql://192.168.47.132:3407/jdbc
    driver-class-name: com.mysql.cj.jdbc.Driver

#注意: com.mysql.jdbc.Driver已被弃用
Loading class `com.mysql.jdbc.Driver'. This is deprecated. The new driver class is `com.mysql.cj.jdbc.Driver'.
The driver is automatically registered via the SPI and manual loading of the driver class is generally unnecessary. - 效果
- 默认是用com.zaxxer.hikari.HikariDataSource作为数据源.
- 数据源的配置文件都在DataSourceProperties中.
整合Druid数据源
- 加入依赖
<!-- 引入druid数据源 -->
<dependency>
    <groupId>com.alibaba</groupId>
    <artifactId>druid</artifactId>
    <version>1.1.18</version>
</dependency>
- 配置文件中修改源类型
spring.datasource.type: com.alibaba.druid.pool.DruidDataSource
- 添加Druid的一些配置
Spring: datasource: ... initialSize: 5 #初始化数据库连接池大小 minIdle: 5 maxActive: 20 maxWait: 60000 timeBetweenEvictionRunsMillis: 60000 minEvictableIdleTimeMillis: 300000 validationQuery: SELECT 1 FROM DUAL testWhileIdle: true testOnBorrow: false testOnReturn: false poolPreparedStatements: true #配置监控统计拦截的filters,去掉后监控界面sql无法统计,'wall'用于防火墙 filters: stat,wall,log4j maxPoolPreparedStatementPerConnectionSize: 20 useGlobalDataSourceStat: true connectionProperties: druid.stat.mergeSql=true;druid.stat.slowSqlMillis=500 - 此时这些配置还未生效, 我们需要写配置类使其对应
@Configuration
public class DruidConfig {

    @ConfigurationProperties(prefix = "spring.datasource")
    @Bean
    public DataSource druid() {
        return new DruidDataSource();
    }
}
- 在配置类中配置一下Druid的监控
//配置Druid的监控
    //1.配置一个管理后台的Servlet
    @Bean
    public ServletRegistrationBean statViewServlet() {
        ServletRegistrationBean bean = new ServletRegistrationBean(new StatViewServlet(), "/druid/*");
        Map<String, String> initParams = new HashMap<>();
        initParams.put("loginUsername", "admin");
        initParams.put("loginPassword", "123456");
        initParams.put("allow", ""); //默认允许所有访问
        initParams.put("deny", "192.168.15.21");
        bean.setInitParameters(initParams);
        return bean;
    }
    //2.配置一个监控的filter
    @Bean
    public FilterRegistrationBean webStatFilter() {
        FilterRegistrationBean bean = new FilterRegistrationBean();
        bean.setFilter(new WebStatFilter());
        Map<String, String> initParams = new HashMap<>();
        initParams.put("exclusions", "*.js,*.css,/druid/**");
        bean.setUrlPatterns(Arrays.asList("/*"));
        bean.setInitParameters(initParams);
        return bean;
    }
- 之后就能查看后台监控了

整合Mybatis
- 添加依赖, 配置Druid, 创建数据表, JavaBean
- 依赖信息
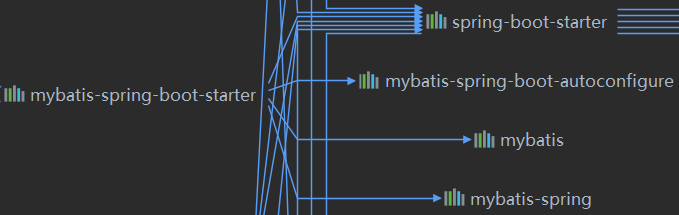
<dependency>
    <groupId>org.mybatis.spring.boot</groupId>
    <artifactId>mybatis-spring-boot-starter</artifactId>
    <version>2.1.2</version>
</dependency>
- 这个不是springboot的starter, 而是mybatis为了适配springboot, 自己写的.
- JavaBean
@NoArgsConstructor
@AllArgsConstructor
@Data
public class Department {

    private Integer id;
    private String departmentName;
}


@NoArgsConstructor
@AllArgsConstructor
@Data
public class Employee {
    private Integer id;
    private String lastName;
    private Integer gender;
    private String email;
    private Integer dId;
}
- 依赖信息
- 注解版
- 创建Mapper接口, 加@Mapper注解, 指定这是一个操作数据库的mapper.
@Component
@Mapper
public interface DepartmentMapper {

    @Select("select * from department where id=#{id}")
    public Department getDeptById(Integer id);

    @Delete("delete from department where id=#{id}")
    public int delDeptById(Integer id);

    //如果插入的表id以自增列为主键, 则允许JDBC支持自动生成主键, 并可将自动生成的主键id返回.
    @Options(useGeneratedKeys = true, keyProperty = "id")
    @Insert("insert into department(departmentName) values(#{departmentName})")
    public int insertDept(Department dept);

    @Update("update department set departmentName=#{departmentName} where id=#{id}")
    public int updateDept(Department dept);
}
- 如何自定义配置规则: 在配置类中给容器中添加一个ConfigurationCustomizer.
@org.springframework.context.annotation.Configuration
public class MybatisConfig {

    //自定义Mybatis的配置规则, 给容器中添加ConfigurationCustomizer组件
    @Bean
    public ConfigurationCustomizer configurationCustomizer() {
        return new ConfigurationCustomizer() {

            @Override
            public void customize(Configuration configuration) {
                //开启驼峰命名法
                configuration.setMapUnderscoreToCamelCase(true);
            }
        };
    }
}
- 若Mapper接口太多, 每个都加@Mapper麻烦, 可以在主启动类上加@MappperScan或@MapperScans
//使用MapperScan批量扫描所有的Mapper接口
@MapperScan(value = "top.binwenhome.springboot.mapper")
@SpringBootApplication
public class Springboot06MybatisApplication {

    public static void main(String[] args) {
        SpringApplication.run(Springboot06MybatisApplication.class, args);
    }
}
- 创建Mapper接口, 加@Mapper注解, 指定这是一个操作数据库的mapper.
- 配置文件版
- 要在application.yml/properties中指定
mybatis: config-location: classpath:mybatis/mybatis.config.xml #指定全局配置文件位置 mapper-locations: classpath:mybatis/mapper/*.xml #指定sql映射文件的位置 - 之后便是mybatis的常规操作了.
- 要在application.yml/properties中指定
- 注解版和配置文件版是可以混合使用的.