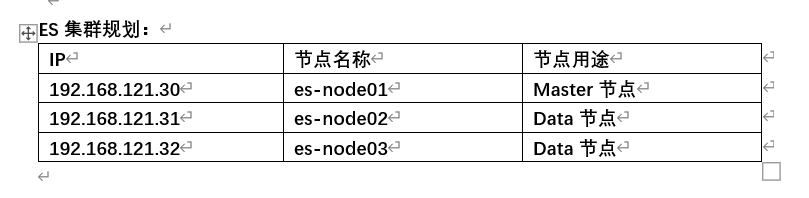
es集群规划:中小型日志收集系统只需要部署(filebeat+elasticsearch+kibana)组合完全够用了
es-node01 192.168.121.30 elasticsearch,kibana,zookerper,kafka
es-node02 192.168.121.31 elasticsearch,logstash,zookerper,kafka
es-node03 192.168.121.32 elasticsearch,zookerper,kafka
kafka集群部署可以参考https://www.cnblogs.com/caidingyu/p/12336365.html

修改所有节点的默认内核参数
echo "vm.swappiness=0" >> /etc/sysctl.conf
echo "vm.max_map_count=655350" >> /etc/sysctl.conf
sysctl -p
修改所有节点的linux资源限制,永久生效
cat /etc/security/limits.conf|grep -v "^#"
* soft    nofile  1024000
* hard    nofile  1024000
* soft    nproc   unlimited
* hard    nproc   unlimited
* soft    core    unlimited
* hard    core    unlimited
* soft    memlock unlimited
* hard    memlock unlimited
执行下以下命令立即生效
ulimit -SHn 1024000
1、分别在3个节点下载并安装elasticsearch
cd /data
wget https://artifacts.elastic.co/downloads/elasticsearch/elasticsearch-7.6.0-x86_64.rpm
yum localinstall elasticsearch-7.6.0-x86_64.rpm
2、在node1安装kibana
cd /data
wget https://artifacts.elastic.co/downloads/kibana/kibana-7.6.0-x86_64.rpm
yum localinstall kibana-7.6.0-x86_64.rpm
3、在node2安装logstash
cd /data
wget https://artifacts.elastic.co/downloads/logstash/logstash-7.6.0.rpm
yum localinstall logstash-7.6.0.rpm
4、在需要采集的服务器上安装filebeat
cd /data
wget https://artifacts.elastic.co/downloads/beats/filebeat/filebeat-7.6.0-x86_64.rpm
yum localinstall filebeat-7.6.0-x86_64.rpm
5、在任意节点配置生成ca证书用于xpack加密认证,一路回车,无需输入密码,默认证书文件位于path.data:指定的数据目录下,这里我们将其拷贝到所有节点的/etc/elasticsearch/目录下
/usr/share/elasticsearch/bin/elasticsearch-certutil ca
/usr/share/elasticsearch/bin/elasticsearch-certutil cert --ca elastic-stack-ca.p12
6、分别修改3个节点的elasticsearch配置文件
es-node01配置信息如下:
cluster.name: ES-cluster
node.name: node-1
node.attr.hotwarm_type: hot
path.data: /data/elasticsearch/data
path.logs: /data/elasticsearch/logs
bootstrap.memory_lock: true
network.host: 0.0.0.0
http.port: 19201
transport.tcp.port: 19301
discovery.seed_hosts: ["192.168.121.30:19301", "192.168.121.31:19302", "192.168.121.32:19303"]
cluster.initial_master_nodes: ["192.168.121.30:19301"]
gateway.recover_after_nodes: 2
gateway.recover_after_time: 5m
gateway.expected_nodes: 3
http.cors.enabled: true
http.cors.allow-origin: "*"
http.cors.allow-headers: Authorization,X-Requested-With,Content-Length,Content-Type
indices.fielddata.cache.size: 20%
xpack.security.enabled: true
xpack.security.transport.ssl.enabled: true
xpack.security.transport.ssl.verification_mode: certificate
xpack.security.transport.ssl.keystore.path: /etc/elasticsearch/elastic-certificates.p12
xpack.security.transport.ssl.truststore.path: /etc/elasticsearch/elastic-certificates.p12
es-node02配置信息如下:
[root@es-node02 elasticsearch]# cat elasticsearch.yml|grep -vE "^#"
cluster.name: ES-cluster
node.name: node-2
node.attr.hotwarm_type: cold
path.data: /data/elasticsearch/data01
path.logs: /data/elasticsearch/logs
bootstrap.memory_lock: true
network.host: 0.0.0.0
http.port: 19202
transport.tcp.port: 19302
discovery.seed_hosts: ["192.168.121.30:19301", "192.168.121.31:19302", "192.168.121.32:19303"]
cluster.initial_master_nodes: ["192.168.121.30:19301"]
gateway.recover_after_nodes: 2
gateway.recover_after_time: 5m
gateway.expected_nodes: 3
http.cors.enabled: true
http.cors.allow-origin: "*"
http.cors.allow-headers: Authorization,X-Requested-With,Content-Length,Content-Type
indices.fielddata.cache.size: 20%
xpack.security.enabled: true
xpack.security.transport.ssl.enabled: true
xpack.security.transport.ssl.verification_mode: certificate
xpack.security.transport.ssl.keystore.path: /etc/elasticsearch/elastic-certificates.p12
xpack.security.transport.ssl.truststore.path: /etc/elasticsearch/elastic-certificates.p12
es-node03配置信息如下:
cat elasticsearch.yml|grep -vE "^#"
cluster.name: ES-cluster
node.name: node-3
node.attr.hotwarm_type: cold
path.data: /data/elasticsearch/data01
path.logs: /data/elasticsearch/logs
bootstrap.memory_lock: true
network.host: 0.0.0.0
http.port: 19203
transport.tcp.port: 19303
discovery.seed_hosts: ["192.168.121.30:19301", "192.168.121.31:19302", "192.168.121.32:19303"]
cluster.initial_master_nodes: ["192.168.121.30:19301"]
gateway.recover_after_nodes: 2
gateway.recover_after_time: 5m
gateway.expected_nodes: 3
http.cors.enabled: true
http.cors.allow-origin: "*"
http.cors.allow-headers: Authorization,X-Requested-With,Content-Length,Content-Type
indices.fielddata.cache.size: 20%
xpack.security.enabled: true
xpack.security.transport.ssl.enabled: true
xpack.security.transport.ssl.verification_mode: certificate
xpack.security.transport.ssl.keystore.path: /etc/elasticsearch/elastic-certificates.p12
xpack.security.transport.ssl.truststore.path: /etc/elasticsearch/elastic-certificates.p12
7、修改默认的/usr/lib/systemd/system/elasticsearch.service文件,这里我们增加了一行LimitMEMLOCK=infinity,(由于前面配置信息中启用了bootstrap.memory_lock: true,默认为false,如果不启用可以不修改elasticsearch.service)
cat /usr/lib/systemd/system/elasticsearch.service
[Unit]
Description=Elasticsearch
Documentation=http://www.elastic.co
Wants=network-online.target
After=network-online.target

[Service]
LimitMEMLOCK=infinity
Type=notify
RuntimeDirectory=elasticsearch
PrivateTmp=true
Environment=ES_HOME=/usr/share/elasticsearch
Environment=ES_PATH_CONF=/etc/elasticsearch
Environment=PID_DIR=/var/run/elasticsearch
Environment=ES_SD_NOTIFY=true
EnvironmentFile=-/etc/sysconfig/elasticsearch

WorkingDirectory=/usr/share/elasticsearch

User=elasticsearch
Group=elasticsearch

ExecStart=/usr/share/elasticsearch/bin/elasticsearch -p ${PID_DIR}/elasticsearch.pid --quiet

# StandardOutput is configured to redirect to journalctl since
# some error messages may be logged in standard output before
# elasticsearch logging system is initialized. Elasticsearch
# stores its logs in /var/log/elasticsearch and does not use
# journalctl by default. If you also want to enable journalctl
# logging, you can simply remove the "quiet" option from ExecStart.
StandardOutput=journal
StandardError=inherit

# Specifies the maximum file descriptor number that can be opened by this process
LimitNOFILE=65535

# Specifies the maximum number of processes
LimitNPROC=4096

# Specifies the maximum size of virtual memory
LimitAS=infinity

# Specifies the maximum file size
LimitFSIZE=infinity

# Disable timeout logic and wait until process is stopped
TimeoutStopSec=0

# SIGTERM signal is used to stop the Java process
KillSignal=SIGTERM

# Send the signal only to the JVM rather than its control group
KillMode=process

# Java process is never killed
SendSIGKILL=no

# When a JVM receives a SIGTERM signal it exits with code 143
SuccessExitStatus=143

[Install]
WantedBy=multi-user.target
8、分别启动node1、node2、node3的elasticsearch服务
systemctl start elasticsearch
systemctl status elasticsearch
systemctl enable elasticsearch
9、启动es集群以后,使用以下指令来初始化各个用户的密码,密码自行设置
/usr/share/elasticsearch/bin/elasticsearch-setup-passwords interactive
Enter password for [elastic]:
Reenter password for [elastic]:
Enter password for [apm_system]:
Reenter password for [apm_system]:
Enter password for [kibana]:
Reenter password for [kibana]:
Enter password for [logstash_system]:
Reenter password for [logstash_system]:
Enter password for [beats_system]:
Reenter password for [beats_system]:
Enter password for [remote_monitoring_user]:
Reenter password for [remote_monitoring_user]:
Changed password for user [apm_system]
Changed password for user [kibana]
Changed password for user [logstash_system]
Changed password for user [beats_system]
Changed password for user [remote_monitoring_user]
Changed password for user [elastic]
10、检查集群状态是否正常,集群状态正常可以返回以下参数,注意status是否为green(elastic:xxxxxxx为步骤9中生成的elastic账户和密码)
curl -XGET --user elastic:xxxxxxx http://localhost:19201/_cluster/health?pretty
{
  "cluster_name" : "ES-cluster",
  "status" : "green",
  "timed_out" : false,
  "number_of_nodes" : 3,
  "number_of_data_nodes" : 3,
  "active_primary_shards" : 13,
  "active_shards" : 23,
  "relocating_shards" : 0,
  "initializing_shards" : 0,
  "unassigned_shards" : 0,
  "delayed_unassigned_shards" : 0,
  "number_of_pending_tasks" : 0,
  "number_of_in_flight_fetch" : 0,
  "task_max_waiting_in_queue_millis" : 0,
  "active_shards_percent_as_number" : 100.0
}
11、修改kibana配置文件,配置文件中的账户密码为步骤9中生成的kibana账户和密码
cat /etc/kibana/kibana.yml|grep -vE "^#|^$"
server.port: 5601
server.host: "0.0.0.0"
elasticsearch.hosts: ["http://192.168.121.30:19201"]
kibana.index: ".kibana"
elasticsearch.username: "kibana"
elasticsearch.password: "xxxxxxxxx"
i18n.locale: "zh-CN"
12、启动kibana服务并访问kibana所在的节点,并使用elastic的账户和密码进行登录,验证是否kibana是否搭建成功
systemctl start kibana
systemctl status kibana
systemctl enable kibana
在浏览器中访问http://192.168.121.30:5601/
13、待续