前言
最近在看JSON Web Token(Jwt)相关的东西,但是发现在Nancy中直接使用Jwt的组件比较缺乏,所以就在空闲时间写了一个。
这个组件是开源的,不过目前只支持.NET Core,后续有时间再考虑兼容,欢迎Start和提Issue。组件也已经上传到NuGet了,可以直接安装使用。
项目地址:https://github.com/hwqdt/Nancy.Authentication.JwtBearer
NuGet地址:https://www.nuget.org/packages/Nancy.Authentication.JwtBearer/
前面也写过在ASP.NET Core中使用的Jwt的博文,只是因为当时为了练习Middleware ,所以是用Middleware来处理的,实际使用是不需要那么麻烦的!
毕竟是一个Action就可以搞定的事,希望没有误导大家。
下面简单介绍一下如何使用这个组件以及这个组件是怎么实现的。
简单使用
第一步 , 用VS创建一个空的ASP.NET Core Web Application

第二步 , 安装相关的NuGet包
通过命令在Package Manager Console执行安装下面的包,也可以用图形界面来完成这一步操作。
Install-Package Microsoft.AspNetCore.Owin -Version 1.1.2
Install-Package Nancy -Pre
Install-Package Nancy.Authentication.JwtBearer
其中,Microsoft.AspNetCore.Owin和Nancy是基础包,Nancy.Authentication.JwtBearer是等下要用到的组件包。
第三步 , 修改Startup,添加对Nancy的支持。
public class Startup
{
    public void Configure(IApplicationBuilder app)
    {
        app.UseOwin(x=>x.UseNancy());
    }
}
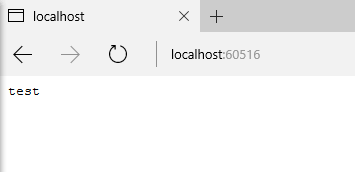
第四步 , 添加一个Module来验证Nancy是否可以正常使用
public class MainModule : NancyModule
{
    public MainModule()
    {
        Get("/",_=>
        {
            return "test";
        });
    }
}
正常情况下,这个时候运行项目是OK的,大致效果如下:
下面一步就是添加一个Bootstrapper用于启用JwtBearer验证。
public class DemoBootstrapper :  DefaultNancyBootstrapper
{
    protected override void ApplicationStartup(TinyIoCContainer container, IPipelines pipelines)
    {
        base.ApplicationStartup(container, pipelines);

        var keyByteArray = Encoding.ASCII.GetBytes("Y2F0Y2hlciUyMHdvbmclMjBsb3ZlJTIwLm5ldA==");
        var signingKey = new SymmetricSecurityKey(keyByteArray);

        var tokenValidationParameters = new TokenValidationParameters
        {
            // The signing key must match!
            ValidateIssuerSigningKey = true,
            IssuerSigningKey = signingKey,
            // Validate the JWT Issuer (iss) claim
            ValidateIssuer = true,
            ValidIssuer = "http://www.cnblogs.com/catcher1994",
            // Validate the JWT Audience (aud) claim
            ValidateAudience = true,
            ValidAudience = "Catcher Wong",
            // Validate the token expiry
            ValidateLifetime = true,
            ClockSkew = TimeSpan.Zero
        };

        var configuration = new JwtBearerAuthenticationConfiguration
        {
            TokenValidationParameters = tokenValidationParameters
        };

        //enable the JwtBearer authentication
        pipelines.EnableJwtBearerAuthentication(configuration);
    }
}
如果使用过Nancy项目自带的其他认证方式(Basic,Forms和Stateless),就会发现下面的才是关键,其他的只是用于JwtBearer认证的配置参数。
pipelines.EnableJwtBearerAuthentication(configuration);
下面简单介绍一下配置参数。
配置参数主要有两个,一个是TokenValidationParameters , 一个是Challenge 。
其中最主要的参数TokenValidationParameters,这是用来验证客户端传过来的token是否合法的!
它位于Microsoft.IdentityModel.Tokens这个命名空间下面。
Challenge参数则是用于指定在Unauthorized时Http响应头中WWW-Authenticate的值。它的默认值是Bearer
注:Challenge参数是从Microsoft.AspNetCore.Authentication.JwtBearer项目借鉴过来的。
到这里, 我们已经完成了对JwtBearer认证的配置和启用,下面还要验证这个配置是否已经生效了!
创建一个新的Module,并在这个Module中使用RequiresAuthentication。
public class SecurityModule : NancyModule
{
    public SecurityModule() : base("/demo")
    {
        //important
        this.RequiresAuthentication();

        Get("/",_=>
        {
            return "JwtBearer authentication";
        });
    }
}
注: 这里需要引用Nancy.Security这个命名空间
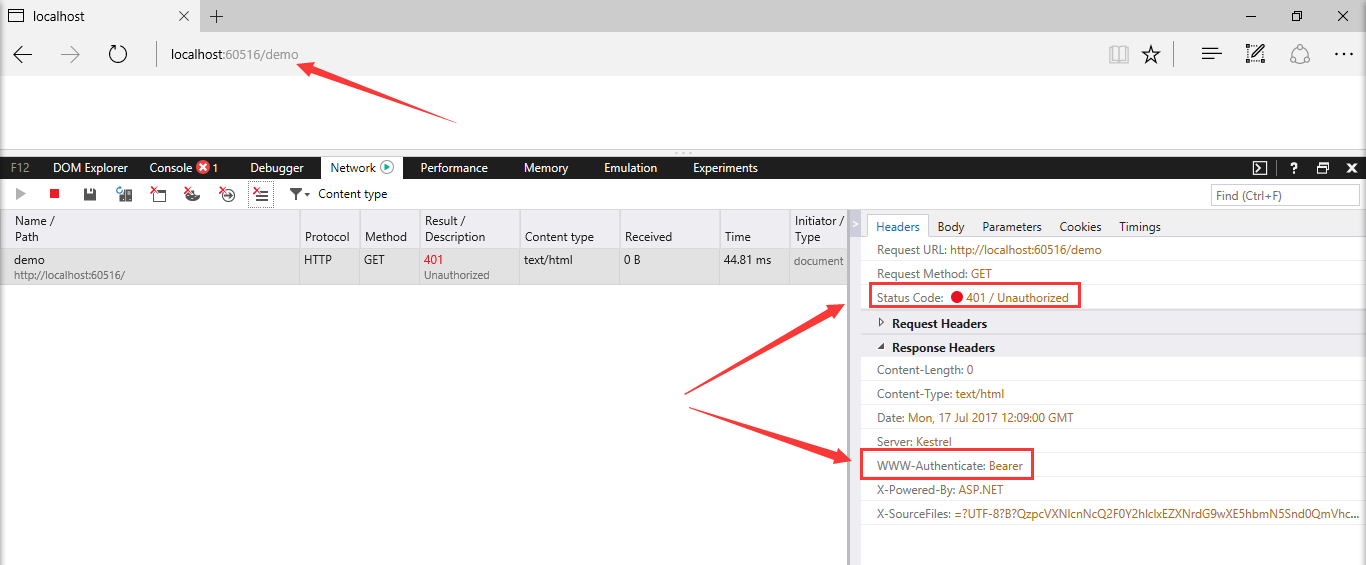
到这里,验证的代码也已经写好了,当我们访问 http://yourdomain.com/demo 的时候
浏览器会提示我们The requested resource requires user authentication , 并且在响应头中我们可以看到WWW-Authenticate对应的值是Bearer。
我们创建一个合法的token值,然后通过Fiddler再发起一次请求,看看能否正常返回我们要的结果。
下面的代码是生成一个测试token用的,其中的JwtSecurityToken对象应当与前面的配置一样,才能确保token是有效的。
private string GetJwt()
{
    var now = DateTime.UtcNow;

    var claims = new Claim[]
    {
        new Claim(JwtRegisteredClaimNames.Sub, "demo"),
        new Claim(JwtRegisteredClaimNames.Jti, Guid.NewGuid().ToString()),
        new Claim(JwtRegisteredClaimNames.Iat, now.ToUniversalTime().ToString(), ClaimValueTypes.Integer64)
    };

    //must the same as your setting in your boostrapper class
    var symmetricKeyAsBase64 = "Y2F0Y2hlciUyMHdvbmclMjBsb3ZlJTIwLm5ldA==";
    var keyByteArray = Encoding.ASCII.GetBytes(symmetricKeyAsBase64);
    var signingKey = new SymmetricSecurityKey(keyByteArray);

    var jwt = new JwtSecurityToken(
        issuer: "http://www.cnblogs.com/catcher1994",
        audience: "Catcher Wong",
        claims: claims,
        notBefore: now,
        expires: now.Add(TimeSpan.FromMinutes(10)),
        signingCredentials: new SigningCredentials(signingKey, SecurityAlgorithms.HmacSha256));
    var encodedJwt = new JwtSecurityTokenHandler().WriteToken(jwt);

    var response = new
    {
        access_token = encodedJwt,
        expires_in = (int)TimeSpan.FromMinutes(10).TotalSeconds
    };

    return JsonConvert.SerializeObject(response, new JsonSerializerSettings { Formatting = Formatting.Indented });
}
通过Fiddler执行这个带上了token的请求,大致结果如下 :
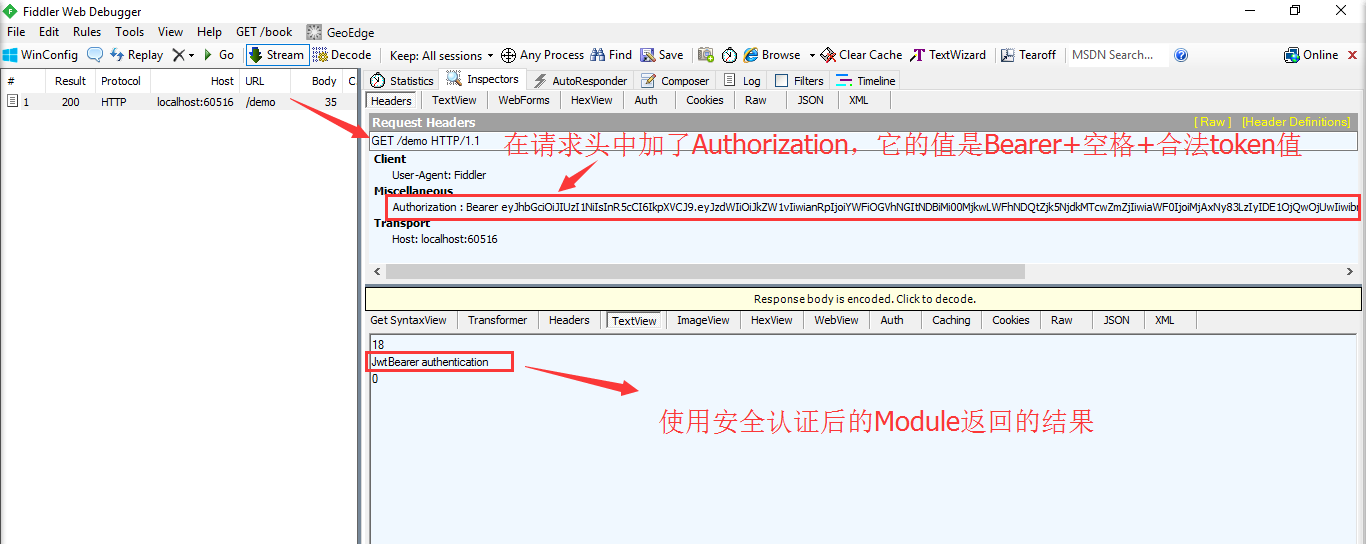
可以看到成功取到了相应的内容!
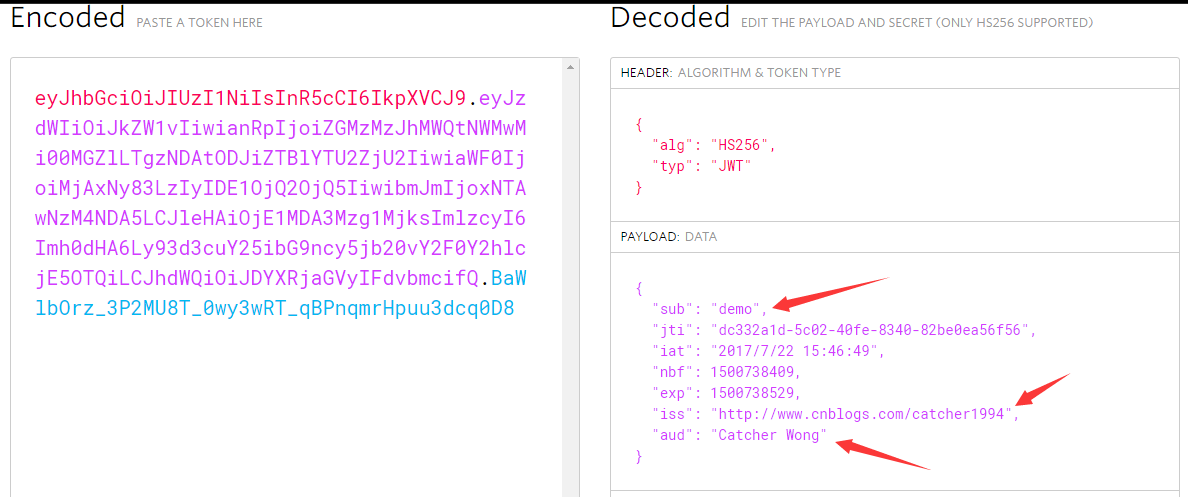
然后是本次测试用的token值相关的信息:
注:用Fiddler发起请求的时候,记得要在请求头部加上Authorization,它的值是
Bearer+空格+token值
到这里,已经展示了如何使用这个JwtBearer认证的组件。
下面就介绍一下是怎么实现的这个组件!
如何实现
在继续下面的内容之前,我假设大家对Nancy的Pipelines有所了解,如果不了解的可以参考我以前的下面的链接
因为其中的BeforePipeliine和AfterPipeline是实现这个认证组件的重要切入点。
另外,实现上还用了Nancy项目的代码风格去编写的代码,所以你可能会发现与其自带的Basic认证等写法差不多。
从我们上面的例子使用来说明内部实现。
在上面例子的启动器(Bootstrapper)中,我们有一行启用JwtBearer认证的入口。这个入口是IPipelines的一个扩展方法。
/// <summary>
/// Module requires JwtBearer authentication
/// </summary>
/// <param name="pipeline">Bootstrapper to enable</param>
/// <param name="configuration">JwtBearer authentication configuration</param>
public static void EnableJwtBearerAuthentication(this IPipelines pipeline, JwtBearerAuthenticationConfiguration configuration)
{
    JwtBearerAuthentication.Enable(pipeline, configuration);
}
在这个扩展方法中,调用了JwtBearerAuthentication这个静态类的Enable方法,同时传递了当前的pipeline和JwtBearer认证的参数给这个方法。
下面是Enable方法的具体实现。
/// <summary>
/// Enables JwtBearer authentication for the application
/// </summary>
/// <param name="pipelines">Pipelines to add handlers to (usually "this")</param>
/// <param name="configuration">JwtBearer authentication configuration</param>
public static void Enable(IPipelines pipelines, JwtBearerAuthenticationConfiguration configuration)
{
    if (pipelines == null)
    {
        throw new ArgumentNullException("pipelines");
    }

    if (configuration == null)
    {
        throw new ArgumentNullException("configuration");
    }

    pipelines.BeforeRequest.AddItemToStartOfPipeline(GetLoadAuthenticationHook(configuration));
    pipelines.AfterRequest.AddItemToEndOfPipeline(GetAuthenticationPromptHook(configuration));
}
以BeforeRequest为例,我们把一个委托对象加入到了请求之前要处理的一个集合中去。这样在每次请求之前都会去处理这个委托。
所以这里有两个部分。
- 请求处理之前的token认证
- 请求处理之后的响应
先来看看请求处理之前的token认证如何处理
private static Func<NancyContext, Response> GetLoadAuthenticationHook(JwtBearerAuthenticationConfiguration configuration)
{
    return context =>
    {
        Validate(context,configuration);
        return null;
    };
}
这里也是一个空壳,用于返回AddItemToStartOfPipeline方法需要的委托对象。
真正处理token的还是Validate这个方法。认证的处理还借助了System.IdentityModel.Tokens.Jwt命名空间下面的JwtSecurityTokenHandler类。
private static void Validate(NancyContext context, JwtBearerAuthenticationConfiguration configuration)
{
    //get the token from request header
    var jwtToken = context.Request.Headers["Authorization"].FirstOrDefault() ?? string.Empty;

    //whether the token value start with Bearer
    if (jwtToken.StartsWith("Bearer ", StringComparison.OrdinalIgnoreCase))
    {
        jwtToken = jwtToken.Substring("Bearer ".Length);
    }
    else
    {
        return;
    }

    //verify the token
    if (!string.IsNullOrWhiteSpace(jwtToken))
    {
        try
        {
            SecurityToken validatedToken;
            var tokenHandler = new JwtSecurityTokenHandler();
            var validatedClaims = tokenHandler.ValidateToken(jwtToken, configuration.TokenValidationParameters, out validatedToken);
            //var jwtSecurityToken = validatedToken as JwtSecurityToken;
            context.CurrentUser = validatedClaims;
        }
        catch (Exception)
        {
        }
    }
}
要对token进行验证,首先要知道token是从那里来的。常规情况下,都是将这个token放到请求头的Authorization中。
所以第一步是要从请求头中取出Authorization的值。这个值是必须以Bearer 开头的一个字符串。注意是Bearer加一个空格!
而我们要验证的部分是去掉开头这部分之后的内容。只需要构造一个JwtSecurityTokenHandler实例并调用这个实例的ValidateToken方法,并把要验证的token值和我们的配置传进去即可。
验证成功后,最为主要的一步是将ValidateToken方法的返回值赋给当前Nancy上下文的CurrentUser!!
当验证失败的时候,ValidateToken方法会抛出一个异常,这里只catch了这个异常,并没有进行其他额外的处理。要处理无非也就是记录日记,可以在这里trace一下,配合Diagnostics的使用。但是目前并没有这样做。
到这里,Before已经OK了,现在要处理After了。
当然对于After,也是只处理401(Unauthorized)的情况。主要是告诉客户端 “当前请求的资源需要用户认证”,并告诉客户端当前请求的资源需要那种认证类型。
private static Action<NancyContext> GetAuthenticationPromptHook(JwtBearerAuthenticationConfiguration configuration)
{
    return context =>
    {
        if (context.Response.StatusCode == HttpStatusCode.Unauthorized)
        {
            //add a response header
            context.Response.WithHeader(JwtBearerDefaults.WWWAuthenticate, configuration.Challenge);
        }
    };
}
一个简单的判断加上响应头部的处理。
到这里,这个JwtBearer认证的组件已经ok了。
当然这里只介绍了Pipeline的实现,还有一个是基于NancyModule的实现,本质还是pipeline的处理,所以这里就不累赘了。
写在最后
虽然简单介绍了如何全使用和实现Nancy.Authentication.JwtBearer这个组件,相信大家对token(access_token)的使用是没有太大疑问的。可能大家有疑问的是refresh_token的使用。
但是,对于refresh_token的使用,可以说因场景而异,也因人而异。只需要记住一点即可:refresh_token是用来换取一个新的并且可用的access_token。
本文已同步到Nancy之大杂烩