1.简述
UITabBarController和UINavigationController类似,UITabBarController也可以轻松地管理多个控制器,轻松完成控制器之间的切换,UITabBarController嵌套UINavigationController是现当下最流行的iOS应用设计模式了.详情可以查看博文:http://www.cnblogs.com/chasonCH/p/5379407.html
2.使用步骤
初始化UITabBarController->设置UIWindow的rootViewController为UITabBarController->创建相应的子控制器(UINavigationController的rootViewController)->把子控制器添加到UITabBarController(ViewControllers/ChildViewController);
a).AppDelegate.m:
DKTabBarController *dkTabBar = [[DKTabBarController alloc] init];
self.window.rootViewController = dkTabBar;
b).DKTabBarController.m
//创建四个导航试图控制器
DKNavigationController *recommendationNaVC = [[DKNavigationController alloc] initWithRootViewController:[[RecommendationViewController alloc] init]];
recommendationNaVC.tabBarItem.title = @"首页";
DKNavigationController *assetNaVC = [[DKNavigationController alloc] initWithRootViewController:[[AssetTableViewController alloc] init]];
assetNaVC.tabBarItem.title = @"投资产品";
DKNavigationController *financialNaVC = [[DKNavigationController alloc] initWithRootViewController:[[AccountViewController alloc] init]];
financialNaVC.tabBarItem.title = @"我的账户";
DKNavigationController *moreNaVC = [[DKNavigationController alloc] initWithRootViewController:[[MoreTableViewController alloc] init]];
moreNaVC.tabBarItem.title = @"更多";
//将导航视图控制器添加到标签视图控制器上
NSArray *controllerArray = [[NSArray alloc] initWithObjects:recommendationNaVC, assetNaVC, financialNaVC, moreNaVC, nil];
self.viewControllers = controllerArray;
self.tabBar.tintColor = [UIColor colorWithRed:254 / 255.0 green:81 / 255.0 blue:81 / 255.0 alpha:1.0];
//设置tabbar图标(22x22/44x44)
recommendationNaVC.tabBarItem.image=[[UIImage imageNamed:@"icon_home_default.png" ] imageWithRenderingMode:UIImageRenderingModeAlwaysOriginal];
recommendationNaVC.tabBarItem.selectedImage = [[UIImage imageNamed:@"icon_home.png"]imageWithRenderingMode:UIImageRenderingModeAlwaysOriginal];
assetNaVC.tabBarItem.image = [[UIImage imageNamed:@"icon_product.png"]imageWithRenderingMode:UIImageRenderingModeAlwaysOriginal];
assetNaVC.tabBarItem.selectedImage = [[UIImage imageNamed:@"icon_product_action.png"]imageWithRenderingMode:UIImageRenderingModeAlwaysOriginal];
financialNaVC.tabBarItem.image = [[UIImage imageNamed:@"icon_money.png"] imageWithRenderingMode:UIImageRenderingModeAlwaysOriginal];
financialNaVC.tabBarItem.selectedImage = [[UIImage imageNamed:@"icon_money_action.png"]imageWithRenderingMode:UIImageRenderingModeAlwaysOriginal];
moreNaVC.tabBarItem.image = [[UIImage imageNamed:@"icon_more.png"] imageWithRenderingMode:UIImageRenderingModeAlwaysOriginal];
moreNaVC.tabBarItem.selectedImage = [[UIImage imageNamed:@"icon_more_action.png"]imageWithRenderingMode:UIImageRenderingModeAlwaysOriginal];
//小插曲:很多人纠结tabbar底部菜单栏标题的字体大小如何改变(包括微信/QQ的底部菜单栏字体都很小), 这里给大家提供一个方法很简单就可以修改字体:
//修改标题字体大小(写在DKTabBarController.m里面即可)
for (int i=0; i<[self.tabBar.items count]; i++) {
[[self.tabBar.items objectAtIndex:i] setTitleTextAttributes:[NSDictionary dictionaryWithObjectsAndKeys:[UIFont systemFontOfSize:14],NSFontAttributeName, nil] forState:UIControlStateNormal];
}
3.UITabBar:
底部菜单栏就是这个工具条,高度各机型固定为49.(顶部状态栏高度固定为20, 导航控制器菜单栏高度固定为44).如果UITabBarController有N个子控制器,那么UITabBar内部就会有N 个UITabBarButton作为子控件与之对应。但是超过5个子控制器的时候最后一个菜单按钮为MoreNavigationController, 点击会跳进一个表视图, 表视图列出来未显示完全的子控制器Button;而且右上角有编辑按钮可以调整UITabBarButton的顺序, 但是关闭程序后再次打开, 按钮顺序还是变回原样. 下面我们就来说说这个MoreNavigationController这么修改他的样式(按钮标题/颜色/图标/隐藏编辑功能等);
UITabBar *tabBar = tabarViewController.moreNavigationController.tabBarController.tabBar;
UIView *lastView=[[tabBar subviews] lastObject];
[[[lastView subviews]lastObject] setText:@"更多"];//当然可以打印[lastView subviews]才找到图标进行修改
//修改moreNavigationController的title代码如下:
tabarViewController.moreNavigationController.topViewController.navigationItem.title=@"更多";
//将customizableViewController属性设置为nil来屏蔽点击MoreNavigationController里面的编辑功能
tabBarViewController.customizableViewControllers =[NSArray arrayWithObjects:con4,con5,con6,nil];
4.selectIndex属性
通过该属性可以获得当前选中的viewController,设置该属性,可以显示对应的视图控制器。当显示的式more导航控制器中的视图是,返回值是NSNotFound。设置超出ViewController的范围就会被忽略。
5.selectedViewController属性
通过该属性可以获取到当前显示的viewController,通过该属性可以设置当前选中的视图控制器。tabBarController.moreNavigationController可以选中moreViewController。
6.delegate
我们可以通过UITabBarControllerDelegate监听UITabBarController的选中的viewController的变化,以及moreViewController中对所有viewController的编辑。这里需要注意的是delegate方法要放在AppDelegate.h头文件里面。而且tabController.delegate要设置为self才会调用设置的方法。
- (BOOL)tabBarController:(UITabBarController *)tabBarController1 shouldSelectViewController:(UIViewController *)viewController
{
if ([tabBarController1.viewControllersindexOfObject:viewController] != 1) {
returnYES;
}
returnNO;
}
//点击编辑按钮
- (void)tabBarController:(UITabBarController *)tabBarController willBeginCustomizingViewControllers:(NSArray *)viewControllers
{
[selfshowAlert:@"willBeginCustom"];
}
//编辑后点击完成按钮
- (void)tabBarController:(UITabBarController *)tabBarController willEndCustomizingViewControllers:(NSArray *)viewControllers changed:(BOOL)changed
{
[selfshowAlert:@"willEndCustom"];
}
//接着会走着个方法
- (void)tabBarController:(UITabBarController *)tabBarController didEndCustomizingViewControllers:(NSArray *)viewControllers changed:(BOOL)changed
{
[selfshowAlert:@"didEndCustom"];
}
iOS开发基础框架
---恢复内容开始---
//appdelegate
//
// AppDelegate.m
// iOS开发架构
//
// Copyright © 2016年 Chason. All rights reserved.
//
#import "AppDelegate.h"
#import "ViewController.h"
#import "CYCTabBarViewController.h"
@interface AppDelegate ()
@end
@implementation AppDelegate
- (BOOL)application:(UIApplication *)application didFinishLaunchingWithOptions:(NSDictionary *)launchOptions {
self.window = [[UIWindow alloc] initWithFrame:[UIScreen mainScreen].bounds];
self.window.backgroundColor = [UIColor whiteColor];
[self.window makeKeyAndVisible];
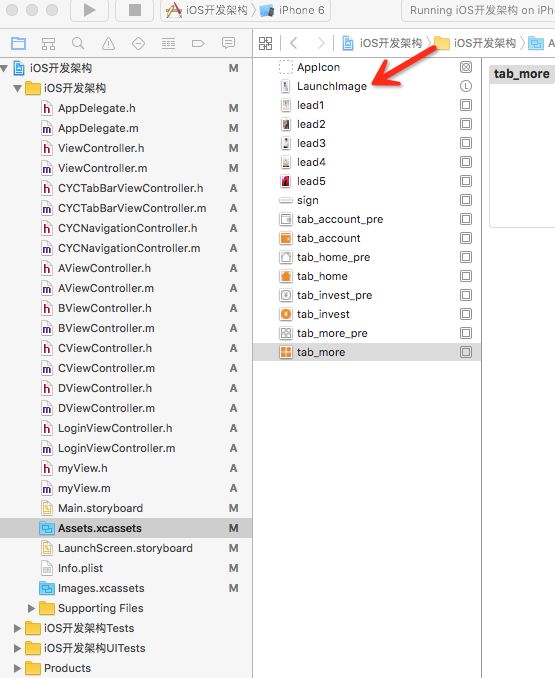
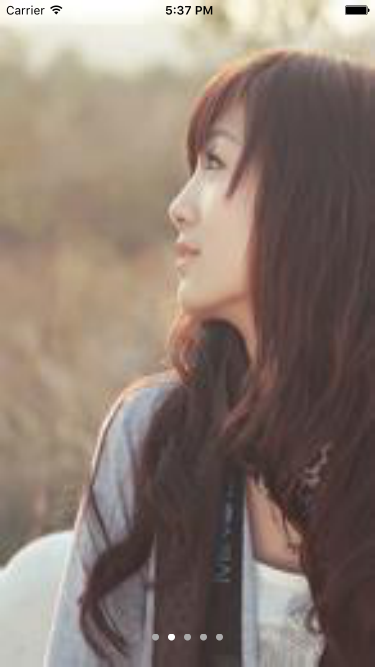
//第一次启动程序时开启项目引导图
if (![[NSUserDefaults standardUserDefaults] boolForKey:@"firstLaunch"]) {
[[NSUserDefaults standardUserDefaults] setBool:YES forKey:@"firstLaunch"];
//如果是第一次启动的话, 使用用户引导图作为根视图
ViewController *firstVC = [[ViewController alloc] init];
self.window.rootViewController = firstVC;
}else{
//否则, 直接进入APP主界面
CYCTabBarViewController *dkTabBar = [[CYCTabBarViewController alloc] init];
self.window.rootViewController = dkTabBar;
}
return YES;
}
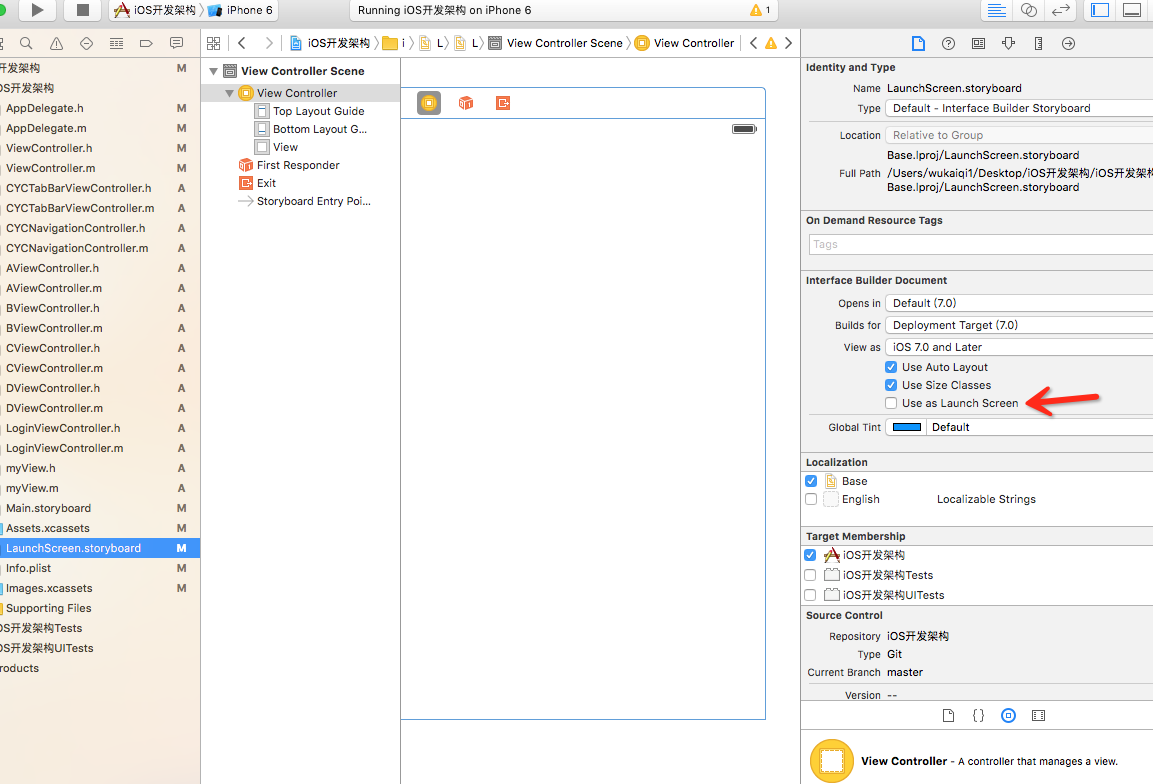
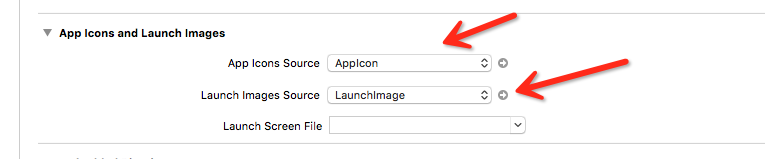
//设置APP启动图
- (void)applicationWillResignActive:(UIApplication *)application {
// Sent when the application is about to move from active to inactive
state. This can occur for certain types of temporary interruptions (such
as an incoming phone call or SMS message) or when the user quits the
application and it begins the transition to the background state.
// Use this method to pause ongoing tasks, disable timers, and throttle
down OpenGL ES frame rates. Games should use this method to pause the
game.
}
- (void)applicationDidEnterBackground:(UIApplication *)application {
// Use this method to release shared resources, save user data,
invalidate timers, and store enough application state information to
restore your application to its current state in case it is terminated
later.
// If your application supports background execution, this
method is called instead of applicationWillTerminate: when the user
quits.
}
- (void)applicationWillEnterForeground:(UIApplication *)application {
// Called as part of the transition from the background to the inactive
state; here you can undo many of the changes made on entering the
background.
}
- (void)applicationDidBecomeActive:(UIApplication *)application {
// Restart any tasks that were paused (or not yet started) while the
application was inactive. If the application was previously in the
background, optionally refresh the user interface.
}
- (void)applicationWillTerminate:(UIApplication *)application {
// Called when the application is about to terminate. Save data if appropriate. See also applicationDidEnterBackground:.
}
@end
//viewController
//
// ViewController.m
// iOS开发架构
//
// Copyright © 2016年 Chason. All rights reserved.
//
#import "ViewController.h"
#import "CYCTabBarViewController.h"
//手机屏幕的宽和高
#define kScreenWidth [UIScreen mainScreen].bounds.size.width
#define KScreenHeight [UIScreen mainScreen].bounds.size.height
@interface ViewController ()<UIScrollViewDelegate>
@property (nonatomic, retain) UIPageControl *page;
@end
@implementation ViewController
- (void)viewDidLoad {
[super viewDidLoad];
//添加app引导图
self.navigationController.navigationBarHidden = YES;
UIScrollView *scrollView = [[UIScrollView alloc] initWithFrame:CGRectMake(0, 0, kScreenWidth, KScreenHeight)];
scrollView.contentSize = CGSizeMake(5 *kScreenWidth, KScreenHeight);
scrollView.pagingEnabled = YES;
scrollView.bounces = NO;
scrollView.delegate = self;
scrollView.contentOffset = CGPointMake(0, 0);
scrollView.showsHorizontalScrollIndicator = NO;
scrollView.showsVerticalScrollIndicator = NO;
UIImageView *imageView = [[UIImageView alloc] initWithFrame:CGRectMake(0, 0, kScreenWidth, KScreenHeight)];
[imageView setImage:[UIImage imageNamed:@"lead1.jpg"]];
[scrollView addSubview:imageView];
UIImageView *imageView1 = [[UIImageView alloc] initWithFrame:CGRectMake(kScreenWidth, 0, kScreenWidth, KScreenHeight)];
[imageView1 setImage:[UIImage imageNamed:@"lead2.jpg"]];
[scrollView addSubview:imageView1];
UIImageView *imageView2 = [[UIImageView alloc] initWithFrame:CGRectMake(2 * kScreenWidth, 0, kScreenWidth, KScreenHeight)];
[imageView2 setImage:[UIImage imageNamed:@"lead3.jpg"]];
[scrollView addSubview:imageView2];
UIImageView *imageView3 = [[UIImageView alloc] initWithFrame:CGRectMake(3 * kScreenWidth, 0, kScreenWidth, KScreenHeight)];
[imageView3 setImage:[UIImage imageNamed:@"lead4.jpg"]];
[scrollView addSubview:imageView3];
UIImageView *imageView4 = [[UIImageView alloc] initWithFrame:CGRectMake(4 * kScreenWidth, 0, kScreenWidth, KScreenHeight)];
[imageView4 setImage:[UIImage imageNamed:@"lead5.jpg"]];
imageView4.userInteractionEnabled = YES;
[scrollView addSubview:imageView4];
//添加体验按钮
UIImageView *imageBtn = [[UIImageView alloc] initWithFrame:CGRectMake(kScreenWidth / 2 - 75, KScreenHeight - 120, 150, 40)];
imageBtn.image = [UIImage imageNamed:@"sign.png"];
imageBtn.userInteractionEnabled = YES;
UITapGestureRecognizer *tap = [[UITapGestureRecognizer alloc] initWithTarget:self action:@selector(handleTap )];
[imageBtn addGestureRecognizer:tap];
[imageView4 addSubview:imageBtn];
[self.view addSubview:scrollView];
//设置翻页控件
_page = [[UIPageControl alloc] initWithFrame:CGRectMake(0, KScreenHeight - 50, kScreenWidth, 40)];
_page.numberOfPages = 5;//总页数
_page.pageIndicatorTintColor = [UIColor lightGrayColor];//主题颜色
_page.currentPageIndicatorTintColor = [UIColor whiteColor];//当前页的小球颜色
[self.view addSubview:_page];//添加到self.view上面,因为如果添加到滚动视图上面的话 就会随着滚动从屏幕显示范围内离开。
}
//在滚动视图停止减速,也就是静止的方法内部,我们改变UIPageControl的currentPage
- (void)scrollViewDidEndDecelerating:(UIScrollView *)scrollView
{
//获取当前滚动视图的偏移量
CGPoint offset = scrollView.contentOffset;
//计算当前是第几页
NSInteger page = offset.x / kScreenWidth;
//给currentPage属性赋值
_page.currentPage = page;
}
- (void)handleTap
{
//进入程序主界面
[self presentViewController:[[CYCTabBarViewController alloc] init] animated:NO completion:nil];
}
- (void)didReceiveMemoryWarning {
[super didReceiveMemoryWarning];
// Dispose of any resources that can be recreated.
}
@end
//tabBar
//
// CYCTabBarViewController.m
// iOS开发架构
//
// Copyright © 2016年 Chason. All rights reserved.
//
#import "CYCTabBarViewController.h"
#import "CYCNavigationController.h"
#import "AViewController.h"
#import "BViewController.h"
#import "CViewController.h"
#import "DViewController.h"
@interface CYCTabBarViewController ()
@end
@implementation CYCTabBarViewController
- (void)viewDidLoad {
[super viewDidLoad];
//创建四个导航试图控制器
CYCNavigationController *ANaVC = [[CYCNavigationController alloc]
initWithRootViewController:[[AViewController alloc] init]];
ANaVC.tabBarItem.title = @"A";
CYCNavigationController *BNaVC = [[CYCNavigationController alloc]
initWithRootViewController:[[BViewController alloc] init]];
BNaVC.tabBarItem.title = @"B";
CYCNavigationController *CNaVC = [[CYCNavigationController alloc]
initWithRootViewController:[[CViewController alloc] init]];
CNaVC.tabBarItem.title = @"C";
CYCNavigationController *DNaVC = [[CYCNavigationController alloc]
initWithRootViewController:[[DViewController alloc] init]];
DNaVC.tabBarItem.title = @"D";
//将导航试图控制器添加到标签试图控制器上
NSArray *controllerArray = [[NSArray alloc] initWithObjects:ANaVC, BNaVC, CNaVC, DNaVC, nil];
self.viewControllers = controllerArray;
self.tabBar.tintColor = [UIColor orangeColor];
//设置tabbar图标(22x22/44x44)
ANaVC.tabBarItem.image=[[UIImage imageNamed:@"tab_home_pre.png" ]
imageWithRenderingMode:UIImageRenderingModeAlwaysOriginal];
ANaVC.tabBarItem.selectedImage = [[UIImage
imageNamed:@"tab_home.png"]imageWithRenderingMode:UIImageRenderingModeAlwaysOriginal];
BNaVC.tabBarItem.image = [[UIImage
imageNamed:@"tab_invest_pre.png"]imageWithRenderingMode:UIImageRenderingModeAlwaysOriginal];
BNaVC.tabBarItem.selectedImage = [[UIImage
imageNamed:@"tab_invest.png"]imageWithRenderingMode:UIImageRenderingModeAlwaysOriginal];
CNaVC.tabBarItem.image = [[UIImage imageNamed:@"tab_account_pre.png"]
imageWithRenderingMode:UIImageRenderingModeAlwaysOriginal];
CNaVC.tabBarItem.selectedImage = [[UIImage
imageNamed:@"tab_account.png"]imageWithRenderingMode:UIImageRenderingModeAlwaysOriginal];
DNaVC.tabBarItem.image = [[UIImage imageNamed:@"tab_more_pre.png"]
imageWithRenderingMode:UIImageRenderingModeAlwaysOriginal];
DNaVC.tabBarItem.selectedImage = [[UIImage
imageNamed:@"tab_more.png"]imageWithRenderingMode:UIImageRenderingModeAlwaysOriginal];
}
- (void)didReceiveMemoryWarning {
[super didReceiveMemoryWarning];
// Dispose of any resources that can be recreated.
}
@end
//创建一个控制器
//
// AViewController.m
// iOS开发架构
//
// Copyright © 2016年 Chason. All rights reserved.
//
#import "AViewController.h"
#import "LoginViewController.h"
@interface AViewController ()
@property (nonatomic, strong) UIButton *loginBtn;
@end
@implementation AViewController
- (void)viewDidLoad {
[super viewDidLoad];
self.title = @"A";
}
//跳转到登录注册界面
- (void)pushToLoginAndRegistVC
{
LoginViewController *loginVC = [[LoginViewController alloc] init];
[self.navigationController pushViewController:loginVC animated:YES];
}
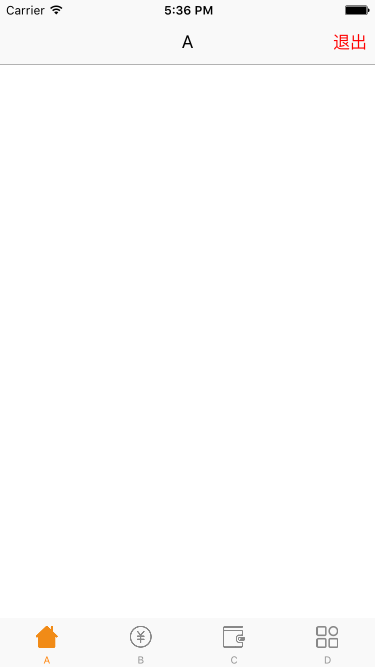
- (void)userOutLogin
{
[[NSUserDefaults standardUserDefaults] setObject:@"" forKey:@"loginName"];
[[NSUserDefaults standardUserDefaults] setObject:@"" forKey:@"loginPwd"];
UIBarButtonItem *rightItem = [[UIBarButtonItem alloc]
initWithTitle:@"登录|注册" style:UIBarButtonItemStylePlain target:self
action:@selector(pushToLoginAndRegistVC)];
self.navigationItem.rightBarButtonItem = rightItem;
self.navigationController.navigationBar.tintColor = [UIColor redColor];
}
-(void)viewWillAppear:(BOOL)animated
{
//判断用户是否登录(本地存储免登陆)
//根据用户登录状况添加/移除登录|注册按钮
if ([[[NSUserDefaults standardUserDefaults] objectForKey:@"loginName"]
isEqualToString:@""] || [[[NSUserDefaults standardUserDefaults]
objectForKey:@"loginPwd"] isEqualToString:@""]) {
UIBarButtonItem *rightItem = [[UIBarButtonItem alloc]
initWithTitle:@"登录|注册" style:UIBarButtonItemStylePlain target:self
action:@selector(pushToLoginAndRegistVC)];
self.navigationItem.rightBarButtonItem = rightItem;
self.navigationController.navigationBar.tintColor = [UIColor redColor];
}else
{
//用户处于登录状态
UIBarButtonItem *rightItem = [[UIBarButtonItem alloc]
initWithTitle:@"退出" style:UIBarButtonItemStylePlain target:self
action:@selector(userOutLogin)];
self.navigationItem.rightBarButtonItem = rightItem;
self.navigationController.navigationBar.tintColor = [UIColor redColor];
}
}
@end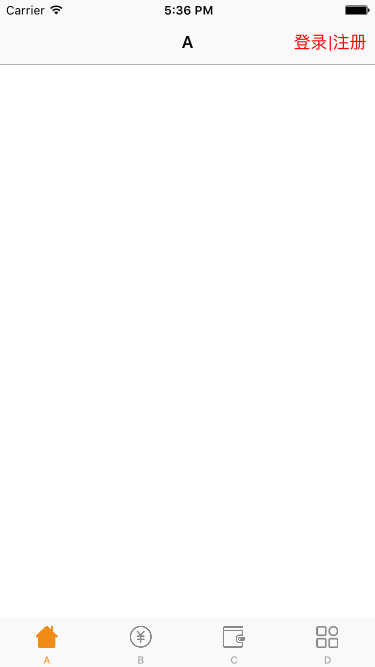
//登录控制器
//
// LoginViewController.m
//
// Copyright (c) 2015年 54贷客. All rights reserved.
//
#import "LoginViewController.h"
#import "myView.h"
//手机屏幕的宽和高
#define kScreenWidth [UIScreen mainScreen].bounds.size.width
#define KScreenHeight [UIScreen mainScreen].bounds.size.height
@interface LoginViewController ()<UITextFieldDelegate>
@property (nonatomic,copy)UITextField * userNametextField;
@property (nonatomic,copy)UITextField * passwordtextField;
@end
@implementation LoginViewController
- (BOOL)textFieldShouldReturn:(UITextField *)textField
{
[textField resignFirstResponder];
return YES;
}
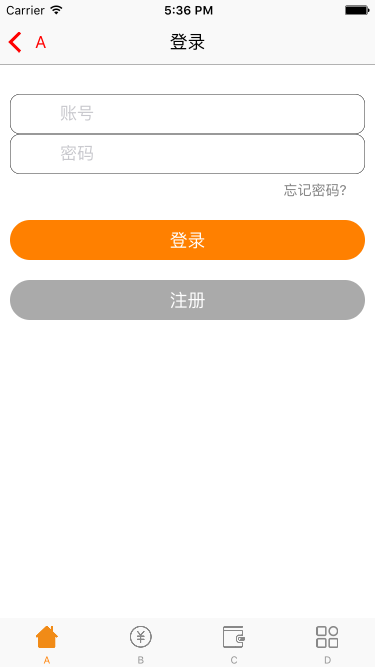
- (void)viewDidLoad {
[super viewDidLoad];
self.view.backgroundColor = [UIColor whiteColor];
self.navigationItem.title = @"登录";
[self.navigationController.navigationBar
setTitleTextAttributes:@{NSFontAttributeName:[UIFont
systemFontOfSize:18], NSForegroundColorAttributeName:[UIColor
blackColor]}];
[self addLoginView];
//添加退出键盘手势
UITapGestureRecognizer *exitKeyBoard = [[UITapGestureRecognizer alloc] initWithTarget:self action:@selector(viewTapped:)];
exitKeyBoard.cancelsTouchesInView = NO;
[self.view addGestureRecognizer:exitKeyBoard];
}
- (void)viewTapped:(UITapGestureRecognizer*)tap1
{
[self.view endEditing:YES];
}
-(void)addLoginView{
NSArray *arr = @[@"账号",@"密码"];
NSArray *imageArr = @[@"user",@"password"];
for (int i = 0; i<2; i++) {
UILabel *label = [[UILabel alloc]initWithFrame:CGRectMake(10, 94 + 40 * i, kScreenWidth - 20, 40)];
label.layer.borderWidth = 0.4f;
label.layer.cornerRadius = 10;
[self.view addSubview:label];
UIImageView *imageView = [[UIImageView alloc]initWithFrame:CGRectMake(10, 12, 13, 16)];
imageView.image = [[UIImage imageNamed:[NSString
stringWithFormat:@"%@.png",imageArr[i]]]
imageWithRenderingMode:UIImageRenderingModeAlwaysOriginal];
[label addSubview:imageView];
label.userInteractionEnabled = YES;
if (i==0) {
_userNametextField = [[UITextField alloc]initWithFrame:CGRectMake(50, 00, kScreenWidth - 100, 40)];
_userNametextField.clearButtonMode = UITextFieldViewModeWhileEditing;
_userNametextField.delegate = self;
_userNametextField.keyboardType = UIKeyboardTypeNumbersAndPunctuation;
_userNametextField.layer.cornerRadius = 10;
_userNametextField.placeholder = arr[i];
[label addSubview:_userNametextField];
}else if(i==1){
_passwordtextField = [[UITextField alloc]initWithFrame:CGRectMake(50, 00, kScreenWidth - 100, 40)];
_passwordtextField.clearButtonMode = UITextFieldViewModeWhileEditing;
_passwordtextField.delegate = self;
_passwordtextField.layer.cornerRadius = 10;
_passwordtextField.secureTextEntry = YES;
_passwordtextField.placeholder = arr[i];
[label addSubview:_passwordtextField];
}
}
//忘记密码
UIButton *button = [UIButton buttonWithType:UIButtonTypeSystem];
[button setTitle:@"忘记密码?" forState:UIControlStateNormal];
button.frame = CGRectMake(kScreenWidth - 100, 180, 80, 20);
button.titleLabel.font = [UIFont systemFontOfSize:14];
[button addTarget:self action:@selector(forgetPwdClick) forControlEvents:UIControlEventTouchUpInside];
button.tintColor = [UIColor grayColor];
[self.view addSubview:button];
//登录 免费注册按钮
UIButton *loginBtn = [myView creatButtonWithFrame:CGRectMake(10, 220,
kScreenWidth-20, 40) title:@"登录" tag:10001 tintColor:[UIColor
whiteColor] backgroundColor:[UIColor orangeColor]];
[loginBtn addTarget:self action:@selector(clickLoginButton:) forControlEvents:UIControlEventTouchUpInside];
loginBtn.layer.cornerRadius = 20;
[self.view addSubview:loginBtn];
UIButton *registBtn = [myView creatButtonWithFrame:CGRectMake(10, 280,
kScreenWidth-20, 40) title:@"注册" tag:10002 tintColor:[UIColor
whiteColor] backgroundColor:[UIColor lightGrayColor]];
[registBtn addTarget:self action:@selector(registerClick) forControlEvents:UIControlEventTouchUpInside];
registBtn.layer.cornerRadius = 20;
[self.view addSubview:registBtn];
}
-(void)forgetPwdClick{
//跳转到忘记密码控制器
NSLog(@"忘记密码啦!");
}
-(void)registerClick{
//跳转到用户注册控制器
NSLog(@"快来注册吧!");
}
-(void)clickLoginButton:(UITextField *)textField{
//登录成功
//本地持久化
[[NSUserDefaults standardUserDefaults] setObject:_userNametextField.text forKey:@"loginName"];
[[NSUserDefaults standardUserDefaults] setObject:_passwordtextField.text forKey:@"loginPwd"];
//登陆成功之后 隐藏输入框内容
[_passwordtextField resignFirstResponder];
[self popToRootVC];//登陆成功后返回
}
- (void)popToRootVC
{
_userNametextField.text = @"";
_passwordtextField.text = @"";
[self.navigationController popToRootViewControllerAnimated:YES];
}
- (void)didReceiveMemoryWarning {
[super didReceiveMemoryWarning];
}
@end
//自定义一个view类
//
// myView.h
//
// Copyright (c) 2015年 54贷客. All rights reserved.
//
#import <Foundation/Foundation.h>
#import <UIKit/UIKit.h>
@interface myView : NSObject
+(UIButton
*)creatButtonWithFrame:(CGRect)frame title:(NSString *)title
tag:(NSInteger)tag tintColor:(UIColor *)tintColor
backgroundColor:(UIColor *)backgroundColor;
@end
//
// myView.m
//
// Copyright (c) 2015年 54贷客. All rights reserved.
//
#import "myView.h"
@implementation myView
+(UIButton
*)creatButtonWithFrame:(CGRect)frame title:(NSString *)title
tag:(NSInteger)tag tintColor:(UIColor *)tintColor
backgroundColor:(UIColor *)backgroundColor{
UIButton *button = [UIButton buttonWithType:UIButtonTypeCustom];
[button setTitle:title forState:UIControlStateNormal];
button.tag = tag;
button.backgroundColor = backgroundColor;
button.tintColor= tintColor;
button.frame = frame;
[button setTitleColor:tintColor forState:UIControlStateNormal];
return button;
}
@end
如果您觉得博文对您有帮助, 希望您能打发给博主一点茶水钱, 您的支持就是博主最大的动力!