我们知道,无论是 ASP.NET1.x,2.0,甚至是以后的版本,ASP.NET最终Render到Client端通过浏览器浏览的都是一样:一个单纯的HTML。 Client通过Submit Form的方式将填入Form的数据提交给Server进行处理。我们现在来看看ASP.NET整个Postback程序处理的过程。
首先我们通过一个Sample来看ASP.NET如何处理一个通过Click一个Button引起的Postback。下面是Web Page的HTML:
 <%@ Page Language="C#" AutoEventWireup="true" CodeFile="Default.aspx.cs" Inherits="_Default" %>
 <!DOCTYPE html PUBLIC "-//W3C//DTD XHTML 1.0 Transitional//EN" "http://www.w3.org/TR/xhtml1/DTD/xhtml1-transitional.dtd"><html xmlns="http://www.w3.org/1999/xhtml"><head runat="server"> <title>Test Page</title></head><body> <form id="form1" runat="server"> <div> <asp:Label runat="server" ID="LabelMessage" ForeColor="red"></asp:Label> </div> <div> <asp:Button runat="server" ID="Button1" Text="Button1" OnClick="Button1_Click" OnCommand="Button_Command" CommandArgument="Button1" /> <asp:Button runat="server" ID="Button2" Text="Button2" OnClick="Button2_Click" OnCommand="Button_Command" CommandArgument="Button2" UseSubmitBehavior="false" /> <asp:Button runat="server" ID="Button3" Text="Button3" OnClick="Button3_Click" OnCommand="Button_Command" CommandArgument="Button3" UseSubmitBehavior="false" /> </div> </form></body></html>
很简单,定义了3个Button,分别注册了他 们的两个Event:Click和Command。3个Button的Command Event Hander是一样的:Button_Command,通过指定的CommandArgument来让Event Handler判断到底是哪个Button触发了Command Event。
下面是Code Behind:
using System;using System.Data;using System.Configuration;using System.Web;using System.Web.Security;using System.Web.UI;using System.Web.UI.WebControls;using System.Web.UI.WebControls.WebParts;using System.Web.UI.HtmlControls;public partial class _Default : System.Web.UI.Page{  protected void Page_Load(object sender, EventArgs e)
 {
{  } protected void Button1_Click(object sender, EventArgs e) { string message = string.Format("The {0} event of {1} is fired", "Click", "Button1"); this.LabelMessage.Text = message; } protected void Button2_Click(object sender, EventArgs e) { string message = string.Format("The {0} event of {1} is fired", "Click", "Button2"); this.LabelMessage.Text = message; } protected void Button3_Click(object sender, EventArgs e) { string message = string.Format("The {0} event of {1} is fired", "Click", "Button3"); this.LabelMessage.Text = message; } protected void Button_Command(object sender, CommandEventArgs e) { string message = string.Format("The {0} event of {1} is fired", "Command", e.CommandArgument); this.LabelMessage.Text += "; " + message; }
 }
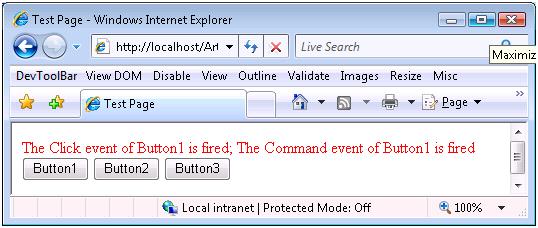
}我们来运行这个Page,并Click某个按钮(比如Button2):

我们通过最上方的Message可以看出,Button2的Click Event和Command先后触发。
这篇Blog的主旨就是从方法调用的角度讲述整个程序运行的过程:从HTML 被Render到Client端,到用户Click某个按钮,输入被Postback到Server端,并触发两个Event,执行Event Handler打印出相关的Message。
首先我们来看看ASP.NET设计的Page Render到Client端的HTML是什么样子:
<!DOCTYPE html PUBLIC "-//W3C//DTD XHTML 1.0 Transitional//EN" "http://www.w3.org/TR/xhtml1/DTD/xhtml1-transitional.dtd"><html xmlns="http://www.w3.org/1999/xhtml"> <head> <title> Test Page </title> </head> <body> <form name="form1" method="post" action="Default.aspx" id="form1"> <div> <input type="hidden" name="__EVENTTARGET" id="__EVENTTARGET" value="" /> <input type="hidden" name="__EVENTARGUMENT" id="__EVENTARGUMENT" value="" /> <input type="hidden" name="__VIEWSTATE" id="__VIEWSTATE" value="/wEPDwUKMTA0NDQ2OTE5OWRk281L4eAk7iZT10hzg+BeOyoUWBQ=" /> </div><script type="text/javascript"> <!--var theForm = document.forms['form1'];if (!theForm) { theForm = document.form1;}function __doPostBack(eventTarget, eventArgument) { if (!theForm.onsubmit || (theForm.onsubmit() != false)) { theForm.__EVENTTARGET.value = eventTarget; theForm.__EVENTARGUMENT.value = eventArgument; theForm.submit(); }}// --></script><div><span id="LabelMessage" style="color:Red;"></span></div><div> <input type="submit" name="Button1" value="Button1" id="Button1" /> <input type="button" name="Button2" value="Button2" onclick="javascript:__doPostBack('Button2','')" id="Button2" /> <input type="button" name="Button3" value="Button3" onclick="javascript:__doPostBack('Button3','')" id="Button3" /></div></form></body></html>上面的HTMLBody部分大体包括3个部分:
1. 定义了3个hidden field:
<input type="hidden" name="__EVENTTARGET" id="__EVENTTARGET" value="" /> <input type="hidden" name="__EVENTARGUMENT" id="__EVENTARGUMENT" value="" /><input type="hidden" name="__VIEWSTATE" id="__VIEWSTATE" value="/wEPDwUKMTA0NDQ2OTE5OWRk281L4eAk7iZT10hzg+BeOyoUWBQ=" />从他们的命名可以看出他们分别代表的意思:__EVENTTARGET代表触发 Event的Control的Unique name;__EVENTARGUMENT代表为Event Handler定义的额外的参数;__VIEWSTATE:代表的是Viewstate。
2. 一段script:
<script type="text/javascript"> <!--var theForm = document.forms['form1'];if (!theForm) { theForm = document.form1;}function __doPostBack(eventTarget, eventArgument) { if (!theForm.onsubmit || (theForm.onsubmit() != false)) { theForm.__EVENTTARGET.value = eventTarget; theForm.__EVENTARGUMENT.value = eventArgument; theForm.submit(); }}// --></script>3. 一段HTML对应通过ASP.NET定义的Web Control。
<div><span id="LabelMessage" style="color:Red;"></span></div><div> <input type="submit" name="Button1" value="Button1" id="Button1" /> <input type="button" name="Button2" value="Button2" onclick="javascript:__doPostBack('Button2','')" id="Button2" /> <input type="button" name="Button3" value="Button3" onclick="javascript:__doPostBack('Button3','')" id="Button3" />div>我们定义的3个Button被转化成3个能向Server端提交表单 的<input > Tag, 但是他们提交表的方式却不一样,第一个以<input type="submit">的方式提交,后面两个通过调用javascript的方式提交表单(<input type="button">)。对于一个System.Web.UI.WebControls.Button,默认采用第一种提交方式,但是我们 通过设置UseSubmitBehavior属性(这个属性时ASP.NET 2.0新加的,1x没有相应的设置),改变其表单提交的行为。
当用户Click Button2的时候,调用__doPostBack,并传入两个参数:一个代表出发Event的对象的Unique name,也就是Button2的名称,另一个描述Event的额外信息的参数,这里不需要,所以这里是空字符串。在__doPostBack中把这两个 参数赋值给两个Hidden Field:__EVENTTARGET,__EVENTARGUMENT。然后向Server端提交表单,完成Postback。
然后我们来看看Server如何处理这个Postback,关于Web Page的生命周期在这里就不详细介绍了。Server端通过__EVENTTARGET这个hidden field的值找到对应的Server端的Control,通过Reflection确定该Control是否实现了 System.Web.UI.IPostBackEventHandler Interface。如果该Control确实实现了该Interface,那么调用Page的RaisePostBackEvent方法,这是一个 Virtual的方法,可以被Override。我们来看该方法的定义。
[EditorBrowsable(EditorBrowsableState.Advanced)]protected virtual void RaisePostBackEvent(IPostBackEventHandler sourceControl, string eventArgument){ sourceControl.RaisePostBackEvent(eventArgument);}我们可以看到该方法直接调用该sourceControl的RaisePostBackEvent, 并传入一个eventArgument参数,在这个例子中sourceControl就是__EVENTTARGET对应的 Web Control:Button2,eventArgument就是__EVENTTARGET对应的值:一个空字符串。Button2的类型是 System.Web.UI.WebControls.Button。我们来看看System.Web.UI.WebControls.Button中的RaisePostBackEvent方法是如何定义的:
protected virtual void RaisePostBackEvent(string eventArgument){ base.ValidateEvent(this.UniqueID, eventArgument); if (this.CausesValidation) { this.Page.Validate(this.ValidationGroup); } this.OnClick(EventArgs.Empty); this.OnCommand(new CommandEventArgs(this.CommandName, this.CommandArgument));}这个方法也很简单,先进行Validation,然后先后出发两个Event:OnClick 和OnCommand,随后调用对应的Event handler,这和我们的输出结果是吻合的。
这基本上就是整个Postback的整个程序执行的过程,现在我们对我们的Page作一些小的有趣的改动,来验证一下:
Client端和Server端进行交互的途径就是提交表单(Form Submitting),而我们现在有两种方式来提交表单:通过<input type="submit">控件;通过调用javascript:__doPostBack。基于这一点我们在Html中加了下面一段 javascript:
<script type="text/javascript"> function postback() { __doPostBack('Button1',''); } document.getElementById("Button2").onclick = postback; document.getElementById("Button3").onclick = postback; </script>我们override Button2和Button3的onclick event,把'Button1作为参数传入__doPostBack方法,可以想象,现在无论Click那个Button,程序都将认为之Click Button1。有兴趣的可以亲自试试,无论Click那个Button,显示的效果都将是下面的样子:
接下来我们取消上面的改动,在Server对Code作另一方面的尝试。我们前面说过,Server接受到Client的Postback,对于事件的 Web Control(或者Html Server Control),如果实现了System.Web.UI.IPostBackEventHandler接口,会调用Page的virtual方 法:RaisePostbackEvent,我们现在来Override这个方法:
protected override void RaisePostBackEvent(IPostBackEventHandler sourceControl, string eventArgument) { sourceControl = this.Button1; base.RaisePostBackEvent(sourceControl, eventArgument);}在上面的Code中,我们把sourceControl设为Button1,这样无论在client端Click的那个Button,现在都将认为是对Button的Click。运行的结果和上面一样。
通过上面的介绍,我们知道了Page的RaisePostBackEvent会调用 Source Control的RaisePostBackEvent方法,这个方法是定义在IPostBackEventHandler接口中,很多Control都 实现了这个方法,对于Button来说,这个方法是Virtual的,它可以被你Override,如果感兴趣的话,可以自己写一个Custom Button,并Override该方法,看看执行的情况,相信会使加深你对Postback的理解。