本文介绍下我在实现文章锚点过程中的思路、遇到的问题和解决方法
最终实现效果如下:

单纯用前端来实现是很简单的,我用的是AntDesignVue的Anchor组件,拷贝Demo代码就能看到Anchor的实现效果。
贴个Demo的代码
<template>
  <a-anchor>
    <a-anchor-link href="#components-anchor-demo-basic" title="Basic demo" />
    <a-anchor-link href="#components-anchor-demo-static" title="Static demo" />
    <a-anchor-link
      href="#components-anchor-demo-basic"
      title="Basic demo with Target"
      target="_blank"
    />
    <a-anchor-link href="#API" title="API">
      <a-anchor-link href="#Anchor-Props" title="Anchor Props" />
      <a-anchor-link href="#Link-Props" title="Link Props" />
    </a-anchor-link>
  </a-anchor>
</template>
从代码中可以轻易发现,锚点是由多个<a-anchor-link>组成的,titile指显示的值,href指需要跳转到的页面元素的id值。
也就是说要实现点击锚点跳转到指定的标题,需要给<a-anchor-link>指定 href、并且页面元素中得有这个id。
讲完了上面这些,下面来看下我在项目中是如何实现 解析和处理文章内容、动态生成锚点的
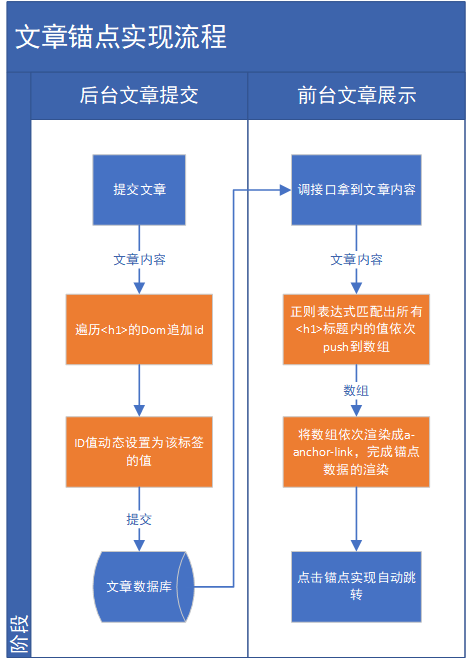
思路:

按照这个流程下来是能实现锚点跳转的。我之前是卡在了后台文章上传时没有对<h1>标签动态追加id,导致锚点无法匹配到页面中对应Id的<h1>标签。
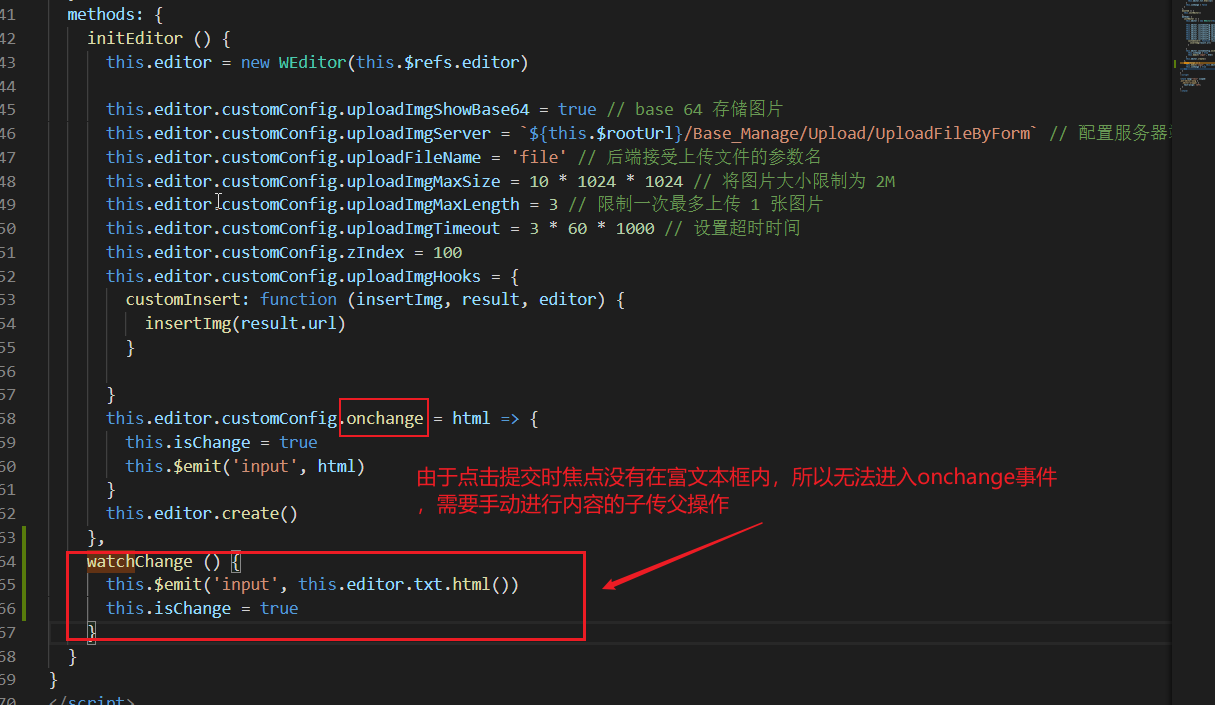
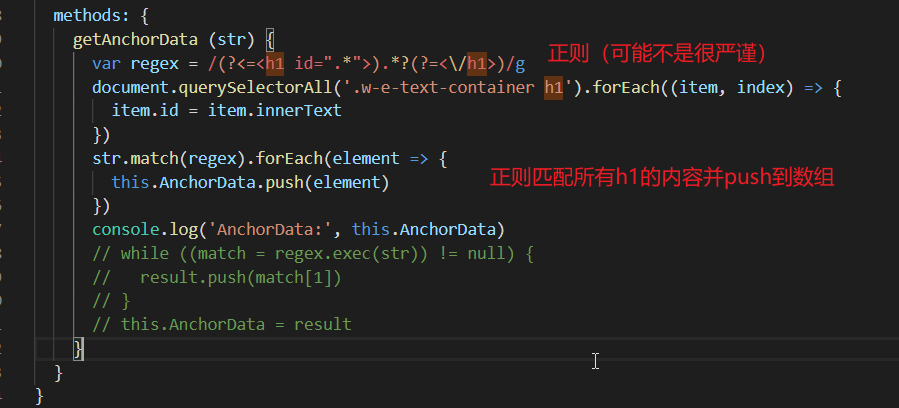
贴一个js操作dom给h1追加id的代码


前台文章展示
正则解析h1作为锚点内容

根据数据进行页面渲染:
