下面开始进入tarsgo正式的开发、使用与上传步骤。
在我们完成goland下tarsgo使用protobuf开发第一部分后,我们得到如下目录:
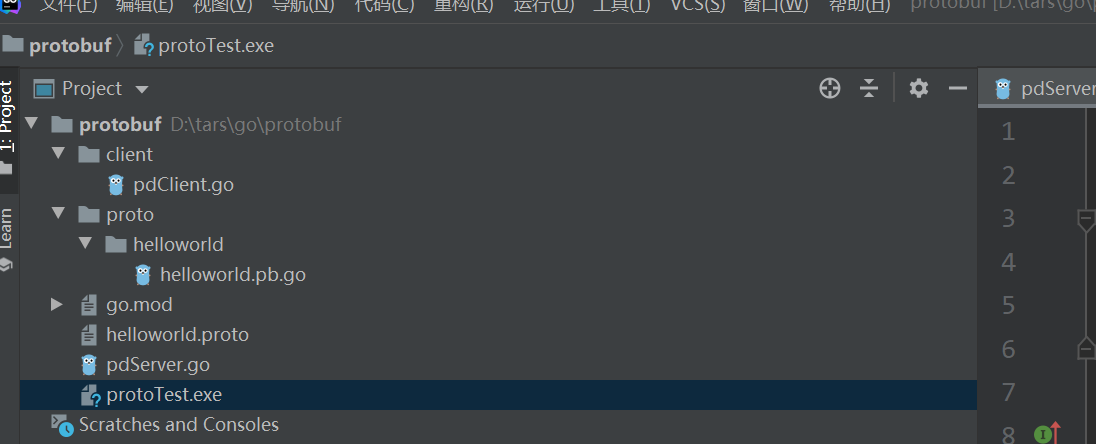
我们知道,helloworld.proto是protobuf的接口描述文件。通过tarsrpc插件生成的go接口文件被我们放到了proto/helloworld这个文件夹中。
之后,随着项目的开发,接口文件会越变越多,所有的接口文件都会放置在proto这个文件夹中,做一个简单分类。
众所周知,作为rpc的服务端,不仅需要生成接口文件,同时还需要实现这个接口方法。
在helloworld.proto中,只有一个简单的rpc方法。
service Greeter {
  // Sends a greeting
  rpc SayHello (HelloRequest) returns (HelloReply) {}
}
我们需要实现它,才能供给客户端调用。
在《goland下tarsgo使用protobuf开发(一)》中,我们将实现他的方法简单的放在了pdServer.go这个文件中。
package main

import (
	"github.com/TarsCloud/TarsGo/tars"
	"protoTest/proto/helloworld"
)
#定义部分
type GreeterImp  struct {
}
#实现部分
func (imp *GreeterImp) SayHello(input helloworld.HelloRequest)(output helloworld.HelloReply, err error) {
	output.Message = "hello" +  input.GetName()
	return output, nil
}

func main() { //Init servant

	imp := new(GreeterImp)                                    //New Imp
	app := new(helloworld.Greeter)                            //New init the A JCE
	cfg := tars.GetServerConfig()                              //Get Config File Object
	app.AddServant(imp, cfg.App+"."+cfg.Server+".GreeterTestObj") //Register Servant
	tars.Run()
}
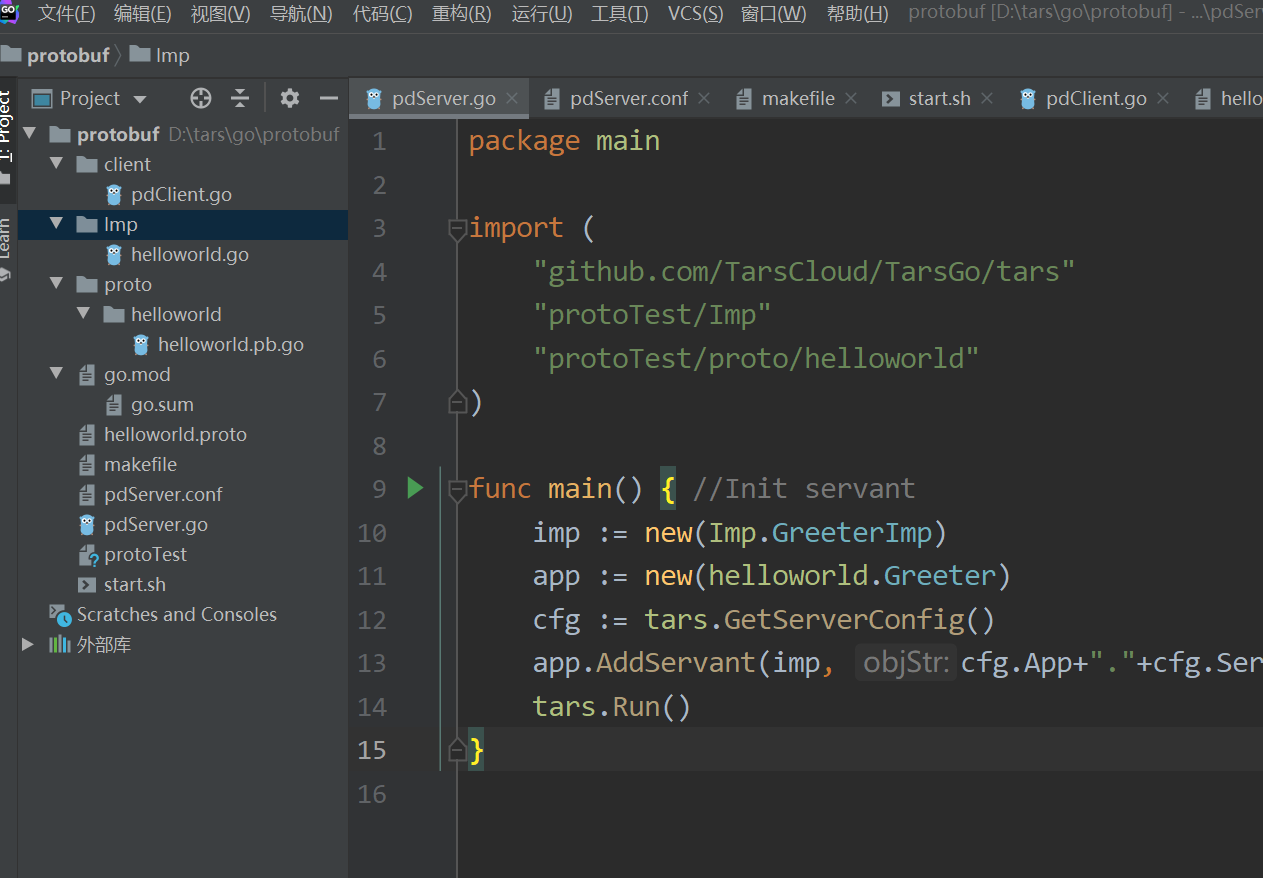
但是,如果项目接口比较多,我们就要以功能层次的方式划分出几个模块。
我们要新建个Imp目录,用于存放我们实现代码。实现部分的代码就分离到Imp这个目录了。
现在的目录变成这个样子:

实现接口的部分:

下一步,我们需要建立服务的配置和适配器文件和sh启动脚本文件
配置和适配器文件pdServer.conf
<tars>
        <application>
                <server>
                        app=StressTest
                        server=protoTest
                        local=tcp -h 127.0.0.1 -p 10014 -t 30000
			logpath=/tmp
                        <StressTest.protoTest.GreeterTestObjAdapter>
                                allow
                                endpoint=tcp -h 127.0.0.1 -p 10015 -t 60000
                                handlegroup=StressTest.protoTest.GreeterTestObjAdapter
                                maxconns=200000
                                protocol=taf
                                queuecap=10000
                                queuetimeout=60000
                                servant=StressTest.protoTest.GreeterTestObj
                                shmcap=0
                                shmkey=0
                                threads=1
                        </StressTest.protoTest.GreeterTestObjAdapter>
                </server>
        </application>
</tars>
服务配置说明:
具体请参考:
https://github.com/tensorchen/TarsGo/blob/code_style/README.zh.md
然后,我们创建makefile文件
APP       := StressTest
TARGET    := protoTest
MFLAGS    :=
DFLAGS    :=
STRIP_FLAG:= N
J2GO_FLAG:=
libpath=${subst :, ,$(GOPATH)}
$(warning  $(GOPATH))
$(foreach path,$(libpath),$(eval -include $(path)/pkg/mod/github.com/!tars!cloud/!tars!go@v1.1.2/tars/makefile.tars.gomod))
下一步,创建开始的脚本文件start.sh
#!/bin/bash
make
./protoTest --config=pdServer.conf
注释:我们项目名称为protoTest,go build .生成的执行程序为protoTest。所以,脚本中需要指定为protoTest
现在整个项目目录:
至此,我们小项目已经构建完毕,开始生成可执行文件。
最后,我们打包上传。
windows想要支持make,需要下载make程序,所以我们直接使用docker

配置好docker镜像,我们进入镜像,输入编译

#设置中国mod代理
export GOPROXY=https://goproxy.cn,direct
#更新mod包依赖
go mod tidy
#打包编译
make && make tar
生成压缩包,然后上传