首先是模型参数和网络结构的保存
#coding:utf-8
import tensorflow as tf
from tensorflow.examples.tutorials.mnist import input_data

mnist = input_data.read_data_sets('MNIST_data',one_hot=True)
#每个批次的大小
batch_size = 100
n_batch = mnist.train._num_examples // batch_size
#定义两个placeholder
x = tf.placeholder(tf.float32, [None,784],name='x-input' )  #模型输入的地方加名字
y = tf.placeholder(tf.float32,[None,10])
keep_prob  = tf.placeholder(tf.float32,name='keepProb')

def weight_variable(shape):
    initial = tf.truncated_normal(shape,stddev=0.1) #生成一个截断的正态分布
    return tf.Variable(initial)
def bias_variable(shape):
    initial = tf.constant(0.1,shape = shape)
    return tf.Variable(initial)
#卷基层
def conv2d(x,W):
    return tf.nn.conv2d(x,W,strides=[1,1,1,1],padding='SAME')
#池化层
def max_pool_2x2(x):
    return tf.nn.max_pool(x,ksize=[1,2,2,1],strides=[1,2,2,1],padding='SAME')


#改变x的格式转为4D的向量[batch,in_height,in_width,in_channels]
x_image = tf.reshape(x, [-1,28,28,1])

#初始化第一个卷基层的权值和偏置
W_conv1 = weight_variable([5,5,1,32]) #5*5的采样窗口 32个卷积核从一个平面抽取特征 32个卷积核是自定义的
b_conv1 = bias_variable([32])  #每个卷积核一个偏置值

#把x_image和权值向量进行卷积,再加上偏置值,然后应用于relu激活函数
h_conv1 = tf.nn.relu(conv2d(x_image,W_conv1)+b_conv1)
h_pool1 = max_pool_2x2(h_conv1) #进行max-pooling

#初始化第二个卷基层的权值和偏置
W_conv2 = weight_variable([5,5,32,64]) # 5*5的采样窗口 64个卷积核从32个平面抽取特征  由于前一层操作得到了32个特征图
b_conv2 = bias_variable([64]) #每一个卷积核一个偏置值

#把h_pool1和权值向量进行卷积 再加上偏置值 然后应用于relu激活函数
h_conv2 = tf.nn.relu(conv2d(h_pool1,W_conv2) + b_conv2)
h_pool2 = max_pool_2x2(h_conv2) #进行max-pooling

#28x28的图片第一次卷积后还是28x28 第一次池化后变为14x14
#第二次卷积后 变为14x14 第二次池化后变为7x7
#通过上面操作后得到64张7x7的平面

#初始化第一个全连接层的权值
W_fc1 = weight_variable([7*7*64,1024])#上一层有7*7*64个神经元,全连接层有1024个神经元
b_fc1 = bias_variable([1024]) #1024个节点

#把第二个池化层的输出扁平化为一维
h_pool2_flat = tf.reshape(h_pool2,[-1,7*7*64])
#求第一个全连接层的输出
h_fc1 = tf.nn.relu(tf.matmul(h_pool2_flat,W_fc1)+b_fc1)

#keep_prob用来表示神经元的输出概率

h_fc1_drop = tf.nn.dropout(h_fc1,keep_prob)

#初始化第二个全连接层
W_fc2 = weight_variable([1024,10])
b_fc2 = bias_variable([10])

#计算输出
prediction = tf.nn.softmax(tf.matmul(h_fc1_drop,W_fc2)+b_fc2, name='output')   #模型输出的地方加名字

#交叉熵代价函数
cross_entropy = tf.reduce_mean(tf.nn.softmax_cross_entropy_with_logits(labels=y,logits=prediction))

#使用AdamOptimizer进行优化
train_step = tf.train.AdamOptimizer(1e-4).minimize(cross_entropy)
#结果存放在一个布尔列表中
correct_prediction = tf.equal(tf.argmax(prediction,1),tf.argmax(y,1)) #argmax返回一维张量中最大的值所在的位置
#求准确率
accuracy = tf.reduce_mean(tf.cast(correct_prediction,tf.float32))

with tf.Session() as sess:
    sess.run(tf.global_variables_initializer())
    for epoch in range(10):
        for batch in range(n_batch):
            batch_xs,batch_ys = mnist.train.next_batch(batch_size)
            sess.run(train_step,feed_dict={x:batch_xs,y:batch_ys,keep_prob:0.7})
        acc = sess.run(accuracy,feed_dict={x:mnist.test.images,y:mnist.test.labels,keep_prob:1.0})
        print ("Iter "+ str(epoch) + ", Testing Accuracy= " + str(acc))
    #保存模型参数与网络结构
    output_graph_def = tf.graph_util.convert_variables_to_constants(sess,sess.graph_def,output_node_names=['output'])
    #保存模型到目录下的model文件夹中
    with tf.gfile.FastGFile('/home/bayes/mymodel.pb',mode='wb') as f:
        f.write(output_graph_def.SerializeToString())
结果
Iter 0, Testing Accuracy= 0.8616
Iter 1, Testing Accuracy= 0.9663
Iter 2, Testing Accuracy= 0.9776
Iter 3, Testing Accuracy= 0.9815
Iter 4, Testing Accuracy= 0.985
Iter 5, Testing Accuracy= 0.9863
Iter 6, Testing Accuracy= 0.9871
Iter 7, Testing Accuracy= 0.9895
Iter 8, Testing Accuracy= 0.9878
Iter 9, Testing Accuracy= 0.9894
Converted 8 variables to const ops.
载入模型参数与网络结构,并且预测图片
#coding:utf-8
import tensorflow as tf
from tensorflow.examples.tutorials.mnist import input_data
from PIL import Image,ImageFilter
mnist = input_data.read_data_sets('MNIST_data',one_hot=True)
#定义一个placeholder
y = tf.placeholder(tf.float32,[None,10])

def imageprepare(argv): # 该函数读一张图片,处理后返回一个数组,进到网络中预测
    im = Image.open(argv).convert('L')
    width = float(im.size[0])
    height = float(im.size[1])
    newImage = Image.new('L', (28, 28), (255))  # creates white canvas of 28x28 pixels

    if width > height:  # check which dimension is bigger
        # Width is bigger. Width becomes 20 pixels.
        nheight = int(round((20.0 / width * height), 0))  # resize height according to ratio width
        if nheight == 0:  # rare case but minimum is 1 pixel
            nheight = 1
            # resize and sharpen
        img = im.resize((20, nheight), Image.ANTIALIAS).filter(ImageFilter.SHARPEN)
        wtop = int(round(((28 - nheight) / 2), 0))  # caculate horizontal pozition
        newImage.paste(img, (4, wtop))  # paste resized image on white canvas
    else:
        # Height is bigger. Heigth becomes 20 pixels.
        nwidth = int(round((20.0 / height * width), 0))  # resize width according to ratio height
        if (nwidth == 0):  # rare case but minimum is 1 pixel
            nwidth = 1
            # resize and sharpen
        img = im.resize((nwidth, 20), Image.ANTIALIAS).filter(ImageFilter.SHARPEN)
        wleft = int(round(((28 - nwidth) / 2), 0))  # caculate vertical pozition
        newImage.paste(img, (wleft, 4))  # paste resized image on white canvas

    # newImage.save("sample.png")

    tv = list(newImage.getdata())  # get pixel values

    # normalize pixels to 0 and 1. 0 is pure white, 1 is pure black.
    tva = [(255 - x) * 1.0 / 255.0 for x in tv]
    return tva
#载入模型
with tf.gfile.FastGFile('/home/bayes/mymodel.pb','rb' ) as f:
    graph_def = tf.GraphDef()
    graph_def.ParseFromString(f.read())
    tf.import_graph_def(graph_def,name='')

with tf.Session() as sess:
    output = sess.graph.get_tensor_by_name('output:0')
      #结果存放在一个布尔列表中
    correct_prediction = tf.equal(tf.argmax(y,1),tf.argmax(output,1)) #argmax返回一维张量中最大的值所在的位置
      #求准确率
    accuracy = tf.reduce_mean(tf.cast(correct_prediction,tf.float32))
    #训练的时候加了dropout,载入模型进行预测或者计算准确率的时候一定记得也加入dropout
    print (sess.run(accuracy,feed_dict={'x-input:0':mnist.test.images, y:mnist.test.labels,'keepProb:0':1.0}))
    array = imageprepare('/home/bayes/logs/3.jpg')
    prediction = tf.argmax(output,1)
    finalClass = sess.run(prediction,feed_dict={'x-input:0':[array],'keepProb:0':1.0})
    print('The digits in this image is:%d' % finalClass)
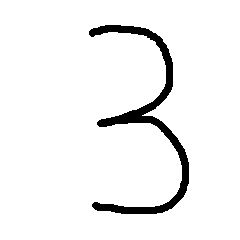
手写数字图片3
结果
I tensorflow/core/common_runtime/gpu/gpu_device.cc:906] DMA: 0
I tensorflow/core/common_runtime/gpu/gpu_device.cc:916] 0:   Y
I tensorflow/core/common_runtime/gpu/gpu_device.cc:975] Creating TensorFlow device (/gpu:0) -> (device: 0, name: GeForce GTX 1080 Ti, pci bus id: 0000:03:00.0)
0.9894
The digits in this image is:3