在本篇博文中,本人主要讲解NIO 的两个核心点 —— 缓冲区(Buffer) 和 通道 (Channel)之一的 缓冲区(Buffer),
有关NIO流的其他知识点请观看本人博文《详解 NIO流》
@
通道 (Channel)
概述:
由 java.nio.channels 包定义的。
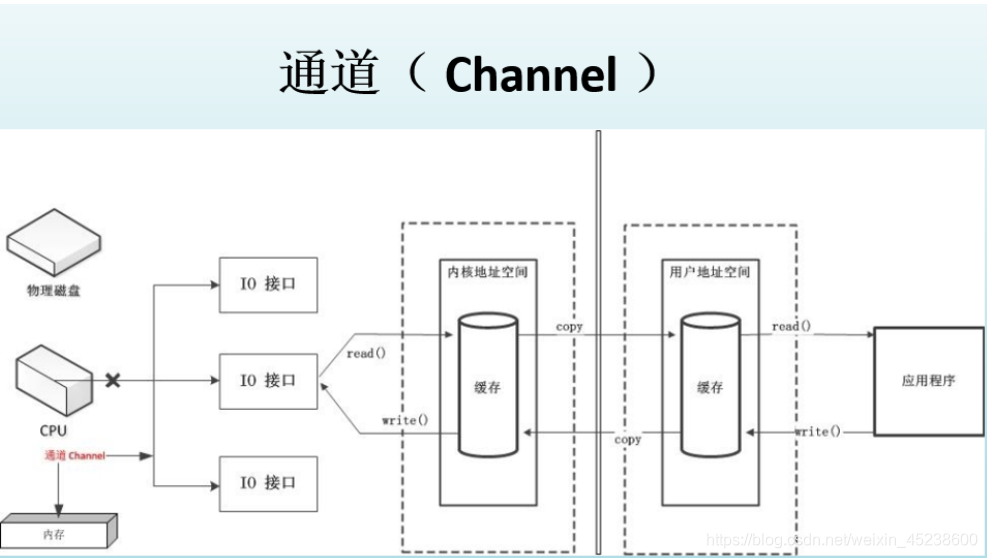
Channel 表示 IO 源与目标打开的连接。
Channel 类似于传统的“流”。
只不过 Channel本身不能直接访问数据, Channel 只能与Buffer 进行交互!
下面,本人来通过一张图展示下我们用NIO流进行数据读写的底层实现步骤:
现在,本人来展示下 Channel 接口的实现类的对象的获取手段:
手段1: 获取通道的一种方式是对支持通道的对象调用getChannel() 方法:
- public FileChannel getChannel()
支持通道的类如下:
本地I/O:
FileInputStream
FileOutputStream
RandomAccessFile网络 I/O:
DatagramSocket
Socket
ServerSocket
手段2:
使用 Files 类的静态方法 newByteChannel()方法 获取字节通道。
- static SeekableByteChannel newByteChannel(Path path, OpenOption... options)
打开或创建一个文件,返回一个可寻址的字节通道存取文件。- static SeekableByteChannel newByteChannel(Path path, Set options, FileAttribute... attrs)
打开或创建一个文件,返回一个可寻址的字节通道存取文件
手段3:
通过 Channel 接口 的静态方法 open()方法 打开并返回指定通道。
- static FileChannel open(Path path, OpenOption... options)
在我们获得了 Channel 接口 的实现类的对象之后,
进行信息的传输:
- public void write(ByteBuffer dst):
将 Buffer 中数据写入 Channel- public void read(ByteBuffer dst):
从 Channel 读取数据到 Buffer
判断可用性:
- void close()
关闭此通道- boolean isOpen()
告诉是否这个通道是打开的
那么,在本篇博文中,本人主要讲解下 Channel 接口实现类中的 FileChannel类:
FileChannel 类:
获得对象的手段在上文中已经讲解过了,本人就不讲解这个类的构造方法了
(一般不会有要求通过构造方法来获取Channel的对象)
那么,本人来展示下这个类的常用API:
- int read(ByteBufferdst):
从Channel中读取数据到ByteBuffer- long read(ByteBuffer[] dsts):
将Channel中的数据“分散”到ByteBuffer[]- int write(ByteBuffer src):
将ByteBuffer中的数据写入到Channel- long write(ByteBuffer[] srcs):
将ByteBuffer[]中的数据“聚集”到Channel- long position():
返回此通道的文件位置- FileChannel position(long p):
设置此通道的文件位置- long size():
返回此通道的文件的当前大小- FileChannel truncate(long s):
将此通道的文件截取为给定大小- void force(boolean metaData):
强制将所有对此通道的文件更新写入到存储设备中
那么,现在,本人来分别展示下使用 FileChannel 类 和 非直接缓冲区/直接缓冲区 来进行文件的复制操作:
首先是 Channel 接口 和 非直接缓冲区 版本:
package edu.youzg.about_nio.core;

import java.io.FileInputStream;
import java.io.FileNotFoundException;
import java.io.FileOutputStream;
import java.io.IOException;
import java.nio.ByteBuffer;
import java.nio.channels.FileChannel;

public class FileCopy {

    public static void main(String[] args) throws IOException {
        FileInputStream in = new FileInputStream("plantsVSzombies.mp4");
        FileOutputStream out = new FileOutputStream("copyViewFile.mp4");
        //获取通道
        FileChannel inChannel = in.getChannel();
        FileChannel outChannel = out.getChannel();
        //面向通道,和缓冲区来复制文件
        //分配一个非直接缓冲区
        ByteBuffer byteBuffer = ByteBuffer.allocate(1024);
        //读写文件
        while (inChannel.read(byteBuffer) != -1){
            //切换读取模式
            byteBuffer.flip();
            //写数据
            outChannel.write(byteBuffer);
            //清空缓冲区
            byteBuffer.clear();
        }
        //释放资源
        in.close();
        out.close();
        inChannel.close();
        outChannel.close();
    }

}
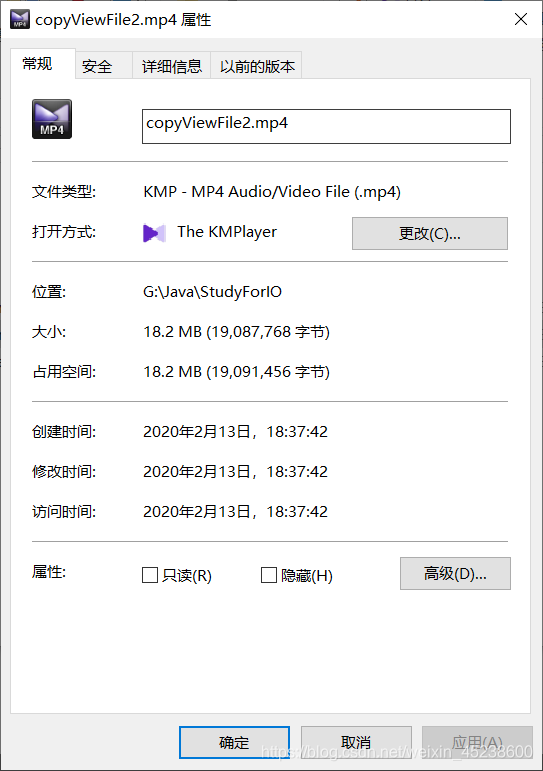
首先,本人展示下源文件的信息:

现在,本人来展示下生成文件的信息:

那么,本人再来展示下使用 FileChannel 类 和 直接缓冲区 进行文件复制:
package edu.youzg.about_nio.core;

import java.io.FileInputStream;
import java.io.FileNotFoundException;
import java.io.FileOutputStream;
import java.io.IOException;
import java.nio.ByteBuffer;
import java.nio.MappedByteBuffer;
import java.nio.channels.FileChannel;
import java.nio.file.Paths;
import java.nio.file.StandardOpenOption;

public class FileCopy {

    public static void main(String[] args) throws IOException {
        //通过文件通道的静态方法,打开读写通道
        //参1:通过Paths获取源文件的路径
        //参2:操作模式 StandardOpenOption.READ 读取模式
        //打开读取文件的通道
        FileChannel in = FileChannel.open(Paths.get("copyViewFile.mp4"), StandardOpenOption.READ);
        //打开写入的通道 模式要读还要写  StandardOpenOption.CREATE 意思是文件不存在就创建,如果存在就覆盖
        //StandardOpenOption.CREATE_NEW 意思是文件不存在就创建,如果存在就报错
        FileChannel out = FileChannel.open(Paths.get("copyViewFile2.mp4"), StandardOpenOption.READ, StandardOpenOption.WRITE, StandardOpenOption.CREATE);
        //操作内存映射文件(也就是这个缓冲区在物理内存中)
        MappedByteBuffer inByteBuffer = in.map(FileChannel.MapMode.READ_ONLY, 0, in.size());
        MappedByteBuffer outByteBuffer = out.map(FileChannel.MapMode.READ_WRITE, 0, in.size());
        //直接对缓冲区进行读写操作
        byte[] bytes = new byte[inByteBuffer.limit()];
        inByteBuffer.get(bytes);
        outByteBuffer.put(bytes);
        //释放资源
        in.close();
        out.close();
    }

}
现在,本人来展示下生成文件的信息:
现在,本人来介绍一下通道的转换性质:
通道的转换性质 主要依靠如下两个方法实现:
- public abstract long transferFrom(ReadableByteChannel src, long position, long count):
将字节从给定的可读字节通道(即:输入通道)传输到这个通道的文件中- public abstract long transferTo(long position, long count, WritableByteChannel target):
将字节从这通道的文件给出到可写字节通道(即:输出通道)
那么,现在,本人来通过这两个方法,实现下文件的复制操作:
package edu.youzg.about_nio.core;

import java.io.FileInputStream;
import java.io.FileNotFoundException;
import java.io.FileOutputStream;
import java.io.IOException;
import java.nio.ByteBuffer;
import java.nio.MappedByteBuffer;
import java.nio.channels.FileChannel;
import java.nio.file.Paths;
import java.nio.file.StandardOpenOption;

public class FileCopy {

    public static void main(String[] args) throws IOException {
        FileChannel inChannel = FileChannel.open(Paths.get("copyViewFile2.mp4"), StandardOpenOption.READ);

        FileChannel outChannel1 = FileChannel.open(Paths.get("copyViewFile3.mp4"), StandardOpenOption.WRITE, StandardOpenOption.CREATE);
        FileChannel outChannel2 = FileChannel.open(Paths.get("copyViewFile4.mp4"), StandardOpenOption.WRITE, StandardOpenOption.CREATE);
        //站在输入通道的角度
        inChannel.transferTo(0,inChannel.size(),outChannel1);
        //站在输出通道的角度
        outChannel2.transferFrom(inChannel,0,inChannel.size());
    }

}
那么,现在,本人来展示下生成的文件的信息:
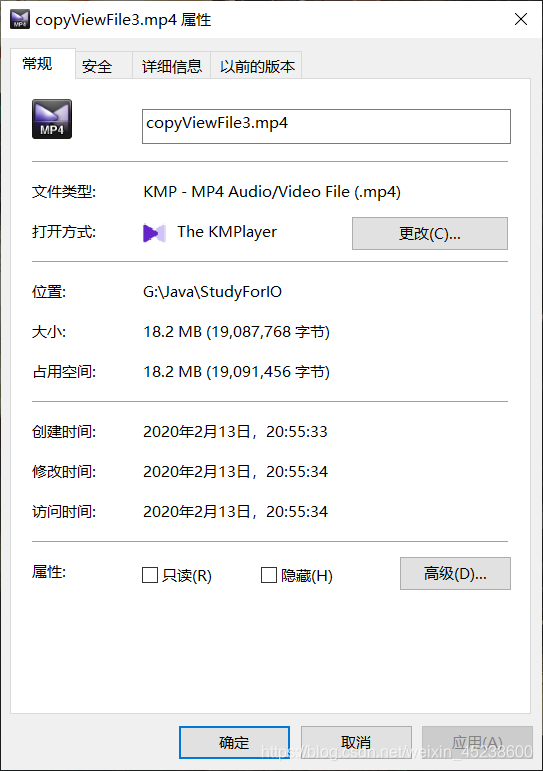
 那么,可以看到,文件的复制成功了!
在本篇博文的最后,本人讲解下一个很重要的思想 —— 分散 (Scatter) 和 聚集 (Gather):
分散 (Scatter) 和 聚集 (Gather):
简介:
所谓的分散和聚集,
就是 分散读取、聚集写入
那么,本人现在来解释下这两个名词:
分散读取( Scattering Reads ):从 Channel 中读取的数据“分散”到多个Buffer缓冲区中
聚集写入( Gathering Writes ):将多个 Buffer缓冲区 中的数据“聚集”到 Channel
本人现在通过两张图来展示下这两个知识点:
-
分散读取( Scattering Reads ):
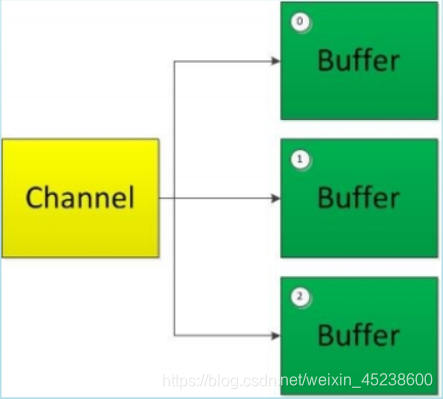 (注意:按照缓冲区的顺序,从Channel中读取的数据依次将Buffer填满)
 -
聚集写入( Gathering Writes ):
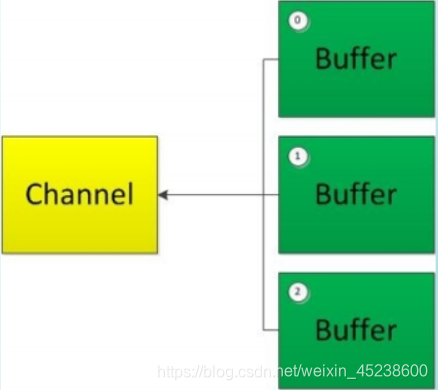
(注意:按照缓冲区的顺序,写入position和limit之间的数据到Channel)
那么,现在,本人来利用这两个知识点,来实现下文件的复制操作:
package edu.youzg.about_nio.core;

import java.io.FileInputStream;
import java.io.FileNotFoundException;
import java.io.FileOutputStream;
import java.io.IOException;
import java.nio.ByteBuffer;
import java.nio.MappedByteBuffer;
import java.nio.channels.FileChannel;
import java.nio.file.Paths;
import java.nio.file.StandardOpenOption;

public class FileCopy {

    public static void main(String[] args) throws IOException {
        FileChannel inChannel = FileChannel.open(Paths.get("copyViewFile4.mp4"), StandardOpenOption.READ);

        FileChannel outChanle = FileChannel.open(Paths.get("copyViewFile5.mp4"), StandardOpenOption.WRITE, StandardOpenOption.CREATE);
        //分配多个缓冲区(缓冲区要分配得足够)
        ByteBuffer byteBuffer1 = ByteBuffer.allocate(1024*2);
        ByteBuffer byteBuffer2 = ByteBuffer.allocate(1024*1024*20);
        //定义一个数组
        ByteBuffer[] byteBuffers={byteBuffer1,byteBuffer2};
        //分散
        inChannel.read(byteBuffers);
        //聚集
        for (ByteBuffer byteBuffer : byteBuffers) {
            byteBuffer.flip();//转换成读取模式
        }
        //写出数据
        outChanle.write(byteBuffers);
        //释放资源
        outChanle.close();
        inChannel.close();
    }

}
现在,本人来展示下生成的文件:
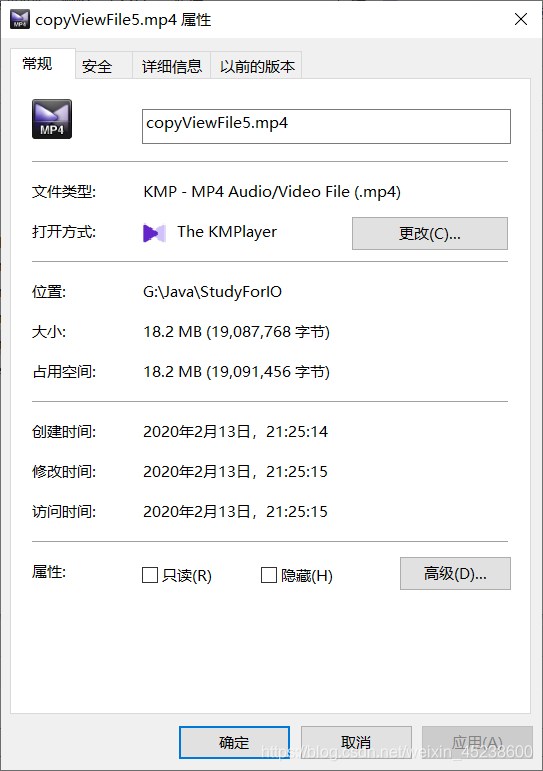
那么,可以看到,文件复制成功了!
(本人 NIO流 博文链接:https:////www.cnblogs.com/codderYouzg/p/12418765.html)