zoukankan      html  css  js  c++  java
  • memcached的简单使用

    memcached的简单使用

    因工作项目本身就安装了memcached,需要安装的请自行百度

     需要额外引入的依赖

    <dependency>
    <groupId>net.spy</groupId>
    <artifactId>spymemcached</artifactId>
    <version>2.12.2</version>
    </dependency>
    <dependency>
    <groupId>org.springframework.boot</groupId>
    <artifactId>spring-boot-configuration-processor</artifactId>
    <optional>true</optional>
    </dependency>
    <dependency>
    <groupId>org.springframework.boot</groupId>
    <artifactId>spring-boot-starter-test</artifactId>
    <scope>test</scope>
    </dependency>

    1.启动类

    package com.memcached.test;

    import java.io.IOException;
    import java.net.InetSocketAddress;

    import javax.annotation.Resource;

    import org.springframework.boot.CommandLineRunner;
    import org.springframework.boot.SpringApplication;
    import org.springframework.boot.autoconfigure.SpringBootApplication;

    import com.memcached.test.Demo.MemcacheSource;

    import net.spy.memcached.MemcachedClient;

    @SpringBootApplication
    public class MemcacheApplication implements CommandLineRunner{
    @Resource
       private  MemcacheSource memcacheSource;

       private MemcachedClient client = null;
    public static void main(String[] args) {
    SpringApplication.run(MemcacheApplication.class, args);
    }

    @Override
    public void run(String... args) throws Exception {
    try {
               client = new MemcachedClient(new InetSocketAddress(memcacheSource.getIp(),memcacheSource.getPort()));
          } catch (IOException e) {
               e.printStackTrace();
          }
    }
    public MemcachedClient getClient() {
           return client;
      }
       
    }

    2.加载ip端口

    package com.memcached.test.Demo;

    import org.springframework.boot.context.properties.ConfigurationProperties;
    import org.springframework.stereotype.Component;

    @Component
    @ConfigurationProperties(prefix = "memcache")//意思会以 memcache.* 为开通将对应的配置文件加载到属性中
    public class MemcacheSource {

       private String ip;

       private int port;

       public String getIp() {
           return ip;
      }

       public void setIp(String ip) {
           this.ip = ip;
      }

       public int getPort() {
           return port;
      }

       public void setPort(int port) {
           this.port = port;
      }
    }

    3.测试memcached的启动类

    package com.memcached.test;

    import javax.annotation.Resource;

    import org.junit.Test;
    import org.junit.runner.RunWith;
    import org.springframework.boot.test.context.SpringBootTest;
    import org.springframework.test.context.junit4.SpringRunner;
    import net.spy.memcached.MemcachedClient;

    @RunWith(SpringRunner.class)
    @SpringBootTest
    public class MemcacheApplicationTests {
    @Resource
       public MemcacheApplication memcachedRunner;

    @Test
    public void testSetGet() {
       MemcachedClient memcachedClient = memcachedRunner.getClient();
       memcachedClient.set("asd",1000,"123");
       System.out.println(""+memcachedClient.get("asd").toString());
    }

    }

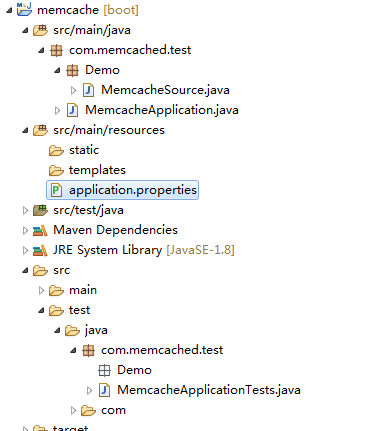
    resources下建一个application.properties

    #缓存配置

    memcache.ip=127.0.0.1

    memcache.port=11211

    配置类会自行读取该配置


  • 相关阅读:
    编写属于自己的Linux Service命令
    Cloudera Manager和CDH4.1的安装
    html5基础教程收集整理精华
    Javascript跳转页面和打开新窗口等方法
    VK值列表
    标准C++之fstream
    PeekMessage用法
    Web系统常用测试方法
    VC控件的一些原理
    Visual C++ 文件操作
  • 原文地址:https://www.cnblogs.com/codecola/p/11765112.html
Copyright © 2011-2022 走看看