本系列随笔转自:https://www.jianshu.com/p/9a8d94c0c90c
中篇见:Spring Cloud Alibaba 简介(中) - Chen洋 - 博客园 (cnblogs.com)
下篇见:Spring Cloud Alibaba 简介(下) - Chen洋 - 博客园 (cnblogs.com)
1.Spring Cloud Alibaba简述
1.1 概述
2018年10月31日,SpringCloudAlibaba 正式入驻 SpringCloud 官方孵化器,并在 Maven 中央库发布第一个版本。
Spring Cloud for Alibaba 0.2.0 released
The Spring Cloud Alibaba project, consisting of Alibaba’s open-source components and several Alibaba Cloud products,
aims to implement and expose well known Spring Framework patterns and abstractions to bring the benefits of Spring Boot
and Spring Cloud to Java developers using Alibaba products.
Spring Cloud for Alibaba,它是由一些阿里巴巴的开源组件和云产品组成的。这个项目的目的是为了让大家所熟知的 Spring 框架,
其优秀的设计模式和抽象理念,以给使用阿里巴巴产品的 Java 开发者带来使用 Spring Boot 和 Spring Cloud 的更多便利。
Spring Cloud Alibaba 致力于提供微服务开发的一站式解决方案。该项目包含开发分布式应用微服务的必需组件,方便开发者通过 Spring Cloud 编程模型轻松使用这些组件来开发分布式应用服务。
依托 Spring Cloud Alibaba,您只需要添加一些注解和少量配置,就可以将 Spring Cloud 应用接入阿里微服务解决方案,通过阿里中间件来迅速搭建分布式应用系统。
1.2 主要功能
- 服务限流降级:默认支持 Servlet、Feign、RestTemplate、Dubbo 和 RocketMQ 限流降级功能的接入,可以在运行时通过控制台实时修改限流降级规则,还支持查看限流降级 Metrics 监控。
- 服务注册与发现:适配 SpringCloud 服务注册与发现标准,默认集成了 Ribbon的支持。
- 分布式配置管理:支持分布式系统中的外部化配置,配置更改时自动刷新。
- 消息驱动能力:基于 SpringCloudStream 为微服务应用构建消息驱动能力。
- 阿里云对象存储:阿里云提供的海量、安全、低成本、高可靠的云存储服务。支持在任何应用、任何时间、任何地点存储和访问任意类型的数据。
- 分布式任务调度:提供秒级、精准、高可靠、高可用的定时(基于 Cron 表达式)任务调度服务。同时提供分布式的任务执行模型,如网格任务。网格任务支持海量子任务均匀分配到所有 Worker(schedulerx-client)上执行。
1.3 组件
- Sentinel:面向分布式服务架构的轻量级流量控制产品,主要以流量为切入点,从流量控制、熔断降级、系统负载保护等多个维度来帮助您保护服务的稳定性。
- Nacos:阿里巴巴推出来的一个新开源项目,这是一个更易于构建云原生应用的动态服务发现、配置管理和服务管理平台。
- RocketMQ:分布式消息系统,基于高可用分布式集群技术,提供低延时的、高可靠的消息发布与订阅服务。
- Alibaba Cloud ACM:一款在分布式架构环境中对应用配置进行集中管理和推送的应用配置中心产品。
- Alibaba Cloud OSS: 阿里云对象存储服务(Object Storage Service,简称 OSS),是阿里云提供的海量、安全、低成本、高可靠的云存储服务。您可以在任何应用、任何时间、任何地点存储和访问任意类型的数据。
- Alibaba Cloud SchedulerX: 阿里中间件团队开发的一款分布式任务调度产品,提供秒级、精准、高可靠、高可用的定时(基于 Cron 表达式)任务调度服务。
2.Spring Cloud Alibaba 创建依赖管理项目
当前 Spring Cloud Alibaba 的 2.1.0.RELEASE 版本基于 Spring Cloud Greenwich 开发,
Spring Cloud Alibaba 项目都是基于 Spring Cloud,而 Spring Cloud 项目又是基于 Spring Boot 进行开发,
并且都是使用 Maven 做项目管理工具。在实际开发中,我们一般都会创建一个依赖管理项目作为 Maven 的 Parent 项目使用,
这样做可以极大的方便我们对 Jar 包版本的统一管理。
创建依赖管理项目
创建文件夹
在电脑上创建一个文件夹hello-spring-cloud-alibaba当做项目的根目录

用idea打开
用idea打开刚刚创建的文件夹:

创建子模块
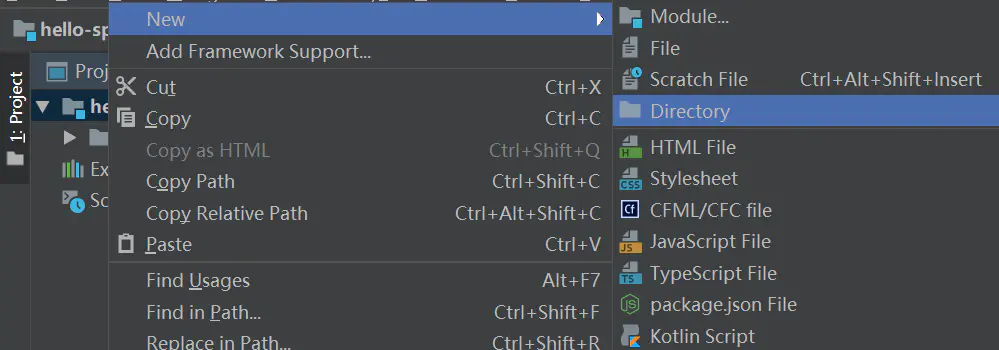
选择hello-spring-cloud-alibaba根目录鼠标右键
创建子模块hello-spring-cloud-alibaba-dependencies
创建pom
在hello-spring-cloud-alibaba-dependencies下创建pom.xml文件
pom.xml内容如下:
<?xml version="1.0" encoding="UTF-8"?>
<project xmlns="http://maven.apache.org/POM/4.0.0" xmlns:xsi="http://www.w3.org/2001/XMLSchema-instance"
         xsi:schemaLocation="http://maven.apache.org/POM/4.0.0 http://maven.apache.org/xsd/maven-4.0.0.xsd">
    <modelVersion>4.0.0</modelVersion>
    <parent>
        <groupId>org.springframework.boot</groupId>
        <artifactId>spring-boot-starter-parent</artifactId>
        <version>2.2.4.RELEASE</version>
    </parent>
    <groupId>com.wsl</groupId>
    <artifactId>hello-spring-cloud-alibaba-dependencies</artifactId>
    <version>1.0.0-SNAPSHOT</version>
    <name>hello-spring-cloud-alibaba-dependencies</name>
    <inceptionYear>2019-Now</inceptionYear>
    <description>Demo project for Spring Boot</description>
    <packaging>pom</packaging>

    <properties>
        <!-- Environment Settings -->
        <java.version>1.8</java.version>
        <project.build.sourceEncoding>UTF-8</project.build.sourceEncoding>
        <project.reporting.outputEncoding>UTF-8</project.reporting.outputEncoding>

        <!-- Spring Settings -->
        <spring-cloud.version>Hoxton.SR1</spring-cloud.version>
        <spring-cloud-alibaba.version>2.2.0.RELEASE</spring-cloud-alibaba.version>
    </properties>

    <dependencyManagement>
        <dependencies>
            <dependency>
                <groupId>org.springframework.cloud</groupId>
                <artifactId>spring-cloud-dependencies</artifactId>
                <version>${spring-cloud.version}</version>
                <type>pom</type>
                <scope>import</scope>
            </dependency>
            <dependency>
                <groupId>com.alibaba.cloud</groupId>
                <artifactId>spring-cloud-alibaba-dependencies</artifactId>
                <version>${spring-cloud-alibaba.version}</version>
                <type>pom</type>
                <scope>import</scope>
            </dependency>
        </dependencies>
    </dependencyManagement>

    <dependencies>
        <dependency>
            <groupId>org.projectlombok</groupId>
            <artifactId>lombok</artifactId>
        </dependency>
    </dependencies>

    <build>
        <plugins>
            <!-- Compiler 插件, 设定 JDK 版本 -->
            <plugin>
                <groupId>org.apache.maven.plugins</groupId>
                <artifactId>maven-compiler-plugin</artifactId>
                <configuration>
                    <showWarnings>true</showWarnings>
                </configuration>
            </plugin>

            <!-- 打包 jar 文件时,配置 manifest 文件,加入 lib 包的 jar 依赖 -->
            <plugin>
                <groupId>org.apache.maven.plugins</groupId>
                <artifactId>maven-jar-plugin</artifactId>
                <configuration>
                    <archive>
                        <addMavenDescriptor>false</addMavenDescriptor>
                    </archive>
                </configuration>
                <executions>
                    <execution>
                        <configuration>
                            <archive>
                                <manifest>
                                    <!-- Add directory entries -->
                                    <addDefaultImplementationEntries>true</addDefaultImplementationEntries>
                                    <addDefaultSpecificationEntries>true</addDefaultSpecificationEntries>
                                    <addClasspath>true</addClasspath>
                                </manifest>
                            </archive>
                        </configuration>
                    </execution>
                </executions>
            </plugin>

            <!-- resource -->
            <plugin>
                <groupId>org.apache.maven.plugins</groupId>
                <artifactId>maven-resources-plugin</artifactId>
            </plugin>

            <!-- install -->
            <plugin>
                <groupId>org.apache.maven.plugins</groupId>
                <artifactId>maven-install-plugin</artifactId>
            </plugin>

            <!-- clean -->
            <plugin>
                <groupId>org.apache.maven.plugins</groupId>
                <artifactId>maven-clean-plugin</artifactId>
            </plugin>

            <!-- ant -->
            <plugin>
                <groupId>org.apache.maven.plugins</groupId>
                <artifactId>maven-antrun-plugin</artifactId>
            </plugin>

            <!-- dependency -->
            <plugin>
                <groupId>org.apache.maven.plugins</groupId>
                <artifactId>maven-dependency-plugin</artifactId>
            </plugin>
        </plugins>

        <pluginManagement>
            <plugins>
                <!-- Java Document Generate -->
                <plugin>
                    <groupId>org.apache.maven.plugins</groupId>
                    <artifactId>maven-javadoc-plugin</artifactId>
                    <executions>
                        <execution>
                            <phase>prepare-package</phase>
                            <goals>
                                <goal>jar</goal>
                            </goals>
                        </execution>
                    </executions>
                </plugin>

                <!-- YUI Compressor (CSS/JS压缩) -->
                <plugin>
                    <groupId>net.alchim31.maven</groupId>
                    <artifactId>yuicompressor-maven-plugin</artifactId>
                    <version>1.5.1</version>
                    <executions>
                        <execution>
                            <phase>prepare-package</phase>
                            <goals>
                                <goal>compress</goal>
                            </goals>
                        </execution>
                    </executions>
                    <configuration>
                        <encoding>UTF-8</encoding>
                        <jswarn>false</jswarn>
                        <nosuffix>true</nosuffix>
                        <linebreakpos>30000</linebreakpos>
                        <force>true</force>
                        <includes>
                            <include>**/*.js</include>
                            <include>**/*.css</include>
                        </includes>
                        <excludes>
                            <exclude>**/*.min.js</exclude>
                            <exclude>**/*.min.css</exclude>
                        </excludes>
                    </configuration>
                </plugin>
            </plugins>
        </pluginManagement>

        <!-- 资源文件配置 -->
        <resources>
            <resource>
                <directory>src/main/java</directory>
                <excludes>
                    <exclude>**/*.java</exclude>
                </excludes>
            </resource>
            <resource>
                <directory>src/main/resources</directory>
            </resource>
        </resources>
    </build>

    <repositories>
        <repository>
            <id>aliyun-repos</id>
            <name>Aliyun Repository</name>
            <url>http://maven.aliyun.com/nexus/content/groups/public</url>
            <releases>
                <enabled>true</enabled>
            </releases>
            <snapshots>
                <enabled>false</enabled>
            </snapshots>
        </repository>

        <repository>
            <id>sonatype-repos</id>
            <name>Sonatype Repository</name>
            <url>https://oss.sonatype.org/content/groups/public</url>
            <releases>
                <enabled>true</enabled>
            </releases>
            <snapshots>
                <enabled>false</enabled>
            </snapshots>
        </repository>
        <repository>
            <id>sonatype-repos-s</id>
            <name>Sonatype Repository</name>
            <url>https://oss.sonatype.org/content/repositories/snapshots</url>
            <releases>
                <enabled>false</enabled>
            </releases>
            <snapshots>
                <enabled>true</enabled>
            </snapshots>
        </repository>

        <repository>
            <id>spring-snapshots</id>
            <name>Spring Snapshots</name>
            <url>https://repo.spring.io/snapshot</url>
            <snapshots>
                <enabled>true</enabled>
            </snapshots>
        </repository>
        <repository>
            <id>spring-milestones</id>
            <name>Spring Milestones</name>
            <url>https://repo.spring.io/milestone</url>
            <snapshots>
                <enabled>false</enabled>
            </snapshots>
        </repository>
    </repositories>

    <pluginRepositories>
        <pluginRepository>
            <id>aliyun-repos</id>
            <name>Aliyun Repository</name>
            <url>http://maven.aliyun.com/nexus/content/groups/public</url>
            <releases>
                <enabled>true</enabled>
            </releases>
            <snapshots>
                <enabled>false</enabled>
            </snapshots>
        </pluginRepository>
    </pluginRepositories>
</project>
- parent:继承了 Spring Boot 的 Parent,表示我们是一个 Spring Boot 工程
- package:pom,表示该项目仅当做依赖项目,没有具体的实现代码
- spring-cloud-alibaba-dependencies:在 properties 配置中预定义了版本号为 2.1.0.RELEASE ,表示我们的 Spring Cloud Alibaba 对应的是 Spring Cloud Greenwich 版本
- build:配置了项目所需的各种插件
- repositories:配置项目下载依赖时的第三方库
将pom加到maven

添加pom文件到maven
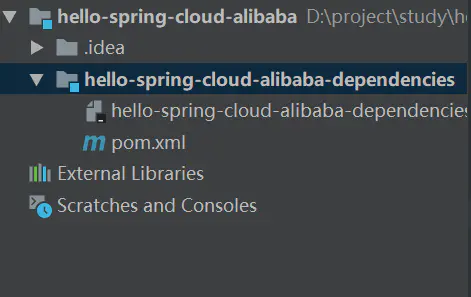
目录结构
依赖版本简介
项目的最新版本是 2.1.0.RELEASE
1.5.x 版本适用于 Spring Boot 1.5.x
2.0.x 版本适用于 Spring Boot 2.0.x
2.1.x 版本适用于 Spring Boot 2.1.x
3.Spring Cloud Alibaba 服务注册与发现(nacos)
由于SpringCloud之前采用的Eureka已经进入暂停维护阶段,所以我们采用阿里巴巴提供的Nacos组件,毕竟论流量中国是世界之最,十年的双十一经验,阿里的服务支持还是很靠谱的。
Nacos 官网
acos
Nacos 致力于帮助您发现、配置和管理微服务。Nacos 提供了一组简单易用的特性集,帮助您快速实现动态服务发现、服务配置、服务元数据及流量管理。
Nacos 帮助您更敏捷和容易地构建、交付和管理微服务平台。 Nacos 是构建以“服务”为中心的现代应用架构 (例如微服务范式、云原生范式) 的服务基础设施。
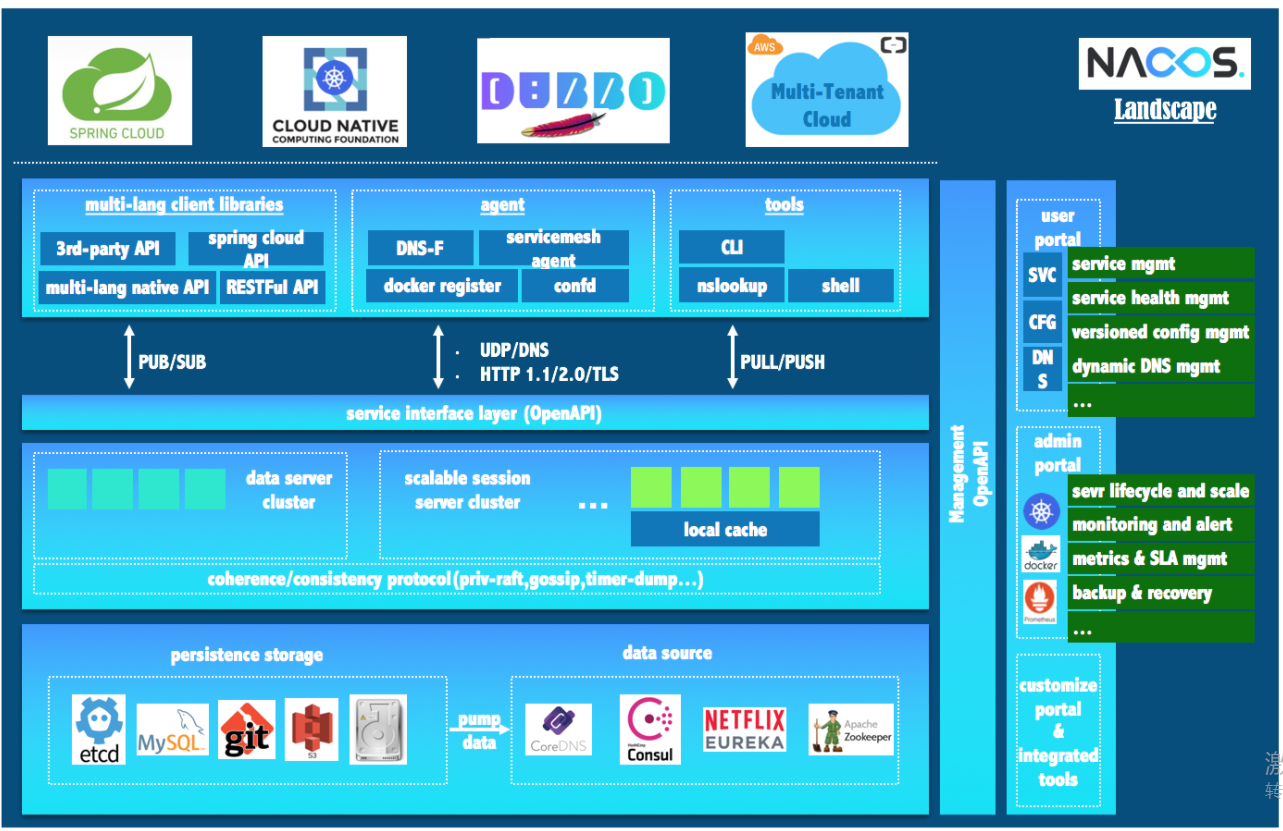
Nacos 地图

- 特性大图:要从功能特性,非功能特性,全面介绍我们要解的问题域的特性诉求
- 架构大图:通过清晰架构,让您快速进入 Nacos 世界
- 业务大图:利用当前特性可以支持的业务场景,及其最佳实践
- 生态大图:系统梳理 Nacos 和主流技术生态的关系
- 优势大图:展示 Nacos 核心竞争力
- 战略大图:要从战略到战术层面讲 Nacos 的宏观优势
Nacos 生态图
安装Nacos
安装环境
Nacos 依赖 Java 环境来运行。如果你是从代码开始构建并运行Nacos,还需要为此配置Maven环境,请确保是在以下版本环境中安装使用:
- 64 bit OS,支持 Linux/Unix/Mac/Windows,推荐选用 Linux/Unix/Mac。
- 64 bit JDK 1.8+
- Maven 3.2.x+
下载并安装
# 下载源码
git clone https://github.com/alibaba/nacos.git

# 安装到本地仓库
cd nacos/
mvn -Prelease-nacos -Dmaven.test.skip=true clean install -U
第一次下载时间有点长,耐心等一会,install时间也不短.....
启动Nacos
cd distribution/target/nacos-server-$version/nacos/bin

# Linux
./startup.sh -m standalone

# Windows
startup.cmd
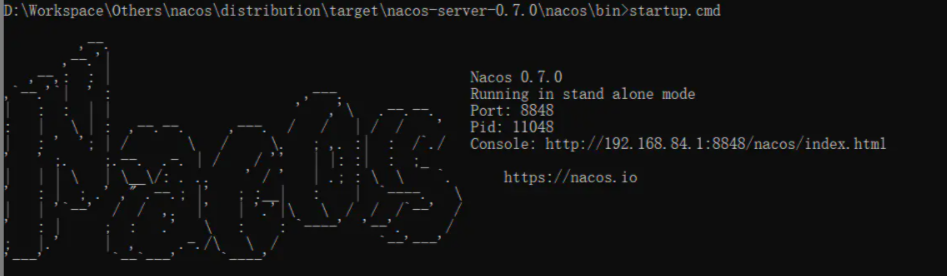
访问服务
打开浏览器访问:http://localhost:8848/nacos
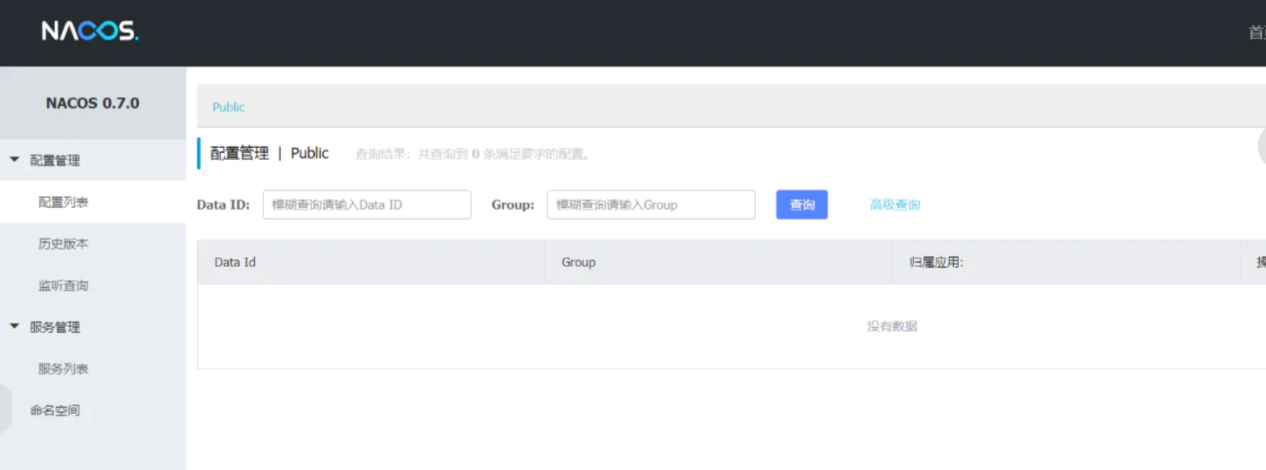
注:从 0.8.0 版本开始,需要登录才可访问,默认账号密码为 nacos/nacos
4.Spring Cloud Alibaba 创建服务提供者
概述
通过一个简单的示例来感受一下如何将服务注册到 Nacos,其实和 Eureka 没有太大差别。
POM
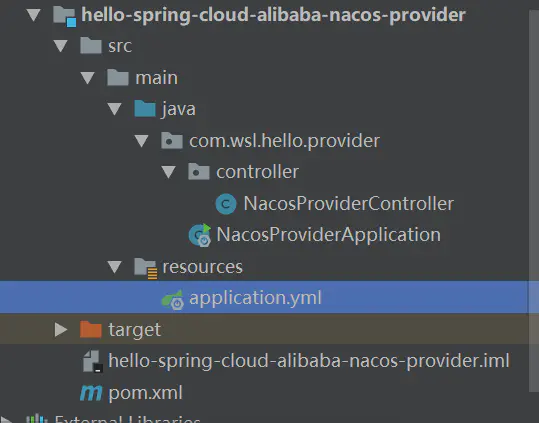
创建一个工程名为 hello-spring-cloud-alibaba-nacos-provider 的服务提供者项目,pom.xml 配置如下:
<?xml version="1.0" encoding="UTF-8"?>
<project xmlns="http://maven.apache.org/POM/4.0.0" xmlns:xsi="http://www.w3.org/2001/XMLSchema-instance"
         xsi:schemaLocation="http://maven.apache.org/POM/4.0.0 http://maven.apache.org/xsd/maven-4.0.0.xsd">
    <modelVersion>4.0.0</modelVersion>
    <parent>
        <groupId>com.wsl</groupId>
        <artifactId>hello-spring-cloud-alibaba-dependencies</artifactId>
        <version>1.0.0-SNAPSHOT</version>
        <relativePath>../hello-spring-cloud-alibaba-dependencies/pom.xml</relativePath>
    </parent>

    <artifactId>hello-spring-cloud-alibaba-provider</artifactId>
    <packaging>jar</packaging>

    <name>hello-spring-cloud-alibaba-provider</name>

    <properties>
        <java.version>1.8</java.version>
    </properties>

    <dependencies>
        <!-- Spring Boot Begin -->
        <dependency>
            <groupId>org.springframework.boot</groupId>
            <artifactId>spring-boot-starter-web</artifactId>
        </dependency>
        <dependency>
            <groupId>org.springframework.boot</groupId>
            <artifactId>spring-boot-starter-actuator</artifactId>
        </dependency>
        <dependency>
            <groupId>org.springframework.boot</groupId>
            <artifactId>spring-boot-starter-test</artifactId>
            <scope>test</scope>
        </dependency>
        <!-- Spring Boot End -->

        <!-- Spring Cloud Begin -->
        <dependency>
            <groupId>com.alibaba.cloud</groupId>
            <artifactId>spring-cloud-starter-alibaba-nacos-discovery</artifactId>
        </dependency>
        <dependency>
            <groupId>com.alibaba.cloud</groupId>
            <artifactId>spring-cloud-starter-alibaba-nacos-config</artifactId>
        </dependency>
        <!-- Spring Cloud End-->
    </dependencies>

    <build>
        <plugins>
            <plugin>
                <groupId>org.springframework.boot</groupId>
                <artifactId>spring-boot-maven-plugin</artifactId>
                <configuration>
                    <mainClass>com.wsl.provider.ProviderApplication</mainClass>
                </configuration>
            </plugin>
        </plugins>
    </build>

</project>
Application
package com.wsl.provider;

import org.springframework.boot.SpringApplication;
import org.springframework.boot.autoconfigure.SpringBootApplication;
import org.springframework.cloud.client.discovery.EnableDiscoveryClient;

@SpringBootApplication
@EnableDiscoveryClient
public class ProviderApplication {

    public static void main(String[] args) {
        SpringApplication.run(ProviderApplication.class, args);
    }
}
通过 @EnableDiscoveryClient注解表明是一个Nacos客户端,该注解是 SpringCloud 提供的原生注解。
application.yml
spring:
  application:
    name: nacos-provider
  cloud:
    nacos:
      discovery:
        server-addr: 127.0.0.1:8848

server:
  port: 8081

management:
  endpoints:
    web:
      exposure:
        include: "*"
controller
@RestController
public class NacosProviderController {

    @Value("${server.port}")
    private String port;

    // 注入配置文件上下文
    @Autowired
    private ConfigurableApplicationContext applicationContext;

    @GetMapping(value = "/test/{message}")
    public String test(@PathVariable String message) {
        return "Hello Nacos Discovery " + message + " i am from port " + port;
    }

    // 从上下文中读取配置
    @GetMapping(value = "/hi")
    public String sayHi() {
        return "Hello " + applicationContext.getEnvironment().getProperty("user.name");
    }
}
启动工程
通过浏览器访问 http://localhost:8848/nacos,即 Nacos Server 网址
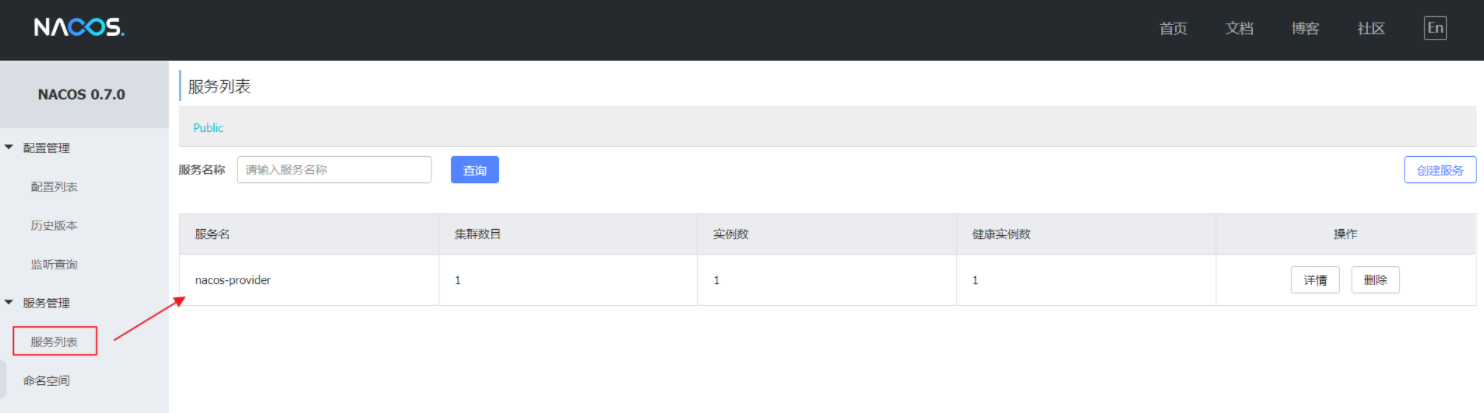
你会发现一个服务已经注册在服务中了,服务名为 nacos-provider
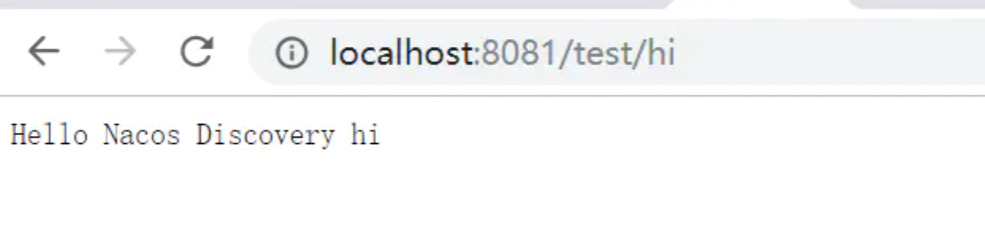
这时打开 http://localhost:8081/test/hi ,你会在浏览器上看到:
服务的端点检查
spring-cloud-starter-alibaba-nacos-discovery 在实现的时候提供了一个 EndPoint, EndPoint 的访问地址为 http://ip:port/actuator/nacos-discovery。 EndPoint 的信息主要提供了两类:
1、subscribe: 显示了当前有哪些服务订阅者
2、NacosDiscoveryProperties: 显示了当前服务实例关于 Nacos 的基础配置
通过浏览器访问 http://localhost:8081/actuator/nacos-discovery 你会在浏览器上看到:

Nacos Starter 更多配置项信息
| 配置项 | Key | 默认值 | 说明 |
|---|---|---|---|
| 服务端地址 | spring.cloud.nacos.discovery.server-addr | 无 | Nacos Server 启动监听的ip地址和端口 |
| 服务名 | spring.cloud.nacos.discovery.service | ${spring.application.name} | 给当前的服务命名 |
| 权重 | spring.cloud.nacos.discovery.weight | 1 | 取值范围 1 到 100,数值越大,权重越大 |
| 网卡名 | spring.cloud.nacos.discovery.network-interface | 无 | 当IP未配置时,注册的IP为此网卡所对应的IP地址,如果此项也未配置,则默认取第一块网卡的地址 |
| 注册的IP地址 | spring.cloud.nacos.discovery.ip | 无 | 优先级最高 |
| 注册的端口 | spring.cloud.nacos.discovery.port | -1 | 默认情况下不用配置,会自动探测 |
| 命名空间 | spring.cloud.nacos.discovery.namespace | 无 | 常用场景之一是不同环境的注册的区分隔离,例如开发测试环境和生产环境的资源(如配置、服务)隔离等。 |
| AccessKey | spring.cloud.nacos.discovery.access-key | 无 | 当要上阿里云时,阿里云上面的一个云账号名 |
| SecretKey | spring.cloud.nacos.discovery.secret-key | 无 | 当要上阿里云时,阿里云上面的一个云账号密码 |
| Metadata | spring.cloud.nacos.discovery.metadata | 无 | 使用 Map 格式配置,用户可以根据自己的需要自定义一些和服务相关的元数据信息 |
| 日志文件名 | spring.cloud.nacos.discovery.log-name | 无 | |
| 接入点 | spring.cloud.nacos.discovery.enpoint | UTF-8 | 地域的某个服务的入口域名,通过此域名可以动态地拿到服务端地址 |
| 是否集成 Ribbon | ribbon.nacos.enabled | true | 一般都设置成 true 即可 |