我们知道如果要求取轮廓可以使用findContours函数,
该函数会返回为vector<vector<Point> >的轮廓向量。
而在以前想对轮廓进行绘制我通常会使用遍历这个vector然后依次将点绘制到img上
其实OpenCV里面已经有drawContours这个函数可以实现这个效果
具体来说,当我想将这个轮廓进行填充的时候我会有下面2步骤:
a)依次遍历轮廓点,将点绘制到img上
    void drawMaxAreaLine(cv::Mat &dst, const std::vector<cv::Point> maxAreaPoints)
    {
        int step = dst.step;
        auto data = dst.data;
        for (int i = 0; i < maxAreaPoints.size(); ++i)
        {
            *(data + maxAreaPoints[i].x + maxAreaPoints[i].y * step) = 255;
        }
    }
b)使用floodFill以及一个种子点进行填充
floodFill(savedGrayMat, Point(currentFrameEdge[0].x + 2, currentFrameEdge[0].y + 2), 255);
这里常会碰到种子点不好选取的问题,因为有时候所选择的种子点不能保证对所有轮廓都适用。也就是查找一个在轮廓内的点是存在一定难度的。
ButInfact:
drawContours就可以办到!
vector<vector<Point> > contours;
contours.push_back(currentFrameEdge);
Mat savedGrayMat = Mat::zeros(RectData[0].rows, RectData[0].cols, CV_8UC1);
//drawMaxAreaLine(savedGrayMat, currentFrameEdge);
//floodFill(savedGrayMat, Point(currentFrameEdge[0].x + 2, currentFrameEdge[0].y + 2), 255);
drawContours(savedGrayMat, contours, 0, Scalar(255), CV_FILLED);
imshow("savedGrayMat", savedGrayMat);
waitKey();
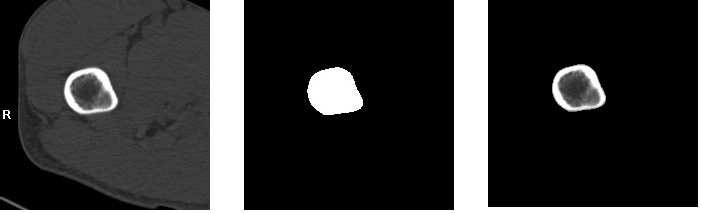
上面中间的图就是通过drawContours得到的
上面的左图和中间图进行与就可以得到右图!
 std::stringstream strStream;
 strStream << "L\\" << i << ".jpg";
 string savedName = strStream.str();
 bitwise_and(savedGrayMat, RectData[i], savedGrayMat);
 //这条语句进行与效果是将原始图与上面得到的ROI图进行&&使得只有中间图的白色区域会留下左图的信息
 cv::imwrite(savedName, savedGrayMat);