- 主PY文件写视图函数,带id参数。
@app.route('/detail/<question_id>')
def detail(question_id):
quest =
return render_template('detail.html', ques = quest) - 首页标题的标签做带参数的链接。
{{ url_for('detail',question_id = foo.id) }} - 在详情页将数据的显示在恰当的位置。
{{ ques.title}}
{{ ques.id }}{{ ques.creat_time }}{{ ques.author.username }}
{{ ques.detail }} -
建立评论的对象关系映射:
class Comment(db.Model):
__tablename__='comment' -
尝试实现发布评论。
1.主PY文件写视图函数,带id参数。
代码如下:
#进入每篇文章详情页
@app.route('/detail/<question_id>')
@loginFirst
def detail(question_id):
    quest=Question.query.filter(Question.id==question_id).first()

    context={
       'comments':Comment.query.order_by('-creat_time').all()

    }
    return render_template('detail.html',**context,ques=quest)
2.首页标题的标签做带参数的链接。
代码如下:
  {% for foo in questions %}


            <li class="list-group-item" style=" 800px">


                <a class="wrap-img" href="#" target="_blank">
                    <img src="{{ foo.author.image }}" width="50px">
                </a>
                <span class="glyphicon glyphicon-left" aria-hidden="true"></span>
                <a href="#" target="_blank">{{ foo.author.username }}</a>
                <br>
                <a href="{{ url_for('detail',question_id=foo.id) }}">{{ foo.title }}</a>

                <br>
                <span class="badge">发布时间:{{ foo.creat_time }}</span>
                <p style="">{{ foo.detail }}
                </p>
{#                {{ url_for('usercenter',user_id=foo.author.id) }}#}
{#                <a href="#" target="_blank"><br>评论({{ foo.comments.length }})</a>#}


            </li>
        {% endfor %}
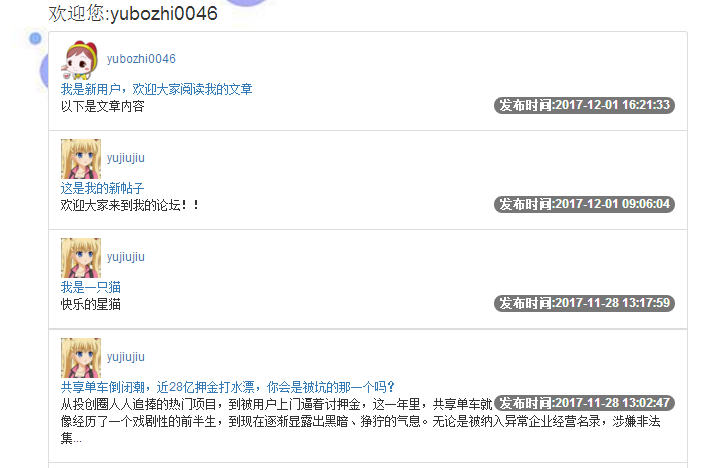
运行结果:

3.在详情页将数据的显示在恰当的位置。
代码如下:
<div class="page-header"> <h3>{{ ques.title }}<br><br> <small>作者:{{ ques.author.username }}    <span class="badge">{{ ques.creat_time }}</span> </small></h3> </div> <p class="lead">{{ ques.detail }}</p> <hr> <form action="{{ url_for('comment') }}" method="post" style=""> <div class="form-group"> <input type="text" value="{{ ques.id }}" name="question_id" hidden> <input type="text" value="{{ user.id }}" name="author_id" hidden> <textarea name="detail" class="form-control" row="3" id="new-comment" placeholder="write your comment"></textarea> </div> <button type="submit" class="btn btn-default">发送</button> </form> <hr>
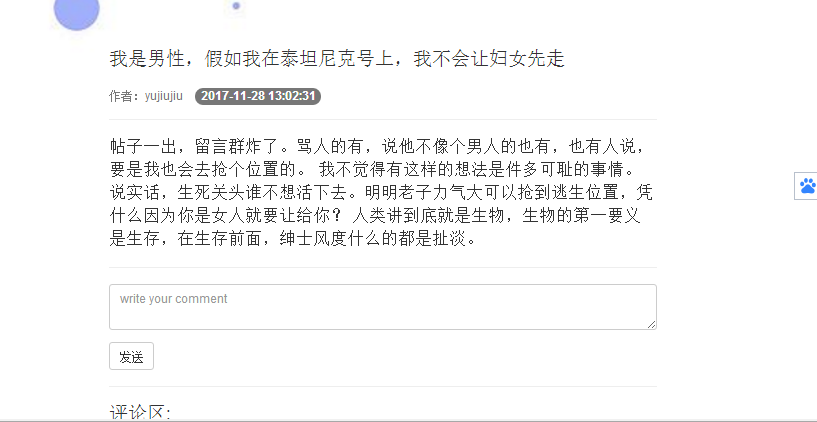
运行结果:

4.建立评论的对象关系映射:
代码如下:
class Comment(db.Model):
    __tablename__ = 'comment'
    # 建立一个表log
    id = db.Column(db.Integer,primary_key=True,autoincrement=True)
    author_id = db.Column(db.Integer,db.ForeignKey('user.id'))
    question_id = db.Column(db.Integer,db.ForeignKey('question.id'))
    creat_time = db.Column(db.DateTime,default=datetime.now)
    detail = db.Column(db.Text,nullable=False)
    question = db.relationship('Question', backref=db.backref('comments'))
    author=db.relationship('User',backref=db.backref('comments'))
运行结果:

5. 尝试实现发布评论。
代码如下:
<h3>评论区:
{#    ({{ ques.comments.length }})#}
</h3><br>


<div class="basic_box" style="padding-bottom: 50px;">
    <ul class="list-group" style="margin-bottom: 10px">
      {% for qu in comments %}

            <li class="list-group-item" style=" 800px">


                <a class="wrap-img" href="#" target="_blank">
                    <img src="{{ qu.author.image }}" width="50px">
                </a>
                <span class="glyphicon glyphicon-left" aria-hidden="true"></span>

                <br>
                <a href="#">{{ qu.author_id }}</a>
                <span class="badge">评论时间:{{ qu.creat_time }}</span>
                <p style="">{{ qu.detail }}
                </p>


            </li>
     {% endfor %}
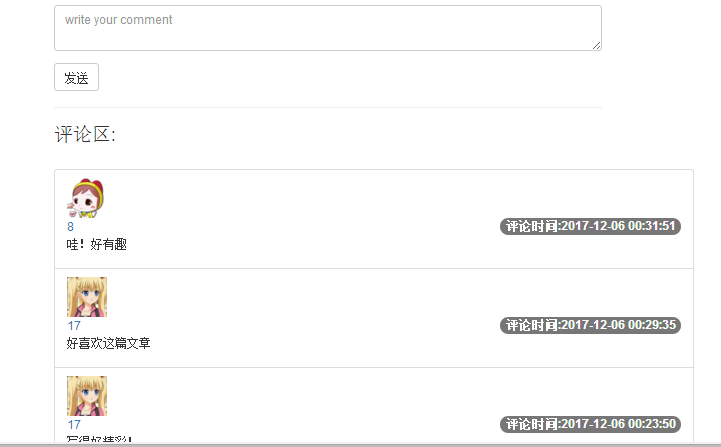
运行结果:
