前言
现在很多APP在用户第一次用的时候,由于用户可能并不知道其中一些功能点的时候,这个时候就需要我们来对用户做一些引导工作。于是这个功能引导界面就应运而生了,先来看看大概效果吧,我这只是很简单的做了一个demo
走,上图


分析
- 1 图中高亮的圆圈部分怎么做呢?
- 2 怎么让我们能很轻易的把圆圈加到我们想要的地方上去呢?
解决办法
- 1 可以让UI做几套图,直接加载上面,但是这样要加许多图片,而且要是以后有新需求的话,又要去换,比较麻烦,故不考虑。
- 2 我们把我们需要高亮的部分通过坐标转换,转换到暗色背景上面,然后通过
UIBezierPath画一个圆圈,最后通过CAShapeLayer的path属性将圆圈展示出来,由于这个是在最上层,而且下面部分不能点击,所以我将其加载了keyWindow上面
部分代码
- (void)showGuideViewWithTapView:(NSArray<UIView *> *)tapview tips:(NSArray<NSString *> *)tips
{
    self.tapNumber  = 0;
    self.tapViews = tapview;
    self.tips = tips;

    CGRect frame = [UIScreen mainScreen].bounds;
    UIView * bgView = [[UIView alloc] initWithFrame:frame];
    bgView.backgroundColor = UICOLOR_FROM_RGB_OxFF_ALPHA(0x323232, 0.8);

    self.bgView = bgView;

    self.tapGesture = [[UITapGestureRecognizer alloc]initWithTarget:self action:@selector(sureTapClick:)];
    [self.bgView addGestureRecognizer:self.tapGesture];

    [[UIApplication sharedApplication].keyWindow addSubview:self.bgView];

    [self addBezierPathWithFrame:frame tapView:tapview[self.tapNumber] tip:tips[self.tapNumber]];

}

- (void)addBezierPathWithFrame:(CGRect)frame tapView:(UIView *)view tip:(NSString *)tip
{
    UIImage *guideImage = [UIImage imageNamed:@"guide3"];

    CGRect tap_frame = [[view superview] convertRect:view.frame toView:self.bgView];

    //通过 UIBezierPath 创建路径
    UIBezierPath *path = [UIBezierPath bezierPathWithRect:frame];
    //画圆圈
    CGFloat radius = 42.5;

    [path appendPath:[UIBezierPath bezierPathWithArcCenter:CGPointMake(tap_frame.origin.x + tap_frame.size.width/2.0, tap_frame.origin.y + tap_frame.size.height/2.0) radius:radius startAngle:0 endAngle:2*M_PI clockwise:NO]];

    //利用CAShapeLayer 的 path 属性
    CAShapeLayer *shapeLayer = [CAShapeLayer layer];
    shapeLayer.path = path.CGPath;
    [self.bgView.layer setMask:shapeLayer];

    CGFloat x = CGRectGetMidX(tap_frame);
    CGFloat y = CGRectGetMaxY(tap_frame) + radius;

    for (UIView *view in self.bgView.subviews)
    {
        if ([view isKindOfClass:[UIImageView class]] || [view isKindOfClass:[UILabel class]])
        {
            [view removeFromSuperview];
        }
    }

    UIImageView * imageView = [[UIImageView alloc]initWithFrame:CGRectMake(x,y,guideImage.size.width,guideImage.size.height)];
    imageView.image = guideImage;
    [self.bgView addSubview:imageView];


    UILabel *lable = [[UILabel alloc] init];
    lable.text = tip;
    lable.font = [UIFont fontWithName:@"Wawati SC" size:20];
    lable.textColor = [UIColor whiteColor];
    //使用代码布局 需要将这个属性设置为NO
    lable.translatesAutoresizingMaskIntoConstraints = NO;
    [self.bgView addSubview:lable];

    NSLayoutConstraint * constraintx = nil;
    //将屏幕分成三等分 来确定文字是靠左还是居中 还是靠右 (大概 可以自己调整)
    if (x <= frame.size.width / 3.0) {
        //创建x居左的约束
        constraintx = [NSLayoutConstraint constraintWithItem:lable attribute:NSLayoutAttributeLeft relatedBy:NSLayoutRelationEqual toItem:imageView attribute:NSLayoutAttributeLeft multiplier:1 constant:0];
    }
    else if ((x > frame.size.width / 3.0) &&(x <= frame.size.width * 2 / 3.0))
    {
        //创建x居中的约束
        constraintx = [NSLayoutConstraint constraintWithItem:lable attribute:NSLayoutAttributeCenterX relatedBy:NSLayoutRelationEqual toItem:imageView attribute:NSLayoutAttributeCenterX multiplier:1 constant:0];
    }
    else
    {
        //创建x居右的约束
        constraintx = [NSLayoutConstraint constraintWithItem:lable attribute:NSLayoutAttributeRight relatedBy:NSLayoutRelationEqual toItem:imageView attribute:NSLayoutAttributeRight multiplier:1 constant:0];
    }

    //创建y坐标的约束
    NSLayoutConstraint * constrainty = [NSLayoutConstraint constraintWithItem:lable attribute:NSLayoutAttributeTop relatedBy:NSLayoutRelationEqual toItem:imageView attribute:NSLayoutAttributeBottom multiplier:1 constant:10];

    [self.bgView addConstraints:@[constraintx,constrainty]];

    self.tapNumber ++;
}
在上面代码中,我把需要高亮的部分的view装在了数组里面,并且把提示文字也加入到数组中,然后传入,这样如果是在一个界面有几个地方需要进行展示,就不用重复调用,只需要传入对应的参数就可以。
注意:在使用的时候,如果程序打开的第一个界面就是引导界面 建议在 viewDidAppear 中调用,因为此时 [UIApplication sharedApplication].keyWindow 为nil,keywindow实际上没有初始化完成
在代码中,由于用到了第三方字体,这里也简答注释下怎么加入第三方字体,大神勿喷哈,我只是记录一下,简单的记录一下
第三方字体导入
首先在plist文件中

然后在TARGETS->Build Phases-> Copy Bundle Resources中导入字体

到此字体就可以使用了,但是还有个问题,就是[UIFont fontWithName:@"Wawati SC" size:20];中的字体名字我们需要去获取,有下面两个方法
- 1 用代码去遍历字体库,打印字体名字
    //打印字体
    NSArray * fontArrays = [[NSArray alloc] initWithArray:[UIFont familyNames]];
    for (NSString * font in fontArrays) {
        NSLog(@"Font name  = %@", font);
    }

- 2 双击字体,然后会安装到字体库中,在字体库的详细信息中,我们可以得到

两种方式在名字上有点不同,但是效果是同的,我估计是因为在mac上,名字有些不一样.
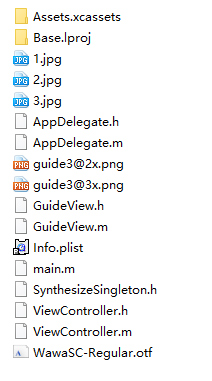
项目文件截图:
 iOS 简单引导界面
注:本文著作权归作者,由demo大师代发,拒绝转载,转载需要作者授权