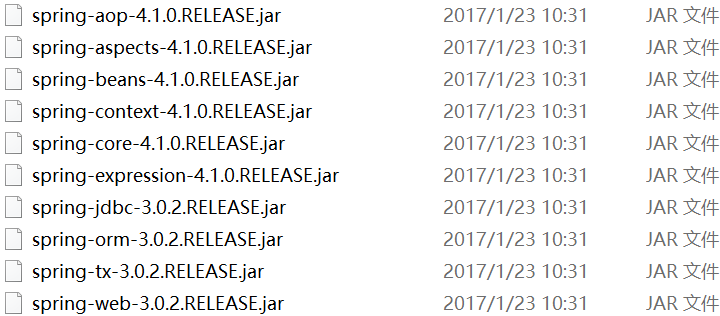
Spring版本基于:
1、配置启动Spring所需的监听器
web.xml中配置监听器
<listener>
        <listener-class>org.springframework.web.context.ContextLoaderListener</listener-class>
</listener>
3
1
<listener> 2
<listener-class>org.springframework.web.context.ContextLoaderListener</listener-class>3
</listener>这是一个典型的 ServletContextListener,Servlet 容器(如 Tomcat 等)在启动时会找到 ContextLoaderListener 并执行其 contextInitialized(ServletContextEvent event) 方法。
ContextLoaderListener.java extends ContextLoader implements ServletContextListener

public void contextInitialized(ServletContextEvent event) {
		this.contextLoader = createContextLoader();
		if (this.contextLoader == null) {
			this.contextLoader = this;
		}
		this.contextLoader.initWebApplicationContext(event.getServletContext());
}
9
1
ContextLoaderListener.java extends ContextLoader implements ServletContextListener 2
3
public void contextInitialized(ServletContextEvent event) {4
this.contextLoader = createContextLoader();5
if (this.contextLoader == null) {6
this.contextLoader = this;7
}8
this.contextLoader.initWebApplicationContext(event.getServletContext());9
}从这里开始,Spring 将会进行 Bean Definition的解析、Bean Processors 设置和处理、Beans 实例化等工作。从而将程序会用到的 Java 对象定义并根据该定义创建好,提供给开发人员去使用。
这里 Spring 首先需要处理的就是 Bean 的定义。经过不断的发展和演化,Bean 的定义方式有:
- 基于 XML 文件的配置方式
- 基于 Annotation 的配置方式
- 基于 Java Code 的配置方式
- 用户自定义的配置方式
这里就基于 XML 配置 Bean Definition 的源码进行解读学习
2、监听器都做了些什么?
Servlet 容器启动时如果 web.xml 配置了 ContextLoaderListener,则会调用该对象的初始化方法。根据 Java 语法规定,ContextLoaderListener 的父类 ContextLoader 有一段 static 的代码会更早被执行。
ContextLoader.java

static {
		// Load default strategy implementations from properties file.
		// This is currently strictly internal and not meant to be customized
		// by application developers.
		try {
			ClassPathResource resource = new ClassPathResource(DEFAULT_STRATEGIES_PATH, ContextLoader.class);
            //private static final String DEFAULT_STRATEGIES_PATH = "ContextLoader.properties";
			defaultStrategies = PropertiesLoaderUtils.loadProperties(resource);
		}
		catch (IOException ex) {
			throw new IllegalStateException("Could not load 'ContextLoader.properties': " + ex.getMessage());
		}
}
15
1
ContextLoader.java 2
3
static {4
// Load default strategy implementations from properties file.5
// This is currently strictly internal and not meant to be customized6
// by application developers.7
try {8
ClassPathResource resource = new ClassPathResource(DEFAULT_STRATEGIES_PATH, ContextLoader.class); 9
//private static final String DEFAULT_STRATEGIES_PATH = "ContextLoader.properties";10
defaultStrategies = PropertiesLoaderUtils.loadProperties(resource);11
}12
catch (IOException ex) {13
throw new IllegalStateException("Could not load 'ContextLoader.properties': " + ex.getMessage());14
}15
}这里的ContextLoader.properties(spring-web-x.x.x.RELEASE.jar --> org.springframework.web.context.support --> ContextLoader.properties)内容为
ContextLoader.properties

org.springframework.web.context.WebApplicationContext=org.springframework.web.context.support.XmlWebApplicationContext
3
1
ContextLoader.properties 2
3
org.springframework.web.context.WebApplicationContext=org.springframework.web.context.support.XmlWebApplicationContext这段代码配置了 XML 默认使用的 Context 为 org.springframework.web.context.WebApplicationContext = org.springframework.web.context.support.XmlWebApplicationContext。根据该定义,如果开发人员没有从 web.xml 指定 contextClass 参数,则默认使用 XmlWebApplicationContext 作为 root WebApplicationContext 工具类。
好了,我们回到刚才的核心方法 initWebApplicationContext() 中去,在这个方法中,有个核心方法
ContextLoader.java

// Store context in local instance variable, to guarantee that
// it is available on ServletContext shutdown.
this.context = createWebApplicationContext(servletContext, parent);
5
1
ContextLoader.java2
3
// Store context in local instance variable, to guarantee that4
// it is available on ServletContext shutdown.5
this.context = createWebApplicationContext(servletContext, parent);我们再继续往里探索
ContextLoader.java

protected WebApplicationContext createWebApplicationContext(ServletContext sc, ApplicationContext parent) {
		//step1
        Class<?> contextClass = determineContextClass(sc);
		if (!ConfigurableWebApplicationContext.class.isAssignableFrom(contextClass)) {
			throw new ApplicationContextException("Custom context class [" + contextClass.getName() +
					"] is not of type [" + ConfigurableWebApplicationContext.class.getName() + "]");
		}

        //step2
		ConfigurableWebApplicationContext wac =
				(ConfigurableWebApplicationContext) BeanUtils.instantiateClass(contextClass);

		// Assign the best possible id value.
		if (sc.getMajorVersion() == 2 && sc.getMinorVersion() < 5) {
			// Servlet <= 2.4: resort to name specified in web.xml, if any.
			String servletContextName = sc.getServletContextName();
			wac.setId(ConfigurableWebApplicationContext.APPLICATION_CONTEXT_ID_PREFIX +
					ObjectUtils.getDisplayString(servletContextName));
		}
		else {
			// Servlet 2.5's getContextPath available!
			try {
				String contextPath = (String) ServletContext.class.getMethod("getContextPath").invoke(sc);
				wac.setId(ConfigurableWebApplicationContext.APPLICATION_CONTEXT_ID_PREFIX +
						ObjectUtils.getDisplayString(contextPath));
			}
			catch (Exception ex) {
				throw new IllegalStateException("Failed to invoke Servlet 2.5 getContextPath method", ex);
			}
		}

		//step3
        wac.setParent(parent);
		wac.setServletContext(sc);
		wac.setConfigLocation(sc.getInitParameter(CONFIG_LOCATION_PARAM));
		customizeContext(sc, wac);

        //step4
        wac.refresh();
		return wac;
}
43
1
ContextLoader.java2
3
protected WebApplicationContext createWebApplicationContext(ServletContext sc, ApplicationContext parent) {4
//step15
Class<?> contextClass = determineContextClass(sc);6
if (!ConfigurableWebApplicationContext.class.isAssignableFrom(contextClass)) {7
throw new ApplicationContextException("Custom context class [" + contextClass.getName() +8
"] is not of type [" + ConfigurableWebApplicationContext.class.getName() + "]");9
}10
11
//step212
ConfigurableWebApplicationContext wac =13
(ConfigurableWebApplicationContext) BeanUtils.instantiateClass(contextClass);14
15
// Assign the best possible id value.16
if (sc.getMajorVersion() == 2 && sc.getMinorVersion() < 5) {17
// Servlet <= 2.4: resort to name specified in web.xml, if any.18
String servletContextName = sc.getServletContextName();19
wac.setId(ConfigurableWebApplicationContext.APPLICATION_CONTEXT_ID_PREFIX +20
ObjectUtils.getDisplayString(servletContextName));21
}22
else {23
// Servlet 2.5's getContextPath available!24
try {25
String contextPath = (String) ServletContext.class.getMethod("getContextPath").invoke(sc);26
wac.setId(ConfigurableWebApplicationContext.APPLICATION_CONTEXT_ID_PREFIX +27
ObjectUtils.getDisplayString(contextPath));28
}29
catch (Exception ex) {30
throw new IllegalStateException("Failed to invoke Servlet 2.5 getContextPath method", ex);31
}32
}33
34
//step335
wac.setParent(parent);36
wac.setServletContext(sc);37
wac.setConfigLocation(sc.getInitParameter(CONFIG_LOCATION_PARAM));38
customizeContext(sc, wac);39
40
//step441
wac.refresh();42
return wac;43
}3、createWebApplicationContext
3.1 //step1
Class<?> contextClass = determineContextClass(sc);
ContextLoader.java

protected Class<?> determineContextClass(ServletContext servletContext) {
		String contextClassName = servletContext.getInitParameter(CONTEXT_CLASS_PARAM); //CONTEXT_CLASS_PARAM = "contextClass"
		if (contextClassName != null) {
			try {
				return ClassUtils.forName(contextClassName, ClassUtils.getDefaultClassLoader());
			}
			catch (ClassNotFoundException ex) {
				throw new ApplicationContextException(
						"Failed to load custom context class [" + contextClassName + "]", ex);
			}
		}
		else {
			contextClassName = defaultStrategies.getProperty(WebApplicationContext.class.getName());
            //defaultStrategies = PropertiesLoaderUtils.loadProperties(resource); defaultStrategies也就是静态代码块中初始化的默认工具类XmlWebApplicationContext
			try {
				return ClassUtils.forName(contextClassName, ContextLoader.class.getClassLoader());
			}
			catch (ClassNotFoundException ex) {
				throw new ApplicationContextException(
						"Failed to load default context class [" + contextClassName + "]", ex);
			}
		}
}
25
1
ContextLoader.java2
3
protected Class<?> determineContextClass(ServletContext servletContext) {4
String contextClassName = servletContext.getInitParameter(CONTEXT_CLASS_PARAM); //CONTEXT_CLASS_PARAM = "contextClass"5
if (contextClassName != null) {6
try {7
return ClassUtils.forName(contextClassName, ClassUtils.getDefaultClassLoader());8
}9
catch (ClassNotFoundException ex) {10
throw new ApplicationContextException(11
"Failed to load custom context class [" + contextClassName + "]", ex);12
}13
}14
else {15
contextClassName = defaultStrategies.getProperty(WebApplicationContext.class.getName()); 16
//defaultStrategies = PropertiesLoaderUtils.loadProperties(resource); defaultStrategies也就是静态代码块中初始化的默认工具类XmlWebApplicationContext 17
try {18
return ClassUtils.forName(contextClassName, ContextLoader.class.getClassLoader());19
}20
catch (ClassNotFoundException ex) {21
throw new ApplicationContextException(22
"Failed to load default context class [" + contextClassName + "]", ex);23
}24
}25
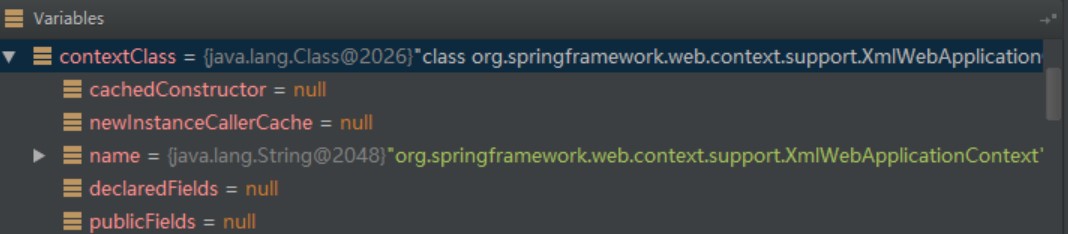
}首先determineContextClass()方法查明具体的Context类,他会读取servletContext的初始化参数contextClass,此参数我们一般不配置。
所以Spring就会读取跟org.springframework.web.context.WebApplicationContext同一个包下面的ContextLoader.properties文件读取默认设置,反射出org.springframework.web.context.support.XmlWebApplicationContext类来。
以图友网项目为例(添加链接),此时返回的为 return ClassUtils.forName(contextClassName, ContextLoader.class.getClassLoader());
3.2 //step2
ConfigurableWebApplicationContext wac = (ConfigurableWebApplicationContext) BeanUtils.instantiateClass(contextClass);
接下来就是通过BeanUtils的方法把新创建的XmlWebApplicationContext进行初始化。

注意看类别的变化
3.3 //step3
对于得到的这个 (ConfigurableWebApplicationContext) XmlWebApplicationContext
然后对之中的属性进行一系列的设置,首先会设置一个默认ID,即org.springframework.web.context.WebApplicationContext:+你项目的ContextPath。
然后再设置其他属性
wac.setParent(parent);
wac.setServletContext(sc);
其中还需要设置
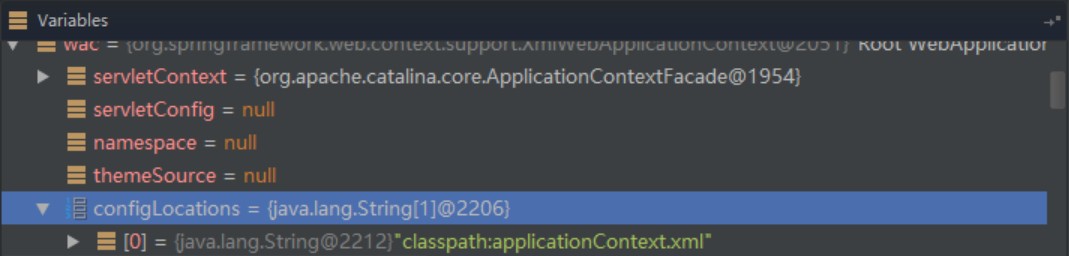
wac.setConfigLocation(sc.getInitParameter(CONFIG_LOCATION_PARAM));
//CONFIG_LOCATION_PARAM = "contextConfigLocation"
//这里设置了你在web.xml中对于applicationContext.xml的地址配置
//e.g.
<context-param>
        <param-name>contextConfigLocation</param-name>
        <param-value>classpath:applicationContext.xml</param-value>
</context-param>
4
1
<context-param>2
<param-name>contextConfigLocation</param-name>3
<param-value>classpath:applicationContext.xml</param-value>4
</context-param>也就是说,你在配置文件中的那些beans,这时候容器已经知道要准备哪些bean了,虽然还没有进行实例化,就像一个工厂已经得到了产品的加工图纸,但是还没有去加工实际产品出来。
customizeContext(sc, wac);
接下来就是customizeContext(sc, wac)方法,此方法会根据用户配置的globalInitializerClasses参数来初始化一些用户自定义的属性,一般我们不配置,所以这里什么也不做。
3.4 //step4
wac.refresh();
最后登场的就是最核心的方法了,在这个方法里,会完成资源文件的加载、配置文件解析、Bean定义的注册、组件的初始化等核心工作。
AbstractApplicationContext.java

@Override
	public void refresh() throws BeansException, IllegalStateException {
		synchronized (this.startupShutdownMonitor) {
			// Prepare this context for refreshing.
            //此方法做一些准备工作,如记录开始时间,输出日志,initPropertySources();和getEnvironment().validateRequiredProperties();一般没干什么事
			prepareRefresh();

			// Tell the subclass to refresh the internal bean factory.
            //step4.1
			ConfigurableListableBeanFactory beanFactory = obtainFreshBeanFactory();

			// Prepare the bean factory for use in this context.
			prepareBeanFactory(beanFactory);

			try {
				// Allows post-processing of the bean factory in context subclasses.
				postProcessBeanFactory(beanFactory);

				// Invoke factory processors registered as beans in the context.
				invokeBeanFactoryPostProcessors(beanFactory);

				// Register bean processors that intercept bean creation.
				registerBeanPostProcessors(beanFactory);

				// Initialize message source for this context.
				initMessageSource();

				// Initialize event multicaster for this context.
				initApplicationEventMulticaster();

				// Initialize other special beans in specific context subclasses.
				onRefresh();

				// Check for listener beans and register them.
				registerListeners();

				// Instantiate all remaining (non-lazy-init) singletons.
                //step4.2
				finishBeanFactoryInitialization(beanFactory);

				// Last step: publish corresponding event.
				finishRefresh();
			}

			catch (BeansException ex) {
				logger.warn("Exception encountered during context initialization - cancelling refresh attempt", ex);

				// Destroy already created singletons to avoid dangling resources.
				destroyBeans();

				// Reset 'active' flag.
				cancelRefresh(ex);

				// Propagate exception to caller.
				throw ex;
			}
		}
}
60
1
AbstractApplicationContext.java2
3
4
public void refresh() throws BeansException, IllegalStateException {5
synchronized (this.startupShutdownMonitor) {6
// Prepare this context for refreshing.7
//此方法做一些准备工作,如记录开始时间,输出日志,initPropertySources();和getEnvironment().validateRequiredProperties();一般没干什么事8
prepareRefresh();9
10
// Tell the subclass to refresh the internal bean factory.11
//step4.112
ConfigurableListableBeanFactory beanFactory = obtainFreshBeanFactory();13
14
// Prepare the bean factory for use in this context.15
prepareBeanFactory(beanFactory);16
17
try {18
// Allows post-processing of the bean factory in context subclasses.19
postProcessBeanFactory(beanFactory);20
21
// Invoke factory processors registered as beans in the context.22
invokeBeanFactoryPostProcessors(beanFactory);23
24
// Register bean processors that intercept bean creation.25
registerBeanPostProcessors(beanFactory);26
27
// Initialize message source for this context.28
initMessageSource();29
30
// Initialize event multicaster for this context.31
initApplicationEventMulticaster();32
33
// Initialize other special beans in specific context subclasses.34
onRefresh();35
36
// Check for listener beans and register them.37
registerListeners();38
39
// Instantiate all remaining (non-lazy-init) singletons.40
//step4.241
finishBeanFactoryInitialization(beanFactory);42
43
// Last step: publish corresponding event.44
finishRefresh();45
}46
47
catch (BeansException ex) {48
logger.warn("Exception encountered during context initialization - cancelling refresh attempt", ex);49
50
// Destroy already created singletons to avoid dangling resources.51
destroyBeans();52
53
// Reset 'active' flag.54
cancelRefresh(ex);55
56
// Propagate exception to caller.57
throw ex;58
}59
}60
}3.4.1 //step4.1 refresh()的核心 obtainFreshBeanFactory()
ConfigurableListableBeanFactory beanFactory = obtainFreshBeanFactory();
初始化BeanFactory,是整个refresh()方法的核心,其中完成了配置文件的加载、解析、注册。
AbstractApplicationContext.java

protected ConfigurableListableBeanFactory obtainFreshBeanFactory() {
		refreshBeanFactory();
		ConfigurableListableBeanFactory beanFactory = getBeanFactory();
		if (logger.isDebugEnabled()) {
			logger.debug("Bean factory for " + getDisplayName() + ": " + beanFactory);
		}
		return beanFactory;
}
10
1
AbstractApplicationContext.java2
3
protected ConfigurableListableBeanFactory obtainFreshBeanFactory() {4
refreshBeanFactory();5
ConfigurableListableBeanFactory beanFactory = getBeanFactory();6
if (logger.isDebugEnabled()) {7
logger.debug("Bean factory for " + getDisplayName() + ": " + beanFactory);8
}9
return beanFactory;10
}跟进一下refreshBeanFactory();
AbstractRefreshableApplicationContext.java

protected final void refreshBeanFactory() throws BeansException {
		if (hasBeanFactory()) {
			destroyBeans();
			closeBeanFactory();
		}
		try {
			DefaultListableBeanFactory beanFactory = createBeanFactory();
			beanFactory.setSerializationId(getId());
			customizeBeanFactory(beanFactory);
			loadBeanDefinitions(beanFactory);
			synchronized (this.beanFactoryMonitor) {
				this.beanFactory = beanFactory;
			}
		}
		catch (IOException ex) {
			throw new ApplicationContextException("I/O error parsing bean definition source for " + getDisplayName(), ex);
		}
}
20
1
AbstractRefreshableApplicationContext.java2
3
protected final void refreshBeanFactory() throws BeansException {4
if (hasBeanFactory()) {5
destroyBeans();6
closeBeanFactory();7
}8
try {9
DefaultListableBeanFactory beanFactory = createBeanFactory();10
beanFactory.setSerializationId(getId());11
customizeBeanFactory(beanFactory);12
loadBeanDefinitions(beanFactory);13
synchronized (this.beanFactoryMonitor) {14
this.beanFactory = beanFactory;15
}16
}17
catch (IOException ex) {18
throw new ApplicationContextException("I/O error parsing bean definition source for " + getDisplayName(), ex);19
}20
}DefaultListableBeanFactory beanFactory = createBeanFactory();
在这个beanFactory中有个beanDefinitionMap,此时size=0
再跟进loadBeanDefinitions(beanFactory);
AbstractXmlApplicationContext.java

protected void loadBeanDefinitions(DefaultListableBeanFactory beanFactory) throws BeansException, IOException {
		// Create a new XmlBeanDefinitionReader for the given BeanFactory.
		XmlBeanDefinitionReader beanDefinitionReader = new XmlBeanDefinitionReader(beanFactory);

		// Configure the bean definition reader with this context's
		// resource loading environment.
		beanDefinitionReader.setEnvironment(this.getEnvironment());
		beanDefinitionReader.setResourceLoader(this);
		beanDefinitionReader.setEntityResolver(new ResourceEntityResolver(this));

		// Allow a subclass to provide custom initialization of the reader,
		// then proceed with actually loading the bean definitions.
		initBeanDefinitionReader(beanDefinitionReader);
		loadBeanDefinitions(beanDefinitionReader);
}
17
1
AbstractXmlApplicationContext.java2
3
protected void loadBeanDefinitions(DefaultListableBeanFactory beanFactory) throws BeansException, IOException {4
// Create a new XmlBeanDefinitionReader for the given BeanFactory.5
XmlBeanDefinitionReader beanDefinitionReader = new XmlBeanDefinitionReader(beanFactory);6
7
// Configure the bean definition reader with this context's8
// resource loading environment.9
beanDefinitionReader.setEnvironment(this.getEnvironment());10
beanDefinitionReader.setResourceLoader(this);11
beanDefinitionReader.setEntityResolver(new ResourceEntityResolver(this));12
13
// Allow a subclass to provide custom initialization of the reader,14
// then proceed with actually loading the bean definitions.15
initBeanDefinitionReader(beanDefinitionReader);16
loadBeanDefinitions(beanDefinitionReader);17
}我们跟进这个方法
protected void loadBeanDefinitions(XmlBeanDefinitionReader reader) throws IOException {
		String[] configLocations = getConfigLocations();
		if (configLocations != null) {
			for (String configLocation : configLocations) {
				reader.loadBeanDefinitions(configLocation);
			}
		}
}
8
1
protected void loadBeanDefinitions(XmlBeanDefinitionReader reader) throws IOException {2
String[] configLocations = getConfigLocations();3
if (configLocations != null) {4
for (String configLocation : configLocations) {5
reader.loadBeanDefinitions(configLocation);6
}7
}8
}在3.3中我们提到,configLocations已经被得到,那么此时可以看到:
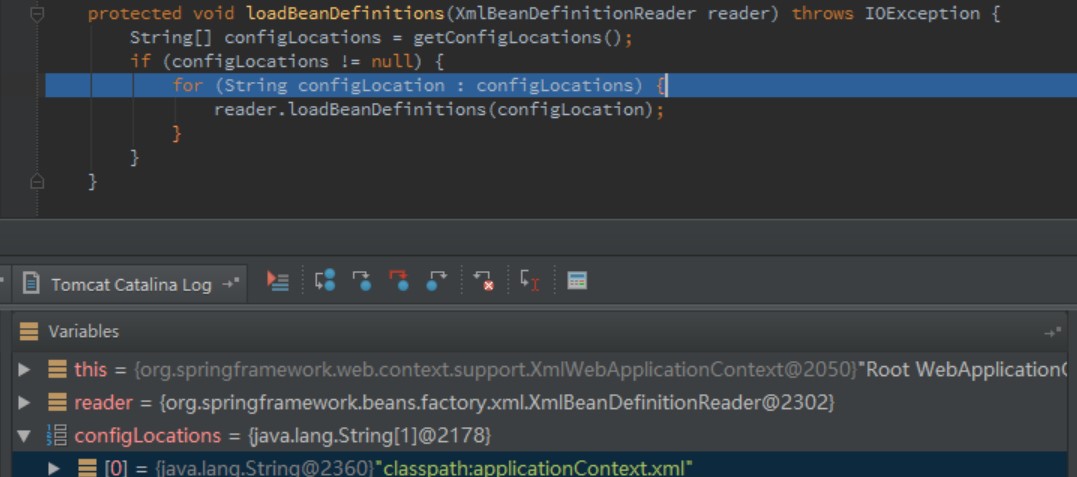
这里设计了层层调用,有很多重载方法,主要就是加载Spring所有的配置文件(可能会有多个),以备后面解析,注册之用。
然后追踪到 org.springframework.beans.factory.xml.DefaultBeanDefinitionDocumentReader.doRegisterBeanDefinitions(Element root) 中
DefaultBeanDefinitionDocumentReader.java
protected void doRegisterBeanDefinitions(Element root) {
// Any nested <beans> elements will cause recursion in this method. In
// order to propagate and preserve <beans> default-* attributes correctly,
// keep track of the current (parent) delegate, which may be null. Create
// the new (child) delegate with a reference to the parent for fallback purposes,
// then ultimately reset this.delegate back to its original (parent) reference.
// this behavior emulates a stack of delegates without actually necessitating one.
BeanDefinitionParserDelegate parent = this.delegate;
this.delegate = createDelegate(this.readerContext, root, parent);
if (this.delegate.isDefaultNamespace(root)) {
String profileSpec = root.getAttribute(PROFILE_ATTRIBUTE);
if (StringUtils.hasText(profileSpec)) {
Assert.state(this.environment != null, "Environment must be set for evaluating profiles");
String[] specifiedProfiles = StringUtils.tokenizeToStringArray(
profileSpec, BeanDefinitionParserDelegate.MULTI_VALUE_ATTRIBUTE_DELIMITERS);
if (!this.environment.acceptsProfiles(specifiedProfiles)) {
return;
}
}
}
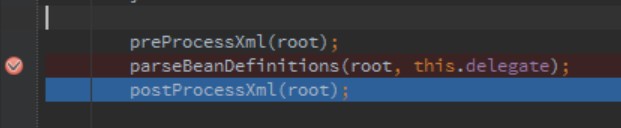
preProcessXml(root);
//xml解析和加载类
parseBeanDefinitions(root, this.delegate);
postProcessXml(root);
this.delegate = parent;
}32
1
DefaultBeanDefinitionDocumentReader.java2
3
protected void doRegisterBeanDefinitions(Element root) {4
// Any nested <beans> elements will cause recursion in this method. In5
// order to propagate and preserve <beans> default-* attributes correctly,6
// keep track of the current (parent) delegate, which may be null. Create7
// the new (child) delegate with a reference to the parent for fallback purposes,8
// then ultimately reset this.delegate back to its original (parent) reference.9
// this behavior emulates a stack of delegates without actually necessitating one.10
BeanDefinitionParserDelegate parent = this.delegate;11
this.delegate = createDelegate(this.readerContext, root, parent);12
13
if (this.delegate.isDefaultNamespace(root)) {14
String profileSpec = root.getAttribute(PROFILE_ATTRIBUTE);15
if (StringUtils.hasText(profileSpec)) {16
Assert.state(this.environment != null, "Environment must be set for evaluating profiles");17
String[] specifiedProfiles = StringUtils.tokenizeToStringArray(18
profileSpec, BeanDefinitionParserDelegate.MULTI_VALUE_ATTRIBUTE_DELIMITERS);19
if (!this.environment.acceptsProfiles(specifiedProfiles)) {20
return;21
}22
}23
}24
25
preProcessXml(root);26
27
//xml解析和加载类28
parseBeanDefinitions(root, this.delegate);29
postProcessXml(root);30
31
this.delegate = parent;32
}BeanDefinitionParserDelegate parent = this.delegate;
这里创建了一个BeanDefinitionParserDelegate实例,解析XML的过程就是委托它完成的。实际上你跟进该类,可以发现里面定义了大量的常量,这些常量实际上就是我们在xml中使用到的节点和属性名。
e.g.
...

public static final String PROPERTY_ELEMENT = "property";

public static final String REF_ATTRIBUTE = "ref";

public static final String VALUE_ATTRIBUTE = "value";

...
9
1
...2
3
public static final String PROPERTY_ELEMENT = "property";4
5
public static final String REF_ATTRIBUTE = "ref";6
7
public static final String VALUE_ATTRIBUTE = "value";8
9
...

这里的delegate实际上也是 BeanDefinitionParserDelegate 类,所以我们看到,在 parseBeanDefinitions(root, this.delegate); 中,是将该类作为一个参数引入了方法,实际上,它在方法中就发挥着解析xml的作用。
//xml解析和加载类
parseBeanDefinitions(root, this.delegate);
DefaultBeanDefinitionDocumentReader.java

protected void parseBeanDefinitions(Element root, BeanDefinitionParserDelegate delegate) {
		if (delegate.isDefaultNamespace(root)) {
			NodeList nl = root.getChildNodes(); //将节点获取存入collection
			for (int i = 0; i < nl.getLength(); i++) { //对collection中存储的节点进行依次遍历
				Node node = nl.item(i); //返回当前序号的节点
				if (node instanceof Element) { //判断节点是否属于元素类(我们不需要文本型)(参考文章《Java是如何解析xml文件的(DOM)》)
					Element ele = (Element) node;
                    //判断是否为默认的命名空间,其实就是根据配置文件的命名空间来判定
                    //如果是beans下的则认为是默认的命名空间,如果不是则认为是自定义的,我们使用的Aop、Tx等都是属于自定义标签的范畴
					if (delegate.isDefaultNamespace(ele)) {
						parseDefaultElement(ele, delegate); //进行解析
					}
					else {
						delegate.parseCustomElement(ele);
					}
				}
			}
		}
		else {
			delegate.parseCustomElement(root);
		}
}
24
1
DefaultBeanDefinitionDocumentReader.java2
3
protected void parseBeanDefinitions(Element root, BeanDefinitionParserDelegate delegate) {4
if (delegate.isDefaultNamespace(root)) {5
NodeList nl = root.getChildNodes(); //将节点获取存入collection6
for (int i = 0; i < nl.getLength(); i++) { //对collection中存储的节点进行依次遍历7
Node node = nl.item(i); //返回当前序号的节点8
if (node instanceof Element) { //判断节点是否属于元素类(我们不需要文本型)(参考文章《Java是如何解析xml文件的(DOM)》)9
Element ele = (Element) node;10
//判断是否为默认的命名空间,其实就是根据配置文件的命名空间来判定11
//如果是beans下的则认为是默认的命名空间,如果不是则认为是自定义的,我们使用的Aop、Tx等都是属于自定义标签的范畴12
if (delegate.isDefaultNamespace(ele)) { 13
parseDefaultElement(ele, delegate); //进行解析14
}15
else {16
delegate.parseCustomElement(ele);17
}18
}19
}20
}21
else {22
delegate.parseCustomElement(root);23
}24
}最终,我们可以看到解析XML的是 parseDefaultElement(ele, delegate); 方法,它会判断并调用对应的解析,这里我们是bean
DefaultBeanDefinitionDocumentReader.java

private void parseDefaultElement(Element ele, BeanDefinitionParserDelegate delegate) {
		if (delegate.nodeNameEquals(ele, IMPORT_ELEMENT)) {
			importBeanDefinitionResource(ele);
		}
		else if (delegate.nodeNameEquals(ele, ALIAS_ELEMENT)) {
			processAliasRegistration(ele);
		}
		else if (delegate.nodeNameEquals(ele, BEAN_ELEMENT)) {
			processBeanDefinition(ele, delegate);
		}
		else if (delegate.nodeNameEquals(ele, NESTED_BEANS_ELEMENT)) {
			// recurse
			doRegisterBeanDefinitions(ele);
		}
}
17
1
DefaultBeanDefinitionDocumentReader.java2
3
private void parseDefaultElement(Element ele, BeanDefinitionParserDelegate delegate) {4
if (delegate.nodeNameEquals(ele, IMPORT_ELEMENT)) {5
importBeanDefinitionResource(ele);6
}7
else if (delegate.nodeNameEquals(ele, ALIAS_ELEMENT)) {8
processAliasRegistration(ele);9
}10
else if (delegate.nodeNameEquals(ele, BEAN_ELEMENT)) {11
processBeanDefinition(ele, delegate);12
}13
else if (delegate.nodeNameEquals(ele, NESTED_BEANS_ELEMENT)) {14
// recurse15
doRegisterBeanDefinitions(ele);16
}17
}然后进一步
DefaultBeanDefinitionDocumentReader.java

protected void processBeanDefinition(Element ele, BeanDefinitionParserDelegate delegate) {
		BeanDefinitionHolder bdHolder = delegate.parseBeanDefinitionElement(ele);
		if (bdHolder != null) {
			bdHolder = delegate.decorateBeanDefinitionIfRequired(ele, bdHolder);
			try {
				// Register the final decorated instance.
				BeanDefinitionReaderUtils.registerBeanDefinition(bdHolder, getReaderContext().getRegistry());
			}
			catch (BeanDefinitionStoreException ex) {
				getReaderContext().error("Failed to register bean definition with name '" +
						bdHolder.getBeanName() + "'", ele, ex);
			}
			// Send registration event.
			getReaderContext().fireComponentRegistered(new BeanComponentDefinition(bdHolder));
		}
}
18
1
DefaultBeanDefinitionDocumentReader.java2
3
protected void processBeanDefinition(Element ele, BeanDefinitionParserDelegate delegate) {4
BeanDefinitionHolder bdHolder = delegate.parseBeanDefinitionElement(ele);5
if (bdHolder != null) {6
bdHolder = delegate.decorateBeanDefinitionIfRequired(ele, bdHolder);7
try {8
// Register the final decorated instance.9
BeanDefinitionReaderUtils.registerBeanDefinition(bdHolder, getReaderContext().getRegistry());10
}11
catch (BeanDefinitionStoreException ex) {12
getReaderContext().error("Failed to register bean definition with name '" +13
bdHolder.getBeanName() + "'", ele, ex);14
}15
// Send registration event.16
getReaderContext().fireComponentRegistered(new BeanComponentDefinition(bdHolder));17
}18
}这个方法如果进一步深入,你可以发现它实际上最核心的两个步骤是:
- 把beanName放到队列里
- 把BeanDefinition放到map中
(关于这段注册bean的方法的源码跟进,可以参考博文:《Spring Ioc 源码分析(四)--parseBeanDefinitions()与BeanDefinitionParserDelegate》)
好了,执行完 parseBeanDefinitions 这个方法,我们看看现在的 delegate 里面多了些什么?
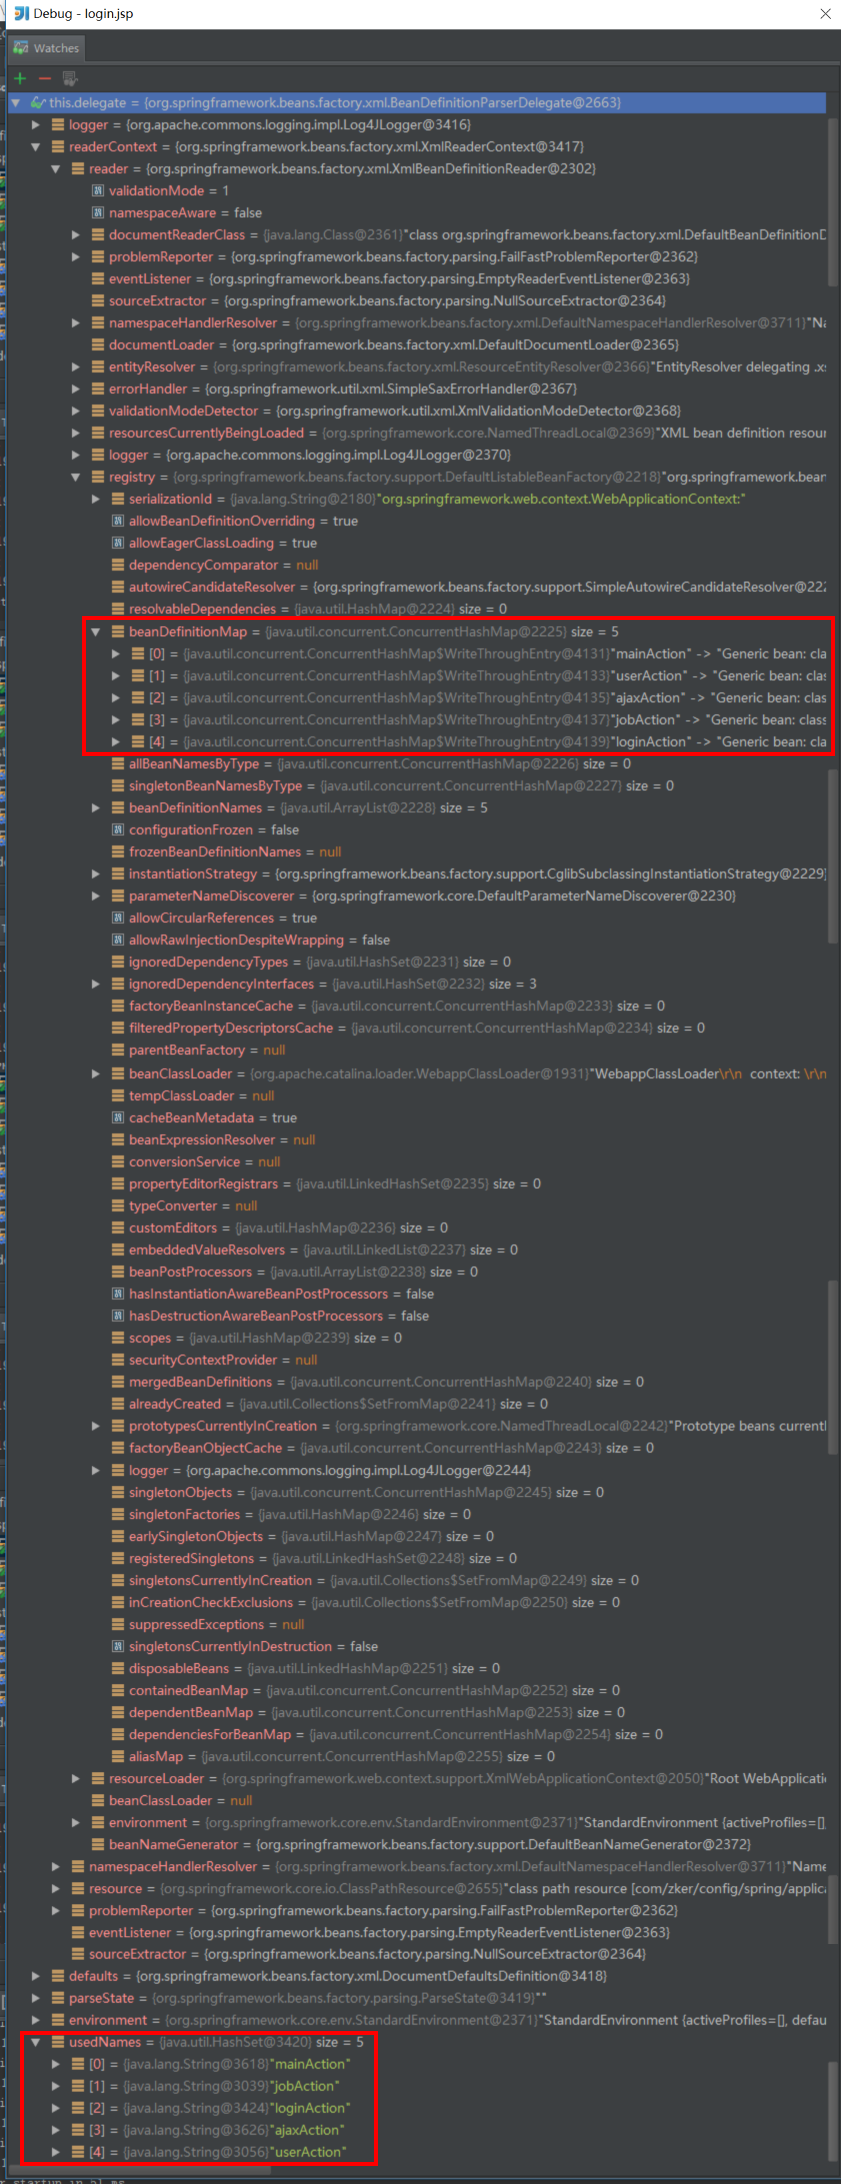
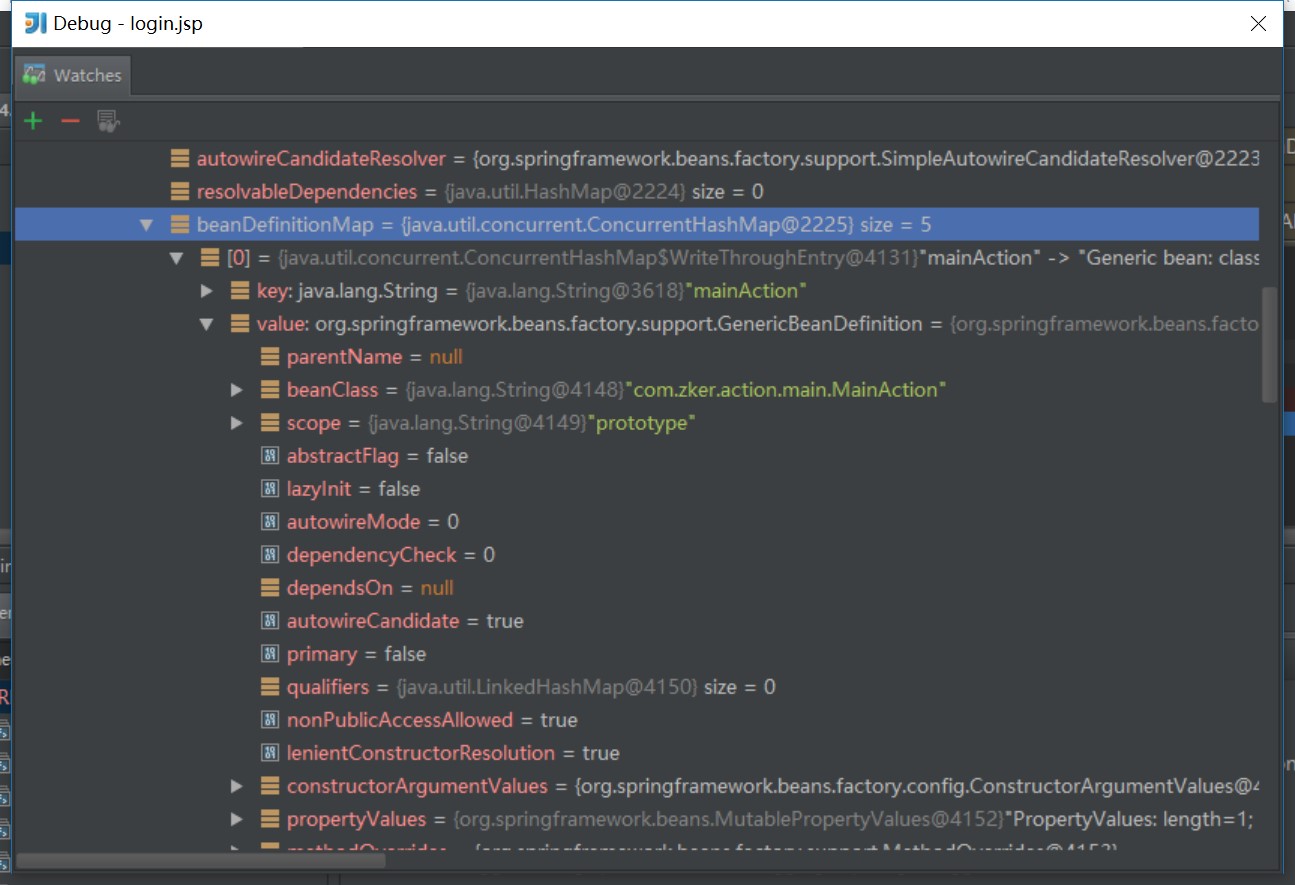
到此,bean的注册就完成了(当然,这里是指所有的bean都注册完)。在后面实例化的时候,就是把beanDefinitionMap中的BeanDefinition取出来,逐一实例化。
obtainFreshBeanFactory() 总算结束了,我们继续看refresh()方法中另一个核心方法,它是将bean进行实例化的重要角色。
3.4.2 //step4.2 refresh()的核心finishBeanFactoryInitialization(beanFactory);
我想到这里估计已经晕乎了,如果不太清楚我们现在走到了哪里,请查看目录中的 3.4 //step4
经过obtainFreshBeanFactory() 这个方法,我们的beanFactory就准备好了,接下来我们主要围绕finishBeanFactoryInitialization(beanFactory)方法,聊聊Spring是如何实例化bean的。
AbstractApplicationContext.java

protected void finishBeanFactoryInitialization(ConfigurableListableBeanFactory beanFactory) {
		// Initialize conversion service for this context.
		if (beanFactory.containsBean(CONVERSION_SERVICE_BEAN_NAME) &&
				beanFactory.isTypeMatch(CONVERSION_SERVICE_BEAN_NAME, ConversionService.class)) {
			beanFactory.setConversionService(
					beanFactory.getBean(CONVERSION_SERVICE_BEAN_NAME, ConversionService.class));
		}

		// Initialize LoadTimeWeaverAware beans early to allow for registering their transformers early.
		String[] weaverAwareNames = beanFactory.getBeanNamesForType(LoadTimeWeaverAware.class, false, false);
		for (String weaverAwareName : weaverAwareNames) {
			getBean(weaverAwareName);
		}

		// Stop using the temporary ClassLoader for type matching.
		beanFactory.setTempClassLoader(null);

		// Allow for caching all bean definition metadata, not expecting further changes.
		beanFactory.freezeConfiguration();

		// Instantiate all remaining (non-lazy-init) singletons.
		beanFactory.preInstantiateSingletons();
}
25
1
AbstractApplicationContext.java2
3
protected void finishBeanFactoryInitialization(ConfigurableListableBeanFactory beanFactory) {4
// Initialize conversion service for this context.5
if (beanFactory.containsBean(CONVERSION_SERVICE_BEAN_NAME) &&6
beanFactory.isTypeMatch(CONVERSION_SERVICE_BEAN_NAME, ConversionService.class)) {7
beanFactory.setConversionService(8
beanFactory.getBean(CONVERSION_SERVICE_BEAN_NAME, ConversionService.class));9
}10
11
// Initialize LoadTimeWeaverAware beans early to allow for registering their transformers early.12
String[] weaverAwareNames = beanFactory.getBeanNamesForType(LoadTimeWeaverAware.class, false, false);13
for (String weaverAwareName : weaverAwareNames) {14
getBean(weaverAwareName);15
}16
17
// Stop using the temporary ClassLoader for type matching.18
beanFactory.setTempClassLoader(null);19
20
// Allow for caching all bean definition metadata, not expecting further changes.21
beanFactory.freezeConfiguration();22
23
// Instantiate all remaining (non-lazy-init) singletons.24
beanFactory.preInstantiateSingletons();25
}这个方法,就是为了实例化非懒加载的单例bean,我们走进 beanFactory.preInstantiateSingletons(); 看一看
(注意,这里实例化单例,而Struts中Action是每次请求都创建,所以Action并不是单例的)
DefaultListableBeanFactory.java

public void preInstantiateSingletons() throws BeansException {
		if (this.logger.isDebugEnabled()) {
			this.logger.debug("Pre-instantiating singletons in " + this);
		}

		List<String> beanNames;
		synchronized (this.beanDefinitionMap) {
			// Iterate over a copy to allow for init methods which in turn register new bean definitions.
			// While this may not be part of the regular factory bootstrap, it does otherwise work fine.
			beanNames = new ArrayList<String>(this.beanDefinitionNames);
		}

		// Trigger initialization of all non-lazy singleton beans...
		for (String beanName : beanNames) { //将加载进来的beanDefinitionNames循环分析
			RootBeanDefinition bd = getMergedLocalBeanDefinition(beanName);
			if (!bd.isAbstract() && bd.isSingleton() && !bd.isLazyInit()) { //如果不是抽象类, 且是单例, 且不是延迟加载
				if (isFactoryBean(beanName)) {
					final FactoryBean<?> factory = (FactoryBean<?>) getBean(FACTORY_BEAN_PREFIX + beanName);
					boolean isEagerInit;
					if (System.getSecurityManager() != null && factory instanceof SmartFactoryBean) {
						isEagerInit = AccessController.doPrivileged(new PrivilegedAction<Boolean>() {
							@Override
							public Boolean run() {
								return ((SmartFactoryBean<?>) factory).isEagerInit();
							}
						}, getAccessControlContext());
					}
					else {
						isEagerInit = (factory instanceof SmartFactoryBean &&
								((SmartFactoryBean<?>) factory).isEagerInit());
					}
					if (isEagerInit) {
						getBean(beanName);
					}
				}
				else {
					getBean(beanName);
				}
			}
		}

		// Trigger post-initialization callback for all applicable beans...
		for (String beanName : beanNames) {
			Object singletonInstance = getSingleton(beanName);
			if (singletonInstance instanceof SmartInitializingSingleton) {
				final SmartInitializingSingleton smartSingleton = (SmartInitializingSingleton) singletonInstance;
				if (System.getSecurityManager() != null) {
					AccessController.doPrivileged(new PrivilegedAction<Object>() {
						@Override
						public Object run() {
							smartSingleton.afterSingletonsInstantiated();
							return null;
						}
					}, getAccessControlContext());
				}
				else {
					smartSingleton.afterSingletonsInstantiated();
				}
			}
		}
}
x
1
DefaultListableBeanFactory.java2
3
public void preInstantiateSingletons() throws BeansException {4
if (this.logger.isDebugEnabled()) {5
this.logger.debug("Pre-instantiating singletons in " + this);6
}7
8
List<String> beanNames;9
synchronized (this.beanDefinitionMap) {10
// Iterate over a copy to allow for init methods which in turn register new bean definitions.11
// While this may not be part of the regular factory bootstrap, it does otherwise work fine.12
beanNames = new ArrayList<String>(this.beanDefinitionNames);13
}14
15
// Trigger initialization of all non-lazy singleton beans...16
for (String beanName : beanNames) { //将加载进来的beanDefinitionNames循环分析17
RootBeanDefinition bd = getMergedLocalBeanDefinition(beanName);18
if (!bd.isAbstract() && bd.isSingleton() && !bd.isLazyInit()) { //如果不是抽象类, 且是单例, 且不是延迟加载19
if (isFactoryBean(beanName)) {20
final FactoryBean<?> factory = (FactoryBean<?>) getBean(FACTORY_BEAN_PREFIX + beanName);21
boolean isEagerInit;22
if (System.getSecurityManager() != null && factory instanceof SmartFactoryBean) {23
isEagerInit = AccessController.doPrivileged(new PrivilegedAction<Boolean>() {24
25
public Boolean run() {26
return ((SmartFactoryBean<?>) factory).isEagerInit();27
}28
}, getAccessControlContext());29
}30
else {31
isEagerInit = (factory instanceof SmartFactoryBean &&32
((SmartFactoryBean<?>) factory).isEagerInit());33
}34
if (isEagerInit) {35
getBean(beanName);36
}37
}38
else {39
getBean(beanName);40
}41
}42
}43
44
// Trigger post-initialization callback for all applicable beans...45
for (String beanName : beanNames) {46
Object singletonInstance = getSingleton(beanName);47
if (singletonInstance instanceof SmartInitializingSingleton) {48
final SmartInitializingSingleton smartSingleton = (SmartInitializingSingleton) singletonInstance;49
if (System.getSecurityManager() != null) {50
AccessController.doPrivileged(new PrivilegedAction<Object>() {51
52
public Object run() {53
smartSingleton.afterSingletonsInstantiated();54
return null;55
}56
}, getAccessControlContext());57
}58
else {59
smartSingleton.afterSingletonsInstantiated();60
}61
}62
}63
}因为Struts项目中Action并不满足条件 “不是抽象类, 且是单例, 且不是延迟加载”,所以该方法对我们自定义的Action几乎没有用,我们一直循环直到单例的对象出现,再来看这个代码。
我们把这小段代码提出来单独看
for (String beanName : beanNames) { //将加载进来的beanDefinitionNames循环分析
			RootBeanDefinition bd = getMergedLocalBeanDefinition(beanName);
			if (!bd.isAbstract() && bd.isSingleton() && !bd.isLazyInit()) { //如果不是抽象类, 且是单例, 且不是延迟加载
				if (isFactoryBean(beanName)) { //是否实现FactoryBean接口
					final FactoryBean<?> factory = (FactoryBean<?>) getBean(FACTORY_BEAN_PREFIX + beanName);
					boolean isEagerInit;
					if (System.getSecurityManager() != null && factory instanceof SmartFactoryBean) {
						isEagerInit = AccessController.doPrivileged(new PrivilegedAction<Boolean>() {
							@Override
							public Boolean run() {
								return ((SmartFactoryBean<?>) factory).isEagerInit();
							}
						}, getAccessControlContext());
					}
					else {
						isEagerInit = (factory instanceof SmartFactoryBean &&
								((SmartFactoryBean<?>) factory).isEagerInit());
					}
					if (isEagerInit) {
						getBean(beanName);
					}
				}
				else {
					getBean(beanName);
				}
			}
}
1
for (String beanName : beanNames) { //将加载进来的beanDefinitionNames循环分析2
RootBeanDefinition bd = getMergedLocalBeanDefinition(beanName);3
if (!bd.isAbstract() && bd.isSingleton() && !bd.isLazyInit()) { //如果不是抽象类, 且是单例, 且不是延迟加载4
if (isFactoryBean(beanName)) { //是否实现FactoryBean接口5
final FactoryBean<?> factory = (FactoryBean<?>) getBean(FACTORY_BEAN_PREFIX + beanName); 6
boolean isEagerInit;7
if (System.getSecurityManager() != null && factory instanceof SmartFactoryBean) {8
isEagerInit = AccessController.doPrivileged(new PrivilegedAction<Boolean>() {9
10
public Boolean run() {11
return ((SmartFactoryBean<?>) factory).isEagerInit();12
}13
}, getAccessControlContext());14
}15
else {16
isEagerInit = (factory instanceof SmartFactoryBean &&17
((SmartFactoryBean<?>) factory).isEagerInit());18
}19
if (isEagerInit) {20
getBean(beanName);21
}22
}23
else {24
getBean(beanName);25
}26
}27
}- 判断这个bean是否是抽象类,是否是单例,是否延迟加载
- 如果不是抽象类, 且是单例, 且不是延迟加载,那么判断是否实现 FactoryBean 接口
- 如果实现了 FactoryBean,则 getBean(FACTORY_BEAN_PREFIX + beanName),否则 getBean(beanName)
(参考链接:)
如果我们跟进 getBean 这个方法,发现它调用了 doGetBean 这个方法,我们再跟进,这个方法非常长(这里就不贴出来了)
在这个方法中,你可以不断地去跟进(这里不再做具体展开),你会发现大概的步骤差不多是
- 创建一个bean的实例
- 将这个实例封装到BeanWrapper中
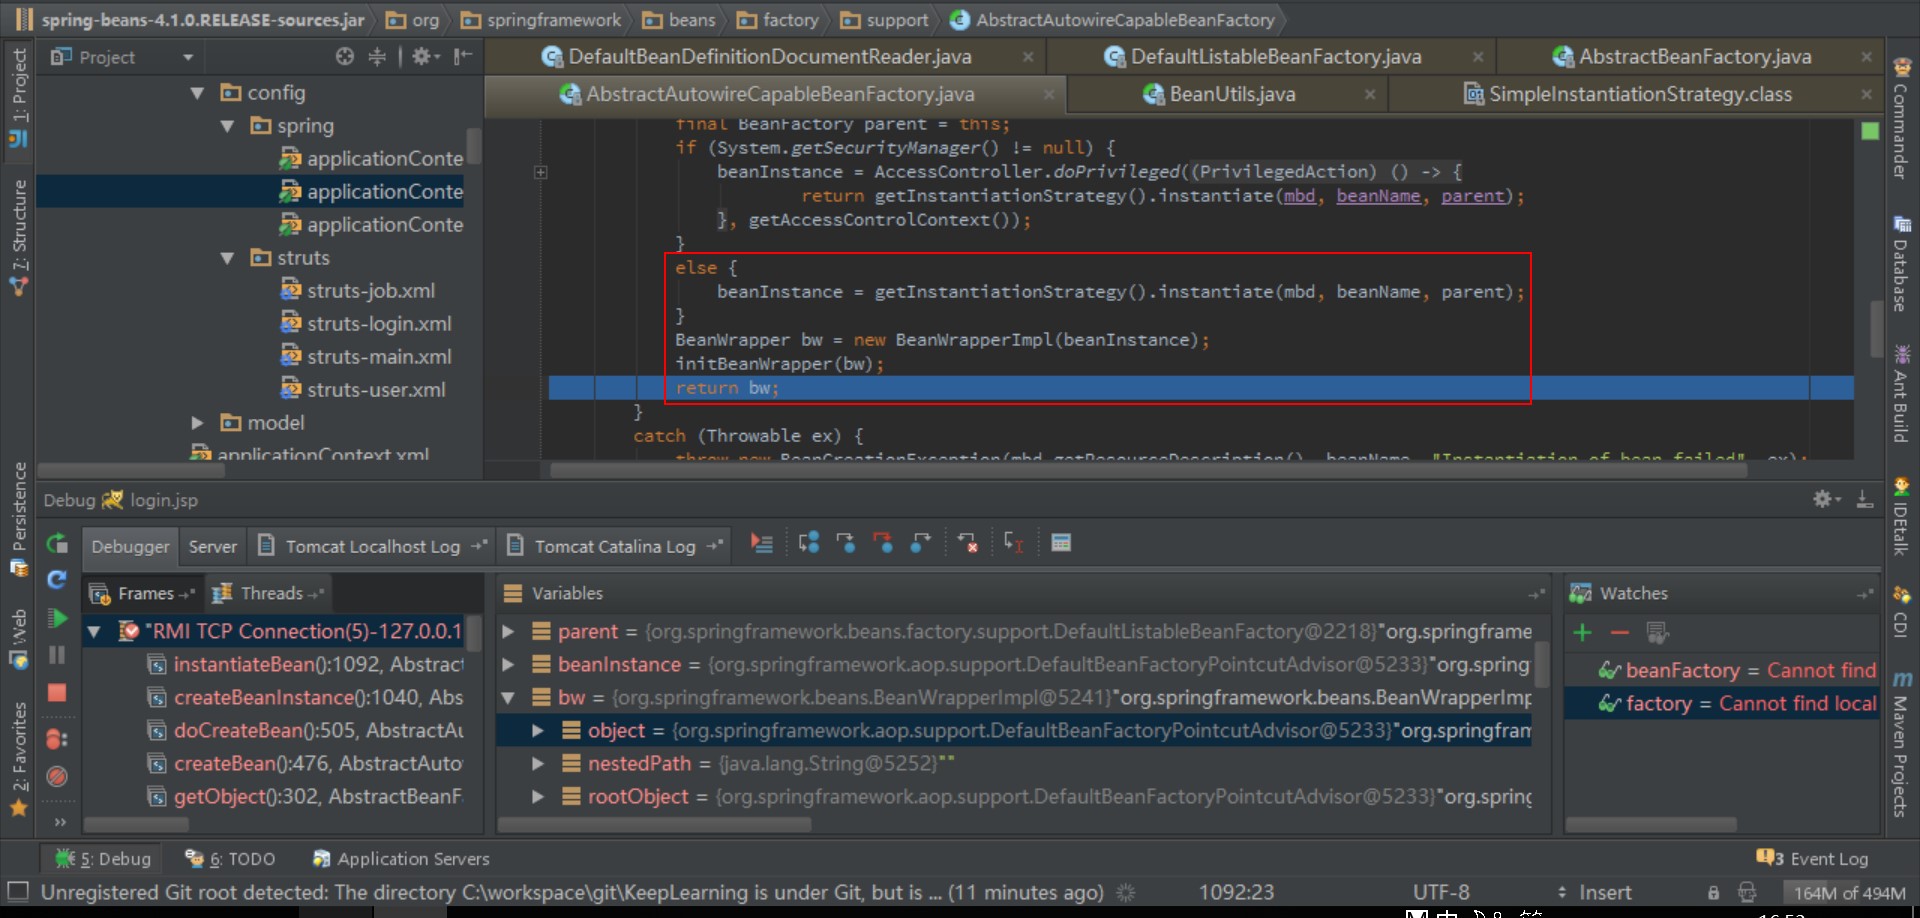
而这里bean的实例化方法,其实是 beanInstance = getInstantiationStrategy().instantiate(mbd, beanName, parent);
这个instantiate 方法在 package org.springframework.beans.factory.support; --> SimpleInstantiationStrategy.java
在这之中采用反射机制将对象进行了实例化。
其实还涉及到bean实例化以后,Spring是如何将bean的属性进行注入的,这里暂时不做进一步的展开了。
可以知道的是,最终属性的注入是利用反射机制,通过setter赋值的。