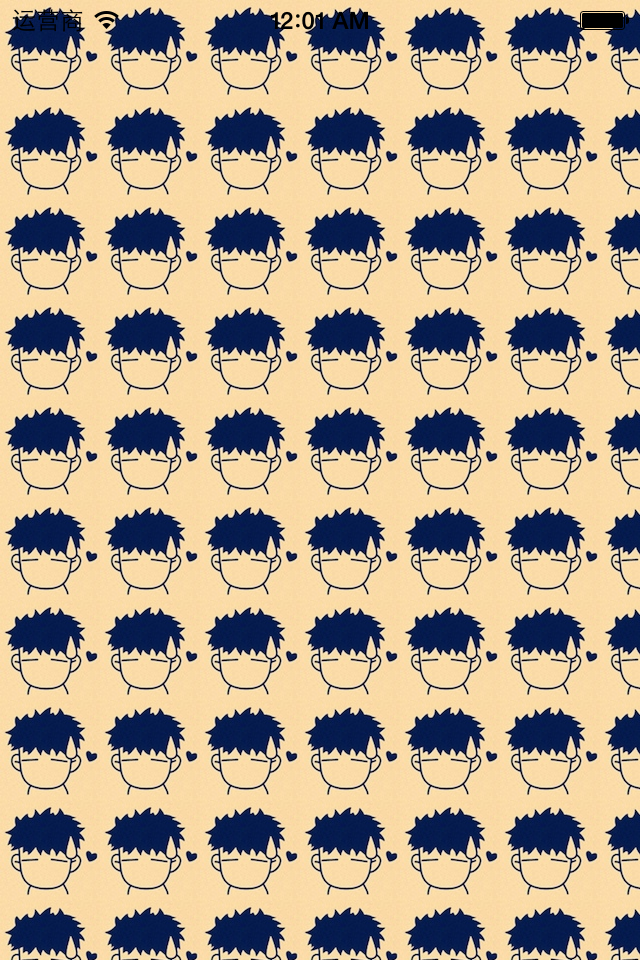
一、前导程序
新建一个项目,在主控制器文件中实现以下几行代码,就能轻松的完成图片在视图中的平铺。

 1 #import "YYViewController.h"
 2
 3 @interface YYViewController ()
 4
 5 @end
 6
 7 @implementation YYViewController
 8
 9 - (void)viewDidLoad
10 {
11     [super viewDidLoad];
12
13     UIImage *image=[UIImage imageNamed:@"me"];
14     UIColor *color=[UIColor colorWithPatternImage:image];
15     self.view.backgroundColor=color;
16 }
17
18 @end
效果:
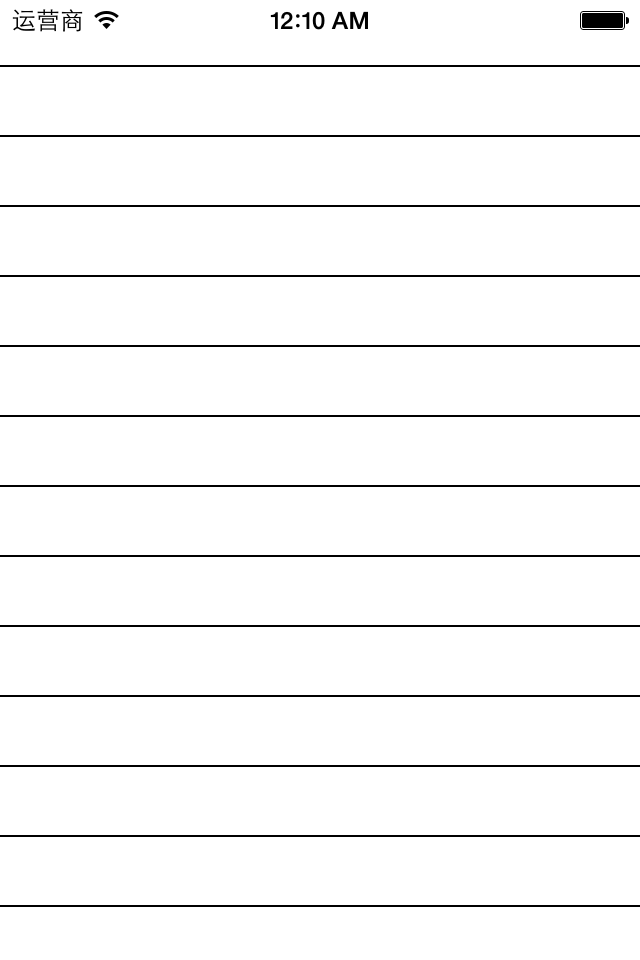
二、实现信纸条纹的效果
利用上面的这种特性来做一个信纸的效果。
默认的view上没有分割线,要在view上加上分割线有两种方式:
(1)让美工做一张专门用来做背景的图片,把图片设置为背景。缺点:信的长度不确定,所以背景图片的长度也难以确定。
(2)通过一张小的图片来创建一个颜色,平铺实现背景效果。
第一步:生成一张以后用以平铺的小图片。
画矩形。
画线条。
第二步:从上下文中取出图片设置为背景。黑乎乎一片?(其他地方时透明的,控制器的颜色,如果不设置那么默认为黑色的)
实现代码:
 1 //
 2 //  YYViewController.m
 3 //  01-信纸条纹
 4 //
 5 //  Created by 孔医己 on 14-6-11.
 6 //  Copyright (c) 2014年 itcast. All rights reserved.
 7 //
 8
 9 #import "YYViewController.h"
10
11 @interface YYViewController ()
12
13 @end
14
15 @implementation YYViewController
16
17 - (void)viewDidLoad
18 {
19     [super viewDidLoad];
20
21
22     // 1.生成一张以后用于平铺的小图片
23     CGSize size = CGSizeMake(self.view.frame.size.width, 35);
24     UIGraphicsBeginImageContextWithOptions(size , NO, 0);
25
26     // 2.画矩形
27     CGContextRef ctx = UIGraphicsGetCurrentContext();
28     CGFloat height = 35;
29     CGContextAddRect(ctx, CGRectMake(0, 0, self.view.frame.size.width, height));
30     [[UIColor whiteColor] set];
31     CGContextFillPath(ctx);
32
33     // 3.画线条
34
35     CGFloat lineWidth = 2;
36     CGFloat lineY = height - lineWidth;
37     CGFloat lineX = 0;
38     CGContextMoveToPoint(ctx, lineX, lineY);
39     CGContextAddLineToPoint(ctx, 320, lineY);
40     [[UIColor blackColor] set];
41     CGContextStrokePath(ctx);
42
43
44     UIImage *image=UIGraphicsGetImageFromCurrentImageContext();
45     UIColor *color=[UIColor colorWithPatternImage:image];
46     self.view.backgroundColor=color;
47 }
48
49 @end
效果:
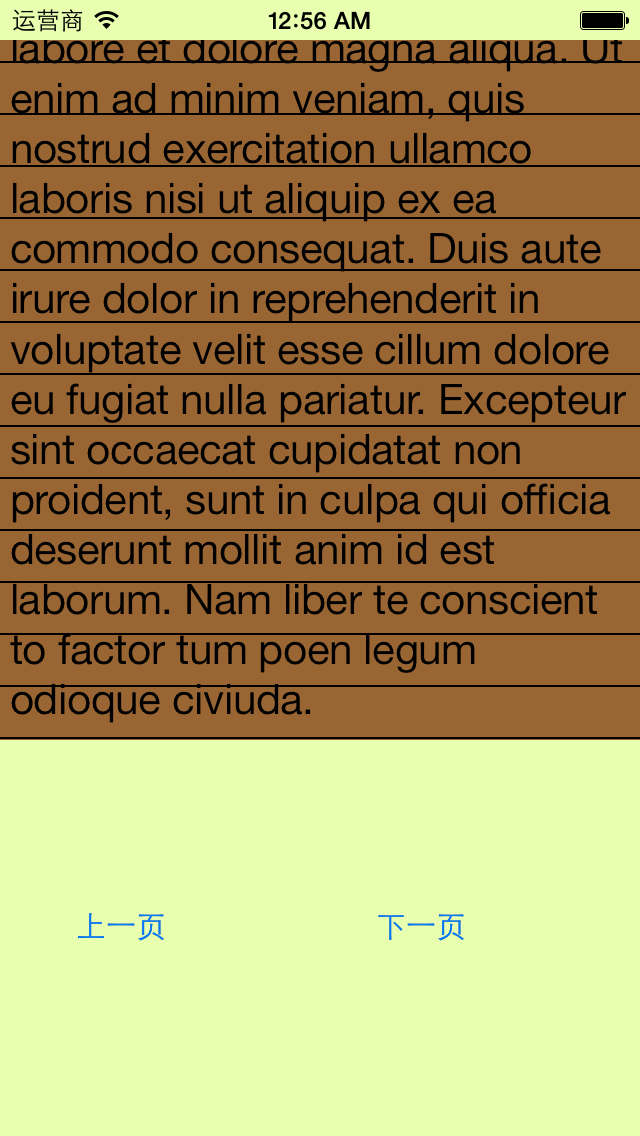
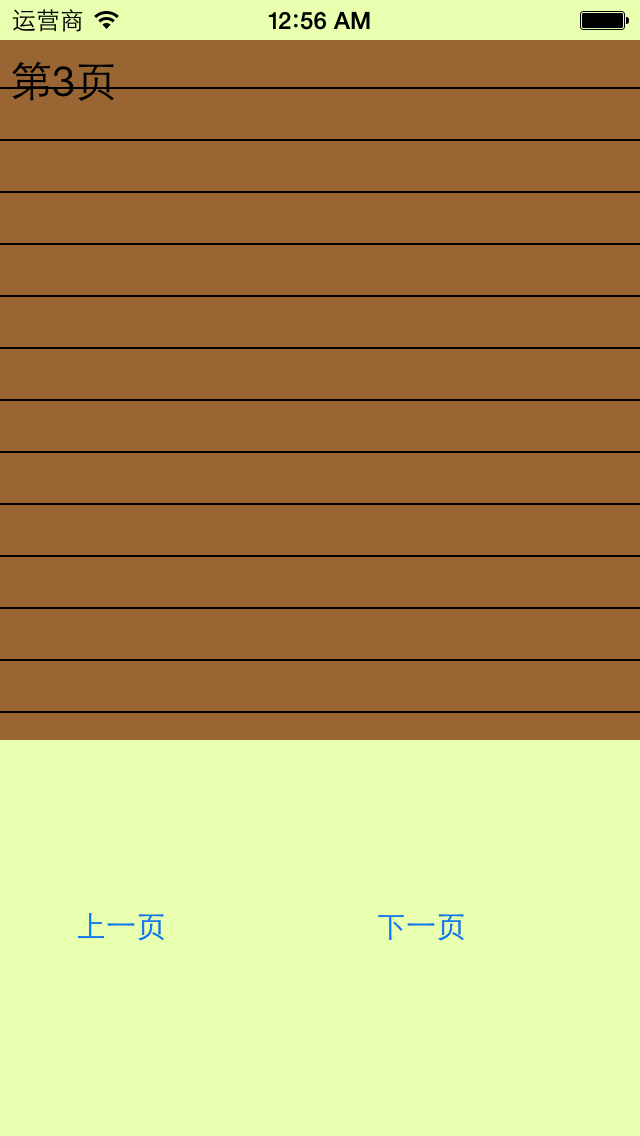
三、应用场景
完成一个简陋的电子书阅读器
代码:
 1 //
 2 //  YYViewController.m
 3 //  01-信纸条纹
 4 //
 5 //  Created by 孔医己 on 14-6-11.
 6 //  Copyright (c) 2014年 itcast. All rights reserved.
 7 //
 8
 9 #import "YYViewController.h"
10
11 @interface YYViewController ()
12
13 @property (weak, nonatomic) IBOutlet UITextView *textview;
14 - (IBAction)perBtnClick:(UIButton *)sender;
15 - (IBAction)nextBtnClick:(UIButton *)sender;
16 @property(nonatomic,assign)int index;
17 @end
18
19 @implementation YYViewController
20
21 - (void)viewDidLoad
22 {
23     [super viewDidLoad];
24
25
26     // 1.生成一张以后用于平铺的小图片
27     CGSize size = CGSizeMake(self.view.frame.size.width, 26);
28     UIGraphicsBeginImageContextWithOptions(size , NO, 0);
29
30     // 2.画矩形
31     CGContextRef ctx = UIGraphicsGetCurrentContext();
32     CGFloat height = 26;
33     CGContextAddRect(ctx, CGRectMake(0, 0, self.view.frame.size.width, height));
34     [[UIColor brownColor] set];
35     CGContextFillPath(ctx);
36
37     // 3.画线条
38
39     CGFloat lineWidth = 2;
40     CGFloat lineY = height - lineWidth;
41     CGFloat lineX = 0;
42     CGContextMoveToPoint(ctx, lineX, lineY);
43     CGContextAddLineToPoint(ctx, 320, lineY);
44     [[UIColor blackColor] set];
45     CGContextStrokePath(ctx);
46
47
48     UIImage *image=UIGraphicsGetImageFromCurrentImageContext();
49     UIColor *color=[UIColor colorWithPatternImage:image];
50     //self.view.backgroundColor=color;
51     self.textview.backgroundColor=color;
52 }
53
54 - (IBAction)perBtnClick:(UIButton *)sender {
55     self.index--;
56     self.textview.text=[NSString stringWithFormat:@"第%d页",self.index];
57     CATransition *ca = [[CATransition alloc] init];
58     ca.type = @"pageCurl";
59
60     [self.textview.layer addAnimation:ca forKey:nil];
61
62 }
63
64 - (IBAction)nextBtnClick:(UIButton *)sender {
65     self.index++;
66     self.textview.text=[NSString stringWithFormat:@"第%d页",self.index];
67     CATransition *ca = [[CATransition alloc] init];
68     ca.type = @"pageCurl";
69
70     [self.textview.layer addAnimation:ca forKey:nil];
71 }
72 @end
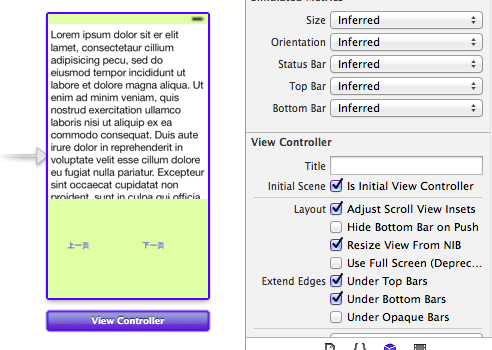
storyboard中的界面布局
实现的简单效果: