一.概述
AOP面向切面编程,生成目标方法所属类的代理类。代理类和目标类的关系:代理类继承目标类,并重载了目标类的方法。
代理类重载方法体里加入了切面业务逻辑和目标类方法的调用。
用户如何使用:从容器中获取目标类,实际上是获取代理类的实例, 代理类实例调用重载了父类的方法,就实现了AOP。
二.步骤
1.在配置类上添加@EnableAspectJAutoProxy注解,开启注解版的AOP功能
2.声明切面类:@Aspect表明这是一个切面类,注:@Aspect是spring-annotation2/libs/com.springsource.org.aspectj.weaver-1.6.8.RELEASE.jar的注解,
在其org.aspectj.lang.annotation包下包含了切面相关的的注解。aop包下载地址:https://www.eclipse.orgaspectj
3.声明切面方法:
1.切点:在哪些目标方法上添加该切面方法 。切点表达式:execution(* com.dr.service.*.buy*(..)):方法访问权限 包路径.类名.方法名(参数类型,参数类型...)
参数类型可以用“..”代替。
2.重用切点:在切面中声明切点方法:添加@Pointcut注解, @Pointcut(value="execution(*******)") 切点方法返回值 void,方法体为空。
在切面方法上引用切点:在通知类型注解里指定 pointcut="切面类.切点方法()"
3.几种通知类型:
1.@Before
到此,AOP功能就实现了。。。
三、运行流程源码解析
1.spring容器用DefaultListableBeanFactory保存 beanNames集合 ,beanName和BeanDefinition映射的集合
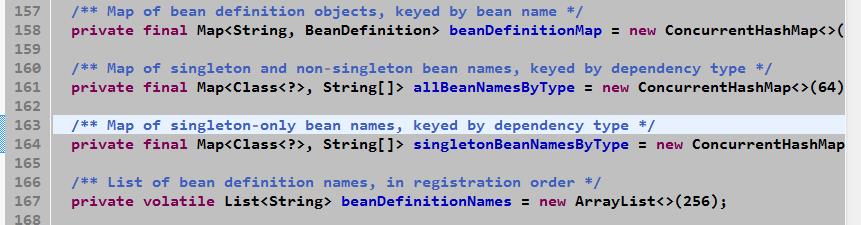
默认加载这6个bean定义:

这6个bean定义信息加载时机:
1.开始:
ApplicationContext ctx=new AnnotationConfigApplicationContext(MainConfig.class);

2.进入构造方法:
public AnnotationConfigApplicationContext(Class<?>... annotatedClasses) {
        this();
        register(annotatedClasses);
        refresh();
    }

3.进入this()
public AnnotationConfigApplicationContext() {
        this.reader = new AnnotatedBeanDefinitionReader(this);
        this.scanner = new ClassPathBeanDefinitionScanner(this);
    }

4.进入this.reader = new AnnotatedBeanDefinitionReader(this);
public AnnotatedBeanDefinitionReader(BeanDefinitionRegistry registry) {
        this(registry, getOrCreateEnvironment(registry));
    }

5.再进入
public AnnotatedBeanDefinitionReader(BeanDefinitionRegistry registry, Environment environment) {
        Assert.notNull(registry, "BeanDefinitionRegistry must not be null");
        Assert.notNull(environment, "Environment must not be null");
        this.registry = registry;
        this.conditionEvaluator = new ConditionEvaluator(registry, environment, null);
        AnnotationConfigUtils.registerAnnotationConfigProcessors(this.registry);
    }

6.AnnotationConfigUtils.registerAnnotationConfigProcessors(this.registry);
最终调用AnnotationConfigUtils的方法:

public static Set<BeanDefinitionHolder> registerAnnotationConfigProcessors(
            BeanDefinitionRegistry registry, @Nullable Object source)   完成注册
AnnotationConfigApplicationContext调用自己的属性AnnotatedBeanDefinitionReader完成注册,AnnotatedBeanDefinitionReader又调
用AnnotationConfigUtils完成注册,而AnnotationConfigUtils定义了这6个beanName常量。
这6个bean如何注册:
if (!registry.containsBeanDefinition(AUTOWIRED_ANNOTATION_PROCESSOR_BEAN_NAME)) {
            RootBeanDefinition def = new RootBeanDefinition(AutowiredAnnotationBeanPostProcessor.class);
            def.setSource(source);
            beanDefs.add(registerPostProcessor(registry, def, AUTOWIRED_ANNOTATION_PROCESSOR_BEAN_NAME));
        }
这6个beanName,spring内部有对应的类: RootBeanDefinition def = new RootBeanDefinition(AutowiredAnnotationBeanPostProcessor.class);
开始分析AOP原理:
一、@EnableAspectJAutoProxy如何开启aop动态代理功能
它的注解源码如下:
@Target(ElementType.TYPE)
@Retention(RetentionPolicy.RUNTIME)
@Documented
@Import(AspectJAutoProxyRegistrar.class)
public @interface EnableAspectJAutoProxy {

    boolean proxyTargetClass() default false;

    boolean exposeProxy() default false;

}
@Import(AspectJAutoProxyRegistrar.class)的功能是注册一个bean:AspectJAutoProxyRegistrar.class是AspectJ自动代理注册器

那么spring什么时候解析配置类上面的注解:(也是解析配置类上的注解,加载bean的流程)

1.进入AnnotationConfigApplicationContext构造器,运行到refresh()
public AnnotationConfigApplicationContext(Class<?>... annotatedClasses) {
        this();
        register(annotatedClasses);
        refresh();
    }
2.refresh()方法里运行到invokeBeanFactoryPostProcessors(beanFactory),该方法的作用是:调用beanFactory(这里的beanFactory实例是:DefaultListableBeanFactory)的后置处理器
public void refresh() throws BeansException, IllegalStateException {
        synchronized (this.startupShutdownMonitor) {
            ......

                // Invoke factory processors registered as beans in the context.
           invokeBeanFactoryPostProcessors(beanFactory);


            ......
        }
    }
3.进入invokeBeanFactoryPostProcessors(beanFactory),
protected void invokeBeanFactoryPostProcessors(ConfigurableListableBeanFactory beanFactory) {
        PostProcessorRegistrationDelegate.invokeBeanFactoryPostProcessors(beanFactory, getBeanFactoryPostProcessors());

        // Detect a LoadTimeWeaver and prepare for weaving, if found in the meantime
        // (e.g. through an @Bean method registered by ConfigurationClassPostProcessor)
        if (beanFactory.getTempClassLoader() == null && beanFactory.containsBean(LOAD_TIME_WEAVER_BEAN_NAME)) {
            beanFactory.addBeanPostProcessor(new LoadTimeWeaverAwareProcessor(beanFactory));
            beanFactory.setTempClassLoader(new ContextTypeMatchClassLoader(beanFactory.getBeanClassLoader()));
        }
    }
4.PostProcessorRegistrationDelegate类invokeBeanFactoryPostProcessors(beanFactory, getBeanFactoryPostProcessors()),调用beanFactory的后置处理器
invokeBeanFactoryPostProcessors执行流程:

    1.判断beanFactory是否 BeanDefinitionRegistry类型
      如果是:
            1.遍历ApplicationContext中的beanFactory后置处理器:
              如果beanFactory是BeanDefinitionRegistryPostProcessor类型:
                           调用BeanDefinitionRegistryPostProcessor的postProcessBeanDefinitionRegistry(registry)

                               postProcessBeanDefinitionRegistry(registry)作用是:Derive further bean definitions from the configuration classes in the registry
                           从beanFactory中解析出所有要加载的bean
              否则就先加到集合中保存。

            2.从DefaultListableFactory之前默认加载6个BeanDefinition中找到BeanDefinitionRegistryPostProcessor类型并且实现了PriorityOrdered接口的bean定义。
              把它实例化:beanFactory.getBean(ppName, BeanDefinitionRegistryPostProcessor.class)),保存到集合中
// First, invoke the BeanDefinitionRegistryPostProcessors that implement PriorityOrdered.
String[] postProcessorNames =
beanFactory.getBeanNamesForType(BeanDefinitionRegistryPostProcessor.class, true, false);
for (String ppName : postProcessorNames) {
if (beanFactory.isTypeMatch(ppName, PriorityOrdered.class)) {
currentRegistryProcessors.add(beanFactory.getBean(ppName, BeanDefinitionRegistryPostProcessor.class));
processedBeans.add(ppName);
}
}
3.invokeBeanDefinitionRegistryPostProcessors(currentRegistryProcessors, registry);遍历第2步得到的BeanDefinitionRegistryPostProcessor集合,调用它的
postProcessBeanDefinitionRegistry(BeanDefinitionRegistry registry) 从所有配置类中解析出要加载的bean。
public void postProcessBeanDefinitionRegistry(BeanDefinitionRegistry registry) {
        int registryId = System.identityHashCode(registry);
        if (this.registriesPostProcessed.contains(registryId)) {
            throw new IllegalStateException(
                    "postProcessBeanDefinitionRegistry already called on this post-processor against " + registry);
        }
        if (this.factoriesPostProcessed.contains(registryId)) {
            throw new IllegalStateException(
                    "postProcessBeanFactory already called on this post-processor against " + registry);
        }
        this.registriesPostProcessed.add(registryId);

        processConfigBeanDefinitions(registry);
    }
第4步解析到这里,停止,因为现在要了解 EnableAspectJAutoProxy注解什么时候加载AspectJAutoProxyRegistrar
5.进入processConfigBeanDefinitions(registry)方法。这里提醒一下:ConfigurationClassPostProcessor implements BeanDefinitionRegistryPostProcessor
  以下操作是在ConfigurationClassPostProcessor类中运行。
  1.从DefaultListableBeanFactory的bean定义集合中找出标了@Configuration的bean定义,加到集合中
  2.解析所有的配置类:使用ConfigurationClassParser类解析所有配置类--->parse(配置类集合)

6.进入ConfigurationClassParser.parse(配置类集合)
  遍历配置类,对每个配置类的每个注解递归解析找到 @Import注解,再加加载该注解指定要加载的类
  于是,这时加载了AspectJAutoProxyRegistrar.class,这个类的作用是加载AnnotationAwareAspectJAutoProxyCreator.class
---------------------现在分析AspectJAutoProxyRegistrar如何注册AnnotationAwareAspectJAutoProxyCreator-------------------------
1.ConfigurationClassParser解析完配置类后(上个解析第5步),ConfigurationClassPostProcessor类中的ConfigurationClassBeanDefinitionReader调用loadBeanDefinitions(ConfigurationClass configClasses集合)
ConfigurationClass包含了对应配置类解析出的所有bean定义
2.ConfigurationClassParser中的方法loadBeanDefinitionsFromRegistrars(configClass.getImportBeanDefinitionRegistrars());这时就加载了AnnotationAwareAspectJAutoProxyCreator
3. AspectJAutoProxyRegistrar implements ImportBeanDefinitionRegistrar ,这时 AspectJAutoProxyRegistrar调用registerBeanDefinitions(metadata, this.registry)
private void loadBeanDefinitionsFromRegistrars(Map<ImportBeanDefinitionRegistrar, AnnotationMetadata> registrars) {
        registrars.forEach((registrar, metadata) ->
                registrar.registerBeanDefinitions(metadata, this.registry));
    }
4.
@Override
    public void registerBeanDefinitions(
            AnnotationMetadata importingClassMetadata, BeanDefinitionRegistry registry) {

        AopConfigUtils.registerAspectJAnnotationAutoProxyCreatorIfNecessary(registry);

        AnnotationAttributes enableAspectJAutoProxy =
                AnnotationConfigUtils.attributesFor(importingClassMetadata, EnableAspectJAutoProxy.class);
        if (enableAspectJAutoProxy != null) {
            if (enableAspectJAutoProxy.getBoolean("proxyTargetClass")) {
                AopConfigUtils.forceAutoProxyCreatorToUseClassProxying(registry);
            }
            if (enableAspectJAutoProxy.getBoolean("exposeProxy")) {
                AopConfigUtils.forceAutoProxyCreatorToExposeProxy(registry);
            }
        }
    }
@Nullable
    public static BeanDefinition registerAspectJAnnotationAutoProxyCreatorIfNecessary(BeanDefinitionRegistry registry) {
        return registerAspectJAnnotationAutoProxyCreatorIfNecessary(registry, null);
    }
@Nullable
    public static BeanDefinition registerAspectJAnnotationAutoProxyCreatorIfNecessary(
            BeanDefinitionRegistry registry, @Nullable Object source) {

        return registerOrEscalateApcAsRequired(AnnotationAwareAspectJAutoProxyCreator.class, registry, source);
    }
最后是调用DefaultListableBeanFactory 注册registry.registerBeanDefinition(AUTO_PROXY_CREATOR_BEAN_NAME, beanDefinition), beanDefinition就是AnnotationAwareAspectJAutoProxyCreator
的bean定义信息。
------------------------------------------------------------------------------------到此,如何注册AnnotationAwareAspectJAutoProxyCreator就分析完了。
现在开始分析,如何spring AOP如何创建切面目标类的代理类:
1.refresh()方法中:finishBeanFactoryInitialization(beanFactory);的作用是:实例化所有已解析加载的bean定义信息,bean就在这个方法中初始化。
2.beanFactory.preInstantiateSingletons();这个方法遍历DefaultListableBeanFactory中所有的bean定义信息(BeanDefinition)如果容器中没有,就初始化
3.以下也是bean的初始化步骤:
getBean(beanName) ——> doGetBean(beanName,...) ——>getSingleton(beanName,()->{... return CreateBean(beanName,RootBeanDefinition,args)})——>doCreateBean(...)
4.要知道AOP如何创建代理,分析doCreateBean(...)方法
doCreateBean(...)方法:{
populateBean(beanName, mbd, instanceWrapper); beanName,BeanDefinition,包含new 出来的目标对象的包装类
exposedObject = initializeBean(beanName, exposedObject, mbd);
}
5. exposedObject = initializeBean(beanName, exposedObject, mbd);解析:
1. invokeAwareMethods(beanName, bean);如果属于BeanFactoryAware,setBeanFactory(DefaultListableBeanFactory )
2. applyBeanPostProcessorsBeforeInitialization(wrappedBean, beanName);
3. invokeInitMethods(beanName, wrappedBean, mbd);
4. applyBeanPostProcessorsAfterInitialization(wrappedBean, beanName);这个方法遍历DefaultListableBeanFactory里面beanPostProcessors的集合
依次执行processor.postProcessAfterInitialization(result, beanName),如果返回null,技术遍历,
当遍历到AnnotationAwareAspectJAutoProxyCreator时,创建bean的代理对象:
它继承自 AbstractAutoProxyCreator extends ProxyProcessorSupport implements SmartInstantiationAwareBeanPostProcessor, BeanFactoryAware
创建代理:1.Object[] specificInterceptors = getAdvicesAndAdvisorsForBean(bean.getClass(), beanName, null);获得通知信息,如切点
        // Create proxy if we have advice.
        Object[] specificInterceptors = getAdvicesAndAdvisorsForBean(bean.getClass(), beanName, null);
        if (specificInterceptors != DO_NOT_PROXY) {
            this.advisedBeans.put(cacheKey, Boolean.TRUE);
            Object proxy = createProxy(
                    bean.getClass(), beanName, specificInterceptors, new SingletonTargetSource(bean));
            this.proxyTypes.put(cacheKey, proxy.getClass());
            return poxy
到此代理类创建完毕,代理类包含了目标类和目标类实现的接口,和切面类的切点信息。
现在分析动态代理 -方法调用- 插入切面逻辑的实现:
1.
public static void main(String[] args) {
        // TODO Auto-generated method stub
        ApplicationContext ctx=new AnnotationConfigApplicationContext(MainConfig.class);
        Calculator cl=(Calculator) ctx.getBean("calculator");
        cl.add(5, 5);
    }
2.这里Calculator实际上是对应的代理类 cl.add(5,5)也是调用代理类的方法
CglibAopProxy内部类DynamicAdvisedInterceptor ,调用inteceptor(...)方法 运行摘要如下:
new CglibMethodInvocation(proxy, target, method, args, targetClass, chain, methodProxy).proceed();责任链模式实现链式执行切面逻辑:
ReflectiveMethodInvocation是责任链执行器,所有切面通知(before,after, ...)对应的类都实现了MethodInterceptor接口,这个接口有invoke()方法
执行流程:
ReflectiveMethodInvocation的proceed()方法遍历通知类,依次调用invoke( 传入ReflectiveMethodInvocation的this ) 方法
invoke(...)方法里面做两件事:1.调用切面通知(before,after,...)对应的类对象,执行对应的切面方法 2.传入的this.proceed()又回到proceed()方法中继续遍历
这是递归调用,1 和 2的顺序根据通知类型顺序不一样
到此,分析结束。