App自动化测试之九宫格操作
了解九宫格
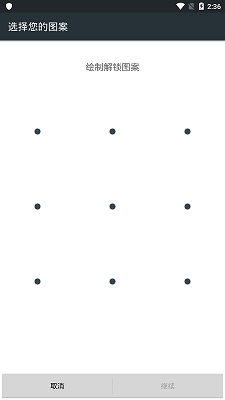
在App测试中我们难免要操作向上面这种的九宫格图案绘制,在使用uiautomatorviewer进行元素定位的时候可以看到这九宫格九个点是一个元素。

那么我们要操作九宫格绘制图案,就需要根据九个点的坐标进行绘制。

我们根据上面的我画的简图看到,先把九宫格元素切割成九个正方形,然后再找到每个正方形的中点,然后就把九宫格的width分割成了6份,每份假设为x,那么第一竖排的横坐标就为x,第二竖排的横坐标就为3x,第三竖排的横坐标就为5x;
同样height也被分割成了6份,每份假设为y,那么第一横排的竖坐标就为y,第二横排的竖坐标就为3y,第三横排的竖坐标就为5y;
九宫格元素的起始坐标并非为(0, 0)坐标,假设起始坐标为(60, 363),那么就可以得到:
第一竖排的横坐标就为x+60,第二竖排的横坐标就为3x+60,第三竖排的横坐标就为5x+60;
第一横排的竖坐标就为y+363,第二横排的竖坐标就为3y+363,第三横排的竖坐标就为5y+363;
由:x = width/6, y = height/6 得到:
第一竖排的横坐标就为(width/6+60),第二竖排的横坐标就为(width/2+60),第三竖排的横坐标就为(width*5/6+60);
第一横排的竖坐标就为(height/6+363),第二横排的竖坐标就为(height/2+363),第三横排的竖坐标就为(height*5/6+363);
通过转化即可得到九个点的坐标:
假设起始坐标为(x,y)
1: ( (width / 6 + x), (height / 6 + y)),
2: ((width / 2 + x), (height / 6 + y)),
3: ((width * 5 / 6 + x), (height / 6 + y)),
4: ((width / 6 + x), (height / 2 + y)),
5: ((width / 2 + x), (height / 2 + y)),
6: ((width * 5 / 6 + x), (height / 2 + y)),
7: ((width / 6 + x), (height * 5 / 6 + y)),
8: ((width / 2 + x), (height * 5 / 6 + y)),
9: ((width * 5 / 6 + x), (height * 5 / 6 + y))
通过上面的分析然后我们还是写九宫格操作代码
1、要先定位到九宫格元素
通过uiautomatorviewer辅助App元素定位中可以得到九宫格元素有一个唯一的resource_id,可以直接根据id进行元素定位。
gg = driver.find_element_by_id('com.android.settings:id/lockPattern')
2、获取九宫格元素的起始坐标和长宽
第一种:通过location和size同时使用获取
appium提供了location方法,可以获取元素起始左上角坐标(x,y)
appium又提供了一个size方法, 可以获取到这个元素的(height,width)的值
# 起始坐标 x,y
x = gg.location['x']
y = gg.location['y']
# 元素的长宽 height,width
height = gg.size['height']
width = gg.size['width']
第二种:通过rect直接可以获取到
size = gg.rect
x = size['x']
y = size['y']
width = size['width']
height = size['height']
3、计算每个点的坐标
point1 = {'x': (width / 6 + x), 'y': (height / 6 + y)}
point2 = {'x': (width / 2 + x), 'y': (height / 6 + y)}
point3 = {'x': (width * 5 / 6 + x), 'y': (height / 6 + y)}
point4 = {'x': (width / 6 + x), 'y': (height / 2 + y)}
point5 = {'x': (width / 2 + x), 'y': (height / 2 + y)}
point6 = {'x': (width * 5 / 6 + x), 'y': (height / 2 + y)}
point7 = {'x': (width / 6 + x), 'y': (height * 5 / 6 + y)}
point8 = {'x': (width / 2 + x), 'y': (height * 5 / 6 + y)}
point9 = {'x': (width * 5 / 6 + x), 'y': (height * 5 / 6 + y)}
4、通过TouchAction类中的press和move_to方法进行操作绘制九宫格
action = TouchAction(driver)
# 假设绘制的图案为[2,5,8,7,9]
action.press(**point2).wait(2000)
	.move_to(**point5).wait(1000)
    .move_to(**point8).wait(1000)
    .move_to(**point7).wait(1000)
    .move_to(**point9).wait(1000)
    .release().perform()
对九宫格操作进行封装
    def gongge(el, operation,driver):
        """
        九宫格操作
        :param el: 九宫格元素
        :param operation: 绘制图案的对应的数字(不能有重复的)
        :param driver: Remote对象
        Usage:
            gongge(el,[1, 2, 5, 8, 7, 9],driver)
        """
		# 获取元素的起始坐标和长宽
        size = el.rect
        x = size['x']
        y = size['y']
        width = size['width']
        height = size['height']
        # 九宫格对应点的坐标
        coordinate = {
            1: {'x': (width / 6 + x), 'y': (height / 6 + y)},
            2: {'x': (width / 2 + x), 'y': (height / 6 + y)},
            3: {'x': (width * 5 / 6 + x), 'y': (height / 6 + y)},
            4: {'x': (width / 6 + x), 'y': (height / 2 + y)},
            5: {'x': (width / 2 + x), 'y': (height / 2 + y)},
            6: {'x': (width * 5 / 6 + x), 'y': (height / 2 + y)},
            7: {'x': (width / 6 + x), 'y': (height * 5 / 6 + y)},
            8: {'x': (width / 2 + x), 'y': (height * 5 / 6 + y)},
            9: {'x': (width * 5 / 6 + x), 'y': (height * 5 / 6 + y)}
        }
        action = TouchAction(driver)
        action.press(**coordinate[operation[0]]).wait(2000)
        for i in operation[1:]:
            action.move_to(**coordinate[i]).wait(1000)
        action.release().perform()