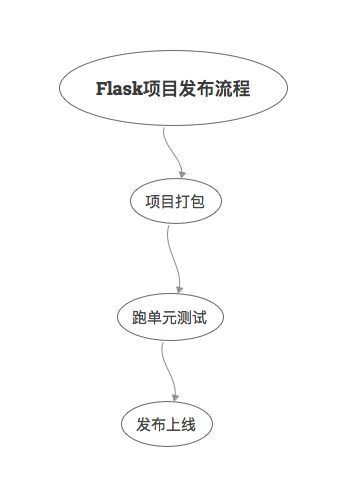
本文继续对Flask官方教程进行学习,我就直接跳过Templates、Static Files、Blog Blueprint三小节了,因为基本不会在实际项目中用到这些技术,有时间多学习下前端才是。这篇文章把Make the Project Installable、Test Coverage、Deploy to Production这三小节汇总来学习。我觉得这是官方给出的一个Flask项目发布流程,如下图所示:
这跟我在大型项目中接触到的发布流程大同小异。尤其是对于我们测试来说,跑单元测试这个环节还是有必要好好了解一下的,幸运的是,得益于Python的简单,理解起来会更容易些。所谓一通百通,Flask的单测懂了,其他语言的单测也通了。
项目打包
创建setup.py文件:
from setuptools import find_packages, setup

setup(
    name='flaskr',
    version='1.0.0',
    packages=find_packages(),
    include_package_data=True,
    zip_safe=False,
    install_requires=[
        'flask',
    ],
)
- packages指定Python包,
find_packages()函数会自动查找。 - include_package_data表示包括其他文件比如静态(static)文件和模板(templates)文件。
如果还需要包括其他数据,那么就创建MANIFEST.in文件:
include flaskr/schema.sql
graft flaskr/static
graft flaskr/templates
global-exclude *.pyc
其中global-exclude排除了*.pyc文件。
接着就可以使用pip命令安装了:
$ pip install -e .
安装以后就能用pip list命令查看:
$ pip list

Package        Version   Location
-------------- --------- ----------------------------------
click          6.7
Flask          1.0
flaskr         1.0.0     /home/user/Projects/flask-tutorial
itsdangerous   0.24
Jinja2         2.10
MarkupSafe     1.0
pip            9.0.3
setuptools     39.0.1
Werkzeug       0.14.1
wheel          0.30.0
这个过程是这样的:pip在当前目录找到setup.py文件,然后根据文件描述把项目文件打包后安装到本地。安装以后就能在任何位置使用flask run来启动应用了,而不仅仅是在flask-turorial目录下。
跑单元测试
单元测试不能保证程序没有Bug,但却是在开发阶段保障代码质量的有效手段。拿我们公司举例来说,开发提测和上线,都会把单元测试作为卡点,单测覆盖率没有达到45%是不能提测和上线的。
Flask项目的单元测试要用到两个工具,一个是我们非常熟悉的pytest,还有一个是coverage,先安装它们:
$ pip install pytest coverage
新建tests/data.sql文件,插入一些测试数据:
INSERT INTO user (username, password)
VALUES
  ('test', 'pbkdf2:sha256:50000$TCI4GzcX$0de171a4f4dac32e3364c7ddc7c14f3e2fa61f2d17574483f7ffbb431b4acb2f'),
  ('other', 'pbkdf2:sha256:50000$kJPKsz6N$d2d4784f1b030a9761f5ccaeeaca413f27f2ecb76d6168407af962ddce849f79');

INSERT INTO post (title, body, author_id, created)
VALUES
  ('test title', 'test' || x'0a' || 'body', 1, '2018-01-01 00:00:00');
pytest的fixture相当于setup,可以做一些测试前的初始化工作,新建tests/conftest.py,编写fixture:
import os
import tempfile

import pytest
from flaskr import create_app
from flaskr.db import get_db, init_db

with open(os.path.join(os.path.dirname(__file__), 'data.sql'), 'rb') as f:
    _data_sql = f.read().decode('utf8')


@pytest.fixture
def app():
    db_fd, db_path = tempfile.mkstemp()

    app = create_app({
        'TESTING': True,
        'DATABASE': db_path,
    })

    with app.app_context():
        init_db()
        get_db().executescript(_data_sql)

    yield app

    os.close(db_fd)
    os.unlink(db_path)


@pytest.fixture
def client(app):
    return app.test_client()


@pytest.fixture
def runner(app):
    return app.test_cli_runner()
app
创建应用,初始化数据库,使用的是测试配置和测试数据。
-
tempfile.mkstemp()创建了一个临时文件,返回文件描述符和文件路径。并且把临时文件路径传入了DATABASE,接着插入测试数据。测试结束后关闭和移除临时文件。fixture的yield前面的代码相当于setup,yield后面的代码相当于teardown。
-
TESTING: True将Flask置为测试模式,Flask内部会进行一些调整以便于进行测试。
client
调用app.test_client返回一个测试客户端,可以用这个客户端给应用发送请求。
runner
调用app.test_cli_runner()返回一个可以执行应用已注册命令的runner。
测试一下Factory:
# tests/test_factory.py
from flaskr import create_app


def test_config():
    assert not create_app().testing
    assert create_app({'TESTING': True}).testing


def test_hello(client):
    response = client.get('/hello')
    assert response.data == b'Hello, World!'
测试一下Database:
# tests/test_db.py
import sqlite3

import pytest
from flaskr.db import get_db


def test_get_close_db(app):
    with app.app_context():
        db = get_db()
        assert db is get_db()

    with pytest.raises(sqlite3.ProgrammingError) as e:
        db.execute('SELECT 1')

    assert 'closed' in str(e.value)


def test_init_db_command(runner, monkeypatch):
    class Recorder(object):
        called = False

    def fake_init_db():
        Recorder.called = True

    # monkeypatch是pytest内置的一个fixture,也就是猴子补丁。
    monkeypatch.setattr('flaskr.db.init_db', fake_init_db)
    result = runner.invoke(args=['init-db'])
    assert 'Initialized' in result.output
    assert Recorder.called
测试一下Authentication:
# tests/conftest.py
class AuthActions(object):
    def __init__(self, client):
        self._client = client

    def login(self, username='test', password='test'):
        return self._client.post(
            '/auth/login',
            data={'username': username, 'password': password}
        )

    def logout(self):
        return self._client.get('/auth/logout')


# 这样就可以使用auth.login()进行用户登录
@pytest.fixture
def auth(client):
    return AuthActions(client)
# tests/test_auth.py
import pytest
from flask import g, session
from flaskr.db import get_db


def test_register(client, app):
    assert client.get('/auth/register').status_code == 200
    response = client.post(
        '/auth/register', data={'username': 'a', 'password': 'a'}
    )
    assert 'http://localhost/auth/login' == response.headers['Location']

    with app.app_context():
        assert get_db().execute(
            "SELECT * FROM user WHERE username = 'a'",
        ).fetchone() is not None


@pytest.mark.parametrize(('username', 'password', 'message'), (
    ('', '', b'Username is required.'),
    ('a', '', b'Password is required.'),
    ('test', 'test', b'already registered'),
))
def test_register_validate_input(client, username, password, message):
    response = client.post(
        '/auth/register',
        data={'username': username, 'password': password}
    )
    assert message in response.data


def test_login(client, auth):
    assert client.get('/auth/login').status_code == 200
    response = auth.login()
    assert response.headers['Location'] == 'http://localhost/'

    # 使用with后就能在上下文中访问session
    with client:
        client.get('/')
        assert session['user_id'] == 1
        assert g.user['username'] == 'test'


@pytest.mark.parametrize(('username', 'password', 'message'), (
    ('a', 'test', b'Incorrect username.'),
    ('test', 'a', b'Incorrect password.'),
))
def test_login_validate_input(auth, username, password, message):
    response = auth.login(username, password)
    assert message in response.data


def test_logout(client, auth):
    auth.login()

    # 使用with后就能在上下文中访问session
    with client:
        auth.logout()
        assert 'user_id' not in session
更多关于Blog的测试用例就不在此赘述了,感兴趣的同学可以点击文章尾部链接到官网查看。
最后用例写完了,就该运行了。在setup.cfg文件中添加一些配置,可以适当减少单测冗余:
[tool:pytest]
testpaths = tests

[coverage:run]
branch = True
source =
    flaskr
然后就可以执行pytest了:
$ pytest

========================= test session starts ==========================
platform linux -- Python 3.6.4, pytest-3.5.0, py-1.5.3, pluggy-0.6.0
rootdir: /home/user/Projects/flask-tutorial, inifile: setup.cfg
collected 23 items

tests/test_auth.py ........                                      [ 34%]
tests/test_blog.py ............                                  [ 86%]
tests/test_db.py ..                                              [ 95%]
tests/test_factory.py ..                                         [100%]

====================== 24 passed in 0.64 seconds =======================
pytest -v可以显示每个测试函数。
单测覆盖率才是灵魂,所以建议这样来跑单测:
$ coverage run -m pytest
然后查看报告:
$ coverage report

Name                 Stmts   Miss Branch BrPart  Cover
------------------------------------------------------
flaskr/__init__.py      21      0      2      0   100%
flaskr/auth.py          54      0     22      0   100%
flaskr/blog.py          54      0     16      0   100%
flaskr/db.py            24      0      4      0   100%
------------------------------------------------------
TOTAL                  153      0     44      0   100%
也可以生成html报告:
$ coverage html
发布上线
先安装wheel库:
$ pip install wheel
然后创建.whl文件:
$ python setup.py bdist_wheel
命令执行后会生成一个dist/flaskr-1.0.0-py3-none-any.whl文件,文件格式是{project name}-{version}-{python tag} -{abi tag}-{platform tag}。
在服务器上就可以安装了:
$ pip install flaskr-1.0.0-py3-none-any.whl
因为是新机器,所以需要初始化数据库:
$ export FLASK_APP=flaskr
$ flask init-db
如果是Python虚拟环境,那么可以在venv/var/flaskr-instance找到Flask实例。
最后设置下SECRET_KEY,Flask官网给出一种生成随机SECRET_KEY的方法:
$ python -c 'import secrets; print(secrets.token_hex())'

'192b9bdd22ab9ed4d12e236c78afcb9a393ec15f71bbf5dc987d54727823bcbf'
生成后新建venv/var/flaskr-instance/config.py文件粘贴即可:
SECRET_KEY = '192b9bdd22ab9ed4d12e236c78afcb9a393ec15f71bbf5dc987d54727823bcbf'
至于生产服务器的选取,建议不要使用flask run,因为这是Werkzeug提供的开发服务器,既不稳定,也不安全。
可以使用WSGI服务器,比如Waitress:
$ pip install waitress
$ waitress-serve --call 'flaskr:create_app'

Serving on http://0.0.0.0:8080
标准的WSGI服务器如下:
-
Gunicorn
-
uWSGI
-
Gevent,我们组就用的这个:
from gevent.pywsgi import WSGIServer from yourapplication import app http_server = WSGIServer(('', 5000), app) http_server.serve_forever() -
Twisted Web
-
Proxy Setups
参考资料:
https://flask.palletsprojects.com/en/2.0.x/tutorial/install/