1.进入微信公众号首页,进行注册登录 https://mp.weixin.qq.com/
2.进入个人首页,进行公众号设置
可参照 公众号文档 进行开发
开发前 先阅读 接口权限列表
3.配置服务器 服务器地址(URL) 令牌(Token)
import hashlib
@app.route('/wx',methods=['GET','POST'])
def wx():
    if request.method == 'GET':
        signature = request.args.get('signature')
        timestamp = request.args.get('timestamp')
        echostr = request.args.get('echostr')
        nonce = request.args.get('nonce')
        token = 'mytoken1'
        if len(request.args)==0:
            return "hello, this is handle view"
        list = [token, timestamp, nonce]
        list.sort()
        s = list[0]+list[1]+list[2]
        hashcode = hashlib.sha1(s.encode('utf-8')).hexdigest()
        if hashcode == signature:
            return echostr
        else:
            print('验证失败')
            return ""
重新启动成功后(python main.py 80),点击提交按钮。若提示”token验证失败”, 请认真检查代码或网络链接等。若token验证成功,会自动返回基本配置的主页面,点击启动按钮
4.接收用户发送的消息 (即粉丝给公众号发送的文本消息)
公众平台发送的xml至开发者服务器。
形式:
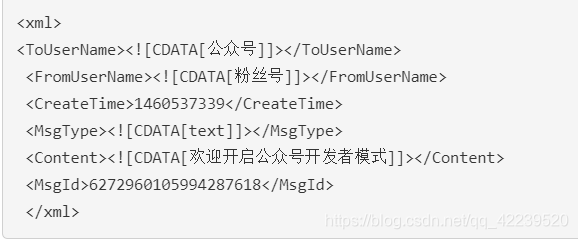
# 接收
        import xml.etree.cElementTree as ET

        xml = ET.fromstring(request.data)
        toUser = xml.find('ToUserName').text
        fromUser = xml.find('FromUserName').text
        msgType = xml.find("MsgType").text
5.自动回复 文本消息
     if msgType == 'text':
		......
        reply = '''<xml>
                            <ToUserName><![CDATA[%s]]></ToUserName>
                            <FromUserName><![CDATA[%s]]></FromUserName>
                            <CreateTime>%s</CreateTime>
                            <MsgType><![CDATA[text]]></MsgType>
                            <Content><![CDATA[%s]]></Content>
                            </xml>'''
        response = make_response(reply % (fromUser, toUser, str(int(time.time())), end))
        response.headers['content-type'] = 'application/xml'
        return response
6. 实现“图”尚往来
        elif msgType == 'image':
            img = xml.find('MediaId').text
            reply = '''<xml>
                                <ToUserName><![CDATA[%s]]></ToUserName>
                                <FromUserName><![CDATA[%s]]></FromUserName>
                                <CreateTime>%s</CreateTime>
                                <MsgType><![CDATA[image]]></MsgType>
                                 <Image>
                                 <MediaId><![CDATA[%s]]></MediaId>
                                 </Image>
                                </xml>'''
            response = make_response(reply % (fromUser, toUser, str(int(time.time())), img))
            response.headers['content-type'] = 'application/xml'
            return response
7.临时素材
class Basic(object):
    def __init__(self):
        self.accessToken = ''
        self.leftTime = ''

    def real_get_access_token(self):
        AppID = '....'
        AppSecret = '...'
        postUrl = "https://api.weixin.qq.com/cgi-bin/token?grant_type=client_credential&appid=%s&secret=%s" % (AppID, AppSecret)
        resp = requests.get(url=postUrl)
        urlResp = json.loads(resp.text)
        access_token = urlResp['access_token']
        print('access_token是',access_token)
        return access_token
class Media(object):
    def __init__(self):
        self.access_token = Basic().real_get_access_token()

    def upload(self,type='image',path=None):
        files = {'apk': open(path, 'rb')}
        data = {'enctype': 'multipart/form-data'}
        post_url = 'https://api.weixin.qq.com/cgi-bin/media/upload?access_token=%s&type=%s'%(self.access_token,type)
        resp = requests.post(url=post_url,data=data,files=files)
        urlResp = json.loads(resp.text)
        print(urlResp)

media = Media()
media.upload(path='123.png')
8.关注和取消事件
用户在关注与取消关注公众号时,微信会把这个事件推送到开发者填写的URL。方便开发者给用户下发欢迎消息或者做帐号的解绑。为保护用户数据隐私,开发者收到用户取消关注事件时需要删除该用户的所有信息。
微信服务器在五秒内收不到响应会断掉连接,并且重新发起请求,总共重试三次。

视图处理:
        elif msgType == 'event':
            event = xml.find('Event').text
            if event == 'subscribe':   #关注
                msg = '输入想要视频资源关键字试试~'
            else:  #取消关注
                msg = '期待你的下次关注~'
            reply = '''<xml>
                                <ToUserName><![CDATA[%s]]></ToUserName>
                                <FromUserName><![CDATA[%s]]></FromUserName>
                                <CreateTime>%s</CreateTime>
                                <MsgType><![CDATA[text]]></MsgType>
                                <Content><![CDATA[%s]]></Content>
                                </xml>'''
            response = make_response(reply % (fromUser, toUser, str(int(time.time())), msg))
            response.headers['content-type'] = 'application/xml'
            return response
9.回复图文消息
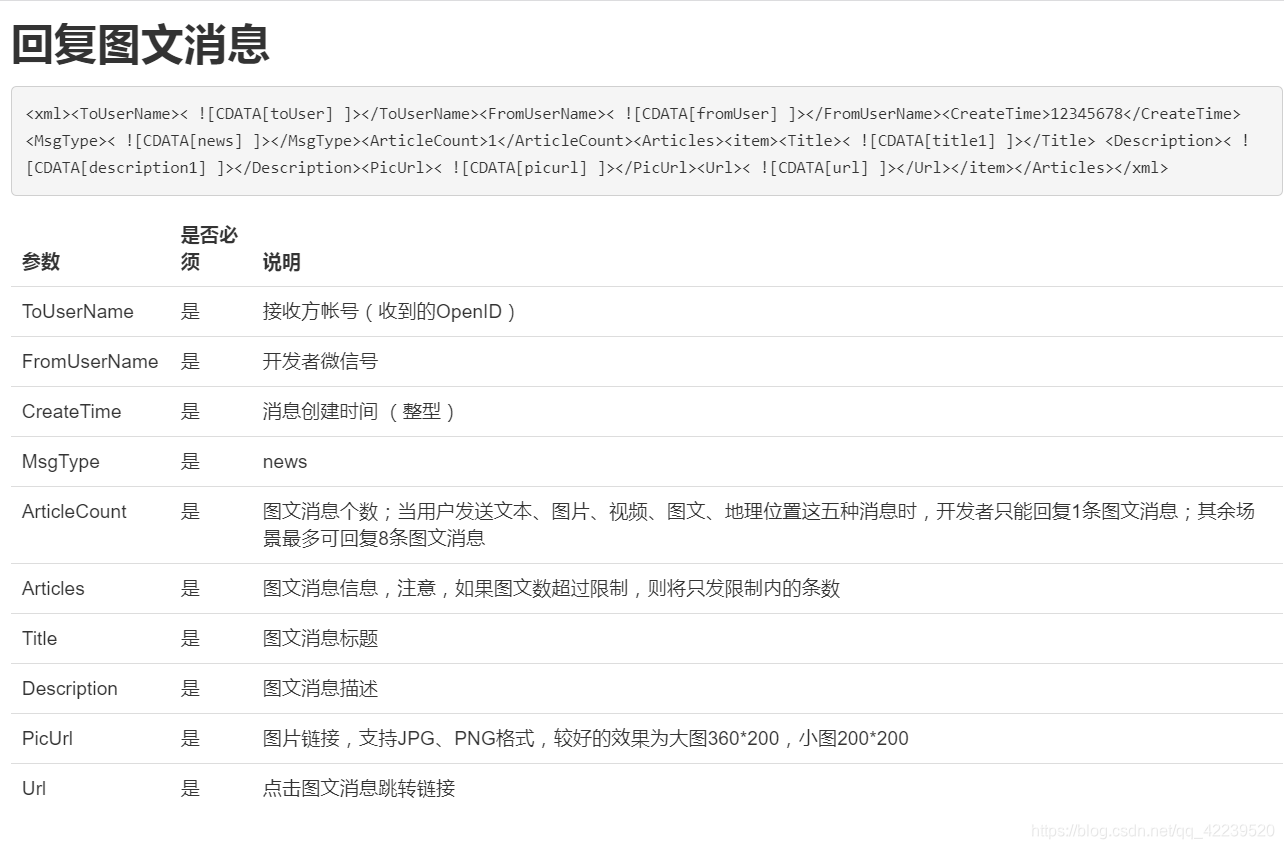
            reply = '''<xml>
                                <ToUserName><![CDATA[%s]]></ToUserName>
                                <FromUserName><![CDATA[%s]]></FromUserName>
                                <CreateTime>%s</CreateTime>
                                <MsgType><![CDATA[news]]></MsgType>
                                <ArticleCount>1</ArticleCount><Articles><item><Title><![CDATA[%s]]></Title>
                                <Description><![CDATA[%s]]></Description>
                                <PicUrl><![CDATA[%s]]></PicUrl><Url>
                                <![CDATA[%s]]></Url></item></Articles>
                                </xml>'''
            response = make_response(reply % (fromUser, toUser, int(time.time()), 'voice','voice Description','http://mmbiz.qpic.cn/mmbiz_jpg/jeXD1dScd9sHxTr4WGwywQiabrcrErmR9p86ZUDthLWcImgLepRMxYrhrVMemibp4nCHpyHFPn7yvYv5A49miarKQ/0?wx_fmt=jpeg','https://www.baidu.com'))
            response.headers['content-type'] = 'application/xml'
            return response
截图: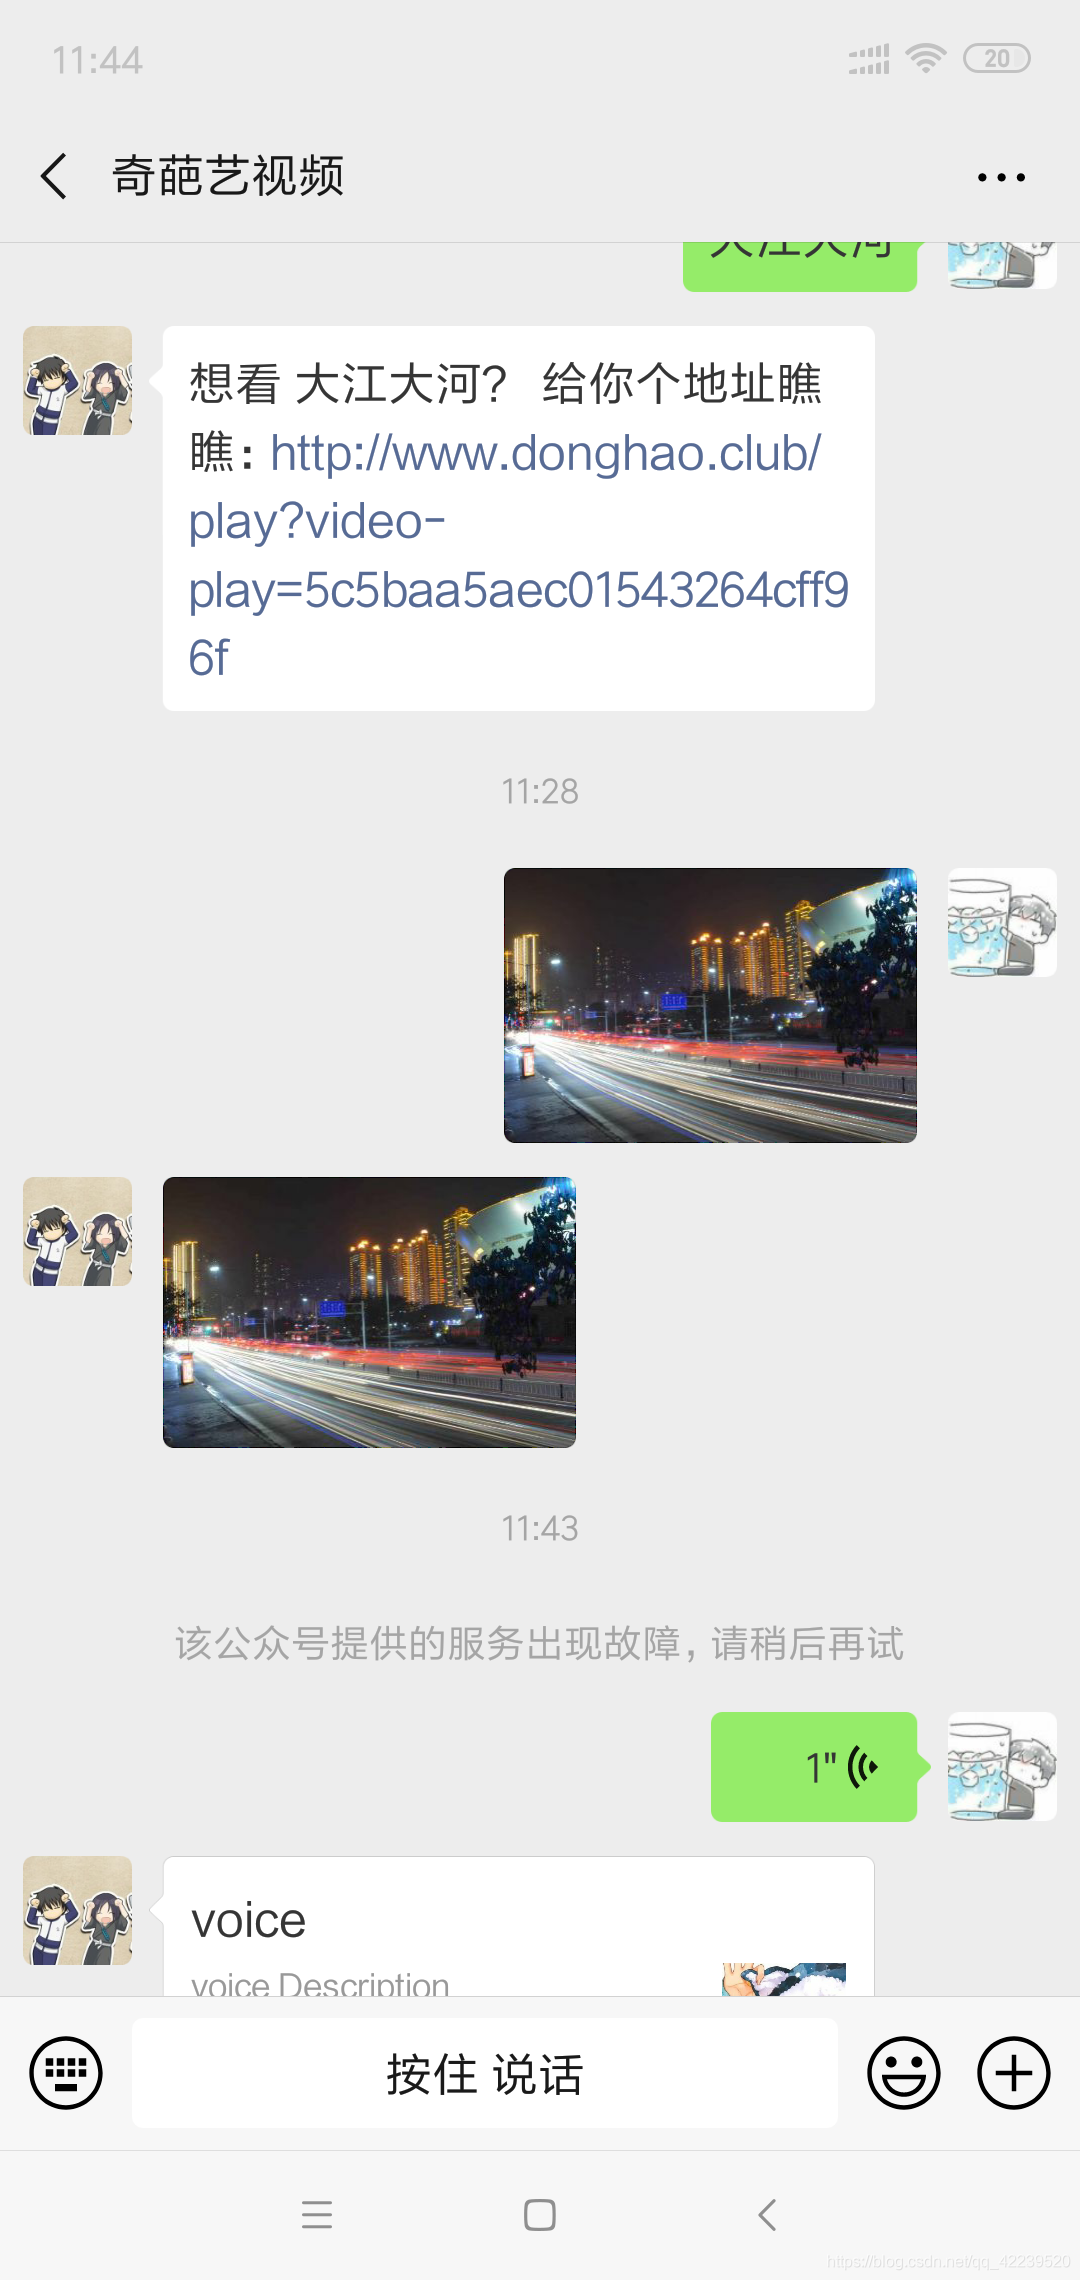
10.js接口安全域名
设置JS接口安全域名后,公众号开发者可在该域名下调用微信开放的JS接口。
注意事项:
1、可填写三个域名或路径(例:wx.qq.com或wx.qq.com/mp),需使用字母、数字及“-”的组合,不支持IP地址、端口号及短链域名。
2、填写的域名须通过ICP备案的验证。
3、 将文件MP_verify_hS2bkgbglKjk0udm.txt(点击下载)上传至填写域名或路径指向的web服务器(或虚拟主机)的目录(若填写域名,将文件放置在域名根目录下,例如wx.qq.com/MP_verify_hS2bkgbglKjk0udm.txt;若填写路径,将文件放置在路径目录下,例如wx.qq.com/mp/MP_verify_hS2bkgbglKjk0udm.txt),并确保可以访问
步骤1.,将文件引入到 项目同一级目录
步骤2.更改flask查找文件路径
因为查找路径为:wx.qq.com/MP_verify_hS2bkgbglKjk0udm.txt
app = Flask(name,static_url_path=’’)