虚拟机安装dpdk
virt-sysprep --root-password password:changeme --uninstall cloud-init --selinux-relabel -a vhuser-test1.qcow2 --network --install "dpdk,dpdk-tools,pciutils"
虚拟机作为vhost server
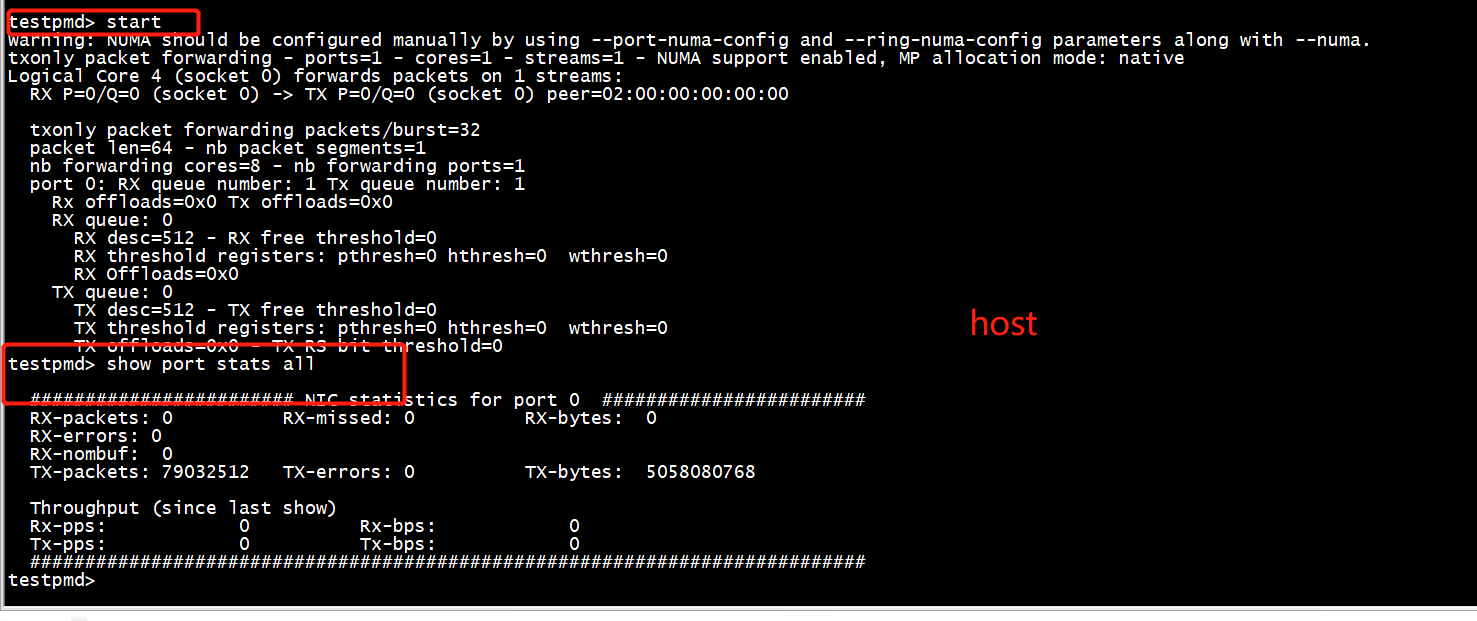
host在testpmd侧运行 start ,show port stats all
虚拟机侧运行
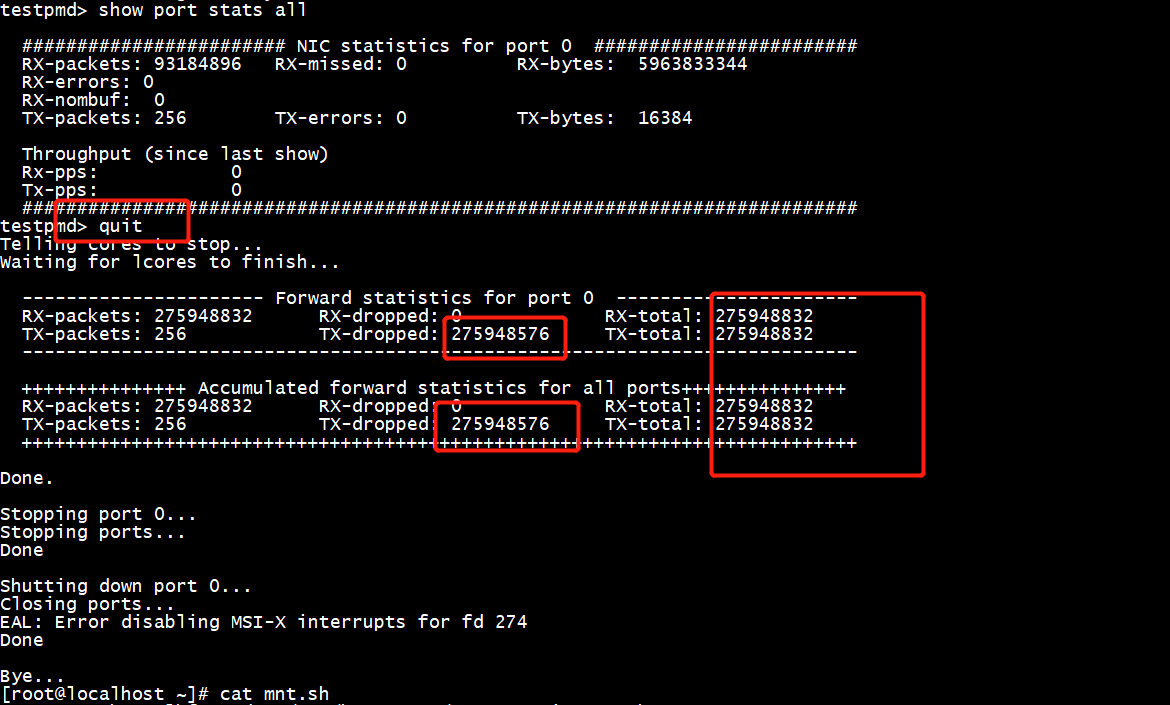
testpmd> start
Packet forwarding already started
testpmd> show port stats all

  ######################## NIC statistics for port 0  ########################
  RX-packets: 0          RX-missed: 0          RX-bytes:  0
  RX-errors: 0
  RX-nombuf:  0
  TX-packets: 0          TX-errors: 0          TX-bytes:  0

  Throughput (since last show)
  Rx-pps:            0
  Tx-pps:            0
  ############################################################################
testpmd> start tx_first
Packet forwarding already started
testpmd> show port stats all

  ######################## NIC statistics for port 0  ########################
  RX-packets: 18380032   RX-missed: 0          RX-bytes:  1176324032
  RX-errors: 0
  RX-nombuf:  0
  TX-packets: 256        TX-errors: 0          TX-bytes:  16384

  Throughput (since last show)
  Rx-pps:       349528
  Tx-pps:            4
  ############################################################################
testpmd>
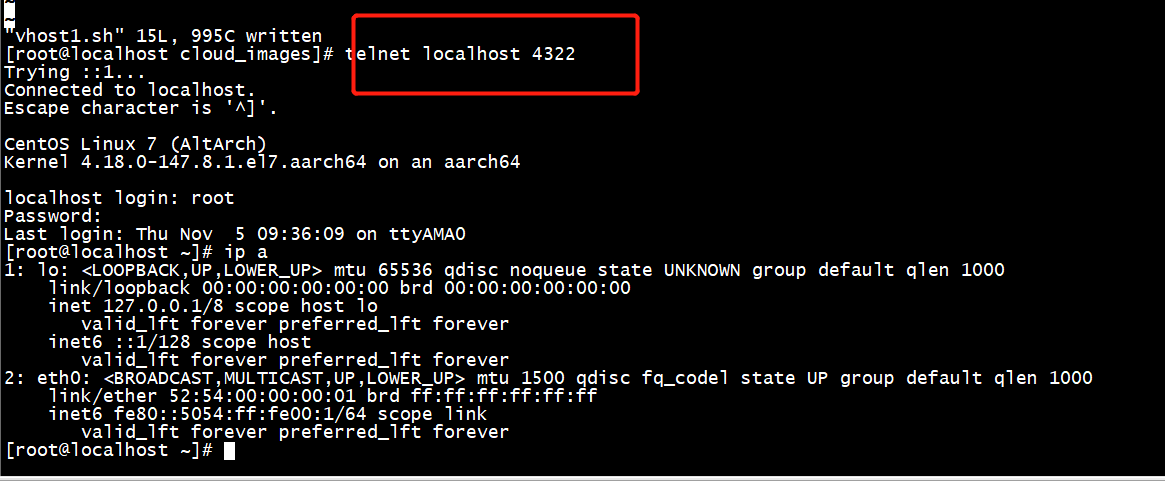
[root@localhost cloud_images]# vi vhost1.sh
      1 qemu-system-aarch64  -name vm2
      2   -enable-kvm -M virt -nographic  -cpu host -smp 2 -m 4096
      3   -object memory-backend-file,id=mem,size=4096M,mem-path=/mnt/huge,share=on
      4  -numa node,memdev=mem -mem-prealloc -drive file=vhuser-test1.qcow2
      5   -global virtio-blk-device.scsi=off
      6   -device virtio-scsi-device,id=scsi
      7   -kernel vmlinuz-4.18 --append "console=ttyAMA0  root=UUID=6a09973e-e8fd-4a6d-a8c0-1deb9556f477 iommu=pt intel_iommu=on iommu.passthrough=1"
      8   -initrd initramfs-4.18
      9  -serial telnet:localhost:4322,server,nowait
     10  -monitor telnet:localhost:4321,server,nowait
     11  -chardev socket,id=char0,path=/tmp/vhost1,server
     12  -netdev type=vhost-user,id=netdev0,chardev=char0,vhostforce
     13  -device virtio-net-pci,netdev=netdev0,mac=52:54:00:00:00:01,mrg_rxbuf=on,rx_queue_size=1024,tx_queue_size=1024
     14  -vnc :10
启动vm

启动testpmd
[root@localhost test-pmd]# cat start.sh
./testpmd -l 2,4,6,8,10,12,14,16,18 --socket-mem 1024,1024 -n 4
 --vdev 'net_vhost0,iface=/tmp/vhost1,queues=4,client=1,iommu-support=1'
 -- --portmask=0x1 -i --rxd=512 --txd=512 --rxq=4 --txq=4 --nb-cores=8 --forward-mode=txonly
[root@localhost test-pmd]#
登陆
虚拟机网卡绑定vfio
 [root@localhost ~]# modprobe  vfio enable_unsafe_noiommu_mode=1
[ 3087.535170] VFIO - User Level meta-driver version: 0.3
[root@localhost ~]# cat /sys/module/vfio/parameters/enable_unsafe_noiommu_mode
Y
[root@localhost ~]# modprobe vfio-pci
[root@localhost ~]# cd /usr/share/d
dbus-1/              dict/                dpdk/
desktop-directories/ doc/
[root@localhost ~]# cd /usr/share/dpdk/
[root@localhost dpdk]# ls
usertools
[root@localhost dpdk]# dpdk-devbind --status net

Network devices using kernel driver
===================================
0000:00:01.0 'Virtio network device 1000' if=eth0 drv=virtio-pci unused=vfio-pci

No 'Crypto' devices detected
============================

No 'Eventdev' devices detected
==============================

No 'Mempool' devices detected
=============================

No 'Compress' devices detected
==============================
[
[root@localhost dpdk]# dpdk-devbind -b vfio-pci 0000:00:01.0
[ 3189.971977] iommu: Adding device 0000:00:01.0 to group 0
[ 3189.973806] vfio-pci 0000:00:01.0: Adding kernel taint for vfio-noiommu group on device
[root@localhost dpdk]#
永久绑定
Now the guest is prepared to run our DPDK based application. To make this binding permanent we could also use the driverctl utility:

root@guest $ driverctl -v set-override 0000:00:10.0 vfio-pci
Do the same for the second virtio-device with address 0000:00:11.0. Then list all overrides to check it worked:

user@guest $ sudo driverctl list-overrides
0000:00:10.0 vfio-pci
0000:00:11.0 vfio-pci
[root@localhost ~]# mkdir -p /mnt/huge
[root@localhost ~]# cat /proc/meminfo  | grep -i huge
AnonHugePages:         0 kB
ShmemHugePages:        0 kB
HugePages_Total:       0
HugePages_Free:        0
HugePages_Rsvd:        0
HugePages_Surp:        0
Hugepagesize:     524288 kB
Hugetlb:               0 kB
[root@localhost ~]#
设置大页
mkdir -p /mnt/huge-2048
mkdir -p /mnt/huge
mount -t hugetlbfs nodev /mnt/huge-2048/ -o pagesize=2048kB

echo 64 > /sys/kernel/mm/hugepages/hugepages-524288kB/nr_hugepages
echo 512 > /sys/kernel/mm/hugepages/hugepages-2048kB/nr_hugepages
mount -t hugetlbfs nodev /mnt/huge-2048/ -o pagesize=2048kB
启动testmd
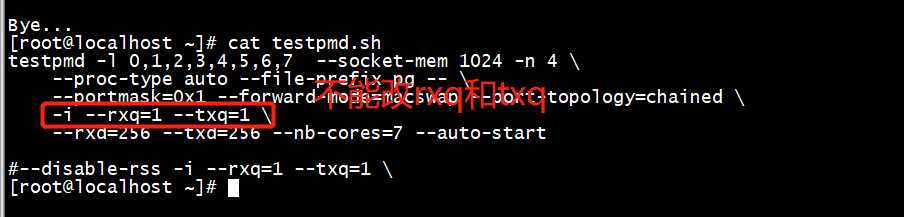
[root@localhost ~]# lscpu
Architecture:          aarch64
Byte Order:            Little Endian
CPU(s):                2
On-line CPU(s) list:   0,1
Thread(s) per core:    1
Core(s) per socket:    2
Socket(s):             1
NUMA node(s):          1
Model:                 0
BogoMIPS:              200.00
NUMA node0 CPU(s):     0,1
Flags:                 fp asimd evtstrm aes pmull sha1 sha2 crc32 atomics fphp asimdhp cpuid asimdrdm jscvt fcma dcpop asimddp asimdfhm
[root@localhost ~]# cat testpmd.sh
testpmd -l 0,1  --socket-mem 1024 -n 4
    --proc-type auto --file-prefix pg --
    --portmask=0x1 --forward-mode=macswap --port-topology=chained
    --disable-rss -i --rxq=1 --txq=1
    --rxd=256 --txd=256 --nb-cores=1 --auto-start
虚拟机发包
5. Start forwarding on the guest.
testpmd> start

6. Start forwarding on the host.
testpmd> start tx_first

host
qemu-system-aarch64: vhost VQ 0 ring restore failed: -1: Transport endpoint is not connected (107)
qemu-system-aarch64: -chardev socket,id=char0,path=/tmp/vhost1,server: info: QEMU waiting for connection on: disconnected:unix:/tmp/vhost1,server


qemu-system-aarch64: Failed to read from slave.
qemu-system-aarch64: Failed to set msg fds.
qemu-system-aarch64: vhost VQ 0 ring restore failed: -1: Transport endpoint is not connected (107)
qemu-system-aarch64: Failed to set msg fds.
qemu-system-aarch64: vhost VQ 1 ring restore failed: -1: Transport endpoint is not connected (107)
虚拟机侧的pmd
testpmd -l 0,1  --socket-mem 1024 -n 4
    --proc-type auto --file-prefix pg --
    --portmask=0x1 --forward-mode=macswap --port-topology=chained
    --disable-rss -i --rxq=1 --txq=1
    --rxd=256 --txd=256 --nb-cores=1 --auto-start
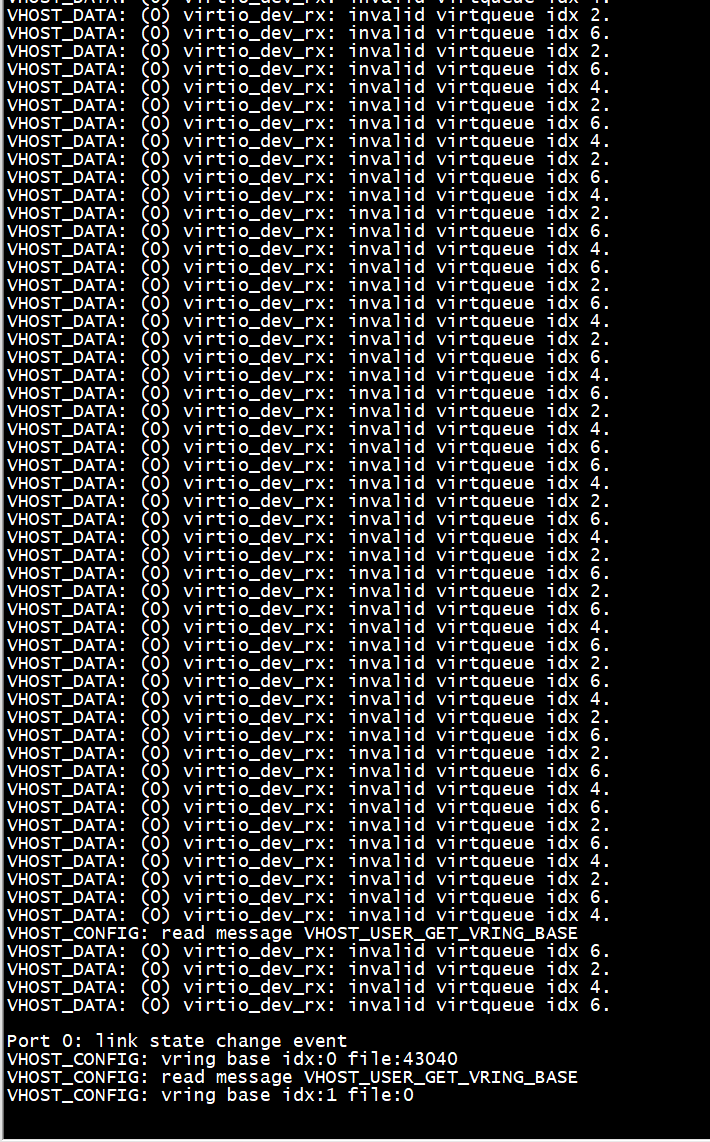
只有一个rxq和txq,而且disable-rss
host侧 --rxq=4 --txq=4,把host侧改为--rxq=4 --txq=4
./testpmd -l 2,4,6,8,10,12,14,16,18 --socket-mem 1024,1024 -n 4
 --vdev 'net_vhost0,iface=/tmp/vhost1,queues=4,client=1,iommu-support=1'
 -- --portmask=0x1 -i --rxd=512 --txd=512 --rxq=1 --txq=1 --nb-cores=8 --forward-mode=txonly
 #-- --portmask=0x1 -i --rxd=512 --txd=512 --rxq=4 --txq=4 --nb-cores=8 --forward-mode=txonly
给虚拟机增加核数目
-enable-kvm -M virt -cpu host -smp 16 -m 4096